:quality(75))
:quality(75))


:quality(75))
Right now, you may be asking yourself: What on earth is Flat Character Design?
Well, the answer is quite simple, it's a simplistic character design style that's two-dimensional and features a flat image with minimal highlights, shadows, or details (or, sometimes none at all).
In design theory terms, flat design focuses on rendering images without skeuomorphism or three-dimensionality.
In Flat Design, from it born the notorious corporate illustrations style, simplicity is king and bold color contrast is queen. It's one of the current design trends that uses vivid color combinations to help sell products and services online.
Jumpstart your ideas with Linearity Curve
Take your designs to the next level.
Drawing in a flat style makes it much easier to convey an idea, and that's why it's perfect for infographics, manuals, logo design, app icons, mobile interfaces, and book illustrations.
Alright, enough about design movements (for now). Let's get started with our tutorial! You can watch the video version below, or keep reading.
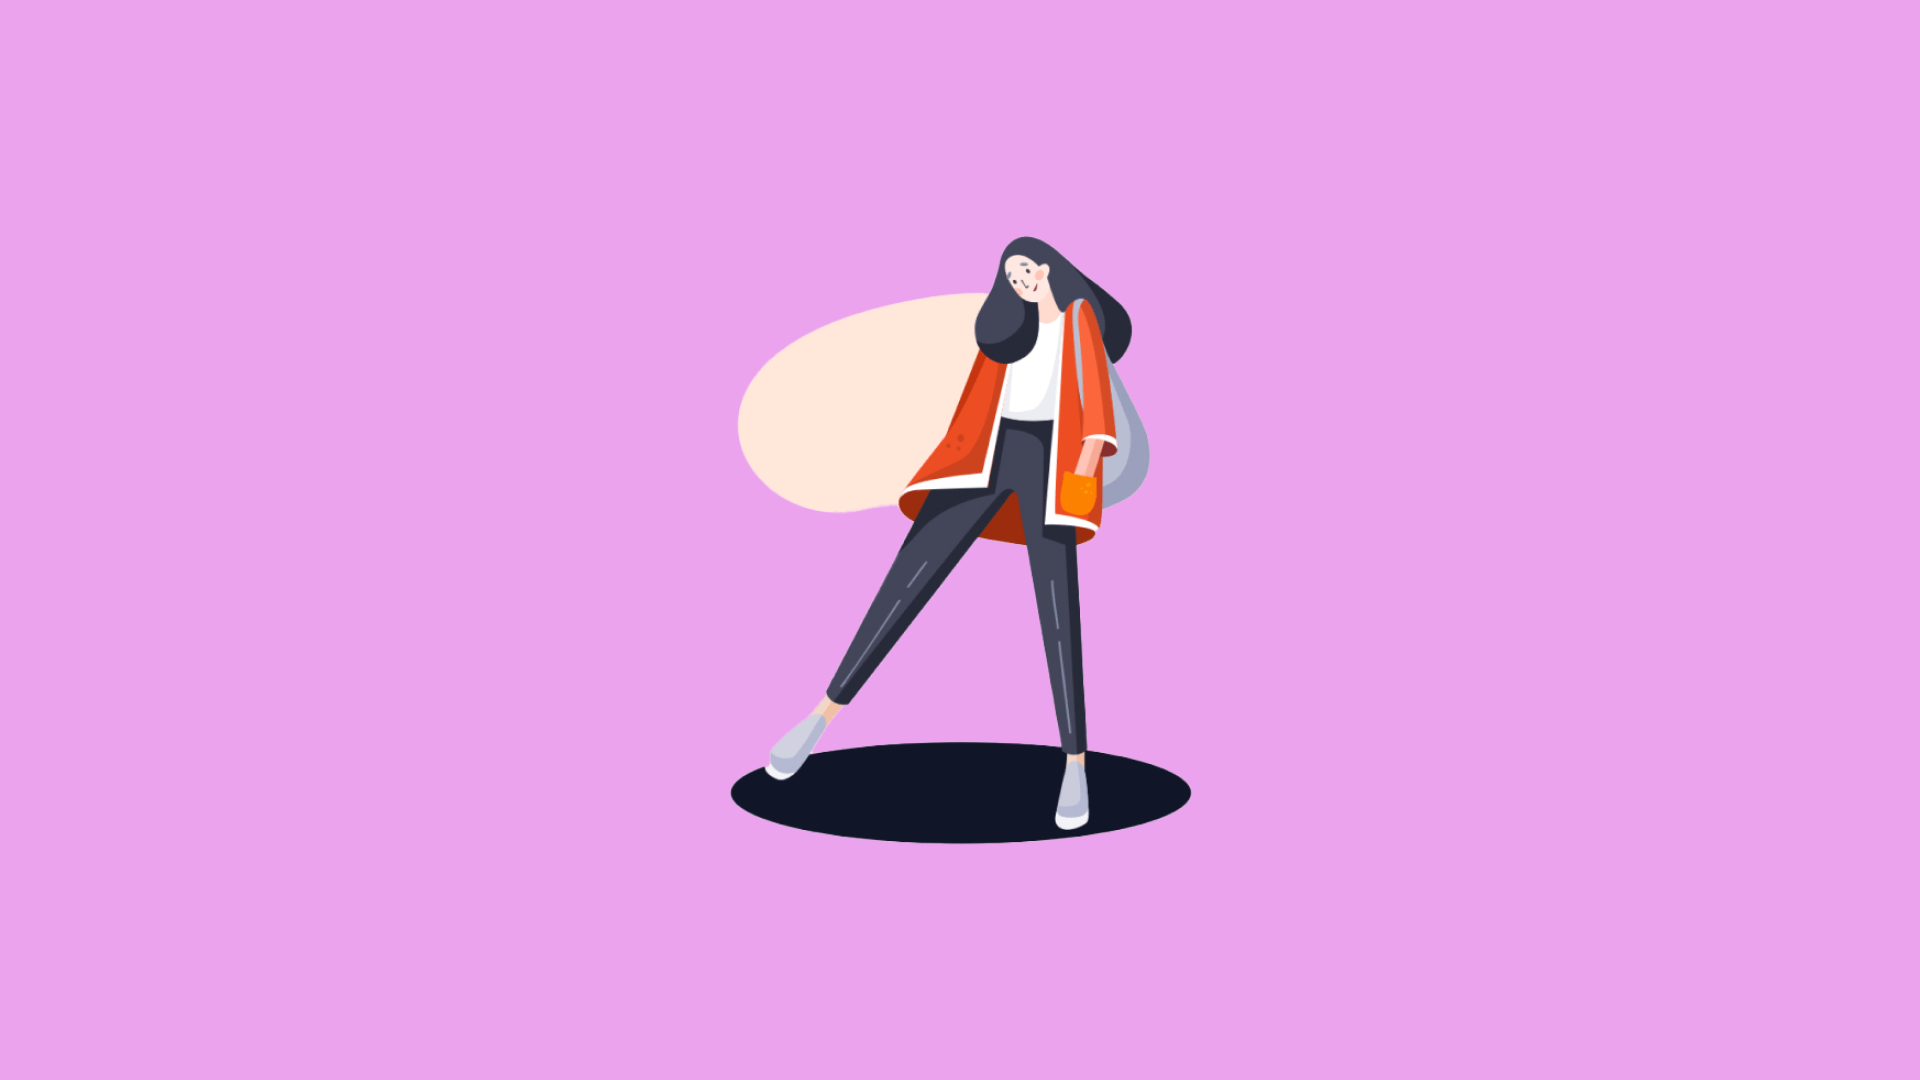
In our new step-by-step guide, artist Soodabeh Damavandi will show us how to create a Flat Design character.
You can apply this design process to any flat character you wish to create in the future.

What you'll need:
• iPad
• Apple Pencil
• The latest version of Vectornator
What you'll learn:
• How to import a reference sketch
• How to use the Pen Tool
• How to use the Pencil Tool
• How to use the Shape Tool
• How to organize layers
• How to perform Boolean Operations
Prepare the document and the color palette
First, you'll need to sketch your character.
Browse the internet and get some inspiration from other artists on how a flat character can be designed. You can also draw a copy of the sketch that Soodabeh created for our tutorial. You can use any drawing software you like for your sketch, but in this guide, Soodabeh has used Procreate.
After you have your initial sketch, it's time to move to Vectornator.
Open a new document in Vectornator by tapping the + button. You can either choose a template or set the size of your document manually.
Ready to create Design Character that pack a punch?
Visit our Academy to learn how to use color palettes.
If you see the checkerboard as the background of your canvas, you can toggle the default white background of your document by going to Settings > Canvas > White Background.
Create a new layer in the Layers Tab and name it “Sketch”. If you press the + button again, you can then select the import option in the popover menu, and select your flat character sketch.
Lower the opacity of the Sketch layer a bit, and then lock it by tapping the lock symbol.

Create a second layer and name it “Vector Shapes.”
Before we start drawing on our new layer, we will first prepare the color palette. Soodabeh was kind enough to give us a full list of the Hex Color Codes for her artwork:
- Orange (hair): #fd553c
- Darkest orange (bun & lips): #e44f25
- Darker orange (background shape): #fd553c
- Yellow (background ovals): #ffb700
- Coral (background ovals & blush & leg shadow): #ffa890
- Skin: #ffc3B3
- Darker skin: #ffa890
- Inside turtleneck & upper dress: #9194a2
- Sleeves & turtle-neck: #bbbdca
- Stripes: #2f3753
- Cuffs: #e1e3ef
- Skirt & bag: #white
- Inside skirt: #434558
- Inside boots & boots rectangle detail: #333b56
- Boot: #5f6782
- Darker boot: #424b5f
Create your custom color palette in Vectornator with the Hex Color Codes from this list.

Add the background elements
Now that we have established our color palette, we will start drawing the background elements with the Shape Tool.
For regular shapes, you can use the Shape Tool, for more irregular shapes you can use the Pen Tool.
First, we'll add a few small background bubbles with the Shape Tool, and for the bigger bubble, we will use the Pen Tool.

Draw the points along the sketched line and adjust the shape by dragging the Bézier Curve Handles. You can close the path you have created with the Pen Tool by clicking on the Start Bézier Node.
If you're completely new to drawing or using a tablet for the first time, you can use the Pencil Tool instead, since it feels more like drawing with a real pen or pencil.
Draw the face, hair, neck, and arms
In our next step, we'll draw the character.
Inside the Fill section of your Style Tab, set the Hex Color Button to #ffc3B3 manually. Select the Pen Tool and follow the contour of the face, and don't forget to include the ears!
Set the points by tapping along the sketched line. Adjust the curve by tapping, holding, and dragging the Bézier Curve Handles. Release when you're satisfied with the result. Tap once on the last node to create sharp angles or deep curves.
Don't despair, it takes some time to get used to the Pen Tool, but once you get the hang of it you can create any shape you want!

Now, set the Hex Color Code to #fd553c to create the hair. Follow the sketched lines of the hair closely, but exclude the hair bun (we will create one later with a separate shape).
Adjust the Nodes and Bézier Curves of your shape by activating the Node Tool if necessary. If you're a beginner, this could take you several attempts, but that’s perfectly fine!
:quality(75))
:quality(75))
Now move the face shape to the front by using the Order Gesture in the Arrange Tab or the Quick Actions Bar.
Create the hair bun as a separate shape and move it behind the hair base by using the Order Gesture in the Quick Actions Bar. Create the neck and the arms by repeating the steps above.
Create the dress
Create the turtleneck opening with the Oval shape.
Select the Oval shape from the Shape Tool and place it above the turtleneck opening in the reference sketch.
Scale, rotate, and move the shape as needed by using the Selection Tool.
Select the Pen Tool again and finish the upper and lower part of the dress, the sleeves, and the cuffs. Don't forget to create separate shapes for each element of the dress!

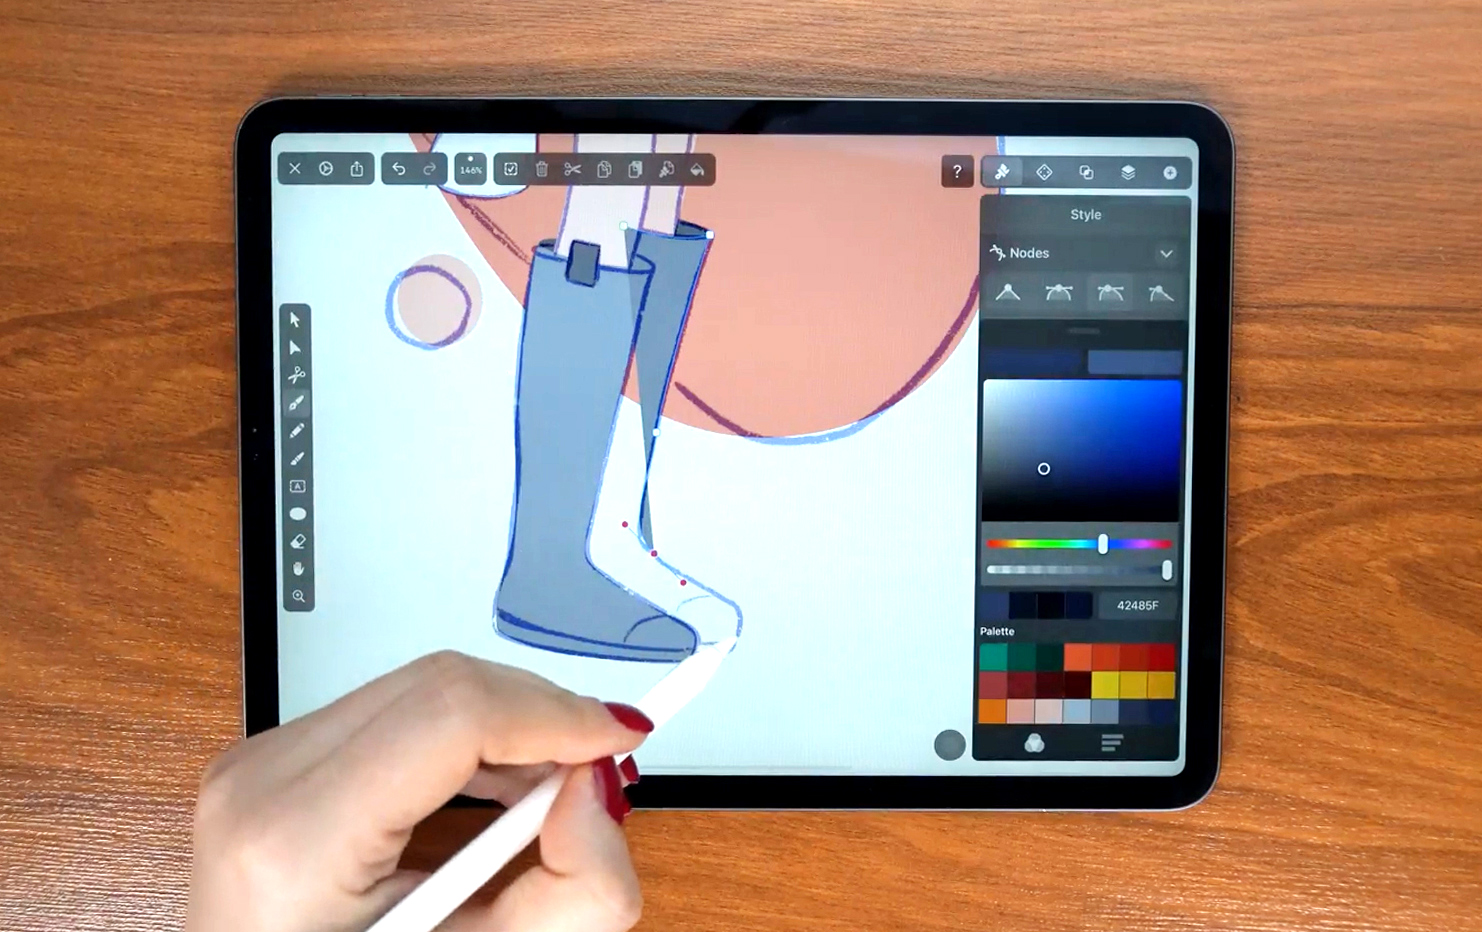
Draw the legs, boots, and purse
Now draw the legs, the small white purse, and the boots. Don't forget to create a separate shape for each element!
Set the Fill color of each shape manually by using the Hex Color Button or by sampling the personal color palette we created beforehand.
Arrange the shapes accordingly by using the Order Gesture in the Quick Actions Bar or the Arrange Tab.
Create the stripes of the dress
In our next step, we'll create the stripes on the upper part of the dress to give it a pattern and add some interest.
Flat design characters usually don't have much detail, but adding a slight hint of decoration doesn’t contradict the minimalist concept of the flat design character. (At least, so we think!)
First, hide the sketch layer by tapping the eye icon on your sketch layer. Then select the Pencil Tool.
Vectornator is now Linearity Curve.
Learn more about our recent rebrand and how we chose our new colors.
In the Style Tab, toggle the Fill Mode off and the Stroke Mode on, and set the line thickness to 3pt.
Set the Hex color of the Stroke to #2f3753. You can adjust the smoothness of the stroke with the slider next to the Pencil Tool.

Draw four lines with an equal distance, as you can see in the reference image. You can select and move the lines separately or all together with the Multi-Select Mode of the Selection Tool to fit the dress precisely.
Create the highlights and shadows
Now that we've established the main shapes, you may have noticed that the shapes that are in the background have a slightly darker tone than those in the foreground.
The legs, boots, and neck that are further away from the viewer are colored darker to give the flat design a subtle hint of dimensionality.
In our next step, we'll create the highlights and shadows of our character.
Create a smooth curve with the Pen Tool where you want to draw highlights or shadows. You can roughly close the shape, but there is no need to make it look perfect, and we’ll explain why a bit later.
Now, duplicate the object with the Duplicate Gesture in the Quick Actions Bar and place it behind the shadow shape. Select both shapes and apply the Boolean Operation Intersect in the Quick Actions Bar.

You can reduce the opacity of the highlight or shadow shapes to make the visual impact less apparent. Additionally, you can use the Blend Mode "Multiply" to create shadows.
Draw the shadows and highlights by repeating the steps we described, and keep a close eye on the reference image from Soodabeh.
Then, create a simple shape on the ground of your character by drawing an Oval Shape and placing it directly under the boots of your character.
Move the Oval Shape beneath the boots by using the Order Gesture in the Arrange Tab.
Draw the details of the face
In our next step, we'll create the facial features of our flat design character.
Create the eyes, the eyebrows, and the blush with the Shape Tool and position the shapes on the face. Use the Pen Tool to shape the nose and the mouth.
Move, scale, and rotate the shapes with the Selection Tool until you are satisfied with the facial appearance of your character. You don't need to copy the exact facial features from Soodabeh, you can draw your own version if you want to!

Phew, that's it guys, we're done! We hope you enjoyed being creative with us – we certainly did!
Don't forget to share your flat design characters with us on social media and in the Vectornator community art gallery.


Jumpstart your ideas with Linearity Curve
Take your designs to the next level.
Share this!
Marion Gerlinger
Marion is a contributing writer to the Linearity Blog.