:quality(75))
:quality(75))


:quality(75))
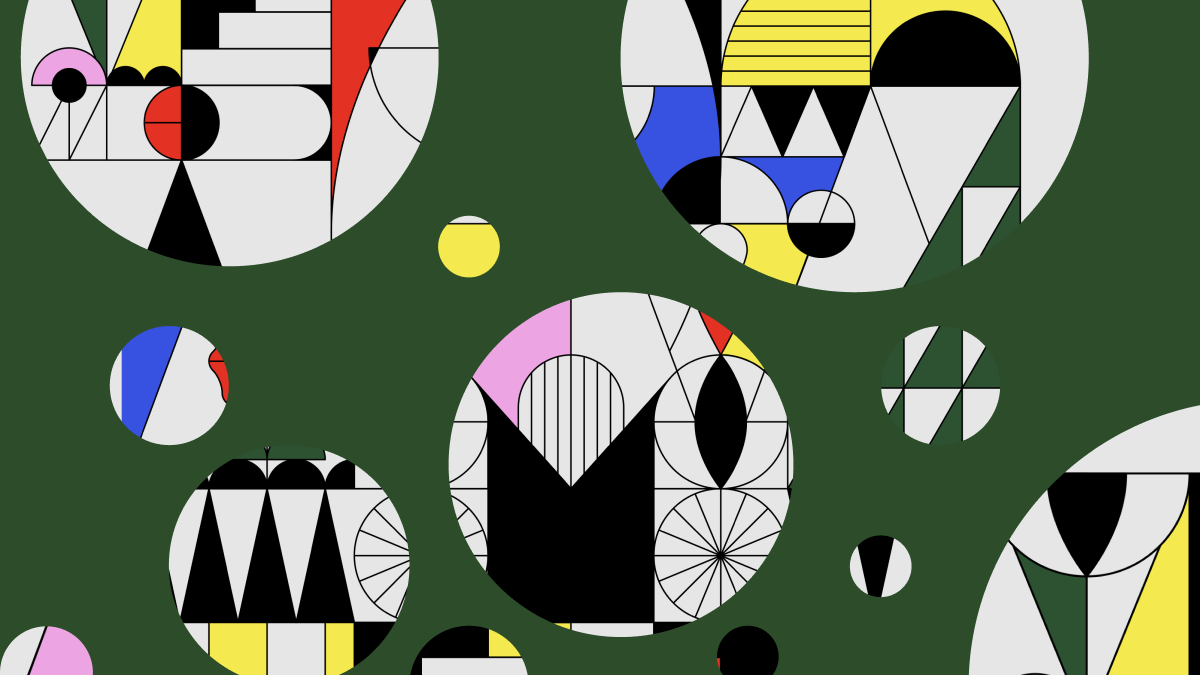
See this super, duper, uber-rad image above? Thinking, "Man, that's cool; how do you make that?" Or maybe you're thinking, "Oh yeah, the good ol' clipping mask effect - haven't used that in a design project in ages..."
Well, either way, you're in the right place! In this article, we explore the ultra-delicious clipping mask tool.
Clipping masks enable you to make designs unique and eye-catching. It's one of the basics everyone should know how to accomplish in Illustrator.
Below, we'll walk you through how to create a clipping mask in Illustrator and Linearity Curve (formerly Vectornator).
We'll throw in some design tips for taking your vector art to the next level with clipping mask effects, and hopefully, you'll finish the article having gained some valuable knowledge. Bookmark this baby to refer back to it any time you need.
Jumpstart your ideas with Linearity Curve
Take your designs to the next level.
What is a Clipping Mask?
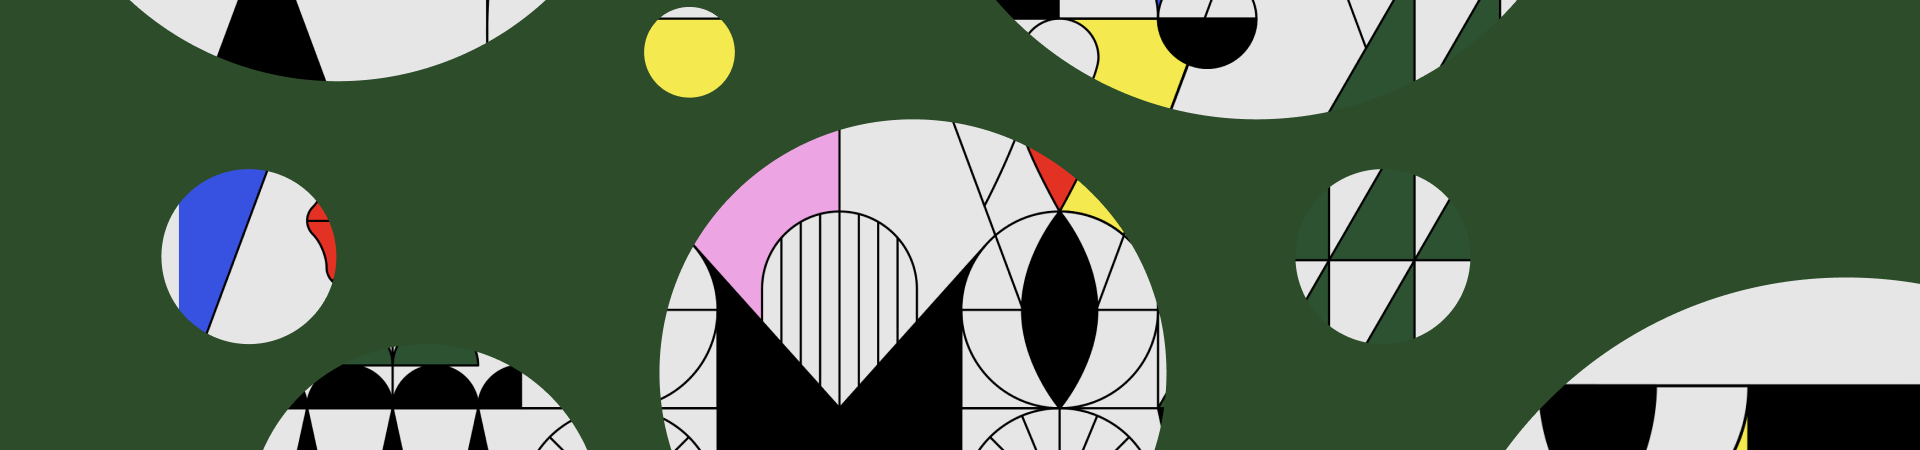
"Masking" is an effect in graphic design where one image is placed like a "mask" over another. Basically, masks show parts of an object within a specific shape. See these hexagons in the image above. Cheesy, we know, but they give you a good idea of how clipping masks can be used.
According to Adobe, a Clipping Mask is "a group of layers to which a mask is applied." Clipping masks create an effect where the layers added on top of a shape are only revealed inside the bounds of that base shape (the mask).
The difference between a layer mask and clipping mask
In Adobe Illustrator, you can create both layer masks and clipping masks. A layer mask hides or exposes different parts of a layer. A clipping mask uses one layer's transparency to expose another's visibility.
So, if you're filling text shapes with a pattern, the text will be on the bottom layer, which will be the mask, and the pattern will exist on a layer above that and become the "clipping," which will fit into the mask.
Clipping masks use multiple layers to hide portions of images, and layer masks use only one layer.
When to use a clipping mask in graphic design
The mask feature is excellent for creating all kinds of intriguing designs. You can use the effect to:
- Create interesting typography by applying a pattern, photo, or any kind of image. You can even have an entire illustration inside the text if you want!
- Create engaging editorial designs. Editorial designers are no strangers to the clipping mask tool. From magazines to brochures, this effect can take simple text, headlines, and layouts to the next level.
- Boost your illustration game by using the clipping mask in illustrations. In particular, this is the perfect tool for creating surrealist illustrations.
- Create a collage effect. The clipping mask is perfect for creating a design that looks like a paper collage.
- Create patterns inside shapes. This is what a clipping mask does on the most basic level, so when you want to apply a pattern inside a shape or text, this tool is your magic wand!
How to make a clipping mask in Adobe Illustrator
In this tutorial, we'll show you how to mask text with a pattern. This is one of the most common looks you'll come across that's achieved with the clipping mask.
There are a few ways to use the tool, and we'll explore three methods below.
Method 1
To begin, you'll need your pattern object and text ready in a new Adobe Illustrator document.
Master the Art of Masking in Vector Design
Uncover the secrets of effective masking techniques with our comprehensive guide. Perfect for enhancing your vector editing skills.
The object you'll be using as a mask clipping could be anything. Why not try a photo or an abstract pattern?
Once you have the main object (the text) and the pattern object (photo), follow the process below:
- Make sure that the text is on top of the pattern.
- If the text is behind the pattern, you can change this by selecting the text, right-clicking, choosing "Arrange" and "Bring To Front."
- Next, you're going to clip the pattern inside the text by selecting both the text and the pattern (hold down Shift while you click to select) and navigating to Object -> Clipping Mask -> Make in the main menu.
- The shortcut for this action is ⌘ + 7 on Mac or ctrl + 7 on Windows.
- Oh yeah! We've now got some mask magic going on and your text should be masked by your pattern.
It might not look right yet, but no worries. You can edit the mask to look exactly how you want. To adjust it, do the following:
- Navigate to the Layers Panel and click on the Layers menu. The menu will expand.
- Here, you'll find a Clip Group containing each element of the mask (i.e., the text and the pattern). You can select the pattern from within the Clip Group.
- Now you'll be able to resize the pattern and move it around until it looks just right.
Method 2
In this method, we'll explain how to create the mask so you can edit your text afterward. This includes changing the actual word, font, and other text properties.
- Create a new Illustrator document and add your text and pattern. Make sure your text is brought to the front of all other objects and the pattern, as explained in "Method 1" above.
- Navigate to the Pathfinder window and click Pathfinder in the top right corner.
- Toggle the Compound Shape button on and select Make Compound Shape. This will enable you to edit the text after applying the pattern.
- Now select both the text and the pattern (hold down Shift while you click to select) and right-click your selection.
- Choose Make Clipping Mask from the menu. Alternatively, you can navigate to Object -> Clipping Mask -> Make.
Alright! Your text will contain your pattern, and you'll be able to press "T" for the Type tool and edit your text while keeping the clipping mask effect.
Method 3
In this method, we'll explain how to create a clipping mask for select items in a pattern. The example below shows how a clipping mask is only applied to some of the shapes. Let's take a look at how to accomplish this.
- Create a clean Illustrator document and import your pattern or image.
- Create the pattern design and drag the pattern on top of the image.
- Decrease the opacity of the pattern so you can see the image underneath.
- Now, hold down shift and select only the shapes from the pattern you want in the clipping mask.
- Navigate to the Pathfinder window and merge these shapes together to create one vector shape. To do this, go to Shape Modes and select Unite on the far left.
- Change this into a Compound Path by navigating to Object -> Compound Path -> Make in the main menu.
- Hold down Shift and click the image and the pattern together, right-click on the selection, and choose Make Clipping Mask.
:quality(75))
:quality(75))
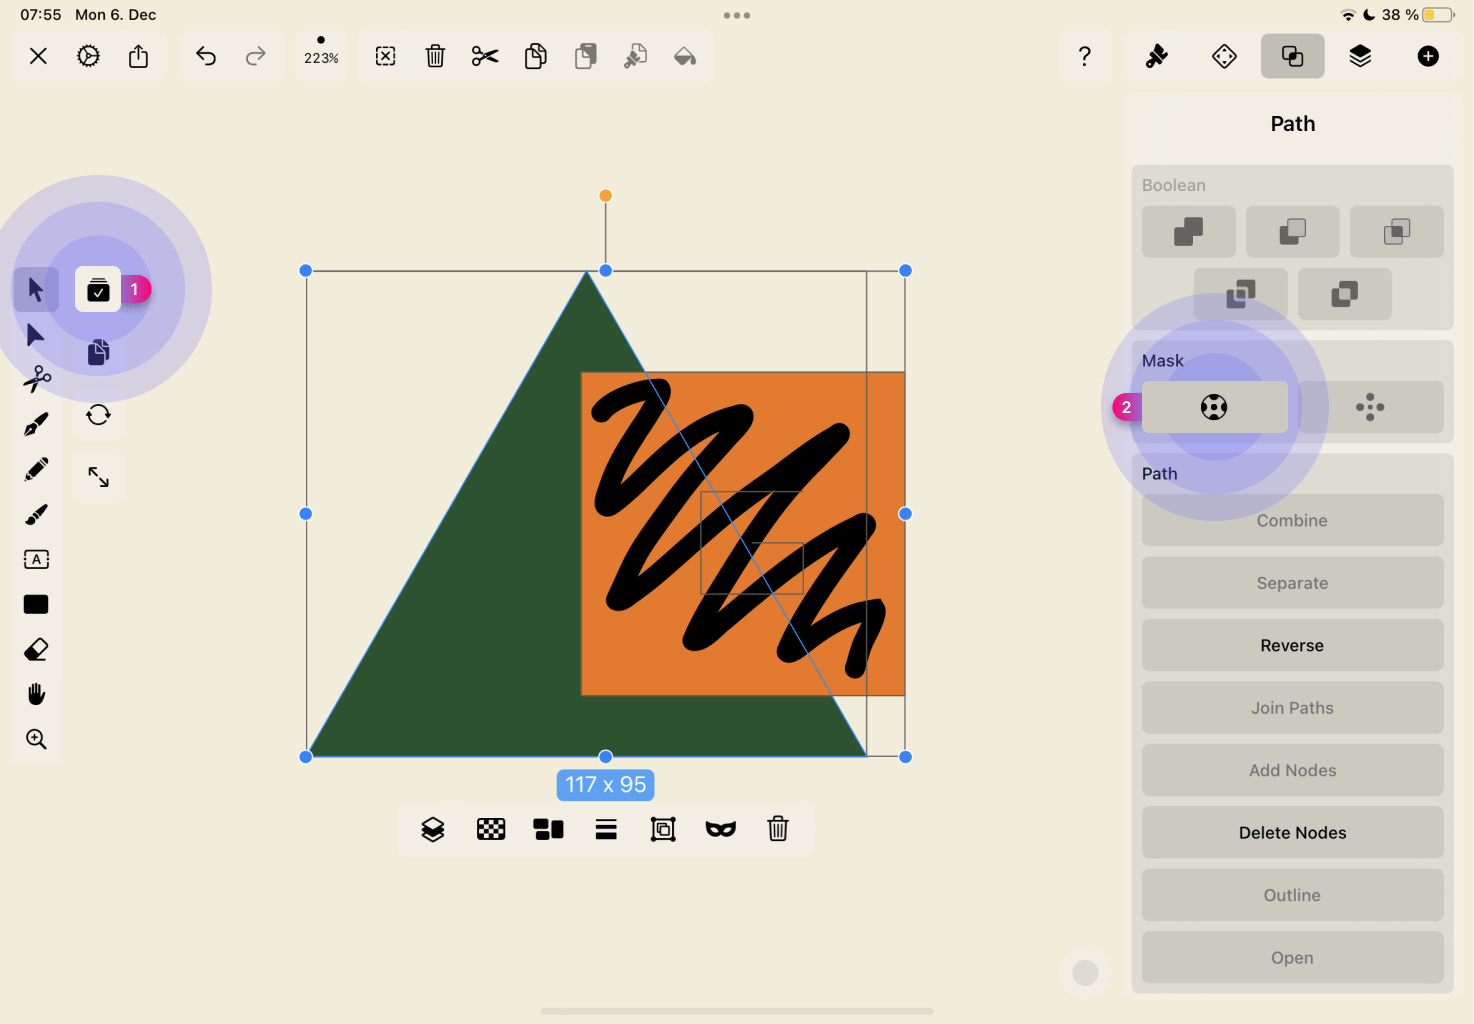
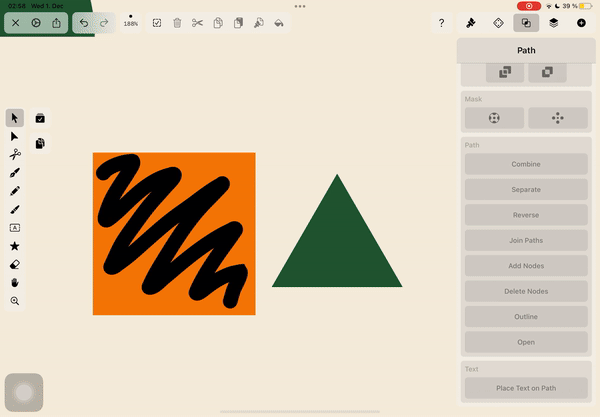
How to create a mask in Linearity Curve
In case you’re looking for an Illustrator alternative, we’ve added a step-by-step guide on creating a mask in Curve.
Masking in Curve is very simple! Any closed shape can be made into a mask. All you need to do is:
- Select the object you want to mask (i.e., the shape, text, or object you want as the base).
- Next, select the shape you want to use as a mask (i.e., the pattern or photo you want to cover with your base shape.)
- You can select both objects at once using the Multi Selection Tool.
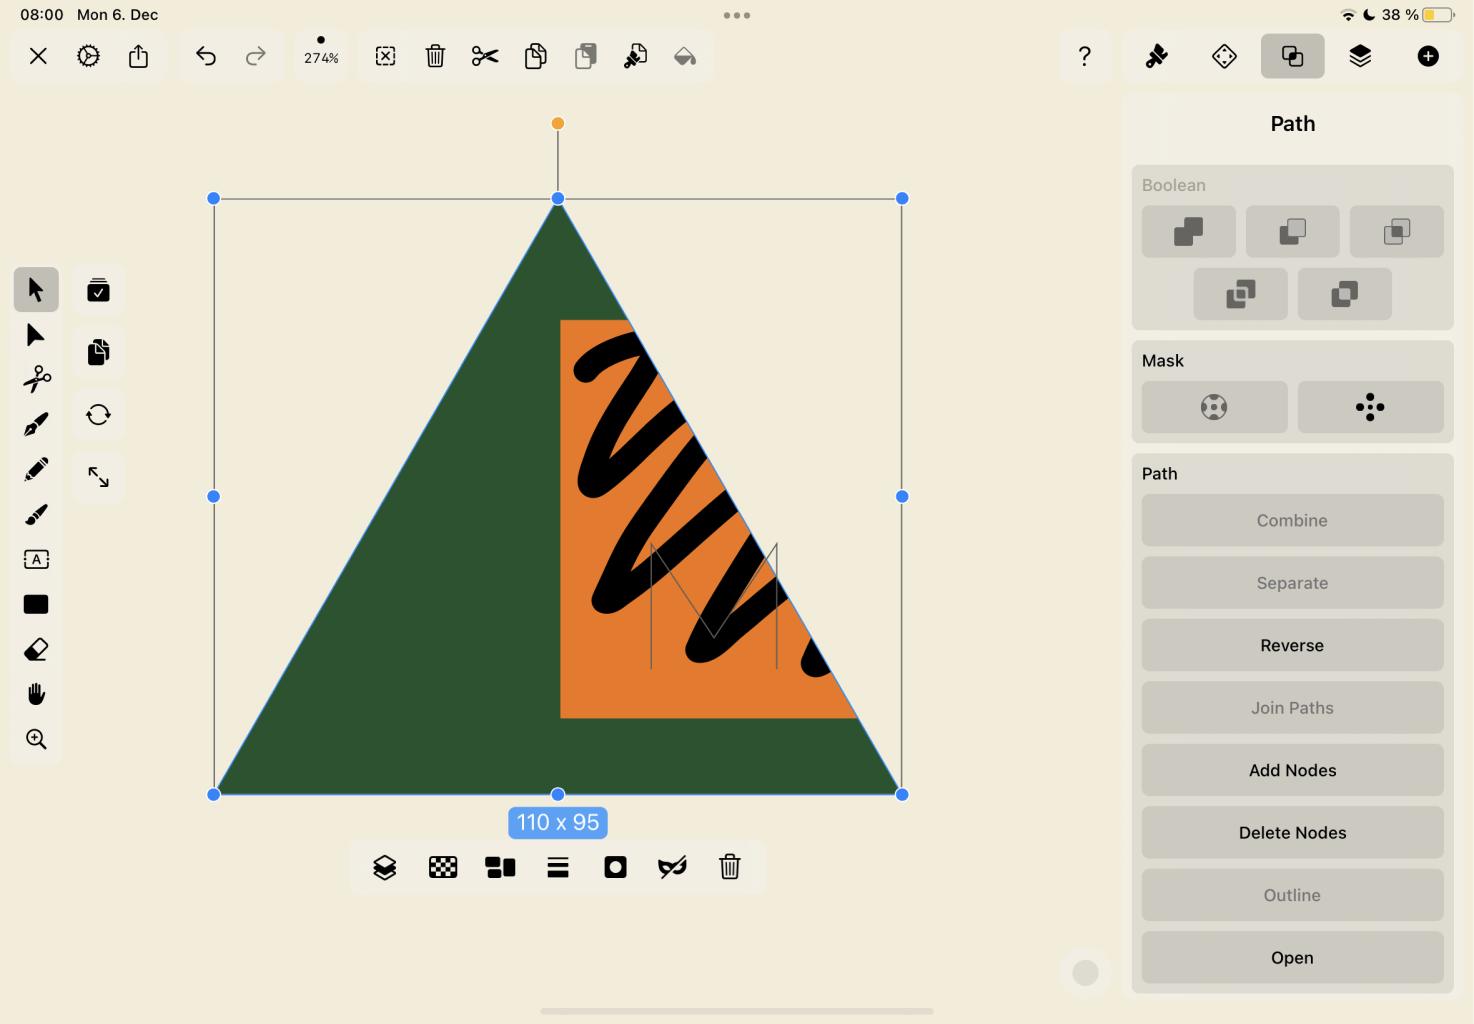
- Now tap the Mask Button. You can find this in the Path Tab. The mask will immediately be applied when you tap the button, and the letter "M" will appear in the bottom corner of your object, so you know it's been masked.
To edit your Mask Shape, double-tap on the masked object and make your adjustments.
When you're satisfied with the finished mask, double-tap outside the area of the object to close the mask again.
For a more in-depth Curve mask tutorial, you can check out this video or read the full article in our Learning Hub.
Here's a GIF of the masking process in Curve!
Ready to create brand assets that pack a punch?
Visit our Academy for free marketing design courses.
Clipping mask inspiration for your creative process
Taking an adventure down the rabbit hole of clipping mask inspiration on Pinterest, Behance, or Dribbble is definitely a couple of hours well spent, but in the meantime, we've curated just a few of our favorite examples of this effect working its magic to get you fired up and eager to design.
Transcendent typography
Clipping masks are commonly used in typography. It’s a simple way to transform ordinary text into a work of captivating letter art.
Illustration sensation
Clipping masks are excellent for illustration and digital art. This tool does wonders for helping artists bring their imaginations to life on the screen. You can create all kinds of surreal, fantastical, and entrancing effects.
Edgy editorial
You can create drool-worthy editorial design when you use this tool right.
Show-stopping shapes
Take any simple shape and transform it into a work of art.
Illusion confusion
Woah. Why not bend your viewers’ minds with a little optical illusion, courtesy of the clipping mask tool?
Strange and surreal
Masking is the perfect feature for creating strange and surreal visuals. If Salvador Dalí worked in Illustrator, this would be his go-to feature without a doubt.
Final thoughts
Hopefully, you've enjoyed deep-diving into using clipping masks for eye-popping graphic designs! Stay up to date with our blog and join our online community or follow us on Instagram, where we share design tips and inspiration.
Jumpstart
your ideas with
Linearity Curve
Take your designs to the next level.
Share this!
Ben Barnhart
Ben is a Content Lead for Linearity living in Berlin. His hobbies include board games, cooking, reading, and writing.