:quality(75))
:quality(75))


:quality(75))

Learn how to use all the tools found in the Pathfinder Panel to cut out shapes in Illustrator. In the end, we will also give you a preview of similar tools you can use in Linearity Curve.
In this series, we want to show you how to use Adobe Illustrator tools and how to navigate the tricky vector design software.
This step-by-step guide will teach you the different ways you can cut out shapes in Illustrator. And we'll also show you how to get the same result in Linearity Curve—a free and easy-to-use alternative to Adobe Illustrator.
Jumpstart your ideas with Linearity Curve
Take your designs to the next level.
Illustrator’s Pathfinder
If you've ever used the Knife Tool or the Scissors Tool to divide objects or crop images in Illustrator, you should know that there is an easier way to cut out shape objects and any image in Illustrator.
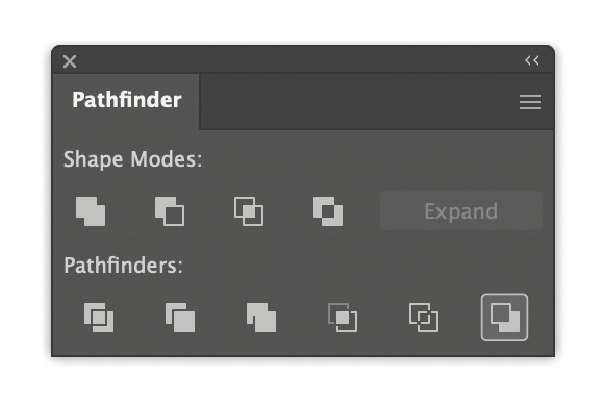
Illustrator’s Pathfinder is what you need anytime you need to cut out Adobe Illustrator shapes. The Pathfinder panel is a group of tools that can help you create different cutouts using two or more shapes in Illustrator.
You can think of Pathfinder as a paper cutter, but it's also like a glue stick that can help you combine several shapes together to create an entirely new shape.
How can you access the Pathfinder panel?
There are two simple ways to do that. The first option is to go to the Window menu, scroll down, and select “Pathfinder.” The other option is to use the following shortcut: Shift + Ctrl + F9.
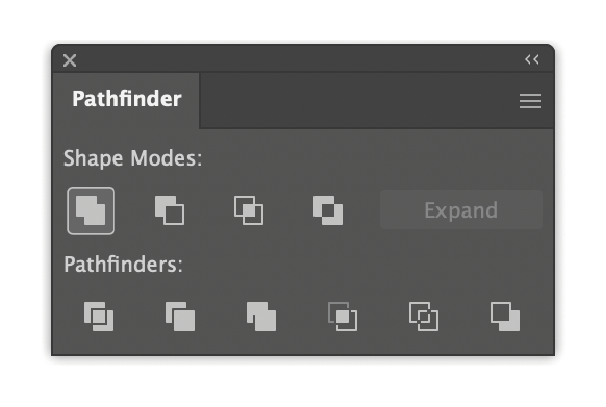
Once the Pathfinder panel is enabled, you will see two sets of tools: Shape Modes and Pathfinders.
Shape modes
You can use shape modes in a lot of different ways. You can also combine several shapes in various ways using the four tools included in the Shape Modes section. Let’s take a look at them one-by-one:
Unite
The “Unite” shape mode is used to combine two or more shapes into a single new shape of your choice.
Do you want to combine a square shape and a circle shape to form a single object? All you need to do is place the two shapes into the desired position so that a part of them is overlapping.
Once you do this, select both shapes using the Selection Tool (V) and then click the “Unite” icon, which is the first one under the “Shape Modes.” The tool, once activated, will combine the shapes as well as their paths.
Minus Front
As the name suggests, the Minus Front tool is used whenever you need to “minus” or subtract the shape you have placed on the top of the background shape.
Do you need to place a circle shape on a square shape and use the Minus Front icon? Once you use the Minus Front tool, you will remove the circle and the overlapping parts from the square shape at the bottom.
Keep in mind that you will have to select all shapes using the Selection Tool (V) and click on the Minus Front icon, the second icon under the “Shape Modes.”
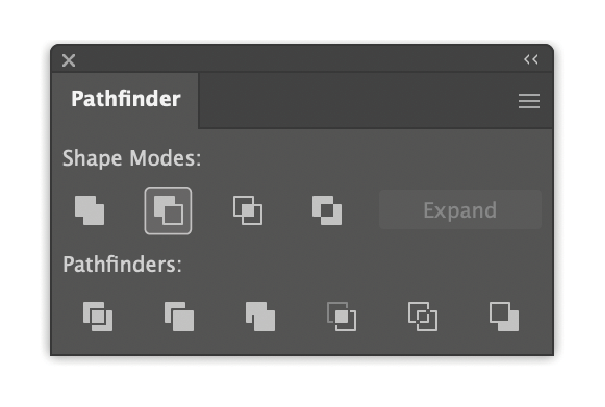
Another way to select the shapes is to press and hold the Shift tab and then click all the shapes you want to use. Then you can go ahead and click on the Minus Front icon. Once activated, this tool will “eliminate” the top shape layers and all the overlaps.
You can use the “Minus Front” whenever you need to cut out two top shape layers from the bottom layer. For instance, you can place a square shape on the bottom layer and two circle shapes on the top layer.
Position them in any way you like. For instance, you can position one circle at the far left of the square and the other circle at the far right.
Once the circles and the overlaps are cut out, you will be left with a shape that will resemble an hourglass sand timer.
Unleash Your Creativity with the Shape Builde
Discover the power and flexibility of the Shape Builder tool. Transform simple shapes into complex designs effortlessly.
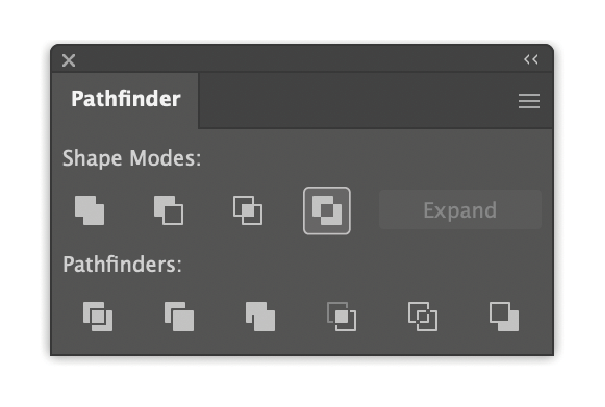
Intersect layer
What if you could create a shape out of the overlap of two or more objects? The Intersect tool allows you to select the path where the shapes you have chosen intersect.
Once you have placed the shapes in the desired position, select them with the Selection Tool (V). Then, click the Intersect icon, the third option under the “Shape modes” section. In the end, you will be left with the overlapping shape of the original objects you have used.

Exclude
The fourth and last option under the “Shape modes” section is the Exclude tool. Consider this tool as the exact opposite of the previous Intersect Layer tool we just mentioned.
The Exclude tool will allow you to place two or more objects on top of one another and remove the overlapping area. Select all the shapes with the Selection Tool and then click on the Exclude icon.
This action will remove the overlaps and leave behind the remaining part as a grouped final shape. If you need to edit the final shapes separately, you can right-click and select “Ungroup.”
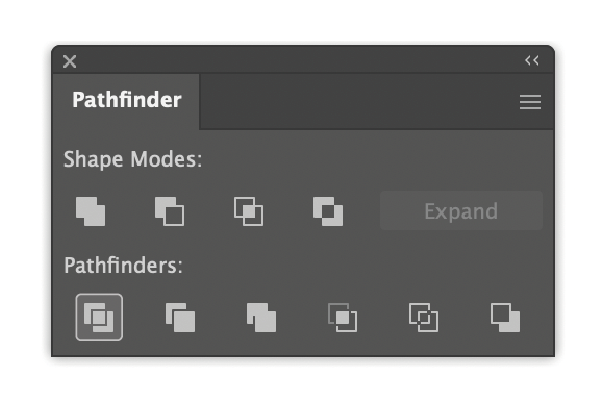
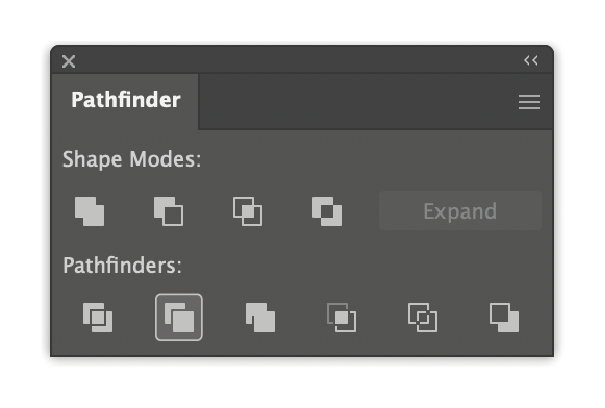
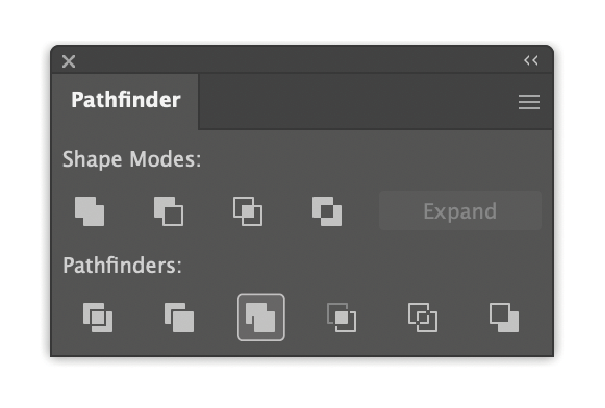
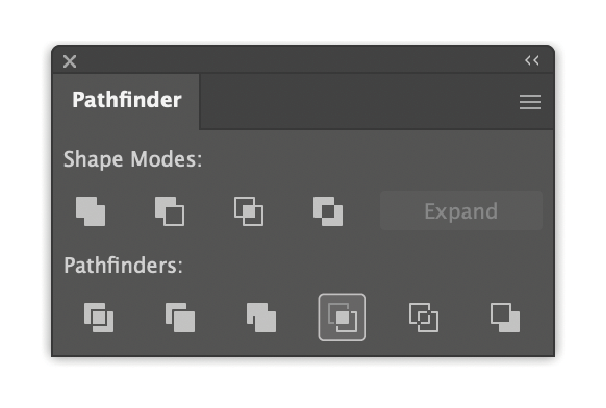
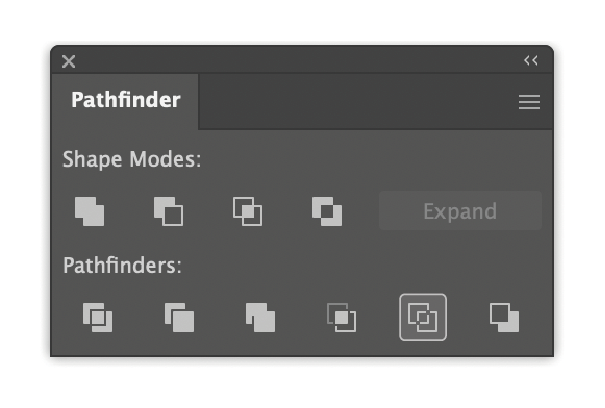
Pathfinders
Under the Pathfinders section, you will find six different tools: Divide, Trim, Merge, Crop, Outline, and Minus Back. Let’s take a look at their functions one-by-one:
Divide
There are so many different ways you can use the Divide tool. This tool is handy if you need to create modern logos.
For instance, if you need an abstract logo that includes abstract shapes and geometric motifs, you can create one using two hexagons.
Once you them, select all the shapes and click on the “Divide” icon. This action will divide the shapes based on the paths created through the overlapping layers and create symmetrical space between the final shapes you used.
Trim
Have you ever used a cookie cutter on dough? The Trim tool is like the digitalized “cookie-cutter” tool of Illustrator.
Just like a cookie-cutter, once you remove the shape on the top from the bottom layer, you will create a “hole” in the original shape in the bottom layer. This shape will have the same shape as the object or shape you placed on top of it.
Another cool thing you can do with the Trim tool is, place several shapes on top of the bottom layer and cut these shapes with the Trim tool at once.
For instance, you can place a Christmas tree shape in the middle and several smaller versions of Christmas decorations around it.
Always make sure that the shapes you want to cut are placed as a top layer. Then select all the shapes, click on the Trim icon, and voila! The remaining result will be a Christmas tree with several Christmas decorations around it.
:quality(75))
:quality(75))
Merge
As its name suggests, the Merge tool merges two or more shapes while “hiding” the overlapping objects.
If you turn all of your shapes into the same color, the Merge tool will join all the areas of the same color. If you use this tool for multicolored shapes, the Merge tool will simply act as the Trim tool.
Crop
Use the crop tool anytime you need to use the overlapping part of two or more shapes or objects. But isn’t that the same function as the Intersect Layer tool, you may ask? Yes, in principle, this tool is similar to the Intersect Layer in that sense.
However, this tool also leaves behind the path information of the shape you have placed on the top layer. This feature can be helpful if you still need that path information and want to use it to alter the final shape you are left with.
You can also use that path to create another shape on top of another object and use any of the other tools you can find on the Pathfinder section.
Outline
This is yet another incredible tool you can use to design creative logos. Once you apply the Outline tool to the shapes you have placed on top of one another, you will be left with the outline of those shapes while preserving the exact colors you used to fill them out.
If you need to use the outlines separately and position them in different angles, you can do so by right-clicking and then selecting “Ungroup.”
Minus Back
The Minus Back tool is the sixth and last tool you will find under the Pathfinders section. The tool is the opposite of the Minus Front, which we mentioned earlier.
If you need to remove the overlapping parts of the shapes you are using and remove the entire shape in the bottom layer, click on the Minus Back icon.
If you want to remove the overlapping parts and the shape on the top layer, you must go to the Shape Modes section and select the Minus Front icon.
Trying out Linearity Curve as an Illustrator alternative
Adobe Illustrator is the go-to tool for many people. However, it is always wise to try out alternative design tools before you make up your mind.
Linearity Curve, with its simple and user-friendly interface, is a strong Adobe Illustrator competitor. Curve is perfect for beginners, and is also offered for free!
Linearity Curve is also designed to fit in with your workflow. For example, you can start your project in another raster program like Procreate, and then turn your graphics into vectors using the Auto Trace tool. Whichever way makes your work process smoother and easier to handle, you can count on Linearity Curve to help with that.
Since we're talking about shapes and altering shapes in this article, let’s take a look at Linearity Curve's Shape Tool.
Ready to create brand assets that pack a punch?
Visit our Academy for free marketing design courses.
What is the Shape Tool?
Linearity Curve's Shape Tool allows you to draw pre-made geometric shapes, such as polygons, circles, rectangles, stars, and spirals.
To draw a shape, simply go to the Toolbar on the left side of your screen, and select the shape icon. To change the shape, tap the “…” (three dots) icon and choose the shape you want to draw. While you have the Shape Tool selected, hold and drag anywhere on the Canvas.
How to change the number of sides?
Let’s say you have drawn a polygon on the canvas and need to change the number of sides in the shape you have drawn.
There are three ways how you can do that:
- Use the Slider to the right of the Polygon Tool
- Use the Slider inside the Style Tab
- Use the Shape Sides Quick Action section
Inspired yet?
We hope this article help clarify each tool you can use to cutout shapes in Illustrator. We also hope it inspired you to take advantage of free resources like Linearity Curve to become a design pro. In the following weeks, we will share more in-depth guides on using pen tools and how to perfect your pen tool skills.
To find out more about Linearity Curve and all you can do with it, take a look at Curve's Use Cases and our Linearity Academy.
Are you planning to play around with Linearity Curve soon? Please be sure to share your favorite works with us. We feature some of the best pieces in our social media channels and blog, so don’t be shy and tag us.
The Adobe online community is very supportive. Nevertheless, learning how to use Adobe products, including Adobe Illustrator, is not an easy task. You always need to look up and research how to use it, no matter if you are a student graphic designer or a seasoned graphic designer.
If you're looking for an intuitive marketing design software that can cut objects out of their background in one click, we've got you covered. Try out Linearity Curve today.
Jumpstart
your ideas with
Linearity Curve
Take your designs to the next level.
Share this!
Ben Barnhart
Ben is a Content Lead for Linearity living in Berlin. His hobbies include board games, cooking, reading, and writing.