:quality(75))
:quality(75))


:quality(75))
Masking is a pivotal skill in video compositing. It gives you precise control over your visual elements and storytelling. You can selectively modify a portion of your scene without affecting the rest.
Masking in motion graphics is great for:
- Revealing and concealing elements: Create suspense or surprise by gradually revealing text or images.
- Complex compositions: Combine different video clips into a single frame to create surreal or composite scenes.
- Focused effects: Apply effects to specific parts of your footage to direct viewer attention or achieve artistic intentions.
Whether you’re looking to isolate effects, enhance visual interest, or create intriguing transitions, this tutorial will guide you through the basics of masking in Adobe After Effects.
We'll also show you how to use masks in Linearity Move, our innovative motion design software for graphic designers and marketers.
Create a new After Effects Composition
Open Adobe After Effects on your desktop computer. Click on the New Composition from Footage card in the Composition panel.
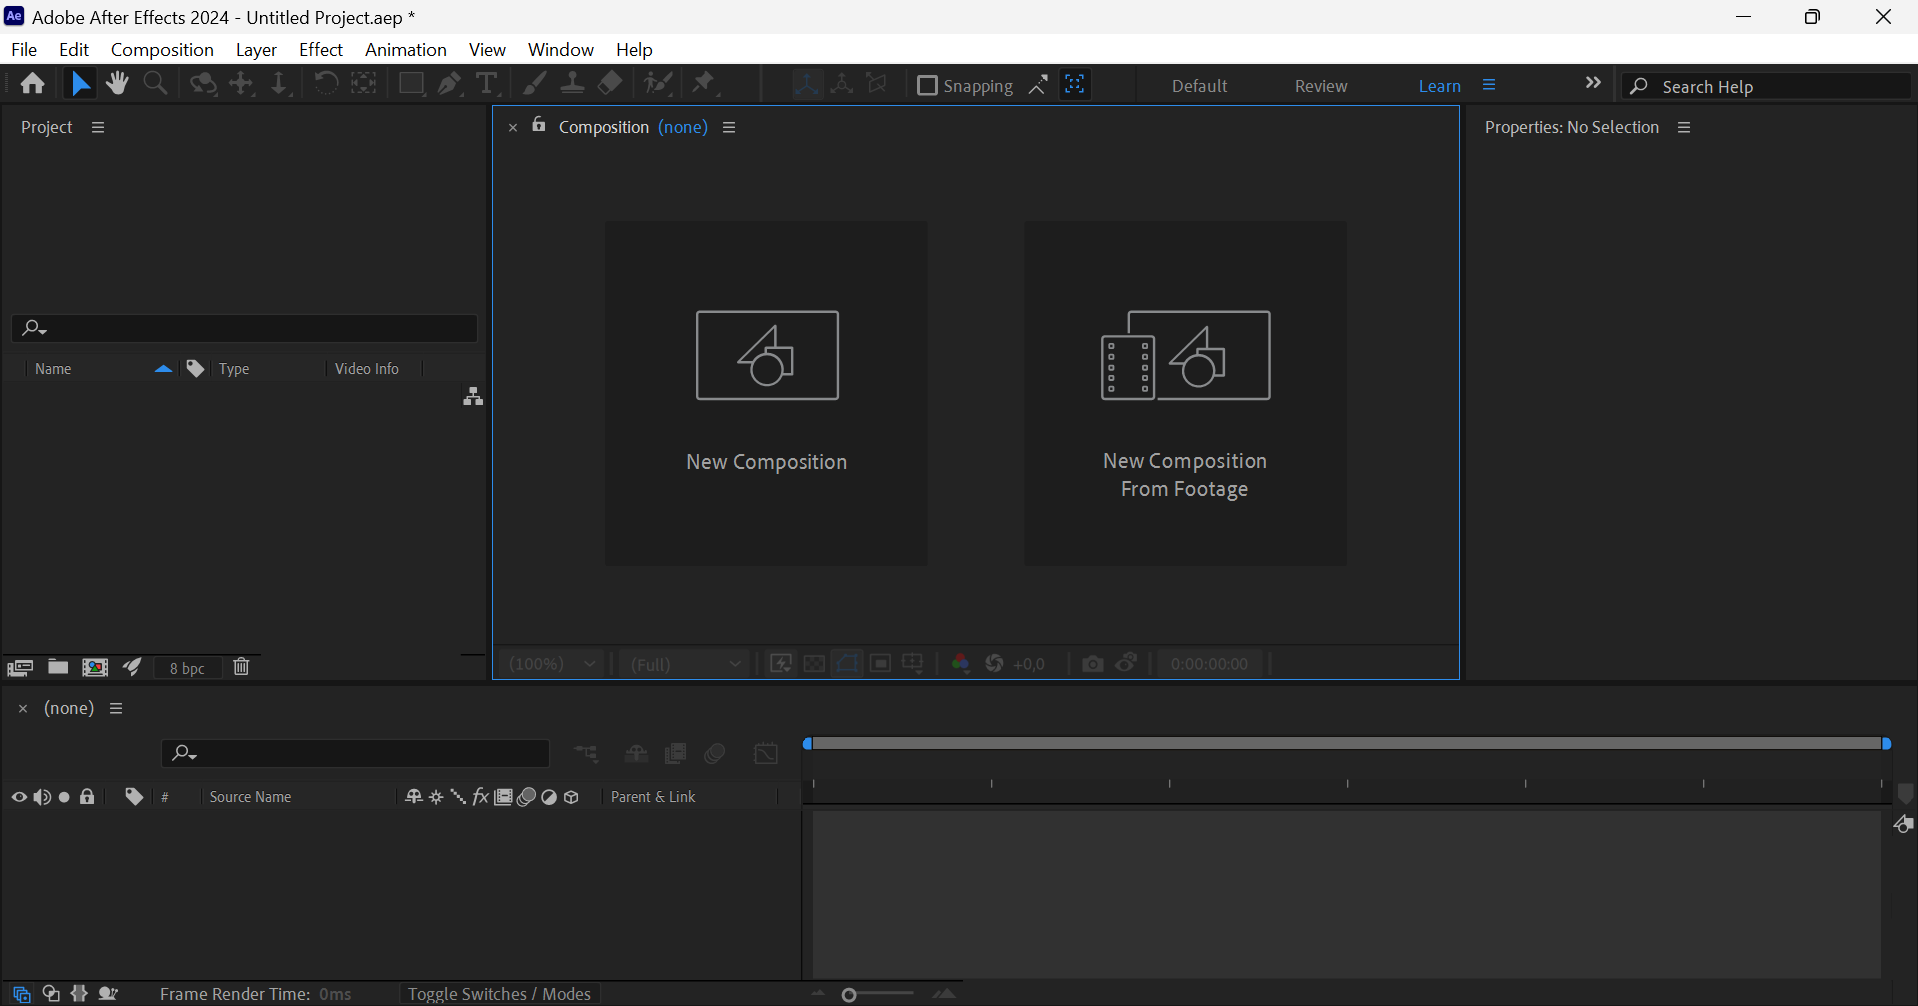
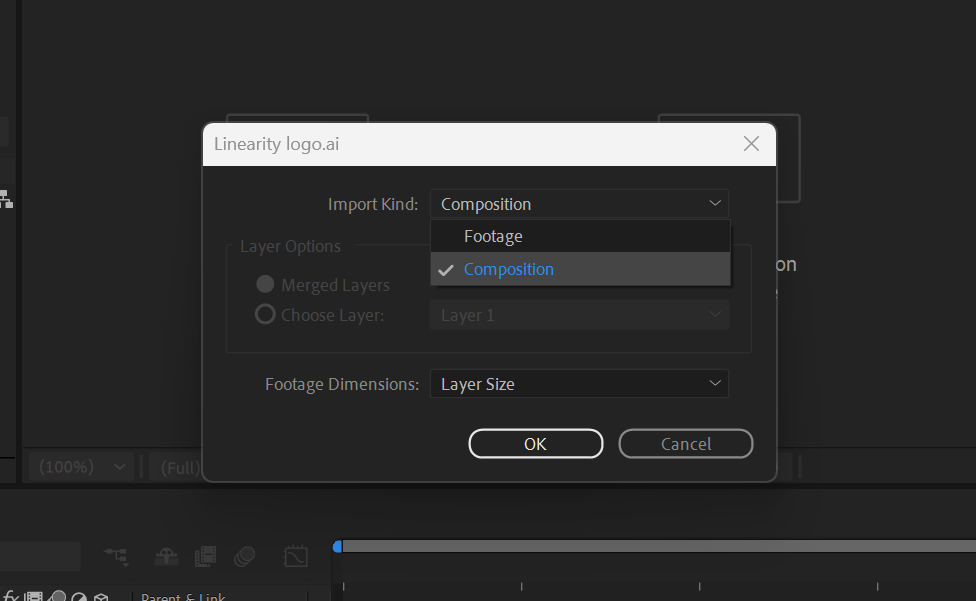
A modal will open. Select the file you'd like to add to your composition. We're using an Adobe Illustrator (.ai) vector file.
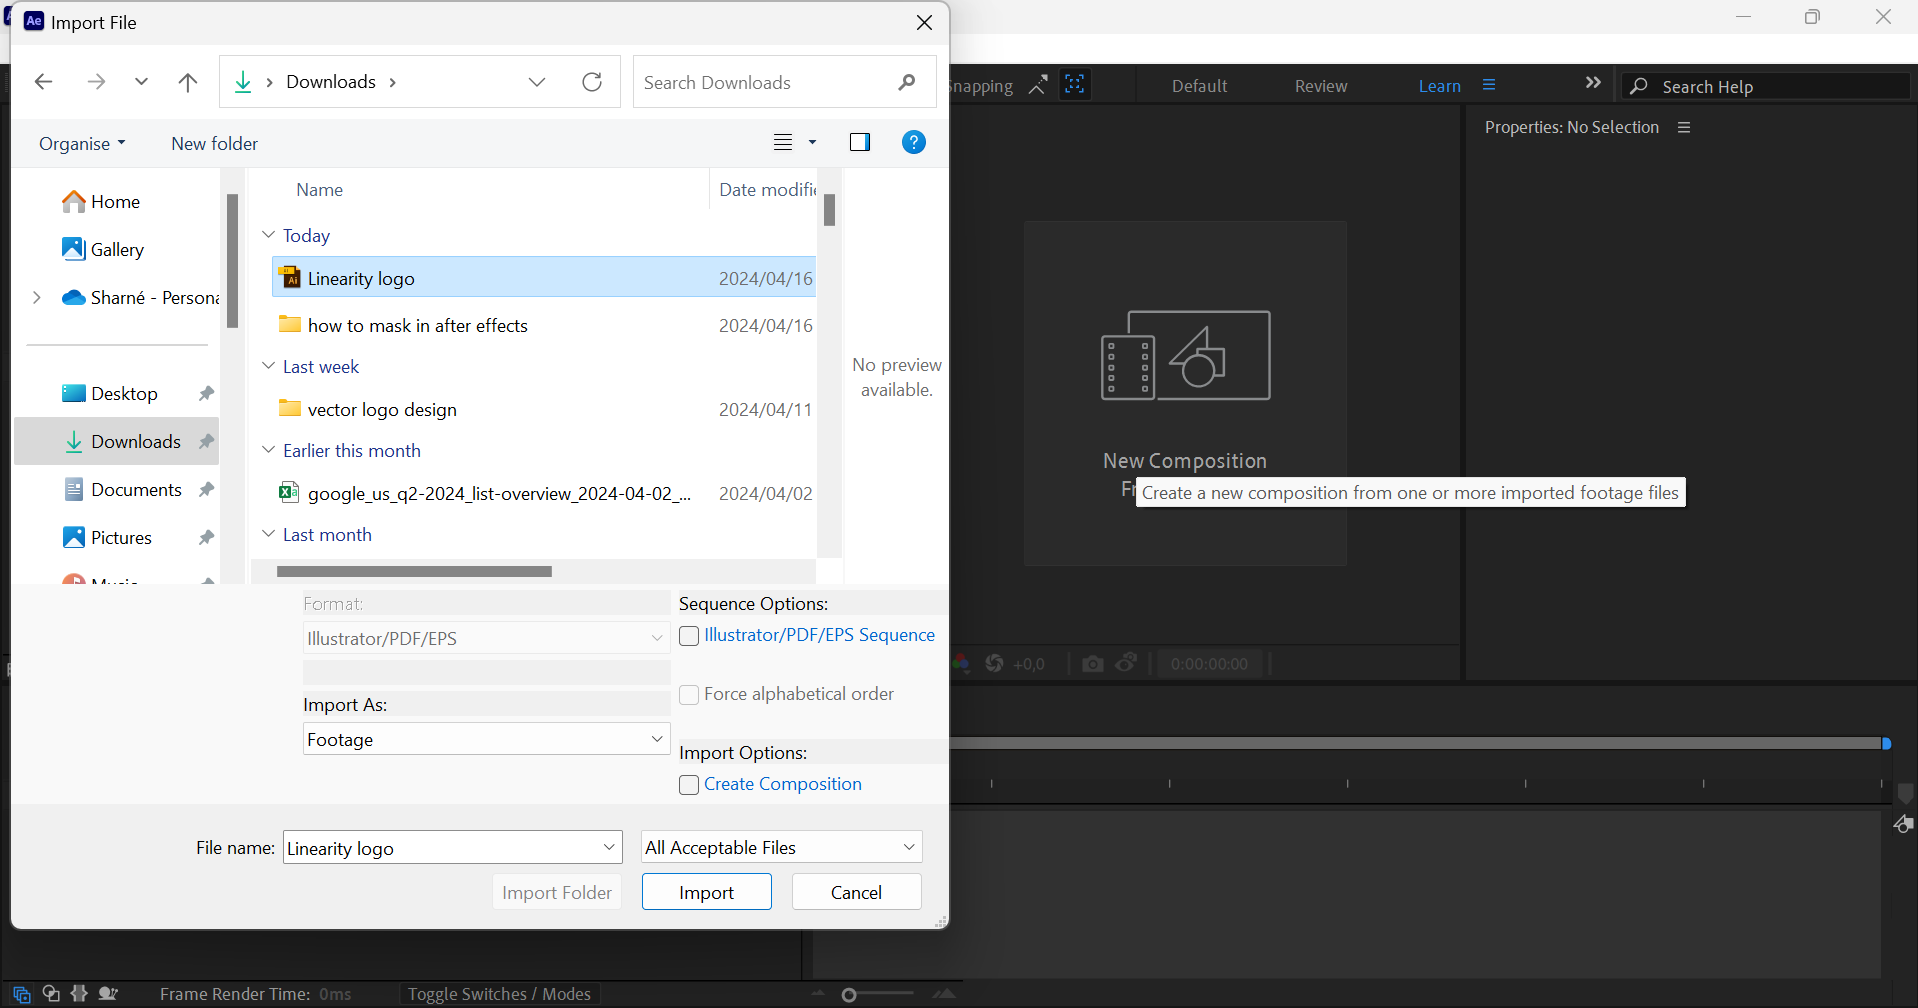
Change Import Kind from Footage to Composition and click OK.
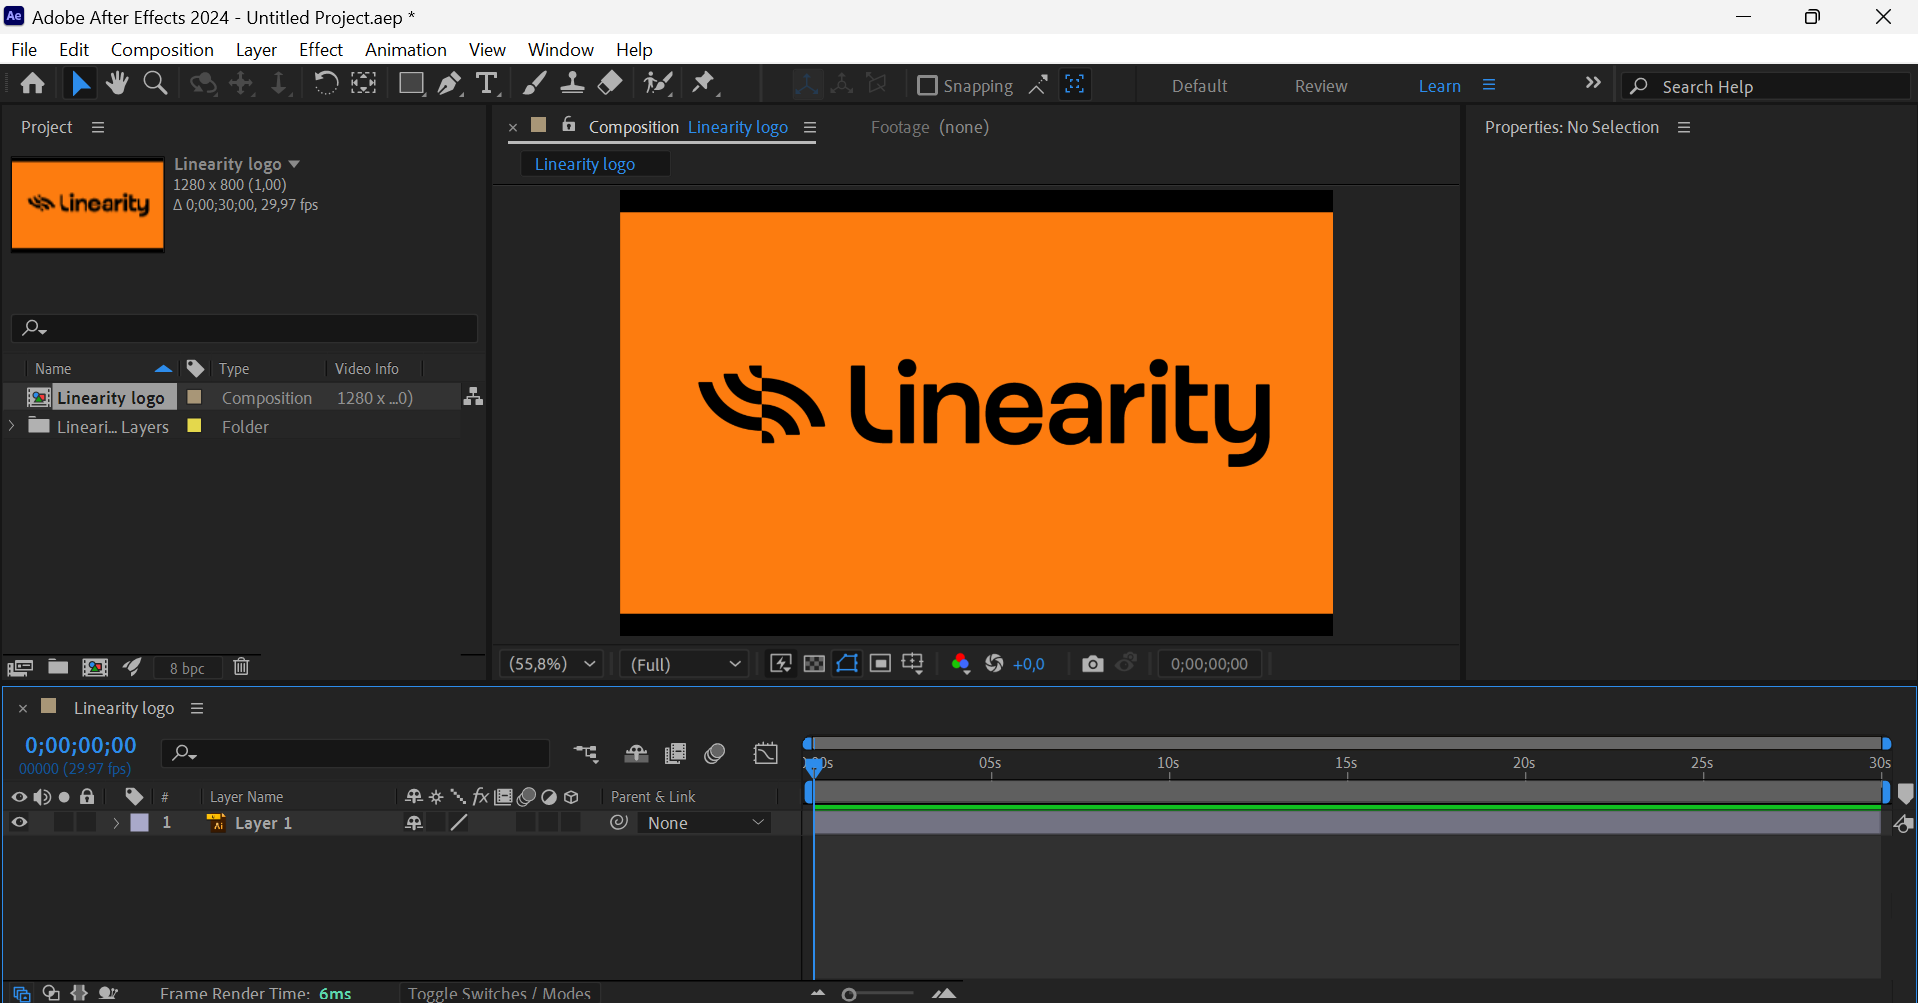
You should see your imported file and its composition file in the Project panel on the left. If you don't see your image in the central Composition panel, double-click on the composition file in the Project panel to add it to your composition.
Draw a mask shape
Select the Rectangle Shape tool from the top panel, or press Q on your keyboard to activate it. Pressing Q multiple times cycles through the various Shape Tool options, such as Ellipse, Polygon, and Star.
You can also draw a custom mask shape using the Pen tool.
Draw a shape on your composition in the Composition panel. You'll see that it automatically creates a Mask layer in the Timeline at the bottom.

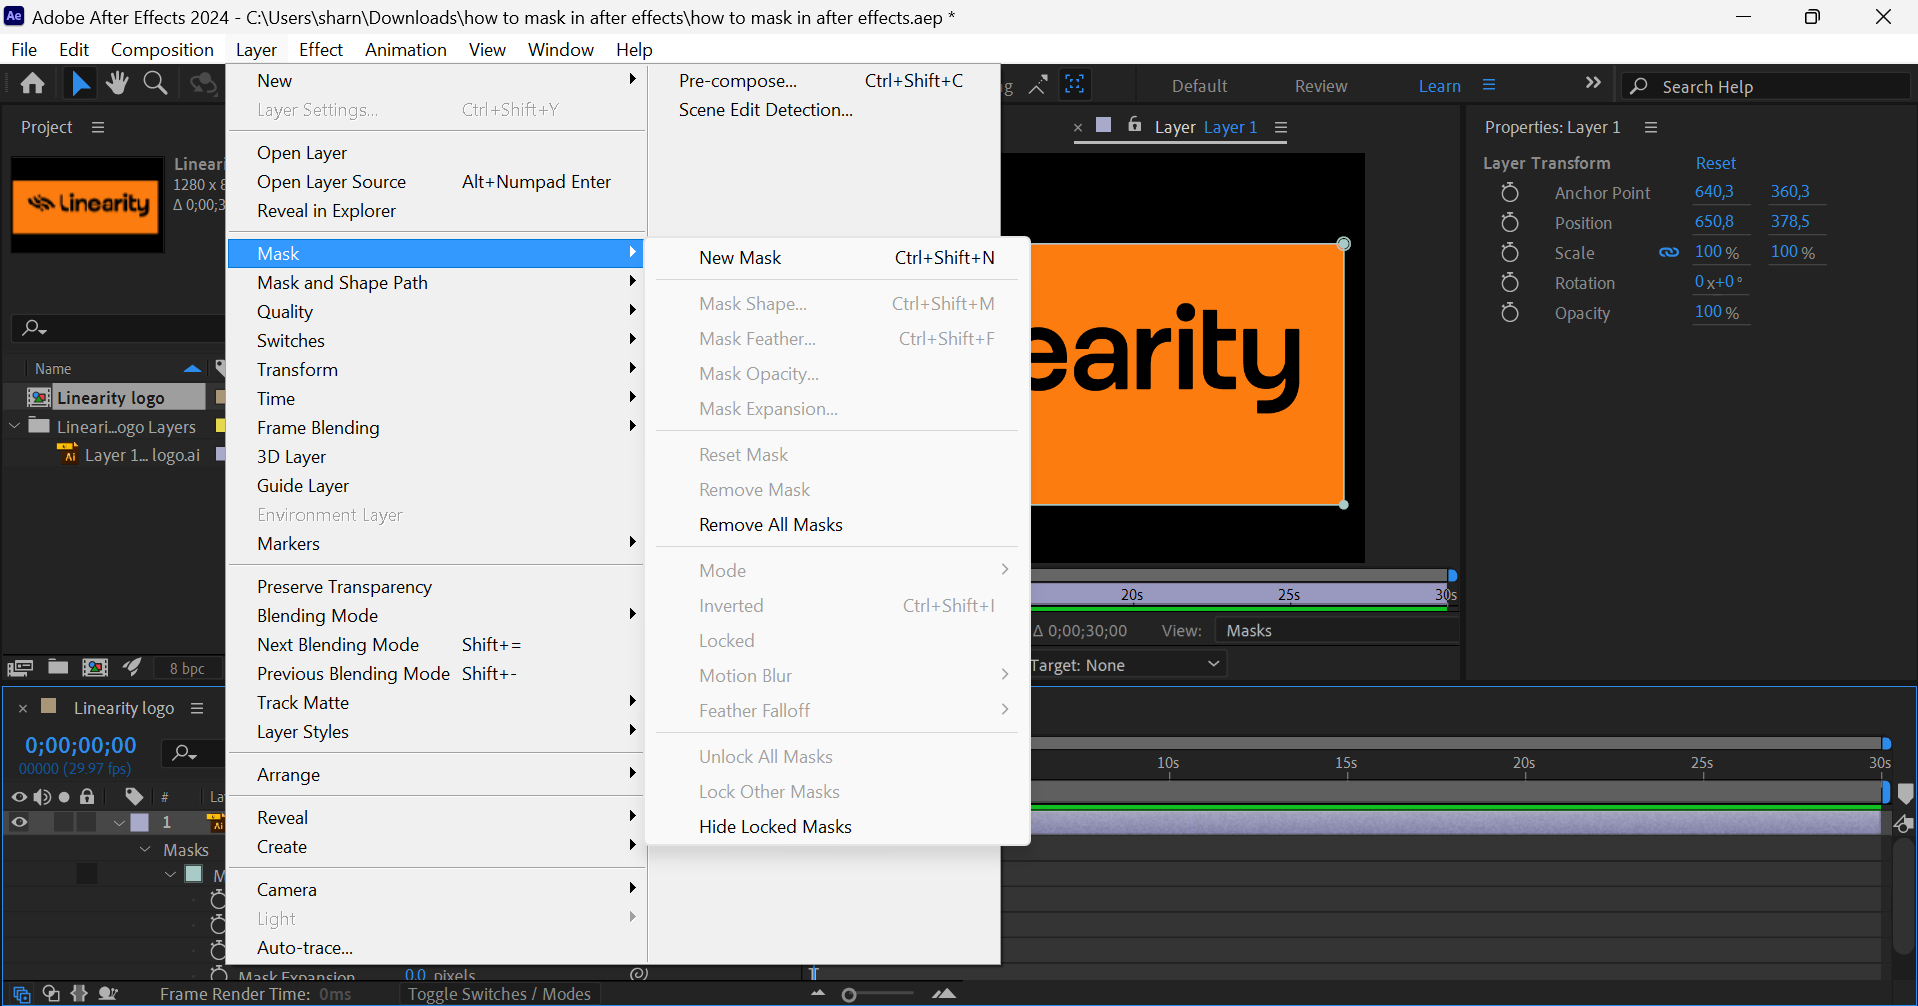
Another option is to head to the Layer menu item and select Mask > New Mask, or simply press Ctrl + Shift + N on your keyboard. This automatically creates a Mask shape around your entire composition.
Animate your mask on the timeline
We're going to make a simple 'conceal' animation by moving the mask from left to right.
Click on the Stopwatch icon next to the Mask Path property nested beneath your Mask layer in the Timeline. This will create your first keyframe.

Move the Current Time Indicator to 3 seconds.
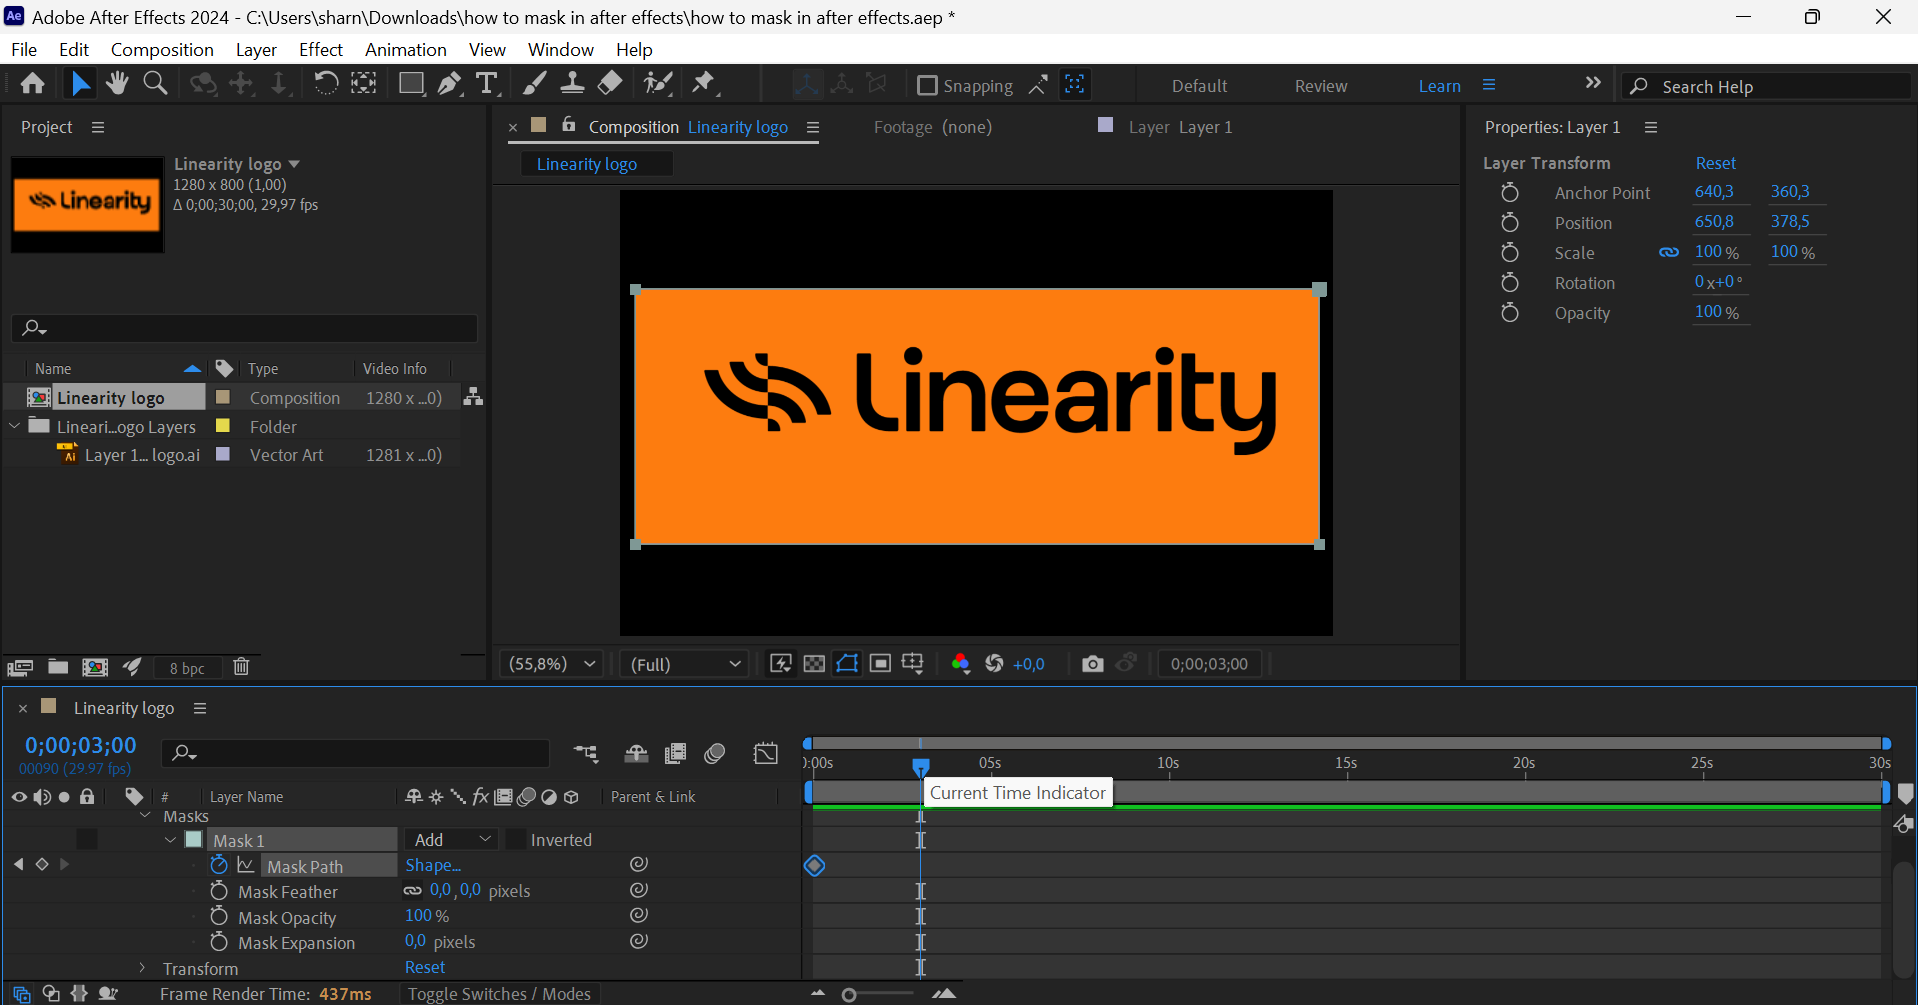
Now, click on the edge of your Mask shape and drag it out of the Composition frame. You can hold down Shift on your keyboard to drag it in a straight path.
A new keyframe will automatically be created.
Get a quick preview of the animation by dragging your Current Time Indicator from the start to the end of the animation on the Timeline. You can also press Space Bar on your keyboard to watch a preview of your animation.
To make your movement look more natural, apply some easing. To do this, click on the Graph Editor icon at the top of your Timeline panel.
This mode allows you to see a graph of your movement. Notice that it's currently linear, moving at the same pace from left to right.

Select the Easy Ease icon at the bottom right of your Timeline. This will quickly create a more dynamic animation flow. You can adjust the graph to get exactly the movement you want.
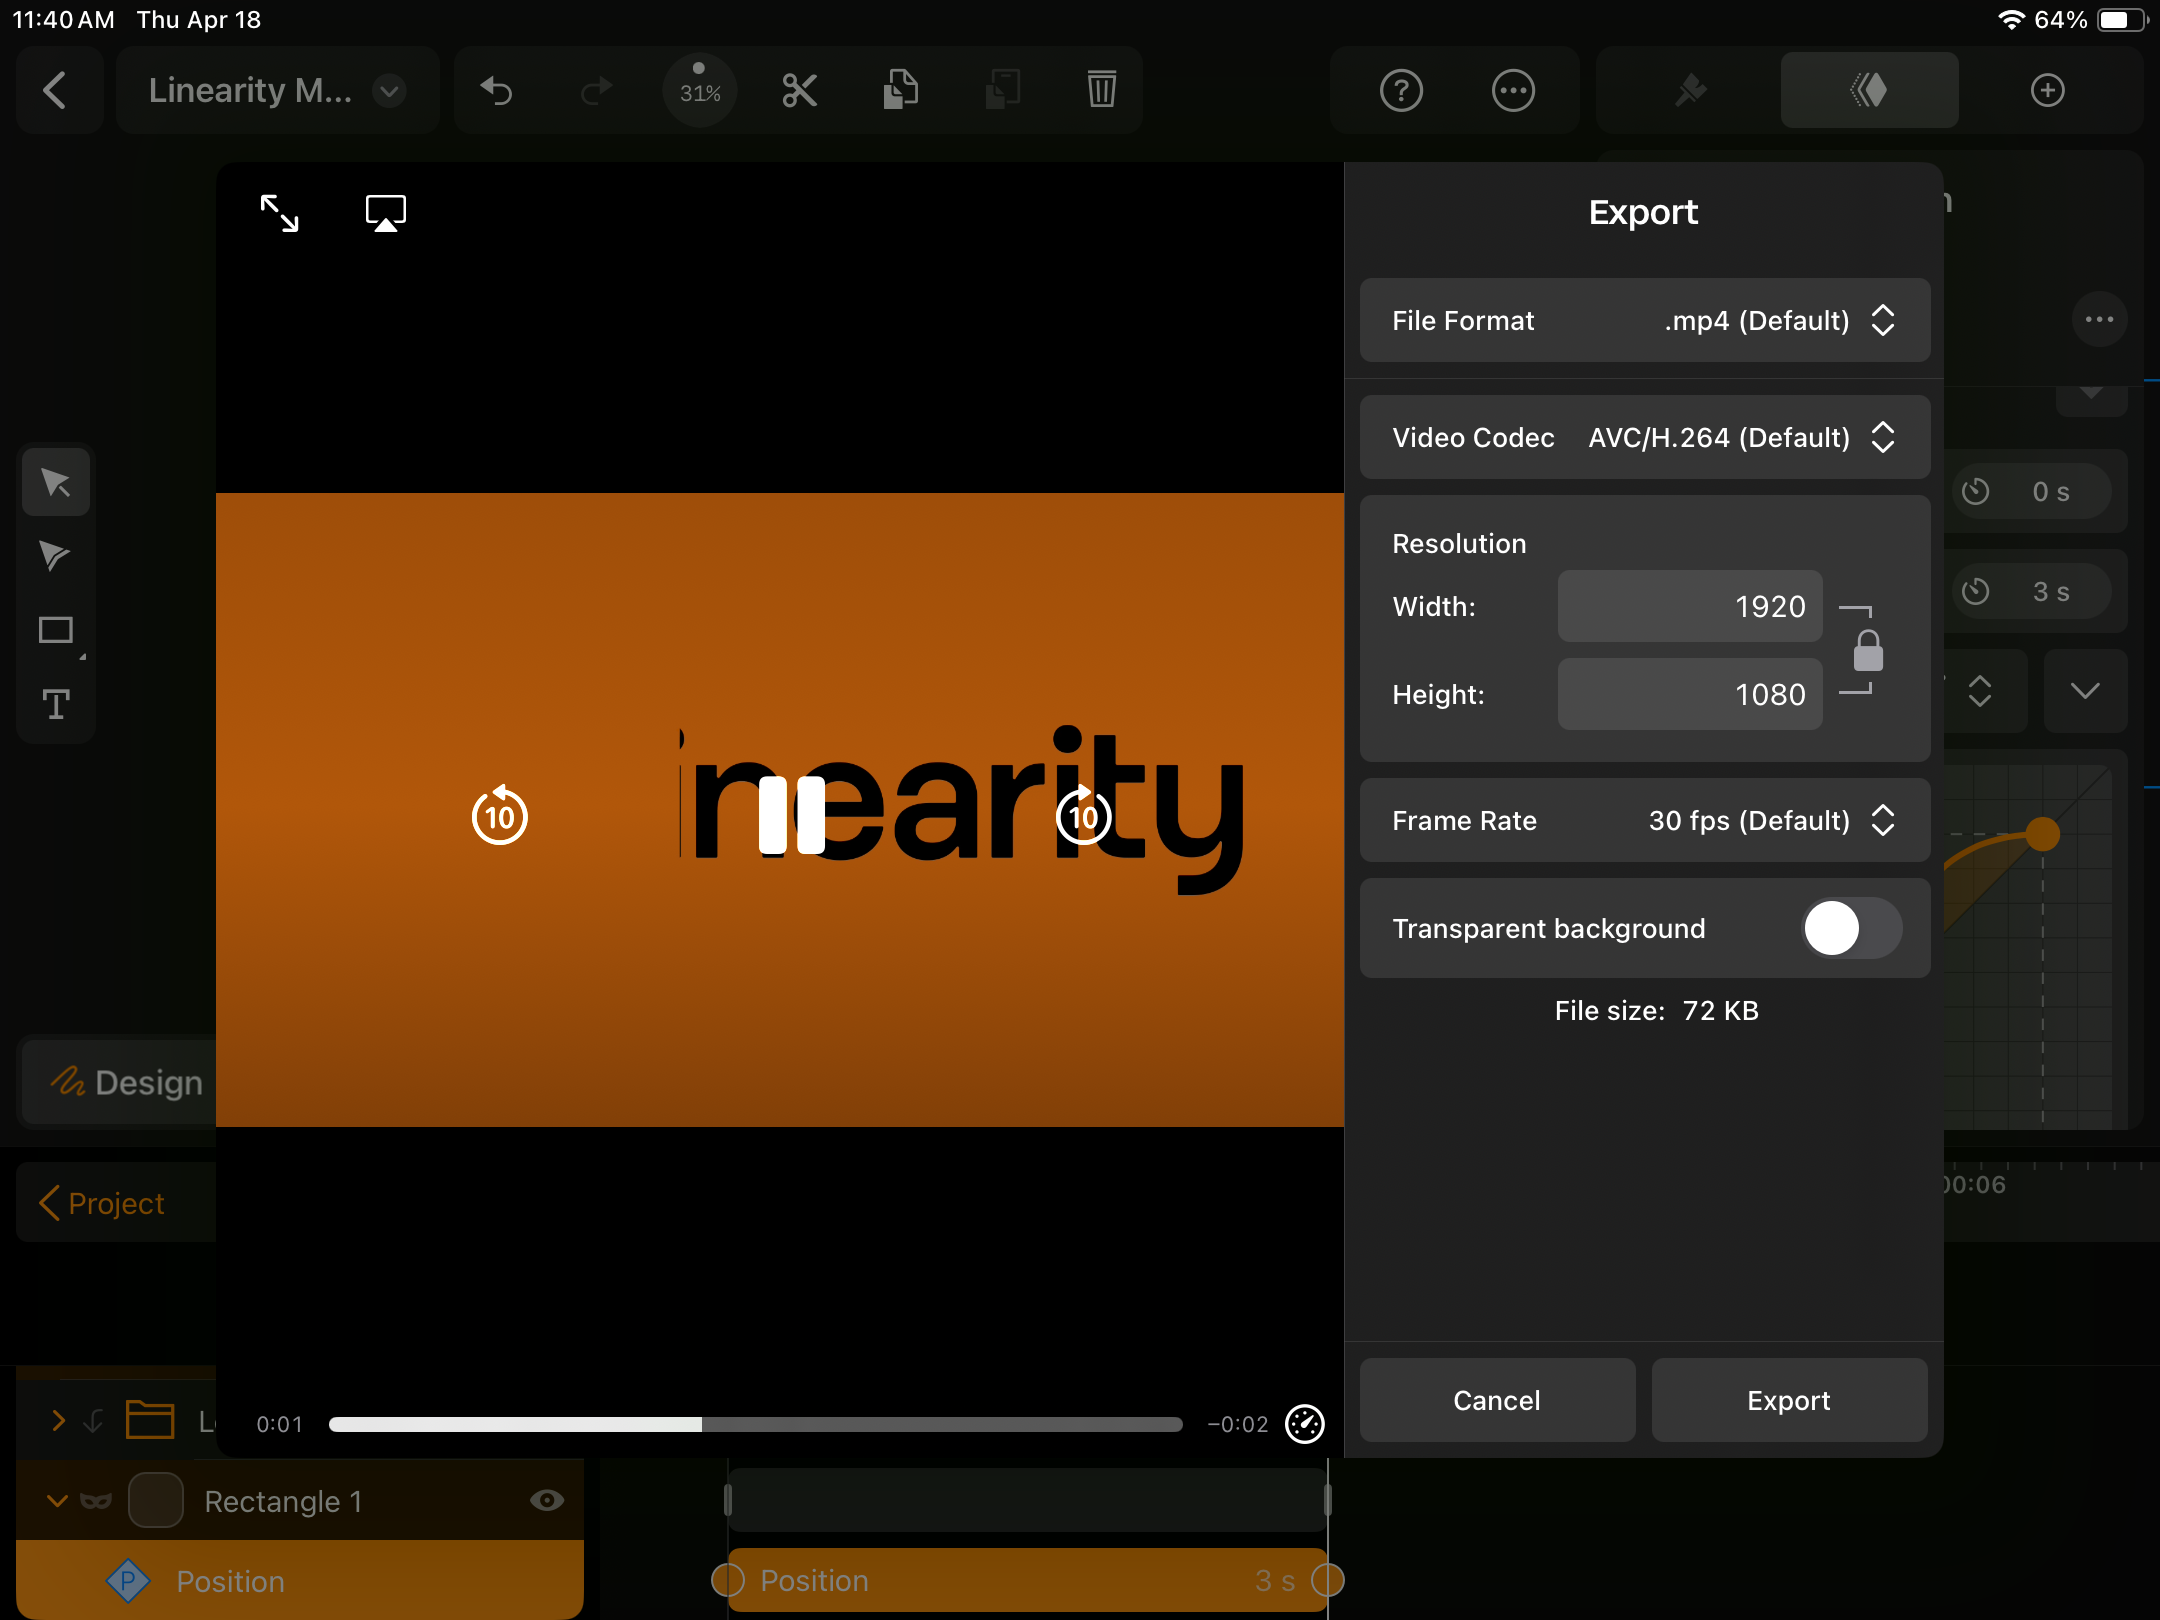
Export your mask animation
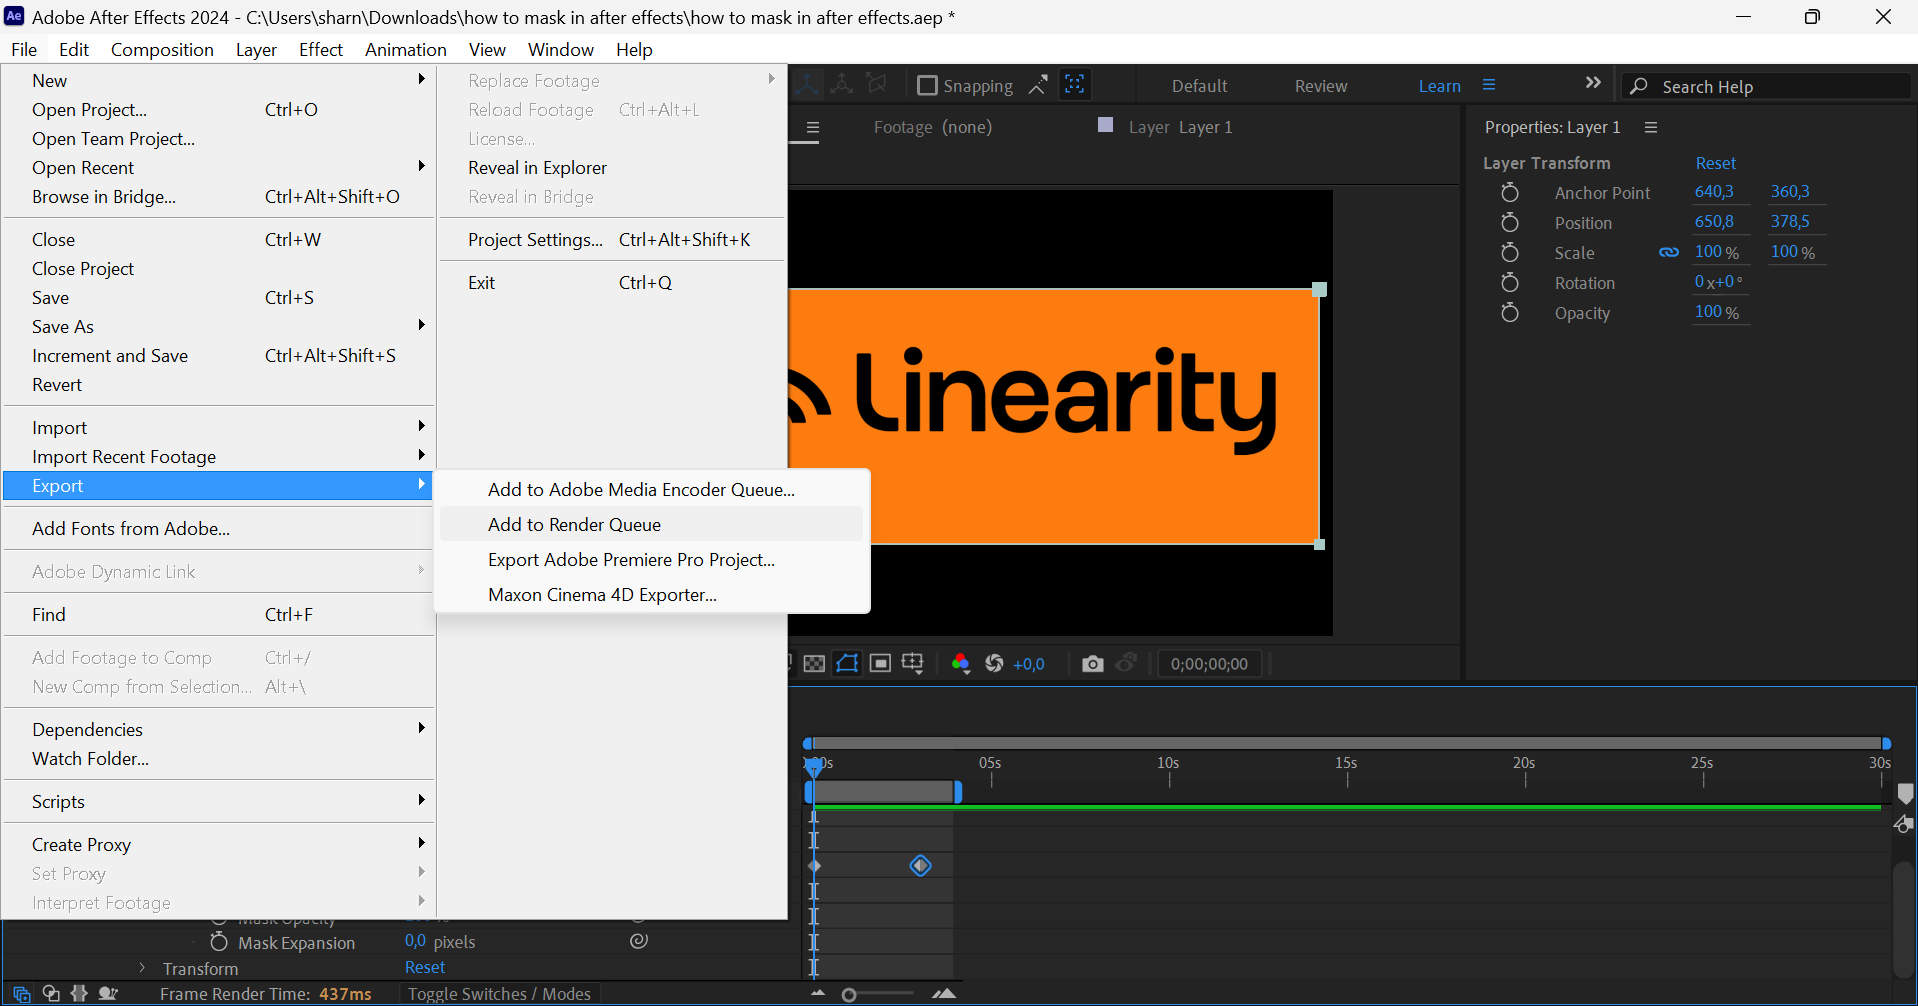
Once you're happy with the results, go to File > Export > Add to Render Queue in the main menu. The Render Queue panel will open at the bottom of your screen.
Next to Output To, click on the "Not yet specified" highlighted text. A modal will open. Select where to save your video.
Click the Render button and wait for the export to complete.
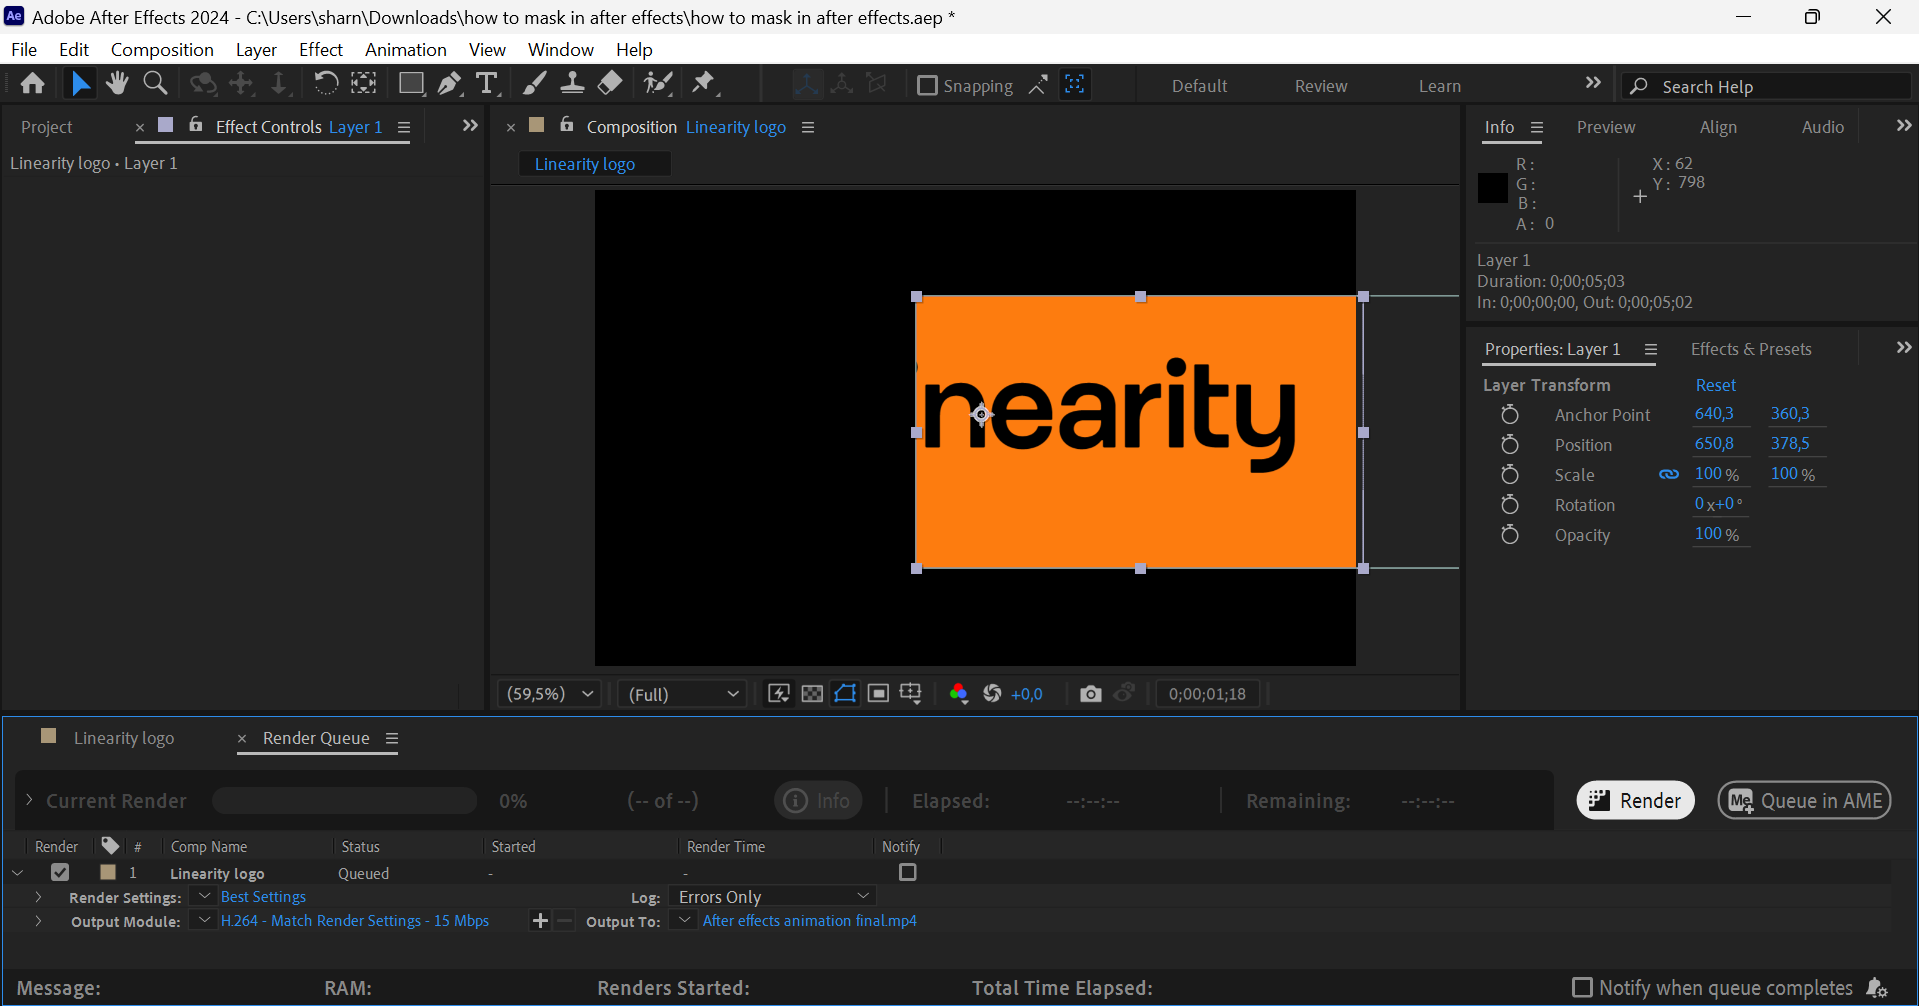
Don't forget to save your After Effects Project—simply press Ctrl + S on your keyboard.
Here's our final animation video:
How to animate a mask in Linearity Move
Let's take a look at how to use masks in our innovative animation software, Linearity Move, using an iPad.
If you haven't downloaded the software yet, get started for free below:


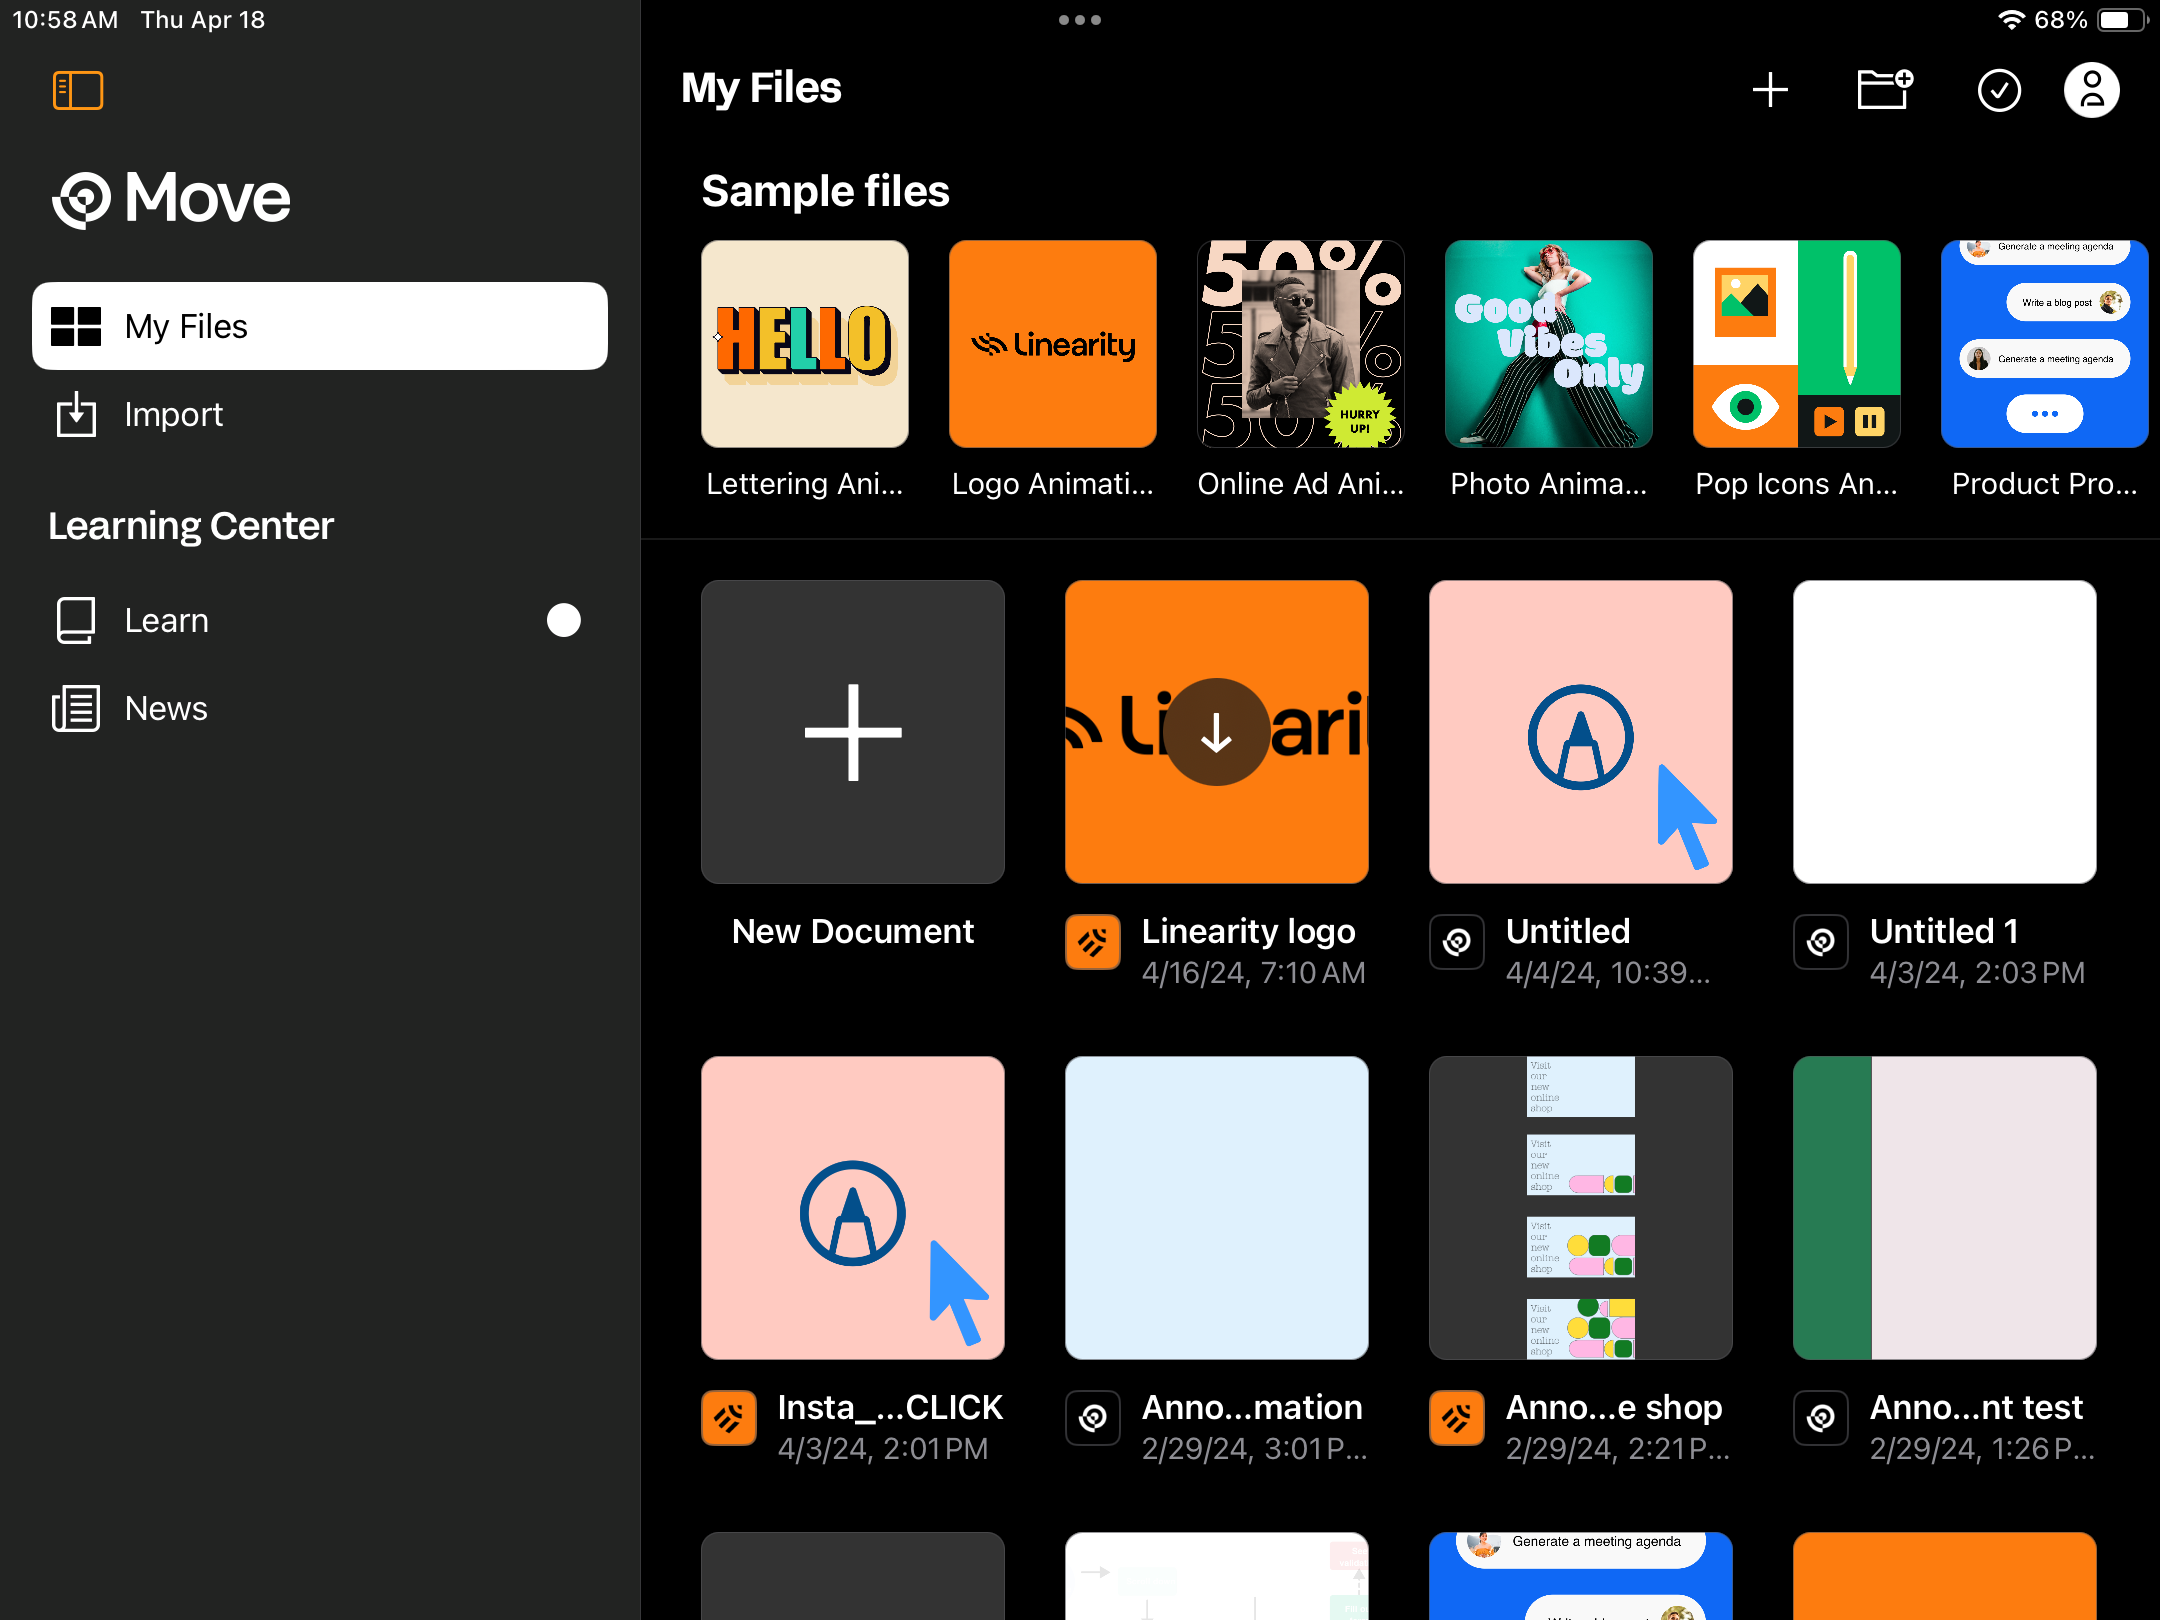
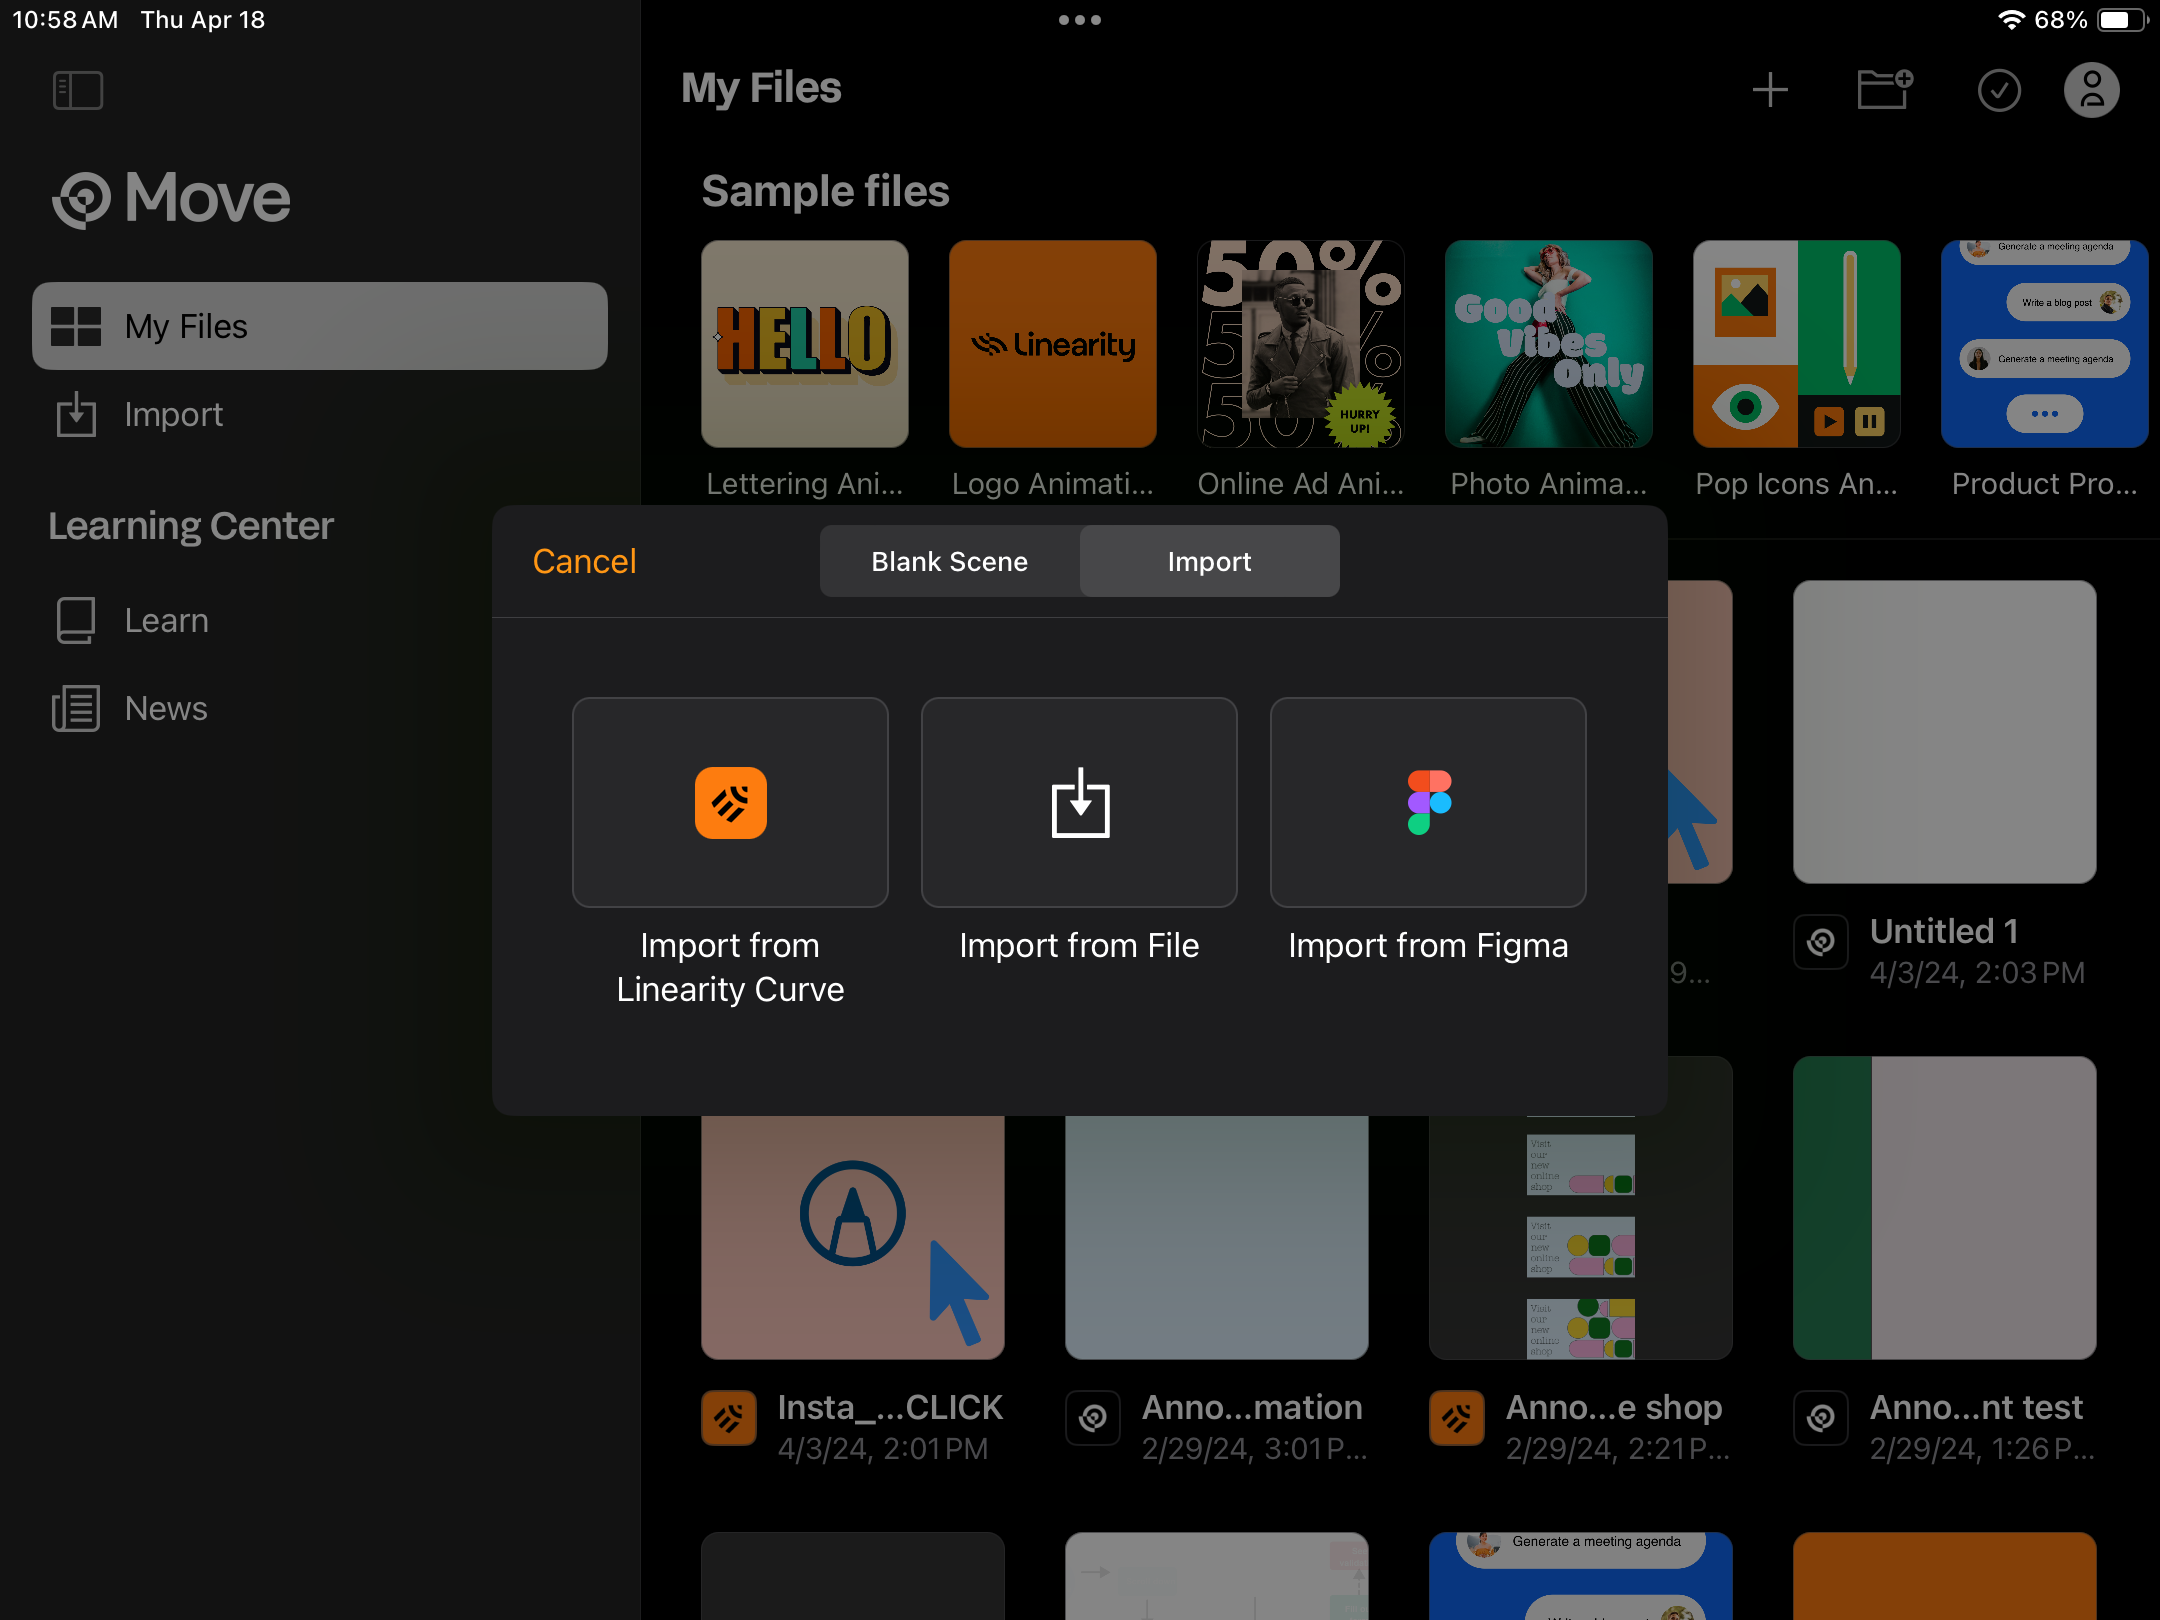
Create a new Linearity Move Project
Open up Linearity Move and tap on the + New Document card in your Homescreen Gallery.
A modal will open. Switch to the Import tab and tap on the Import from File card.
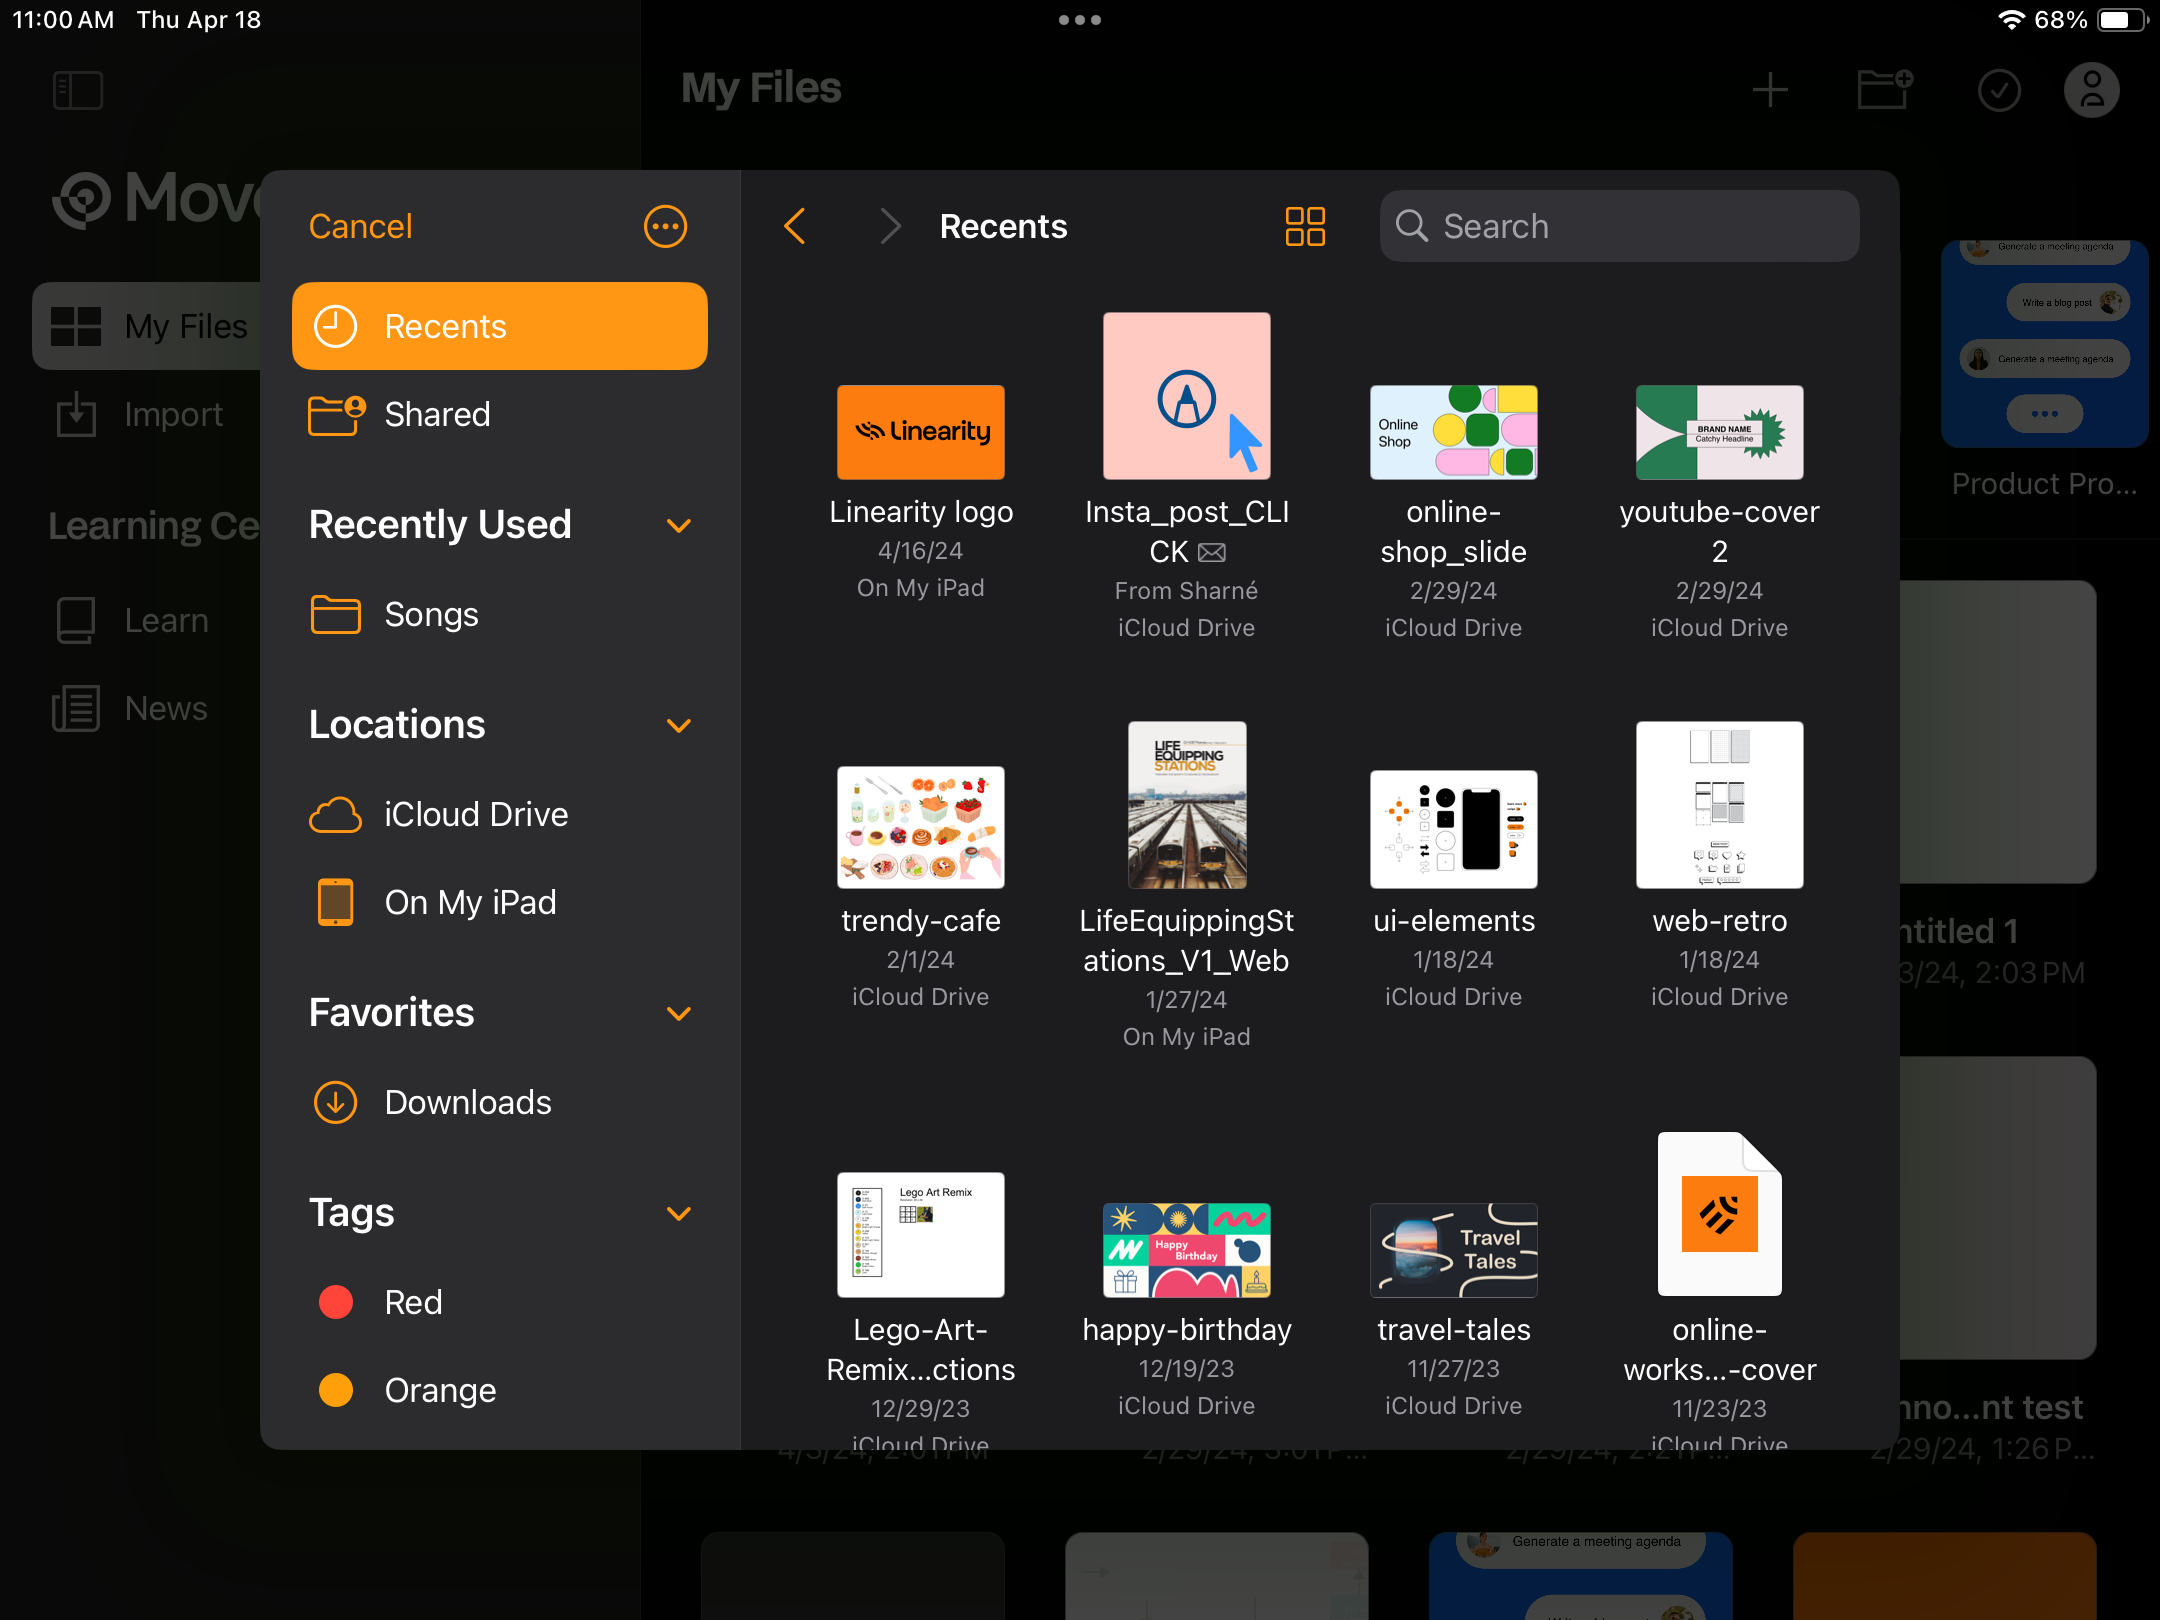
Select the image file on your device you want to use in your animation.
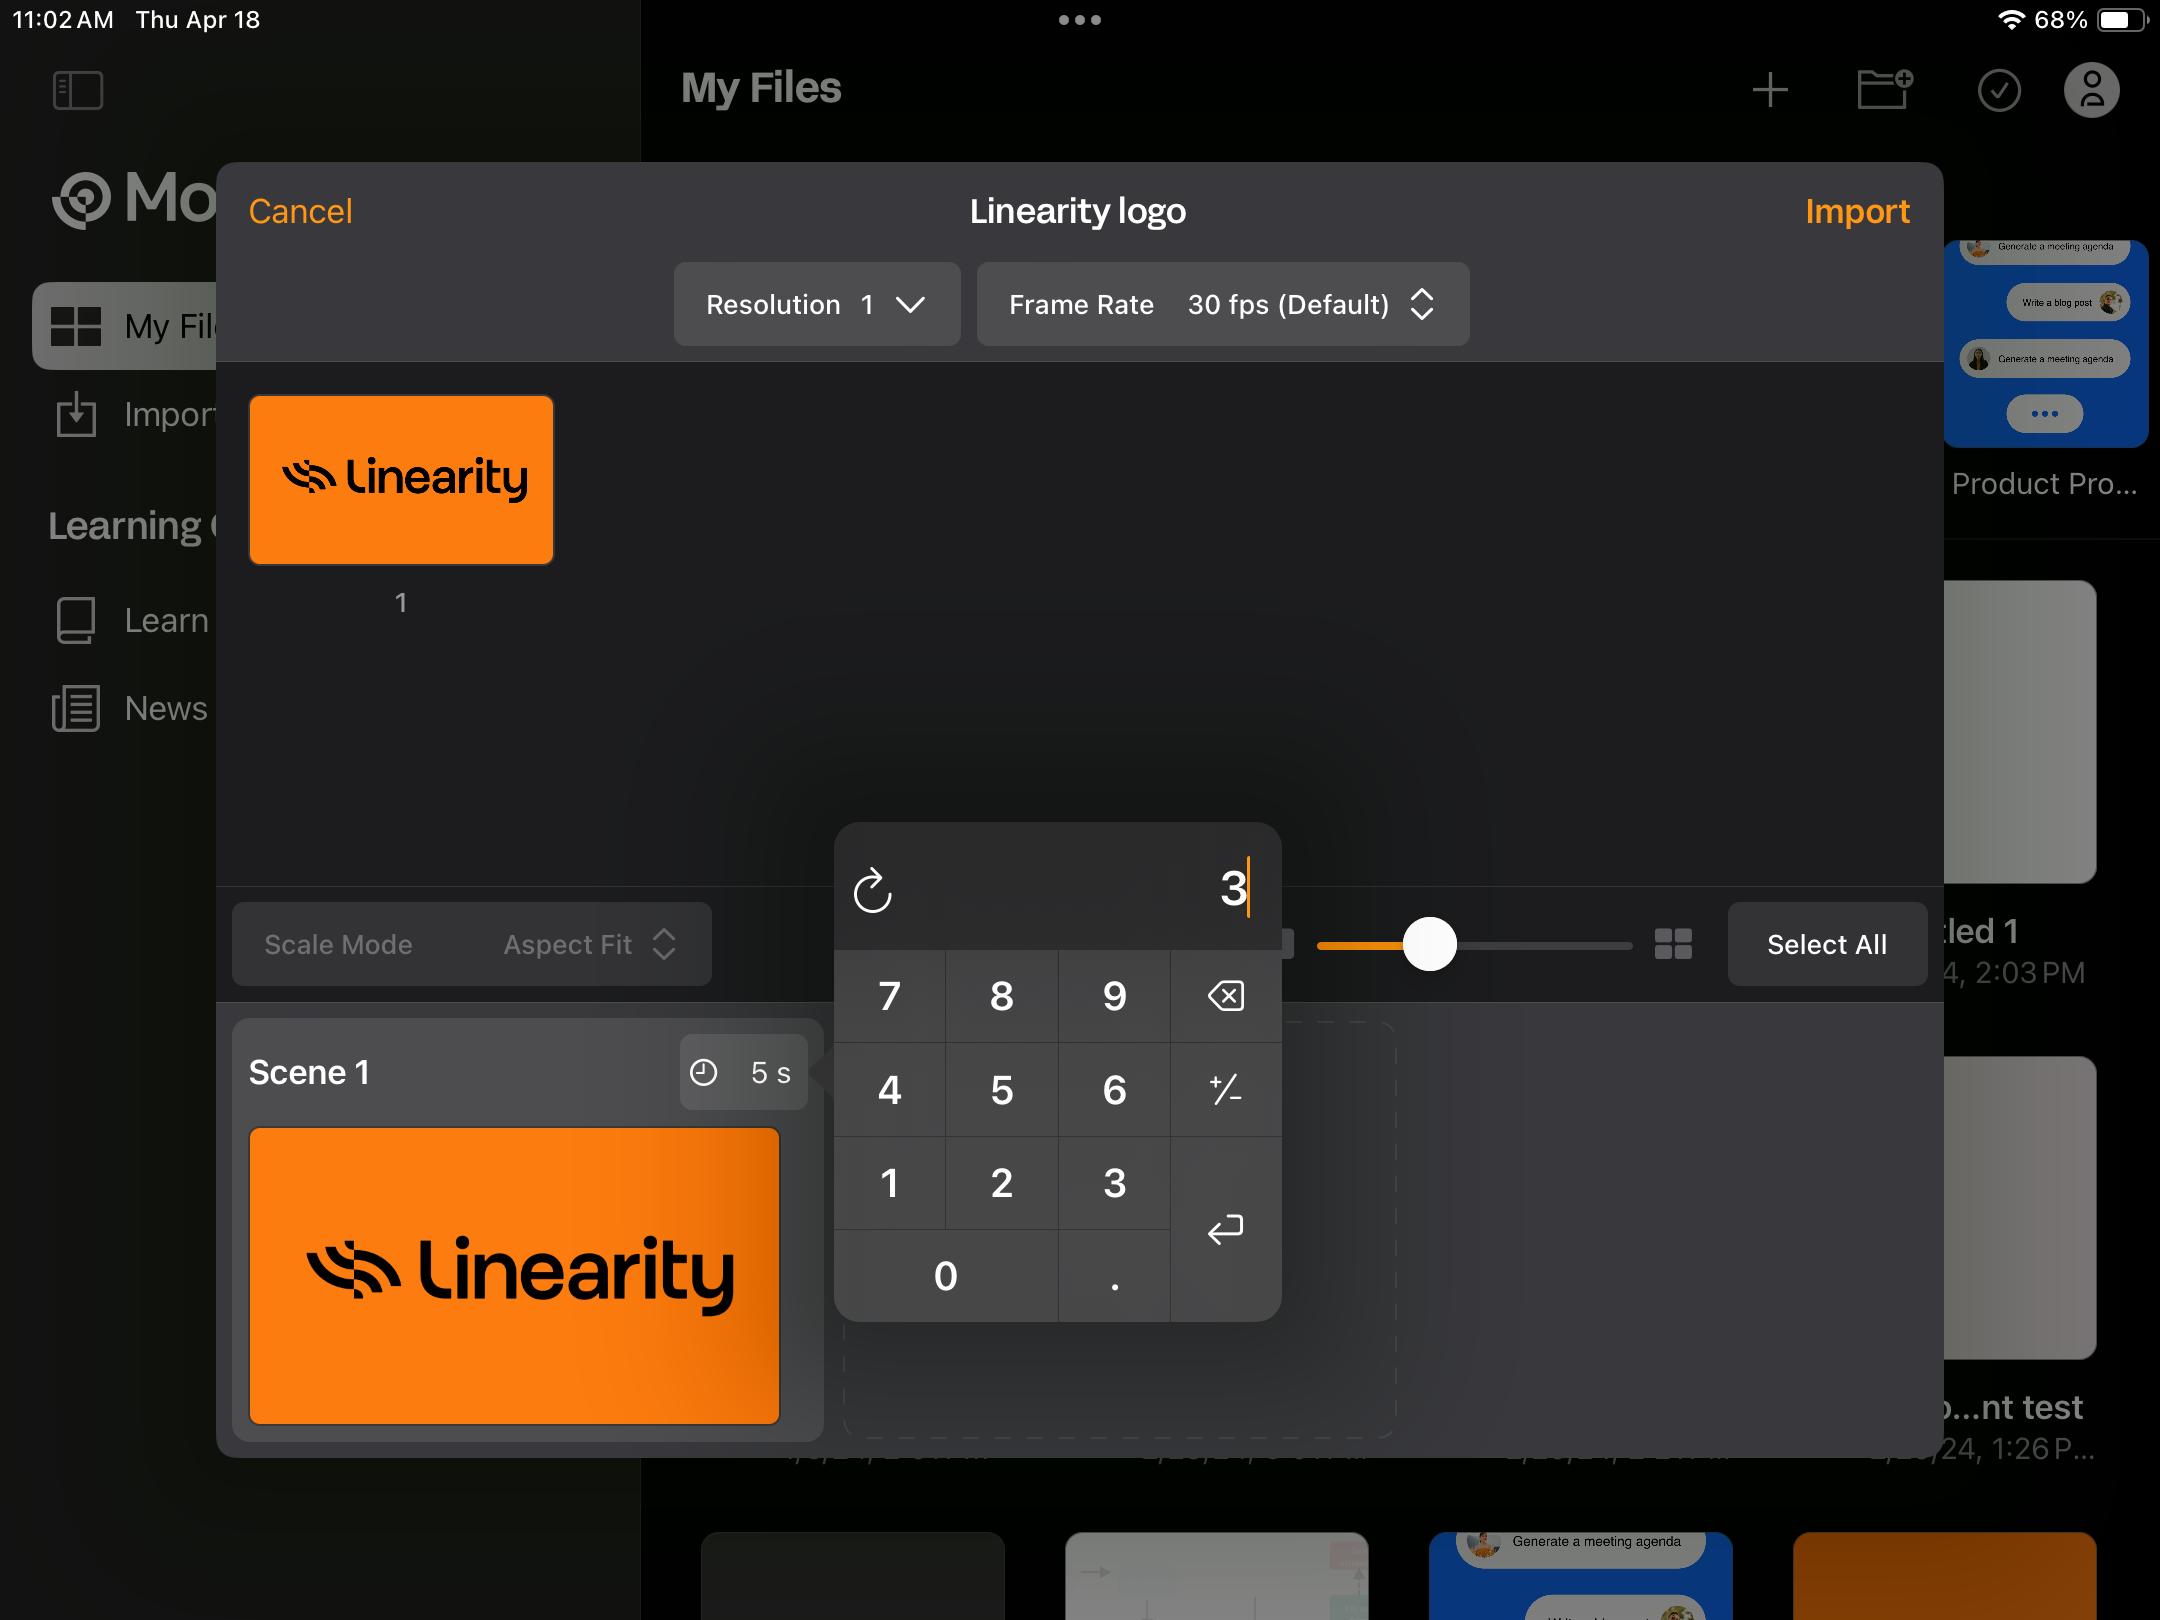
Now you can drag and drop the image into the Scene Builder to set up your Timeline.

Change the Scene Duration to 3 seconds and tap Import in the top right corner of the modal.
Your new Move Project will open.
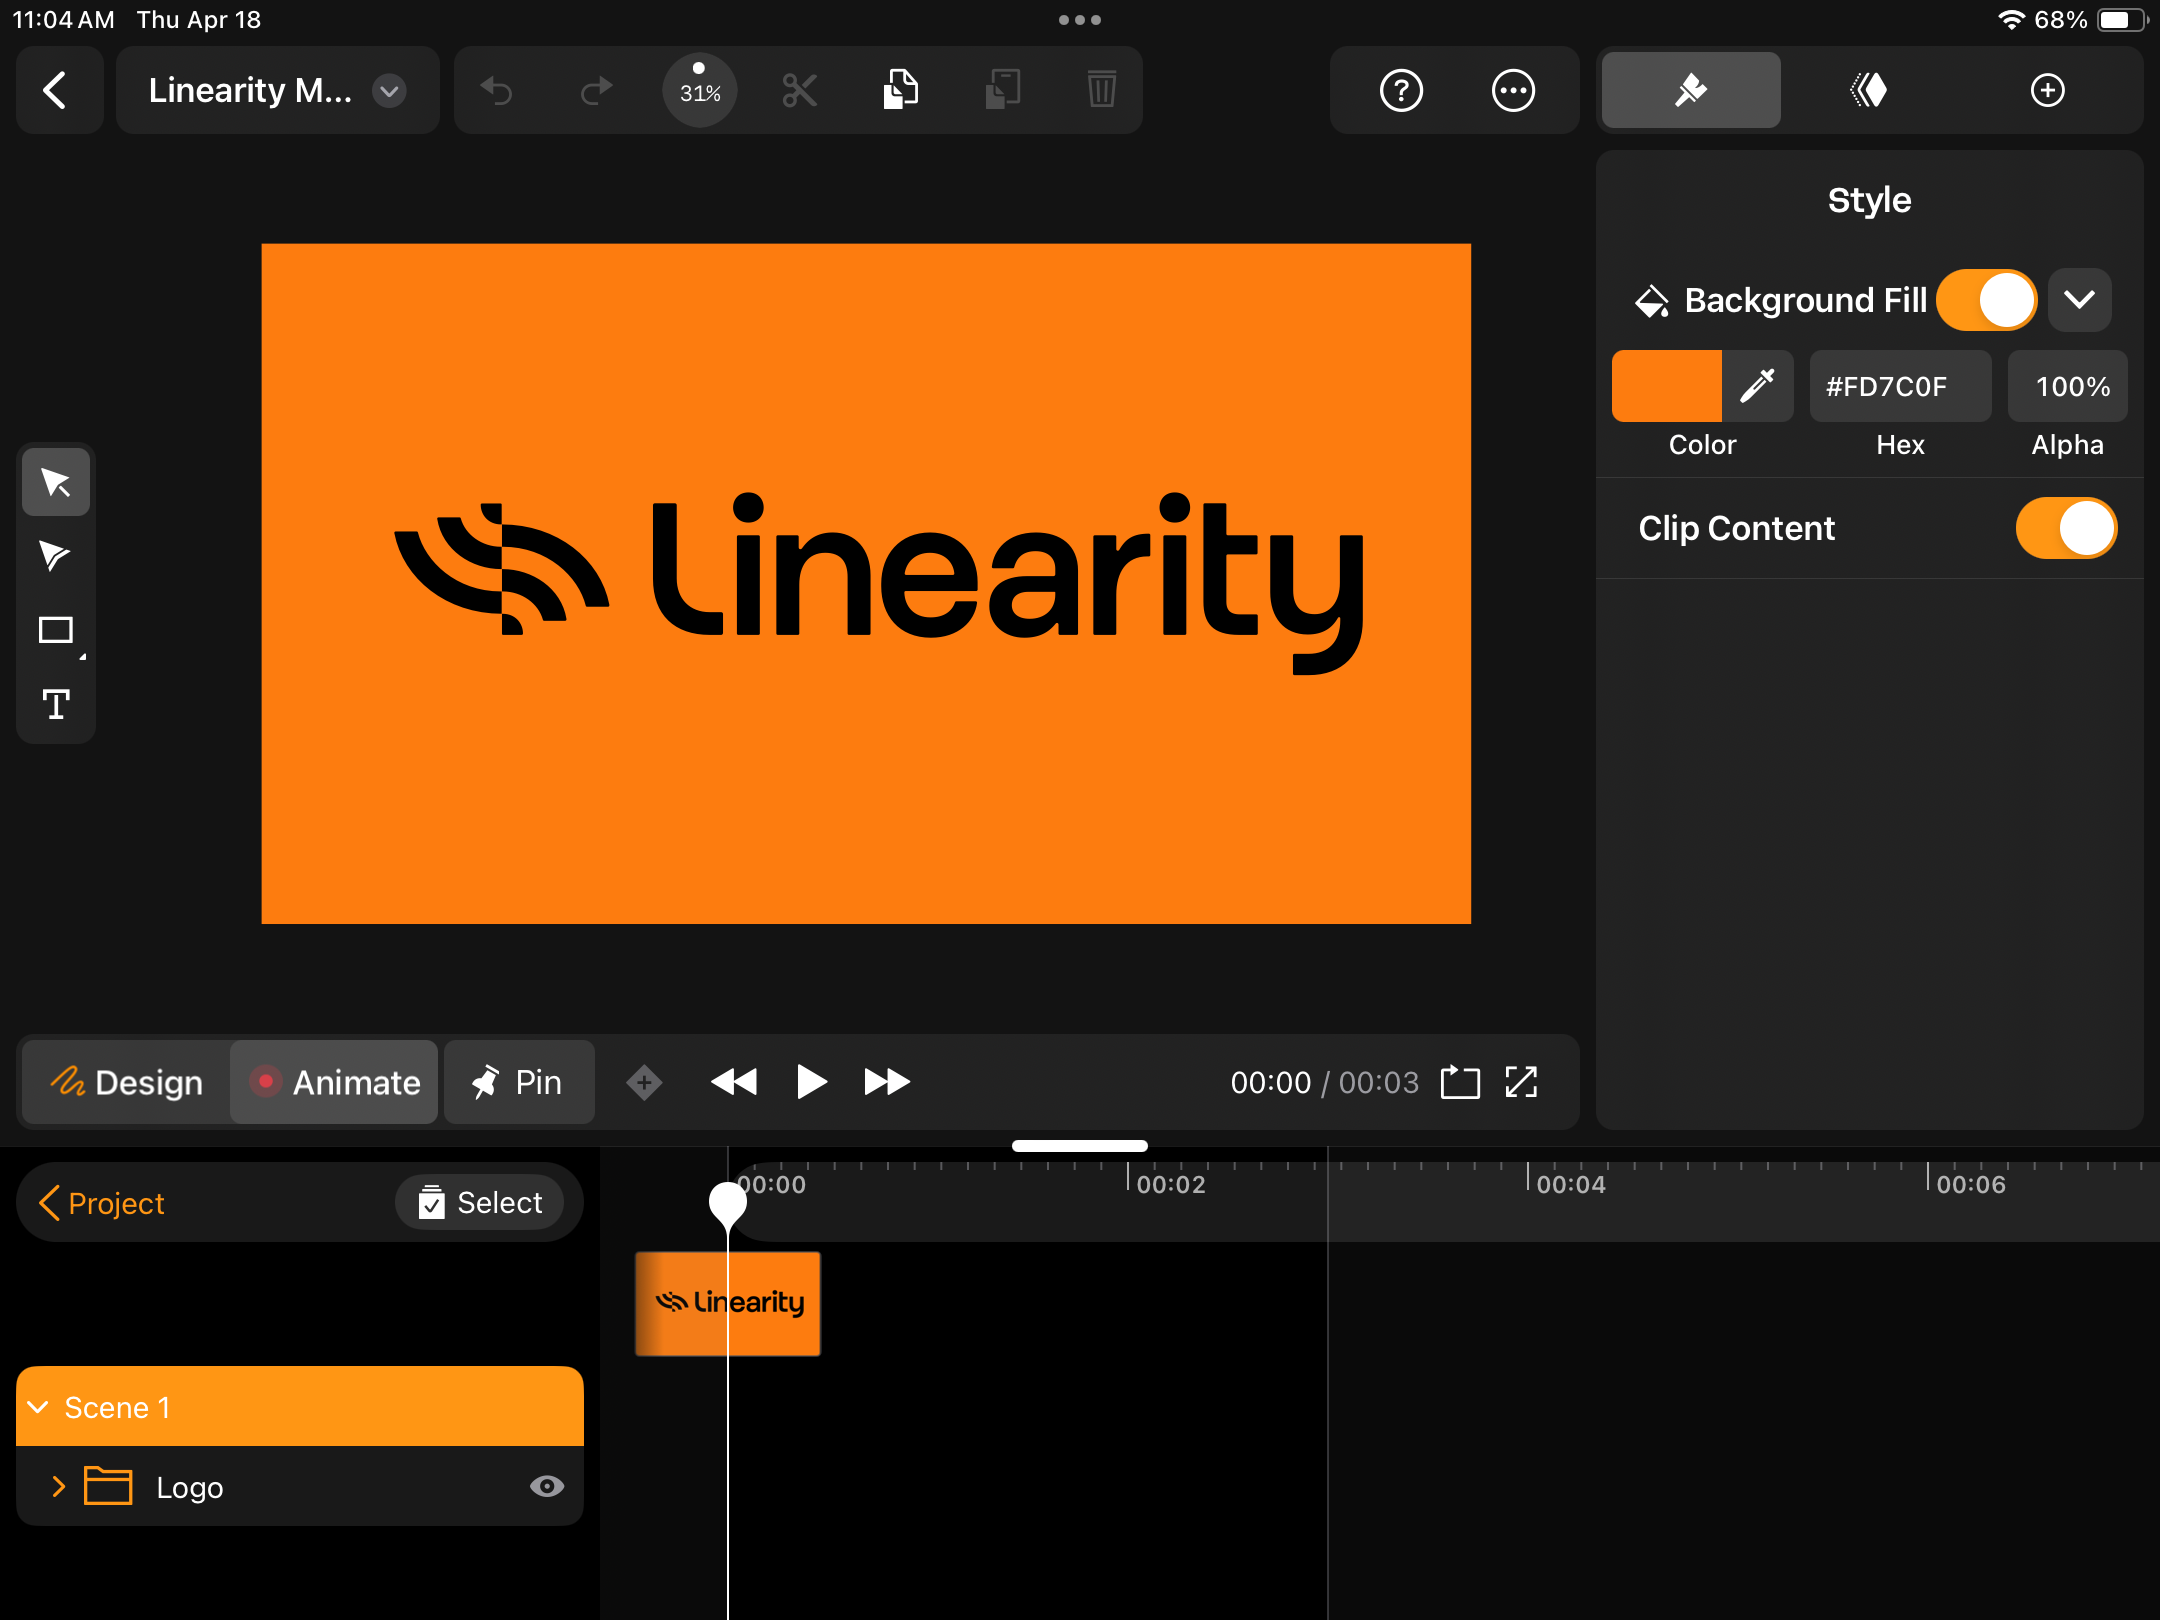
Make your mask shape
While in Animate Mode, select the Rectangle Shape Tool from the Toolbar on the left and draw a shape on the canvas.
The shape will appear as a new layer in your Layers Panel on the left of the Scene Timeline. Drag the shape layer beneath your main image in the Layers Panel.
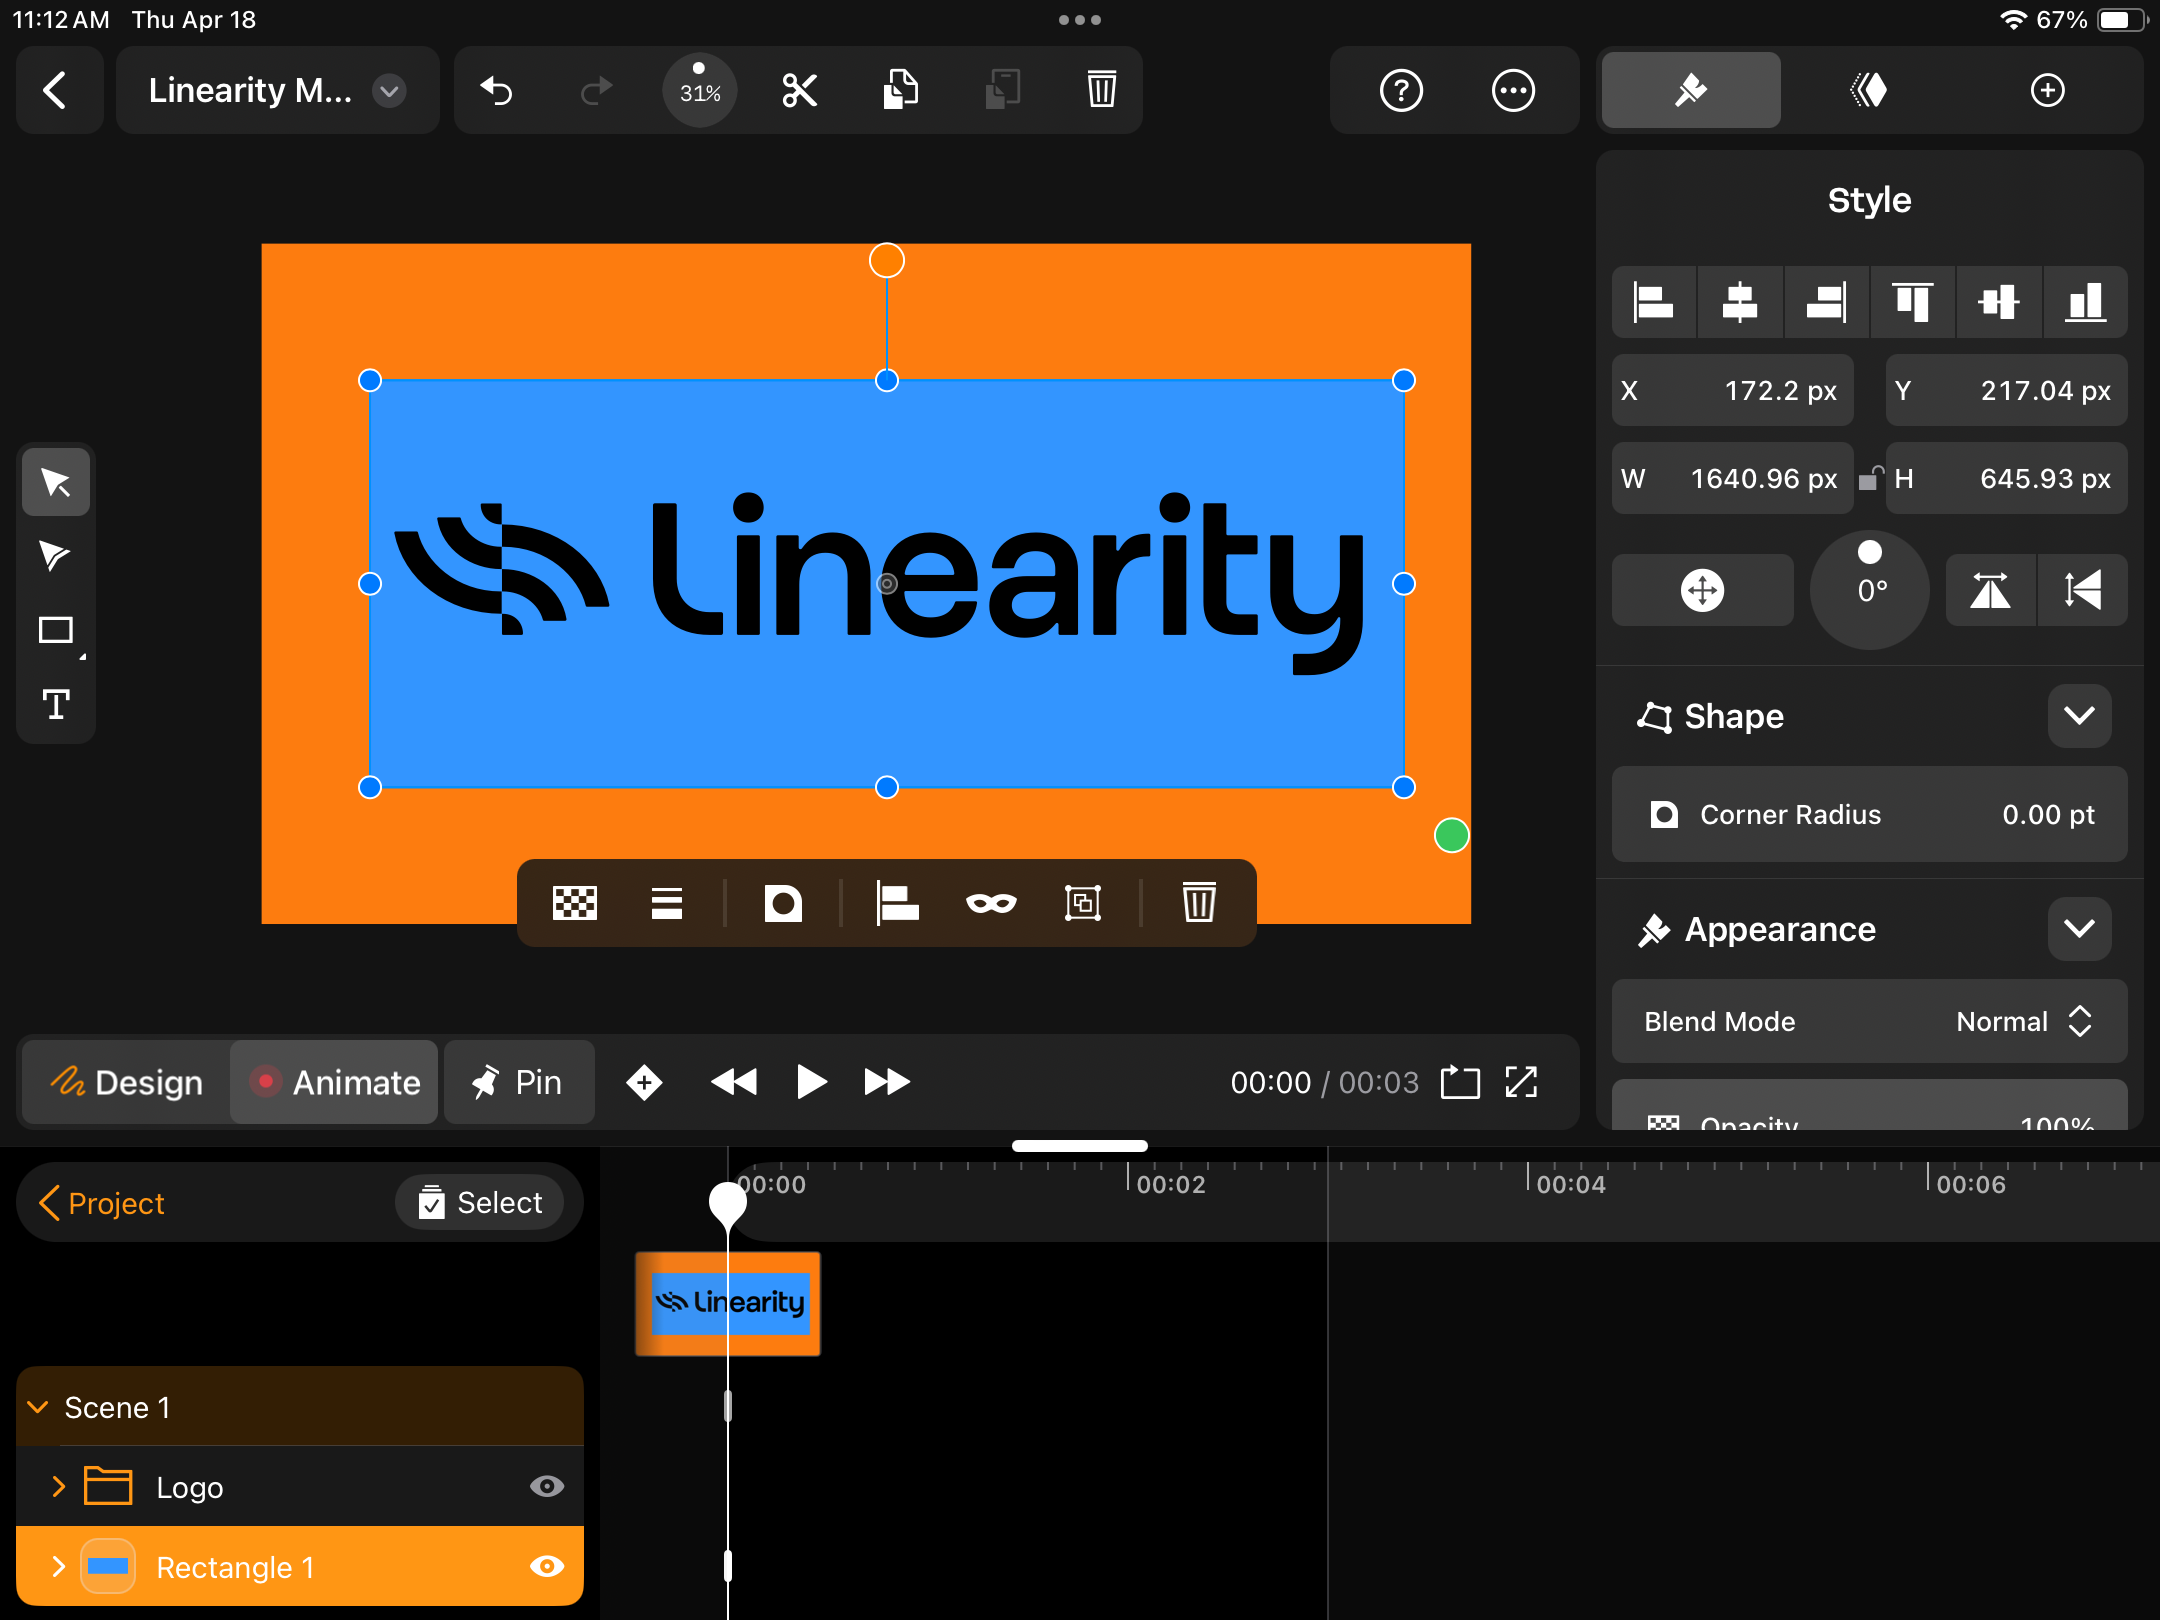
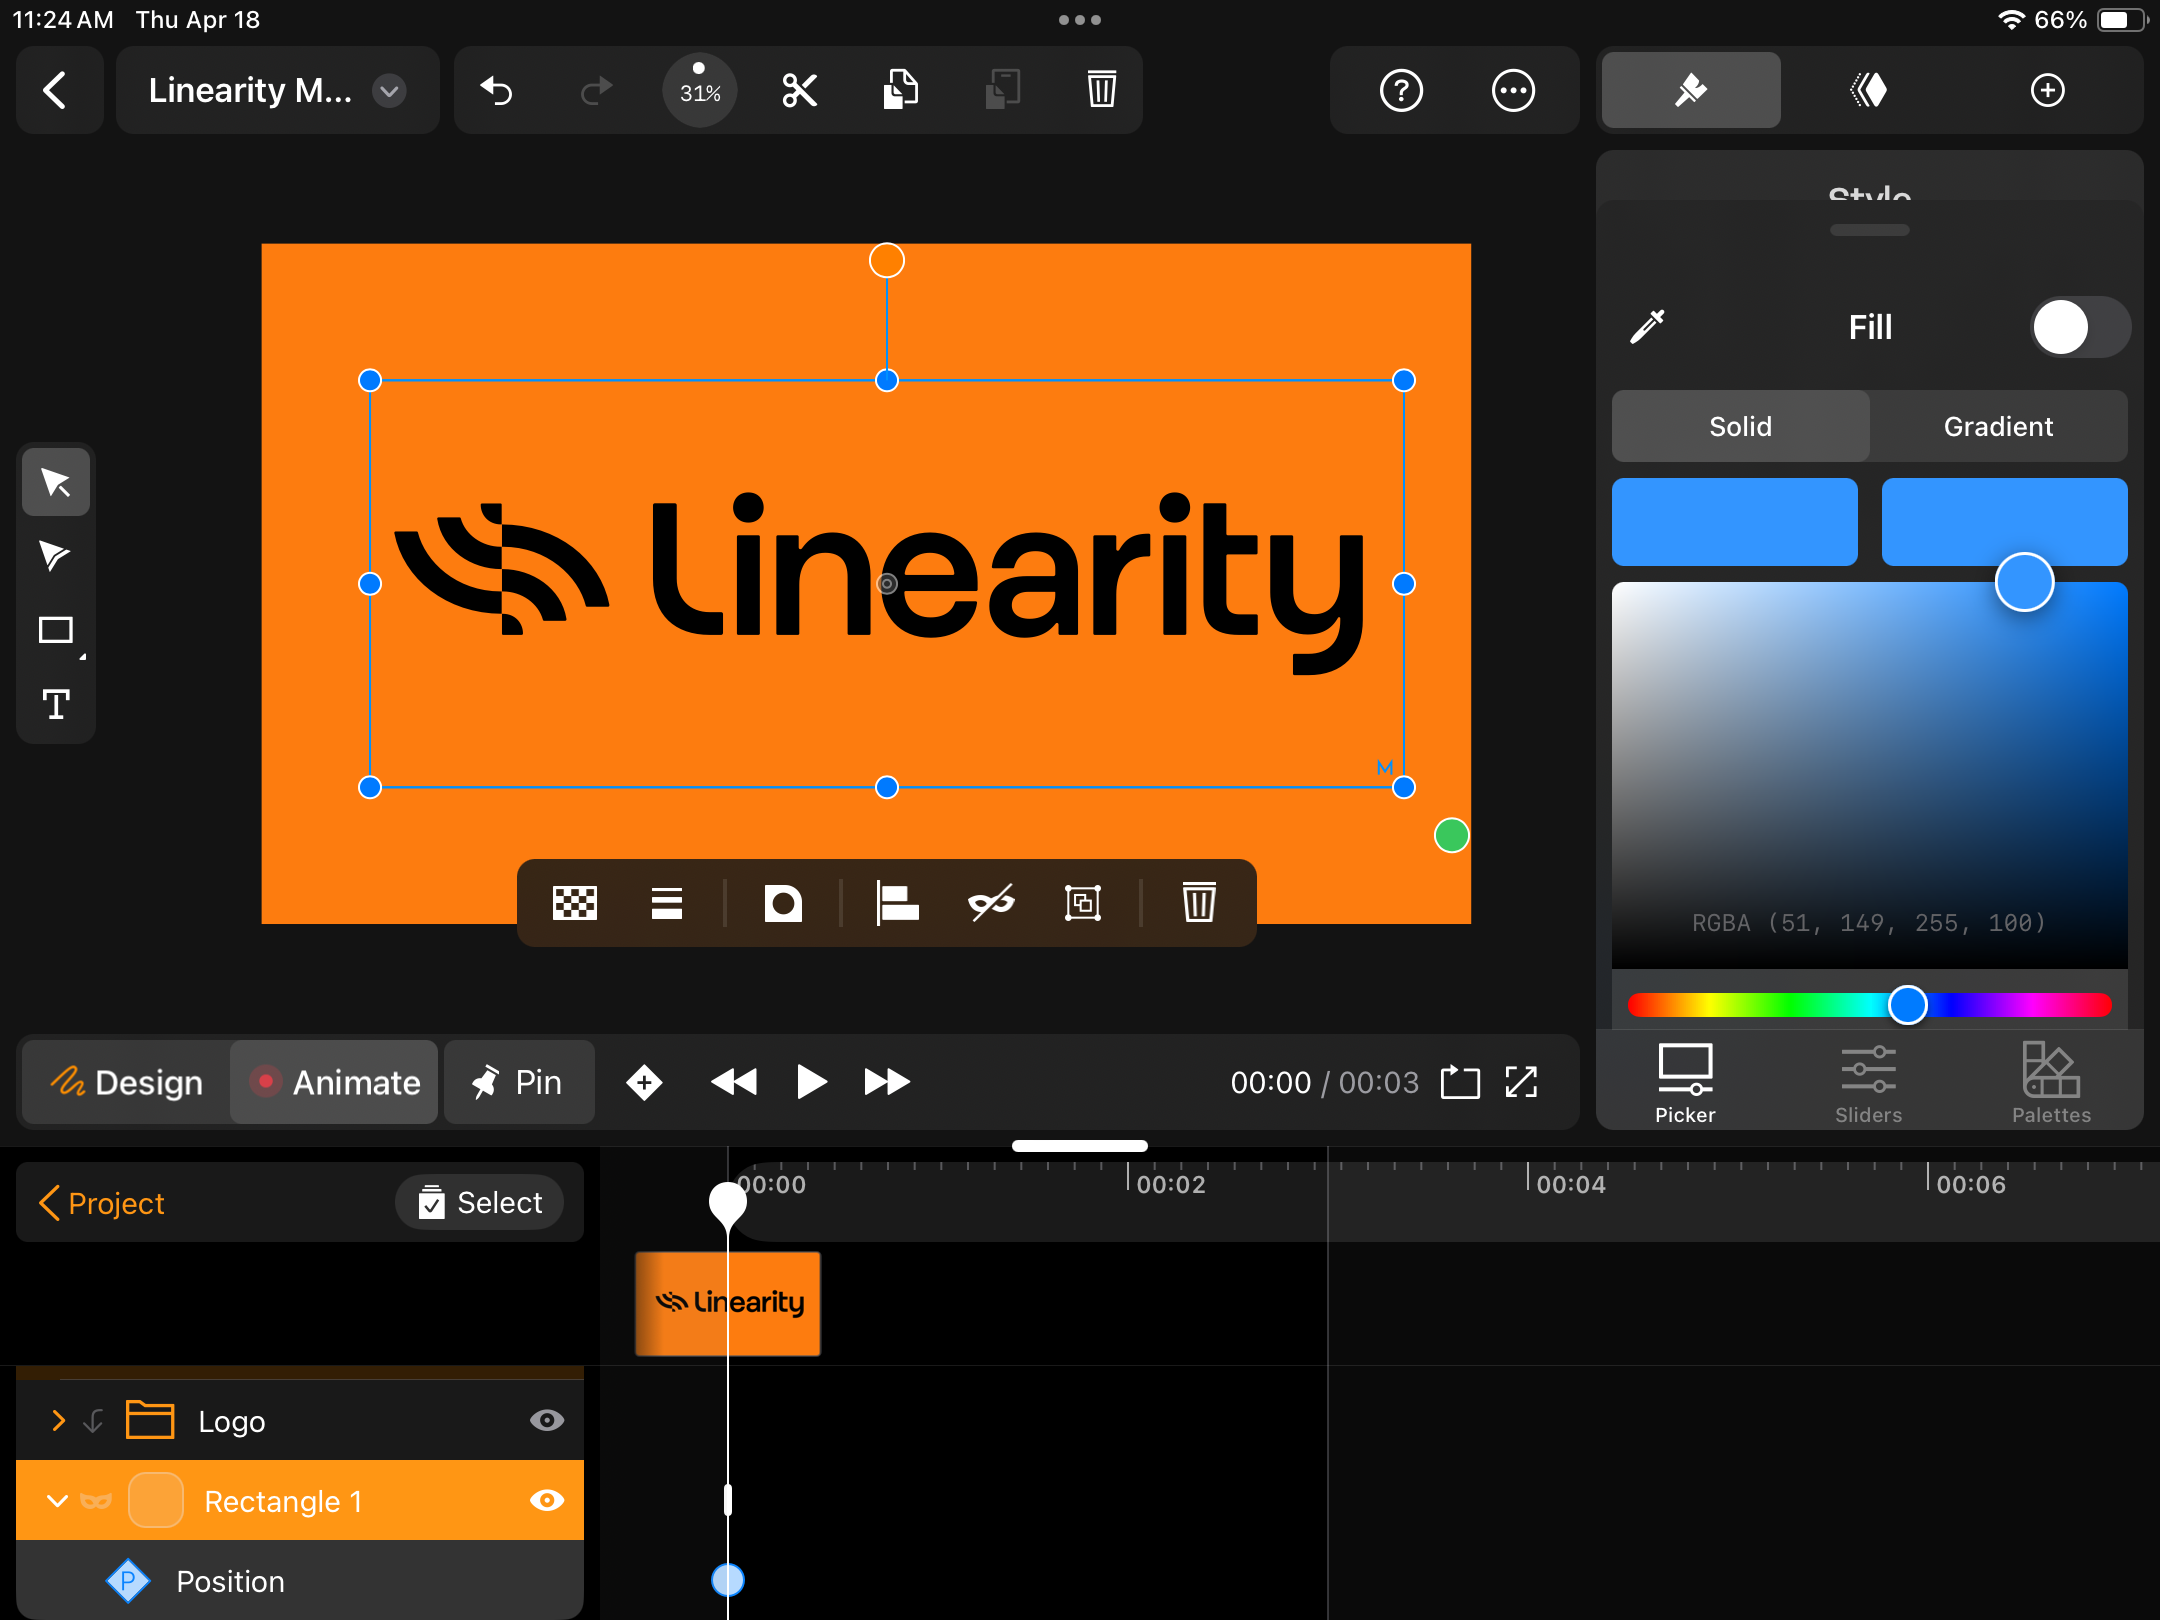
Tap on the Mask icon in the Quick Actions Toolbar that appears beneath your shape. This will create your mask.
You can also toggle off the Fill Color to make your mask shape transparent.
Animate your mask shape
Move the Playhead in the Scene Timeline to the end of your animation, which is at the 3-second mark.
Now, tap and drag your mask shape to the far right to create the 'conceal' animation.
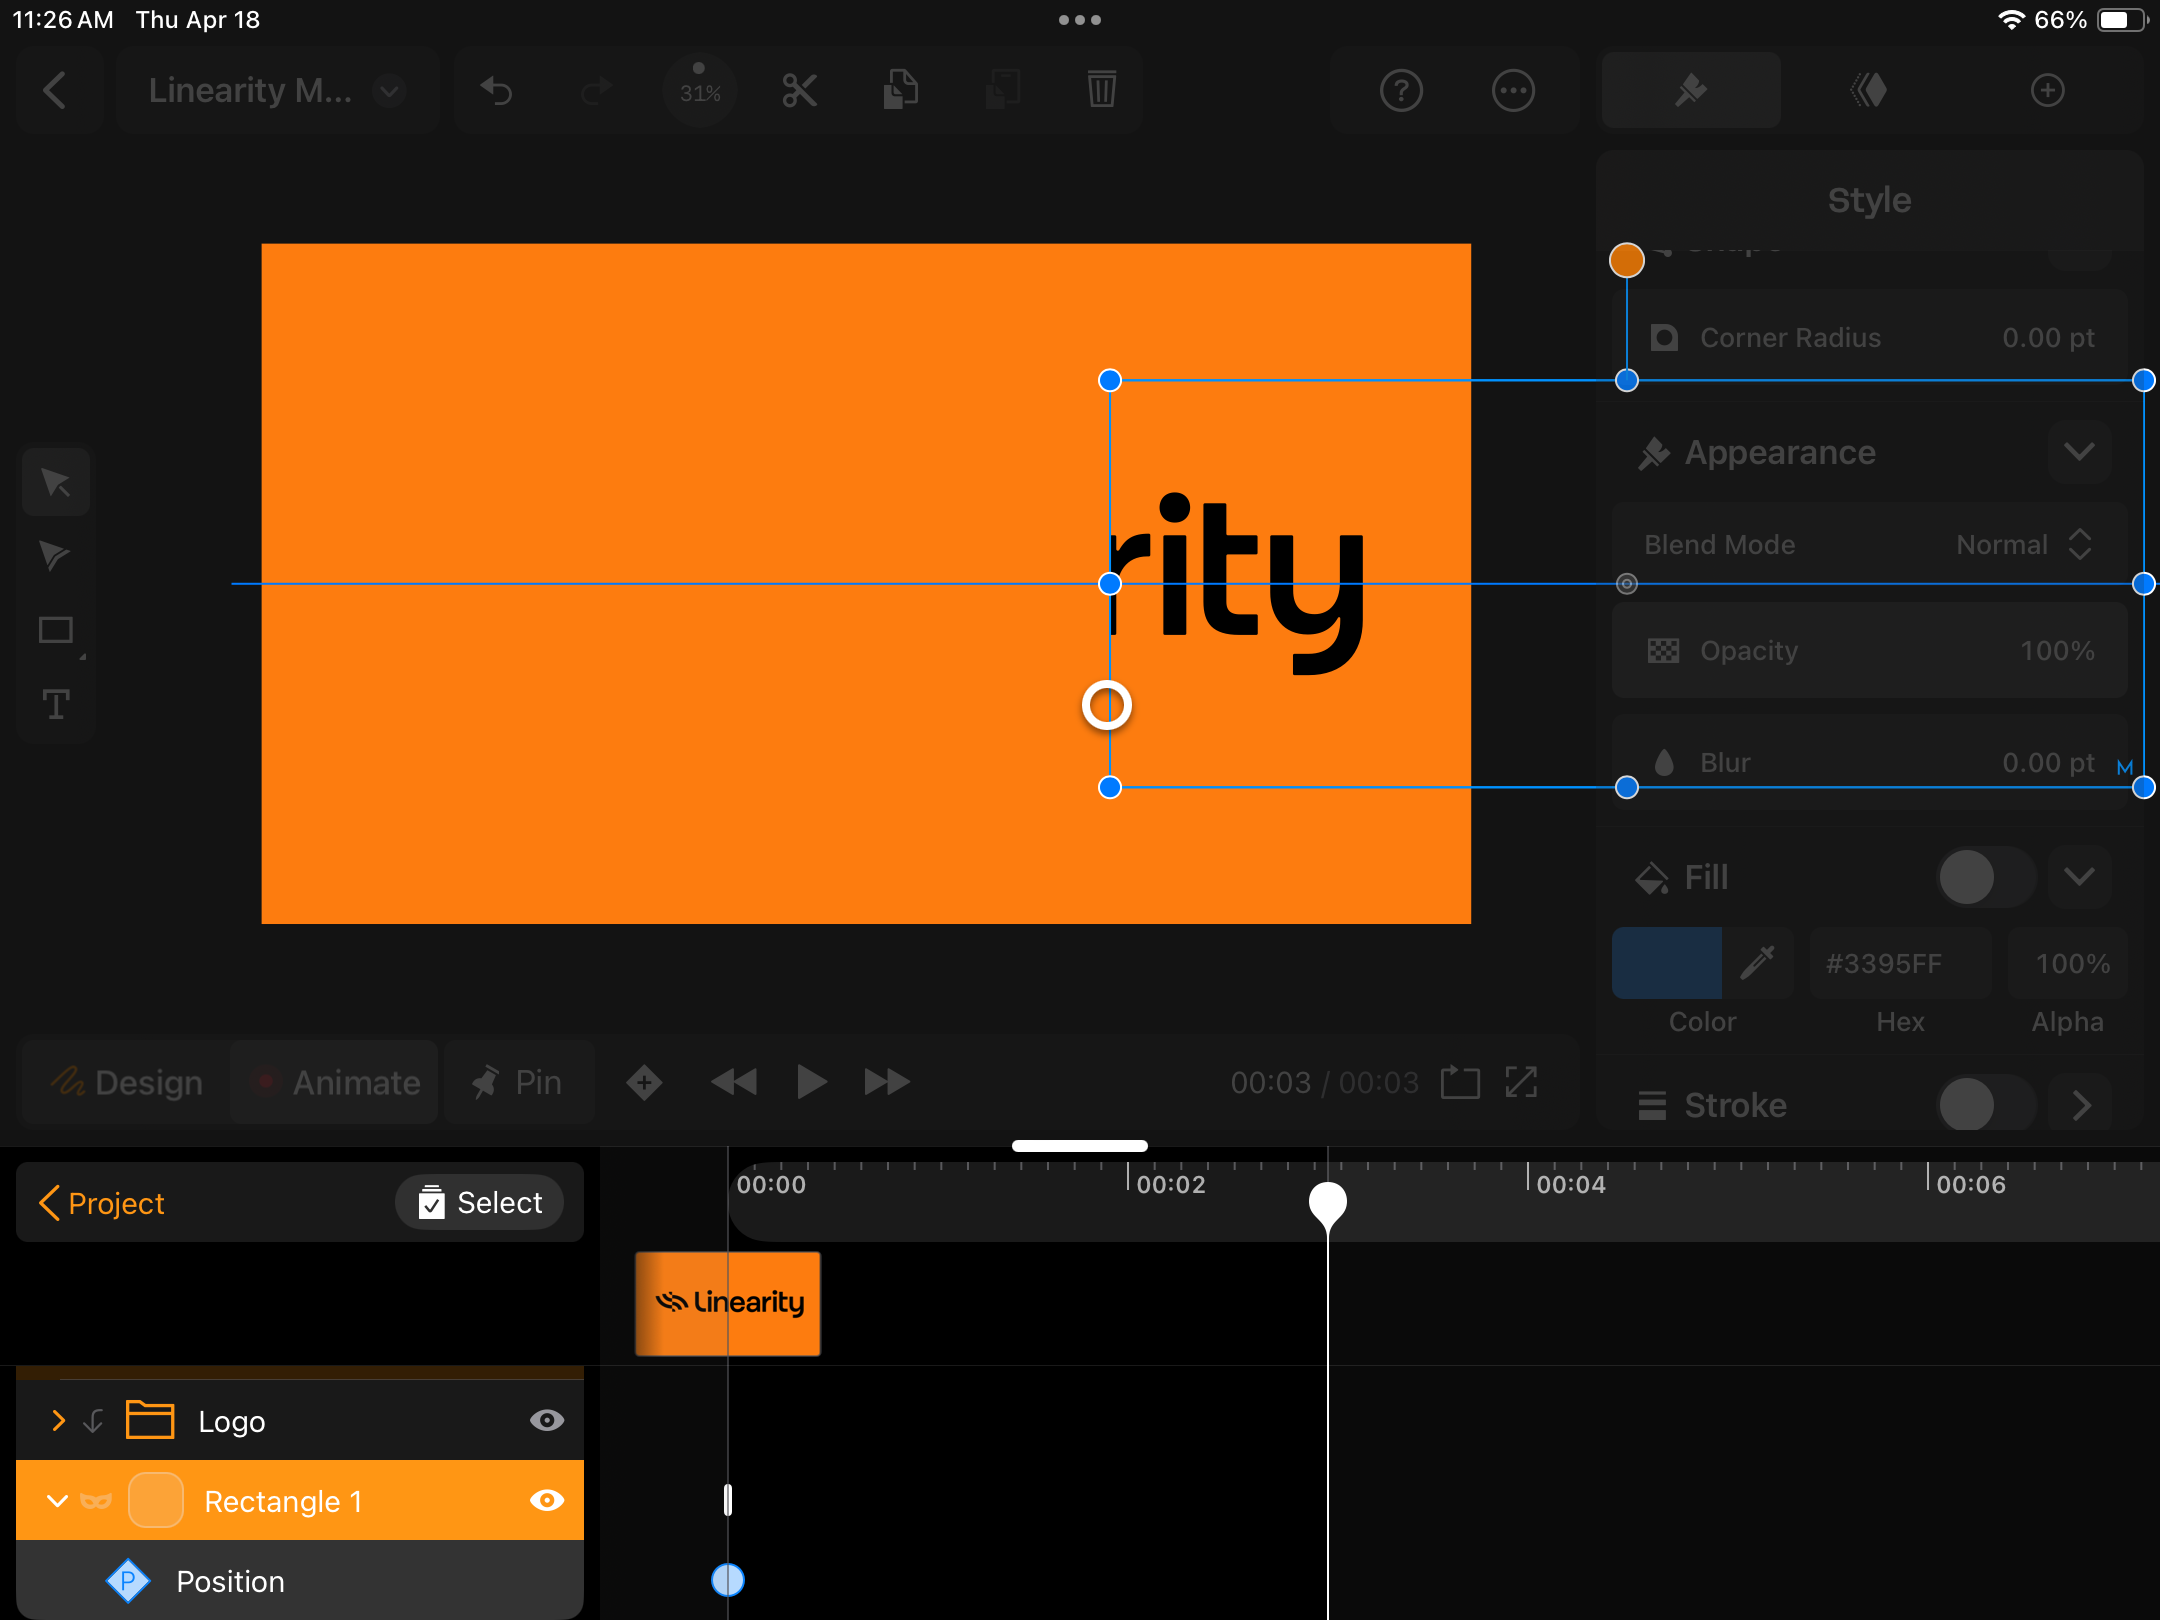
Notice that Move automatically applied a Natural (Ease In Out) Timing Effect to your animation. Looks good.
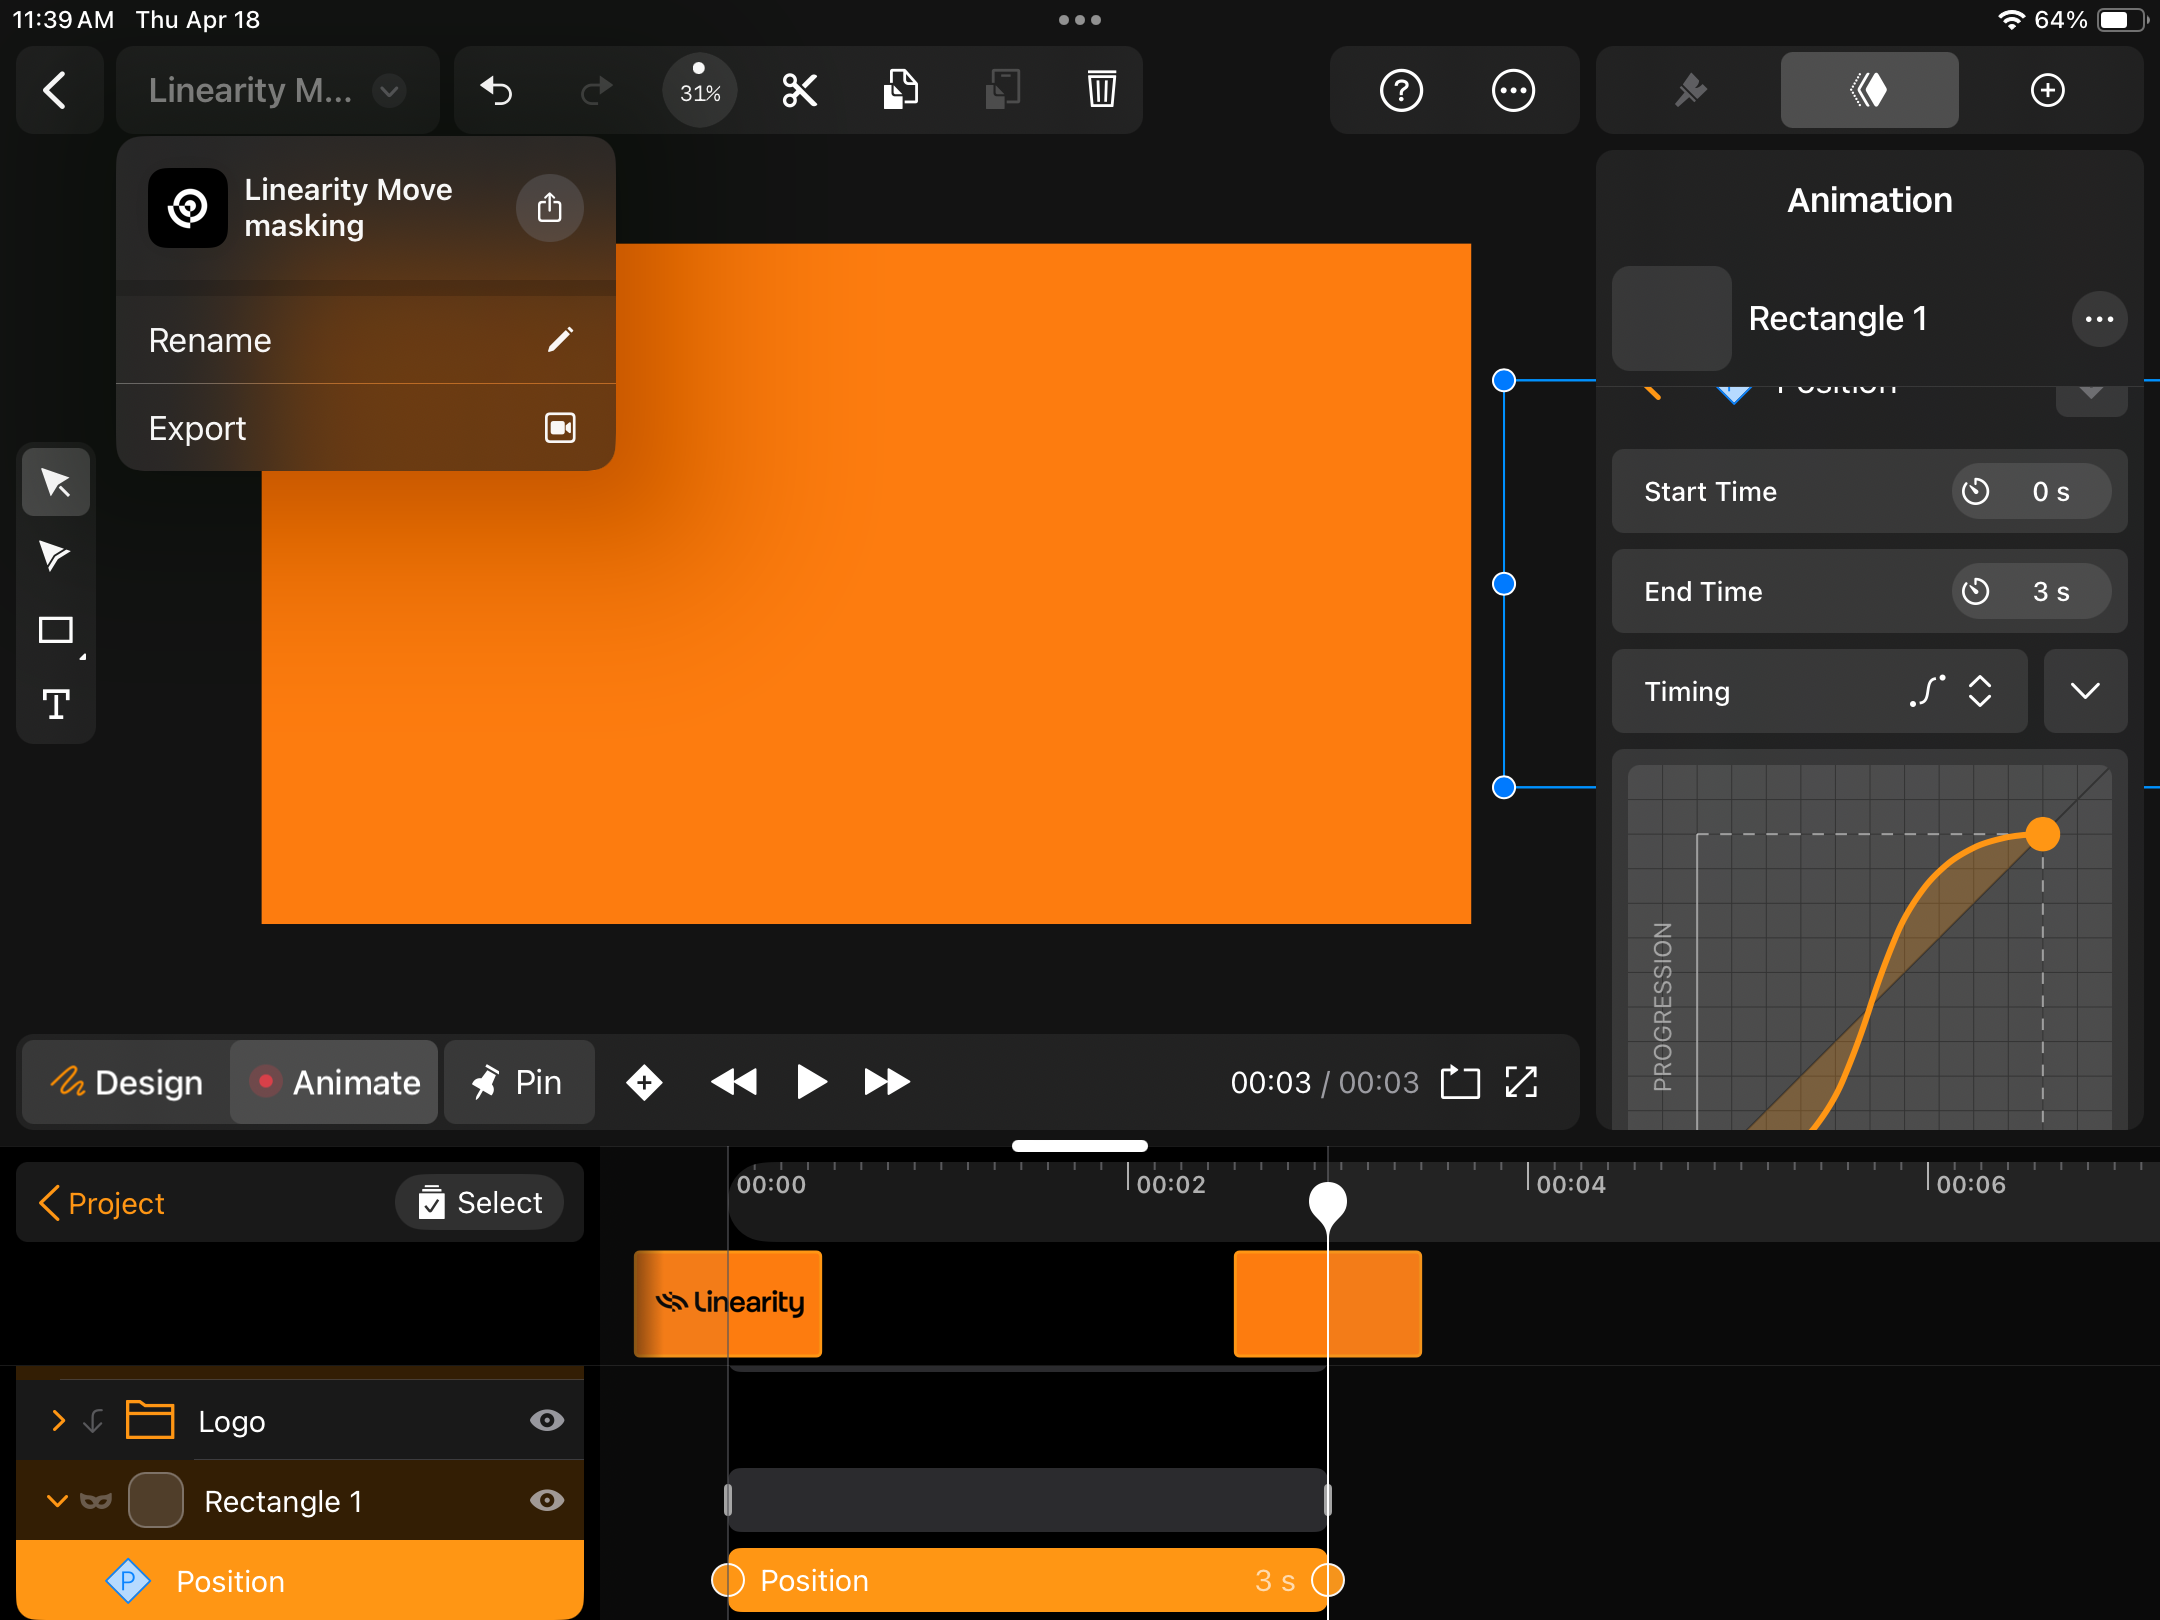
If you want, you can adjust the Timing Effect by going to the Animation Tab in the Inspector on the far right.
Tap on the Position property to see the values you can adjust: Start Time, End Time, Timing, and X and Y parameters.
You can also tap on the arrow icon next to Timing to twirl down the Graph view and edit the Timing Curves.

Export your masked animation
Once you're happy with your animation, tap on your Project's name at the top right of the screen and select Export from the dropdown.
Check and adjust your Export settings, then tap the Export button at the bottom right of the modal and select Save to Files.
Here's our final mask animation video made with Linearity Move:
Unveil animation design for your marketing team
Masking in Adobe After Effects is pretty straightforward, but the interface can be daunting for new animation designers like you.
While the software is powerful, with all the advanced features motion graphic designers need, it may be a bit "OTT" for designers and marketers.
We learned from industry-leading software like After Effects to create Linearity Move: a powerful, intuitive (and fun) animation software.
No experience needed. And you can try it for free.
Ready to try new and innovative animation software for your team? Get started below or check out our pricing options.
Frequently asked questions
How can masking enhance animation in marketing videos?
Masking is a powerful tool in marketing videos, allowing for precise control over visual elements. It can focus viewer attention on specific products, dynamically highlight new features, and seamlessly integrate promotional messages or text overlays.
For example, you can mask out an older product model and reveal the new one beneath it to emphasize upgrades or changes, making your marketing message clearer and more compelling.
What are some creative ways to use masks in Adobe After Effects?
Masks can be used in numerous creative ways:
- Transitional effects: Create unique transitions between scenes using masks that animate to reveal the next scene in a creative pattern.
- Text reveals: Use video footage to fill in the text by masking the text shape over your video, which can be particularly effective for titles or key messages in promotional videos.
- Spotlight effects: Highlight a specific area of your footage by creating a spotlight effect. Mask around the area you want to highlight and apply a brightness effect to just that part.
- Custom animation paths: Mask an object and animate the mask path to make the object appear as if it is moving through an environment in your video.
Can masks be used for color correction in specific parts of a video?
Yes, masks are extremely useful for selectively applying color correction. By masking a part of your footage, you can adjust the color settings (like brightness, contrast, and saturation) within that mask, leaving the rest of the footage unchanged.
This advanced technique is ideal for correcting exposure on faces, enhancing the sky without affecting the landscape, or drawing attention to specific elements through color.
What's the best way to animate a mask for smooth transitions?
There are many ways to use masks in animation. Using Linearity Move, you can easily draw and mask a shape in the Quick Actions Toolbar. In Animate Mode, Move automatically creates keyframes and applies easing to streamline your animation process.
Animating a mask smoothly in Adobe After Effects involves keyframe interpolation:
- Set keyframes: Place your keyframes at the start and end points of your animation.
- Easy Ease: Apply the Easy Ease function to your keyframes for smoother acceleration and deceleration of the animation.
- Graph Editor: Use the Graph Editor to fine-tune the speed and timing of your mask animation. Adjusting the handles in the graph editor allows you to control the motion curve for each keyframe, ensuring a fluid transition.
Share this!
Sharné McDonald
Sharné is a contributing writer to the Linearity Blog. She has 10+ years' experience in graphic design and marketing and holds a Master's degree in Art Education.