:quality(75))
:quality(75))


:quality(75))
Your logo is the heartbeat and first impression of your brand's identity. Logo animation brings your brand to life, transforming simple static images into vibrant motion graphics. And it can convey your brand's ethos and values in seconds.
Animated logos used to be reserved for corporations with the resources to create complex motion graphics. But with Linearity Move, any marketing team can now create an animated logo.
In this guide, we'll walk you through the steps to create an animated logo representing your brand's dynamic spirit.


What do you need to start animating logos?
Creativity, technical skills, and the right animation tools are essential for animating logos. But first and foremost, a clear understanding of your brand's identity and messaging is crucial. You want to ensure the animation effects complement your brand’s ethos rather than detract from it.
From a technical standpoint, you need graphic design skills and the right animation software. Programs like Adobe After Effects, Blender, or specific vector-based animation editors like Linearity Move offer a range of functionalities tailored for complex animations.
Understanding animation basics, such as timing, pacing, and easing, is vital. These principles will help you animate logos in a natural and engaging way.
Lastly, a computer with sufficient processing power and a high-quality display will ensure that your animation process is smooth and the outcomes are viewed accurately.
Ready to dive into our step-by-step logo animation tutorial? Let’s get started.
Open a new document
To start, open Linearity Move on your computer. Navigate to the File menu item in the Top navigation toolbar. From the dropdown menu, select New.
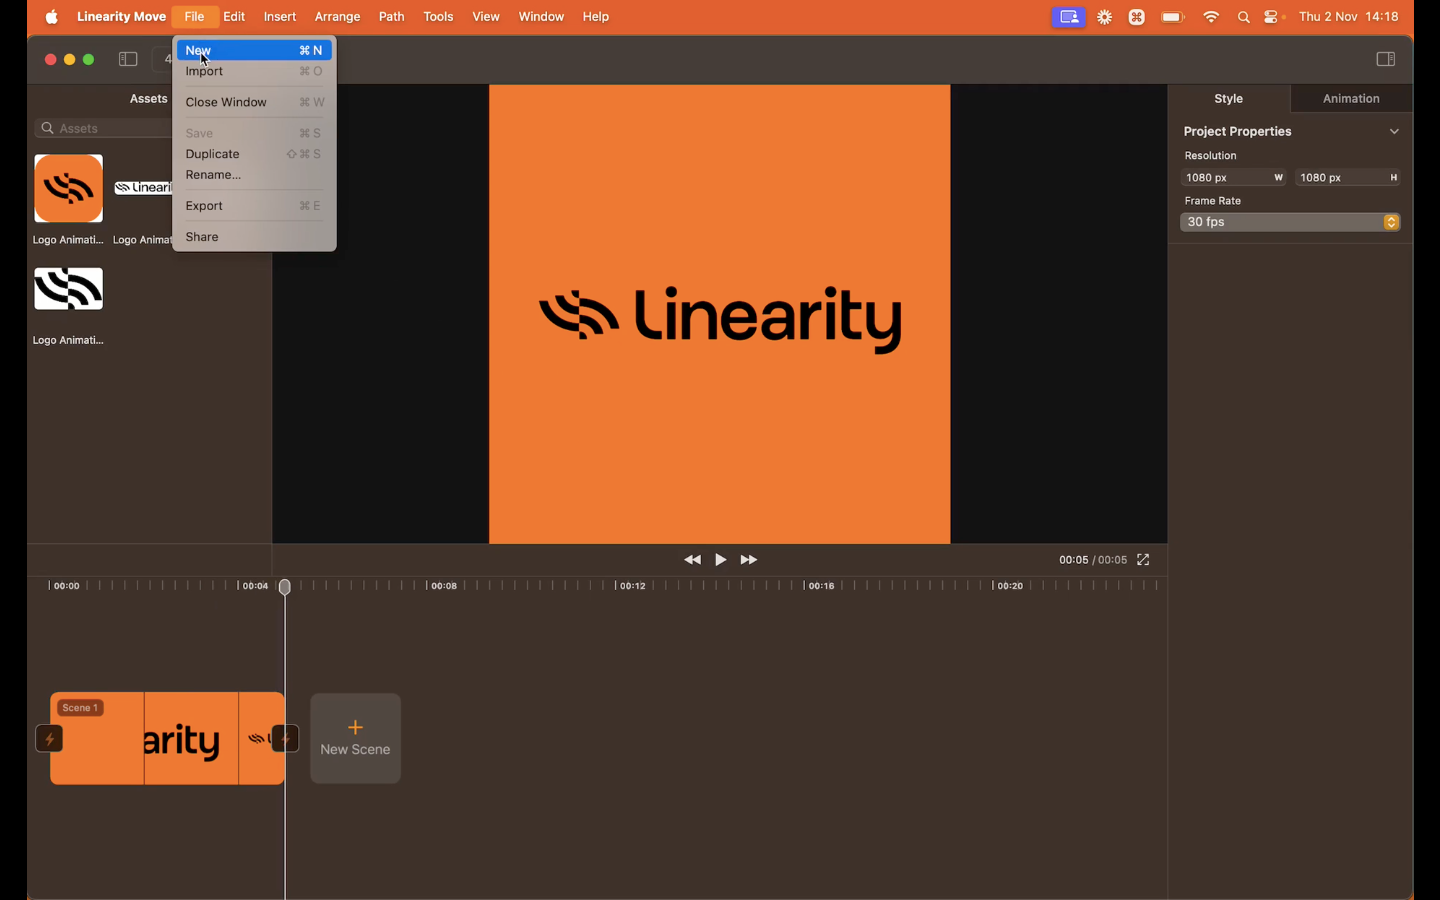
A dialog box will appear where you'll set up your new file. Set the Resolution to Square, which we recommend for social media posts.
Ensure the Frame Rate is configured to 30fps (frames per second). This is the standard playback speed and a popular choice for creating smooth animations well-suited for social media content.
Click the Confirm button in the dialog box. This action finalizes the creation of a fresh Artboard within Linearity Move. Your Artboard is now ready for you to begin working on your logo animation.
Before you move on to the next steps, download the template below to follow this tutorial's steps:
Import your template and arrange your Artboards
Create a new scene by clicking the New Scene option in the screen's bottom left corner and then look for the Import option.
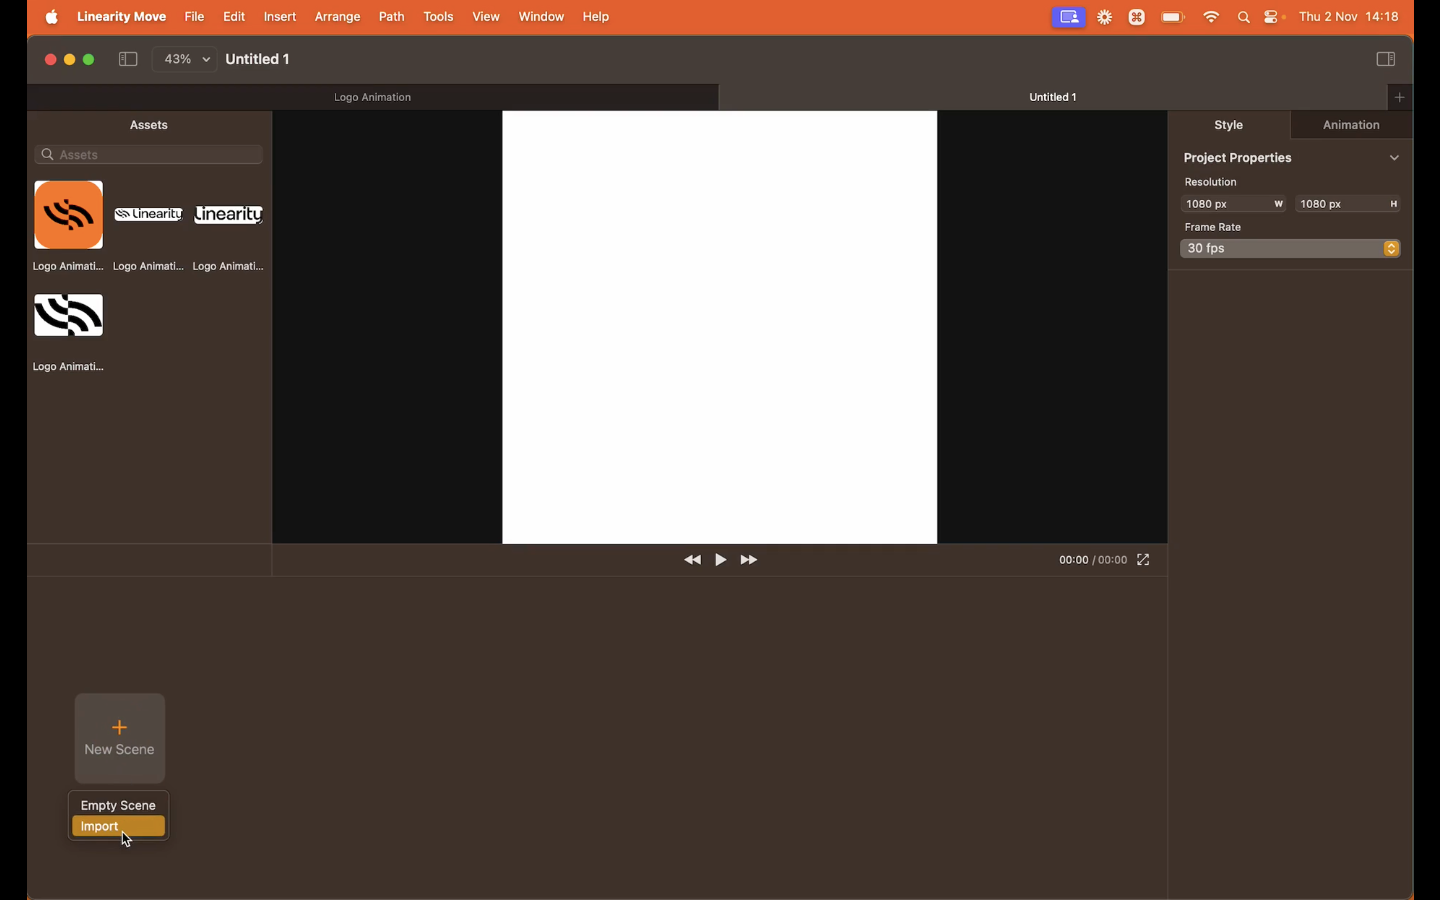
In the Import Panel that appears, browse your computer’s files to locate the specific logoanimation.curve file you downloaded in the previous step. Select the file and click Open.
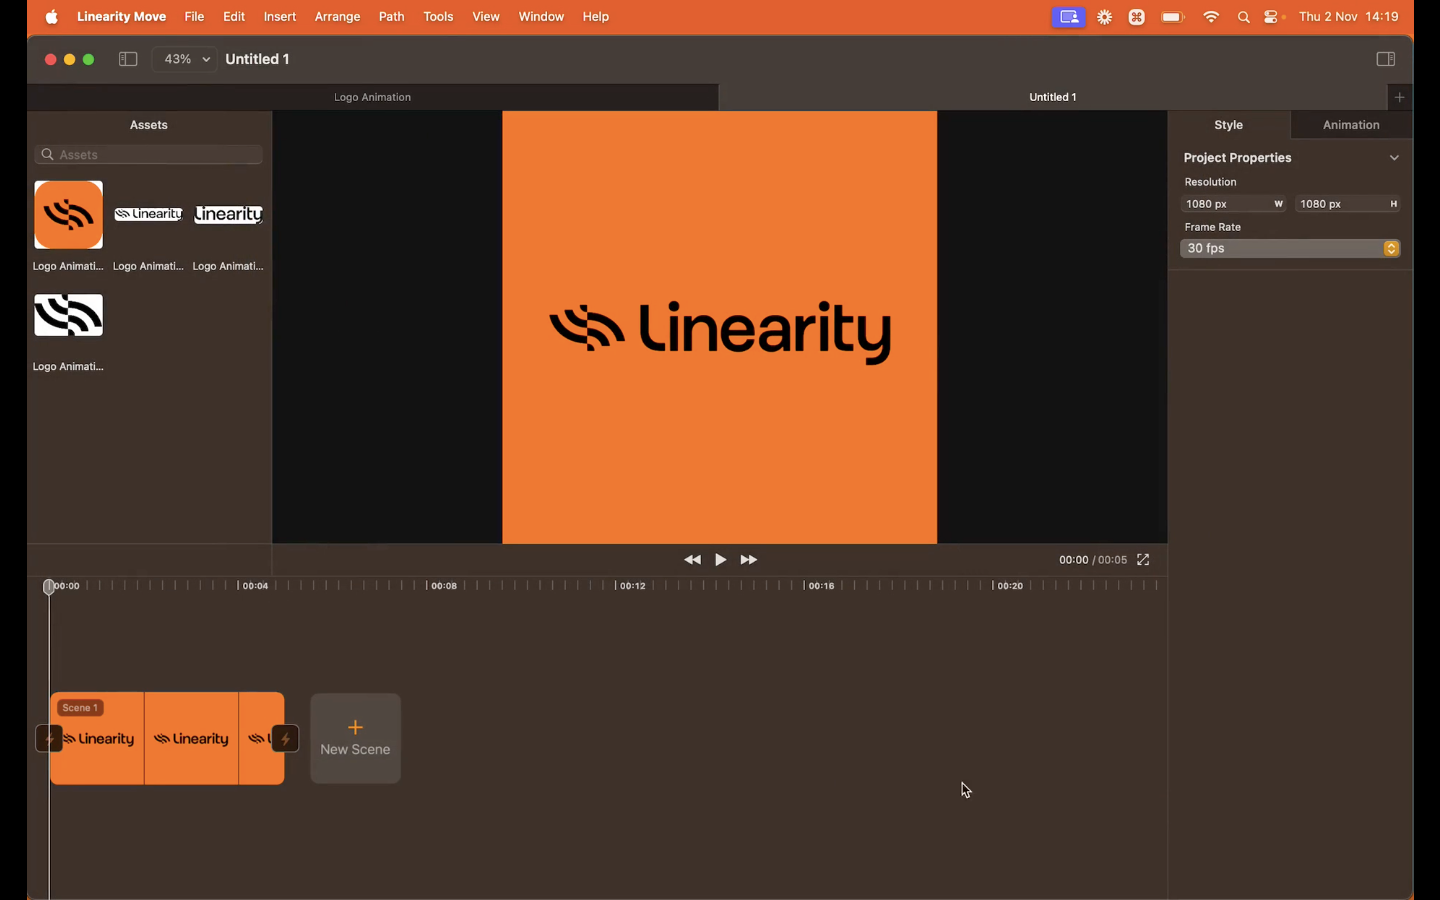
A panel that displays the various Artboards contained within the .curve file you've selected will then open, in this case there is only one. This Artboard represents a scene or animated segment of your video. Double-click on Scene 1 to begin editing your animation.
Click on the Layers stack in the left-hand panel to reveal the animation layers. Using animation layers helps you keep your file organized.
Create Masks for your logo icon reveal
We want to achieve a reveal effect of our logo icon—an effect that gradually shows or hides elements in animations.
First, ensure you're in Design Mode, which you can access while in the Scene View. You’ll be in Animate Mode by default, so click the toggle at the top left of the Timeline to switch to Design mode.
Next, look for the Shape Tool in the Toolbar, which allows you to create geometric shapes like rectangles, lines, ovals, stars, polygons, and spirals. Clicking on the icon once will select the Shape Tool. Clicking a second time will open a sub-menu where you can select different shapes.
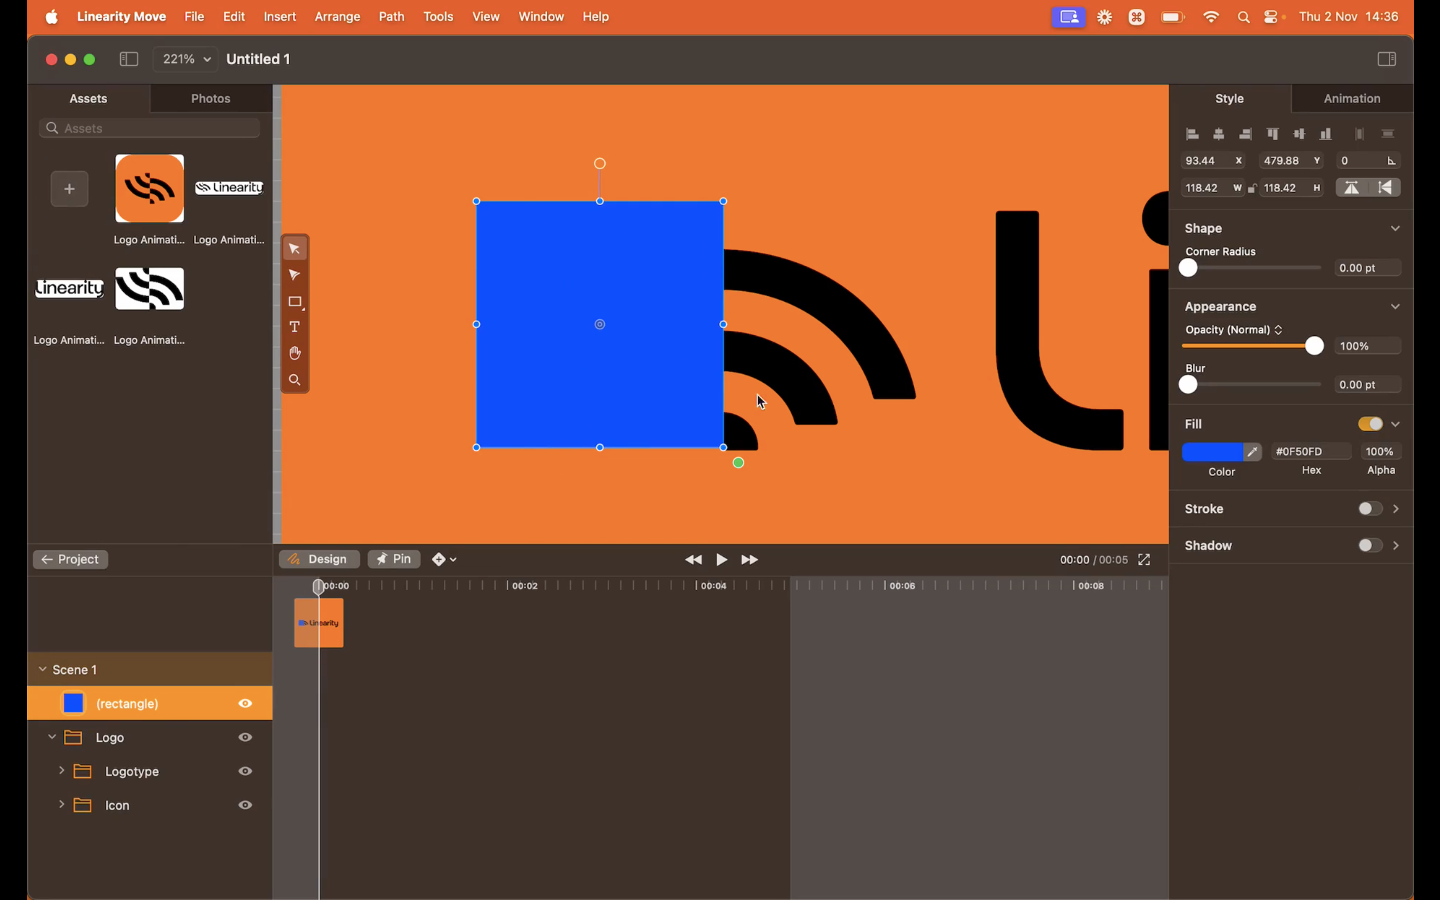
Select the Rectangle Tool and start drawing two rectangles on your canvas. These rectangles will serve as Masks to reveal the icon. Position them accurately on each side of the icon, ensuring they cover the entire icon when combined.
To keep your project organized, rename the squares in the Layers Panel. This will help you identify them easily to create and edit the Masks. Right-click on each square layer and choose the Rename option. Give them descriptive names, such as "Left Mask" and "Right Mask."
Once you’re happy with their positioning, head to the Style Tab, locate the Fill color option for both squares, and change the Fill color to something easy to see on the Artboard, like blue.
Then, reduce the Opacity in the Style Tab above to see the logo icon beneath. This will help you accurately position the two squares over the logo icon
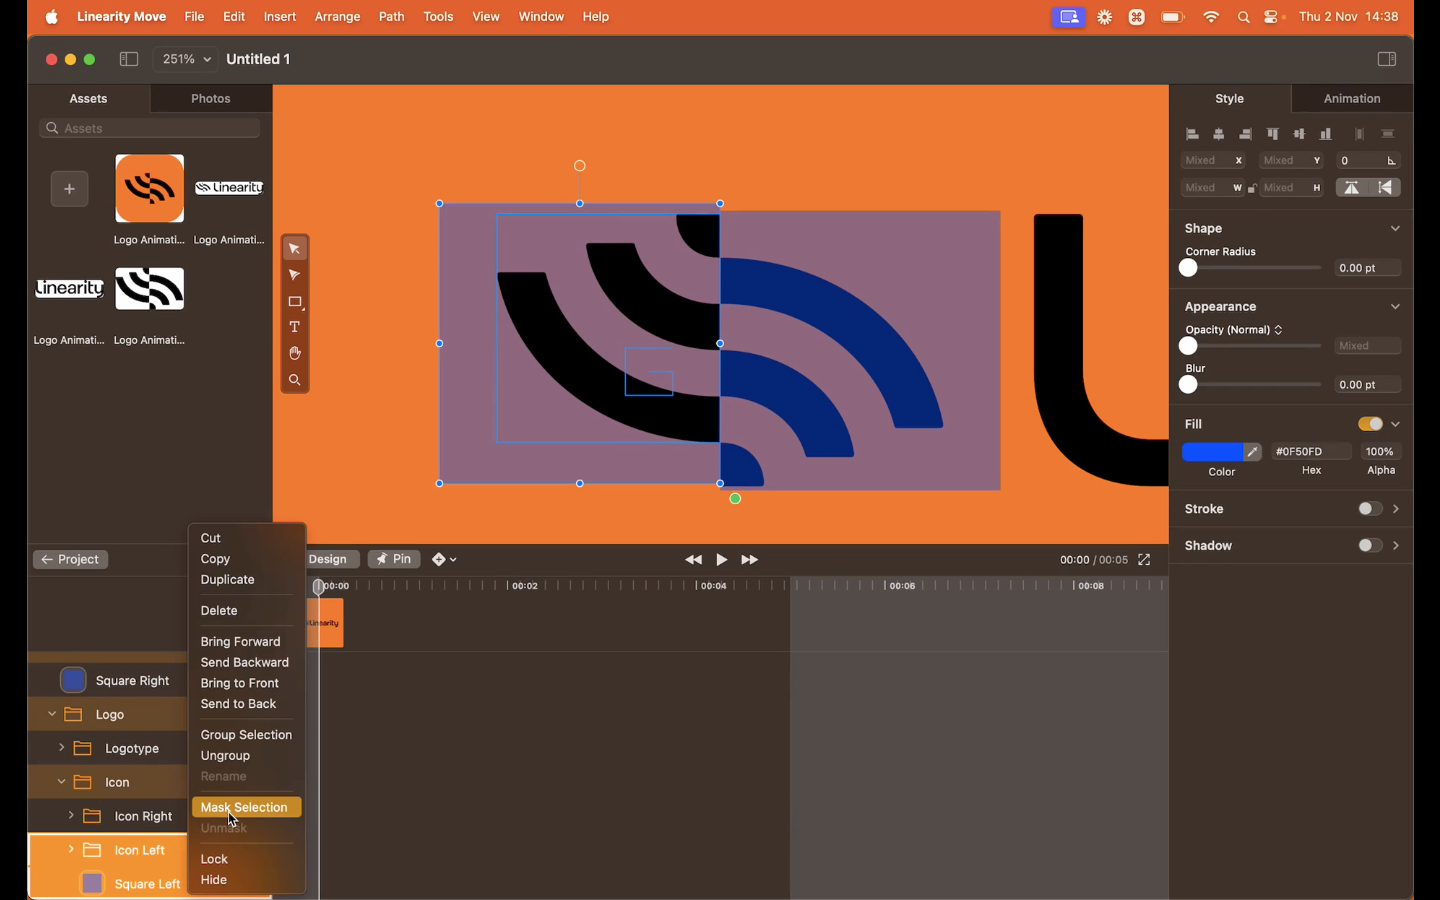
To create the Masks, you need to move the squares inside the Icon folders in the Layers Panel. Select the Right Square and Right Icon by holding down the Shift key while clicking. Then, right-click on your selection and choose the Mask Selection option to make a Mask. Then repeat the action for the left side of the animation to create the second Mask.
Animate the Masks for your logo icon reveal
To animate the Masks, return to Animate Mode by adjusting the toggle at the top left of the Timeline to Animate. Select both the "Left Mask" and "Right Mask" layers by holding down the Shift key and clicking on these layers in the Layers Panel.
To get your Masks to create your desired animation effect, set their animation Keyframes. Keyframes define specific points in the Timeline where an animation property changes. In this case, we'll be animating the position of the Masks to reveal the logo icon gradually.
Position your Playhead (the Timeline marker) at the beginning of your animation (00.00).
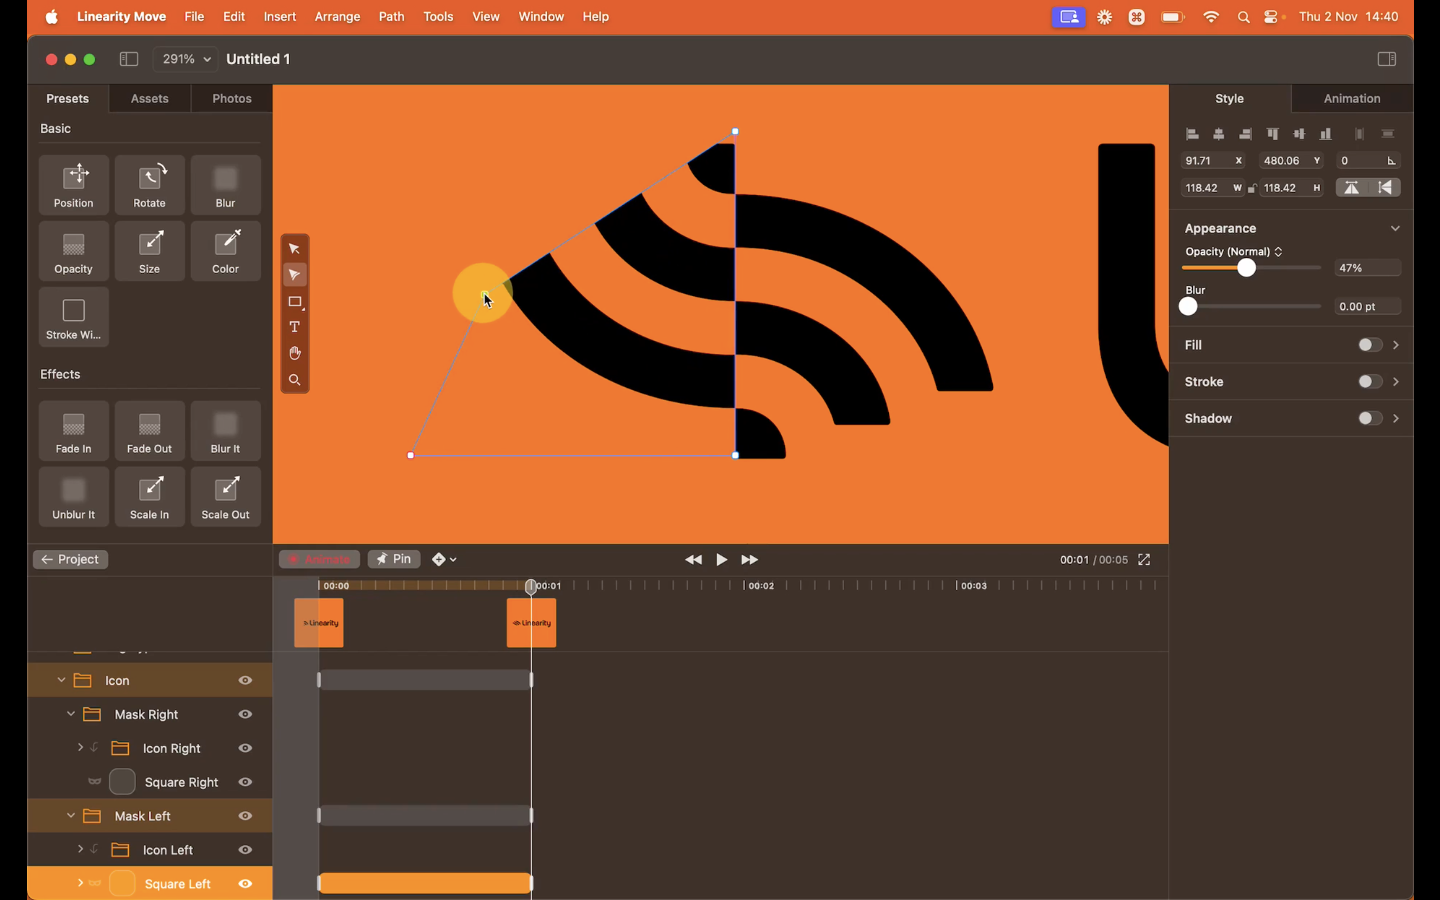
Next, adjust the position of the Masks to cover the icon using the Node Tool, which allows you to select individual vector points in your shapes and paths. Select the top-left corner Node of your “Left Mask” and drag it to the bottom right-hand corner of the rectangle so that they line up perfectly with each other.
Then, reverse this action to restore the Node to its starting point. New keyframes should automatically be created with this action, animating what you just did.
Preview your animation to see how the icon reveal effect looks by clicking on the Play icon at the center of your screen. If it doesn't match your expectations, don't worry—animation often involves some trial and error. You can refine the timing and position of the keyframes to achieve the desired effect.
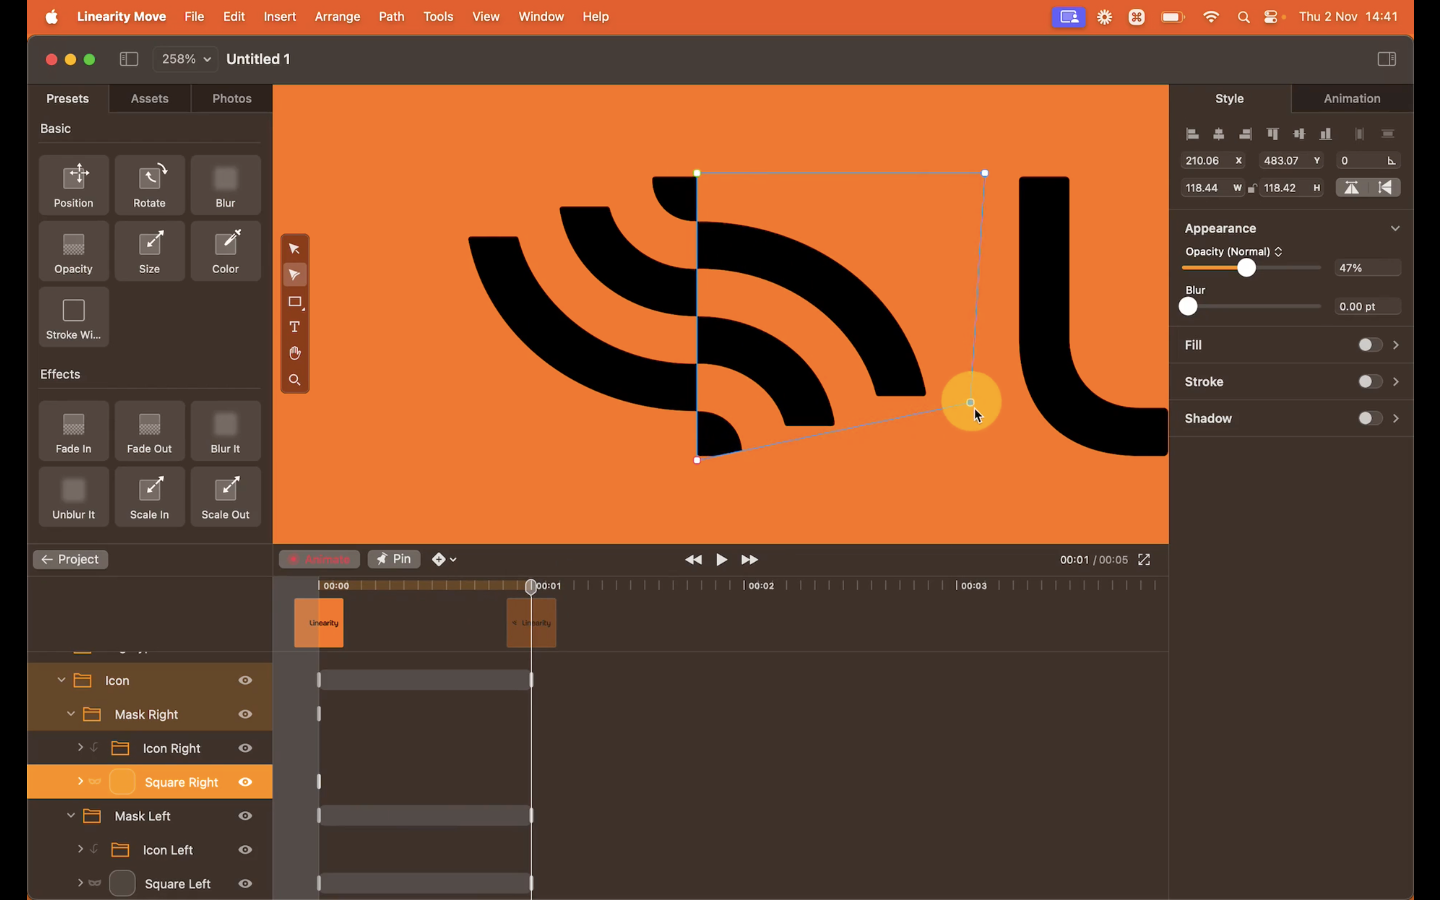
Repeat these steps with your “Right Mask” Layer to animate the other side of the logo icon. Select the layer in the Layers Panel and repeat the same action in the opposite direction.
In other words, select Node's bottom right-hand corner and drag it to the top-left corner. Then, move the Playhead to 00.01 and reverse that action, creating a second animation sequence.
Once again, Preview your animation to see how the icon reveal effects work together.
Animate your logotype
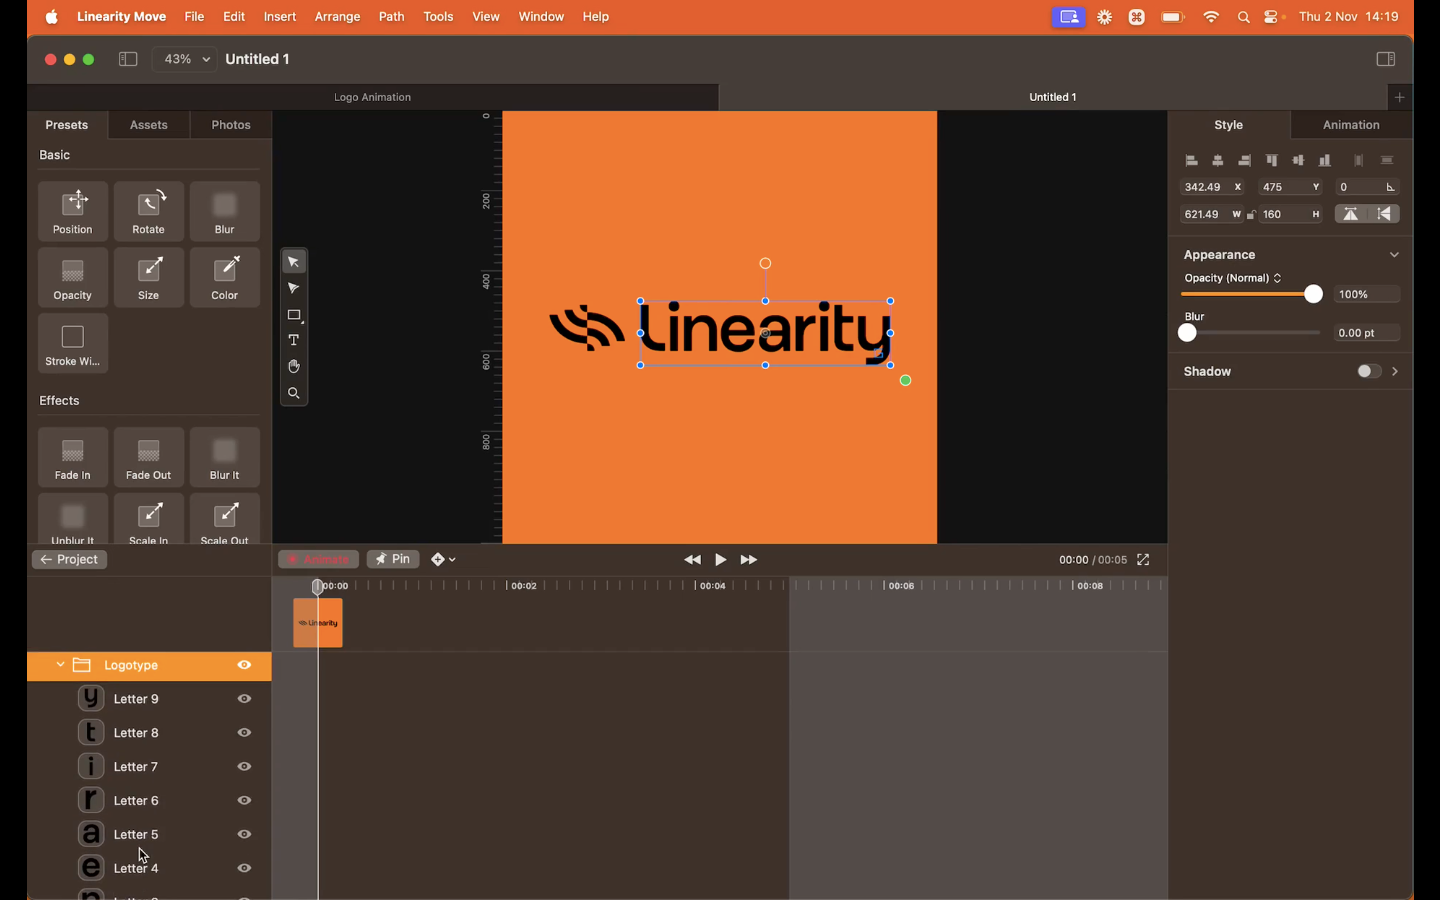
Let’s animate the individual letters of the logotype to give the text some motion. Select the "Logotype” group in your Layers Panel containing all the individual letters of your logo.
Within the "Logotype" group, select each of the individual letter Layers by holding Shift and selecting them together. You’ll see the whole word selected on your Artboard.
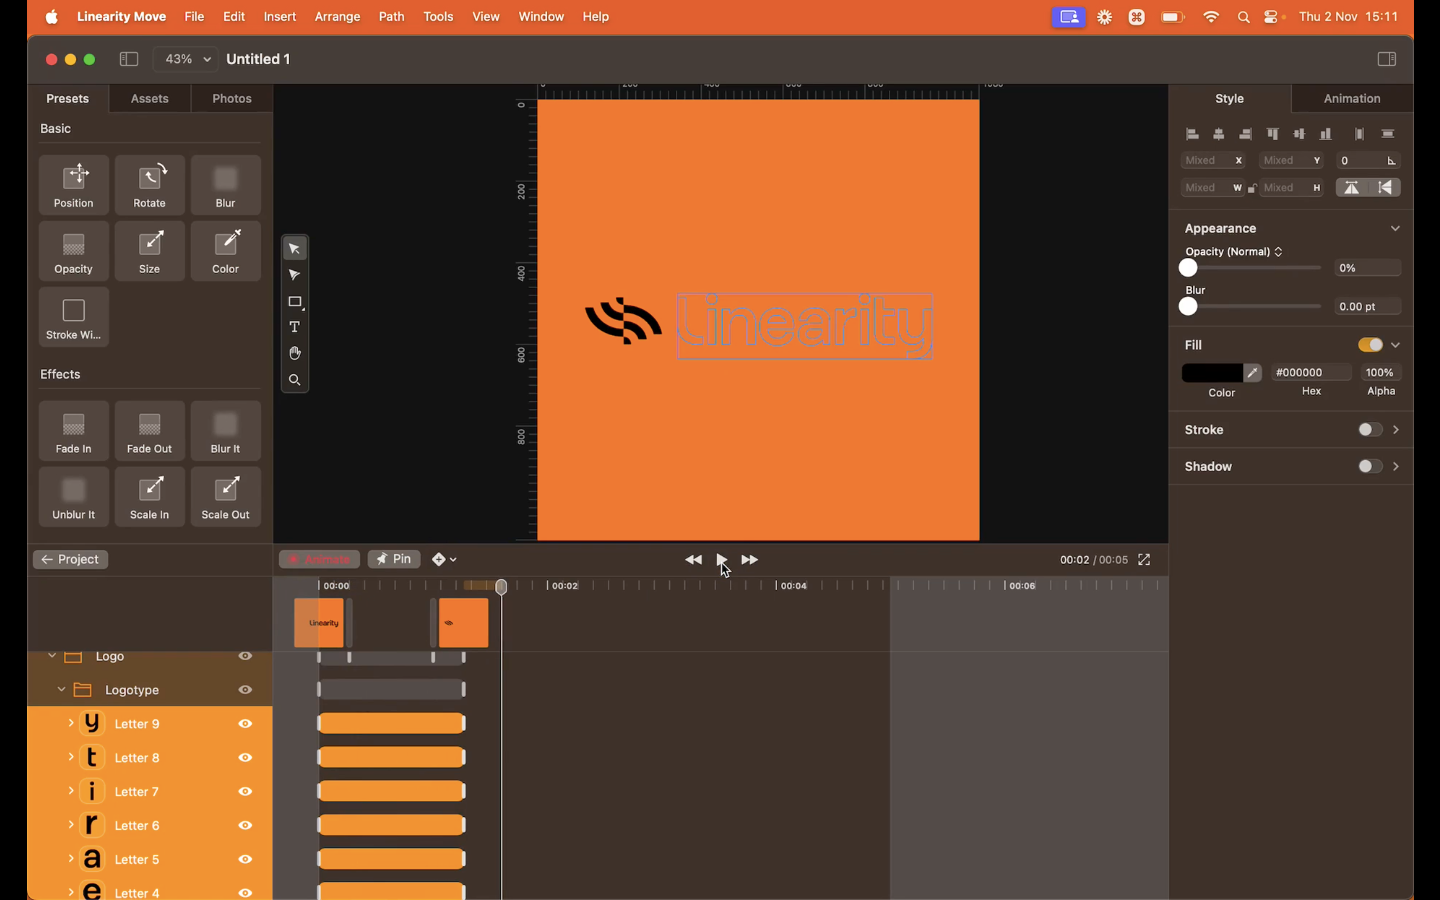
Drag the word lower down on your Artboard—about two-thirds of the way down. Hold Shift on your keyboard while you drag to ensure it moves straight.
To make the letters disappear, change the Opacity in the Style Tab to 0% to make the letters disappear once you’ve dragged the logo down.
Preview the animation to experience the effect—your logotype should move down and gradually become invisible.
The logotype is now disappearing, but we want it to reveal itself (like the icon). To get this effect, we can switch things around by simply clicking on the Animation Bar corresponding to the logotype group and selecting the Keyframes on the left. Then, drag the Keyframes to the opposite side of the animation.
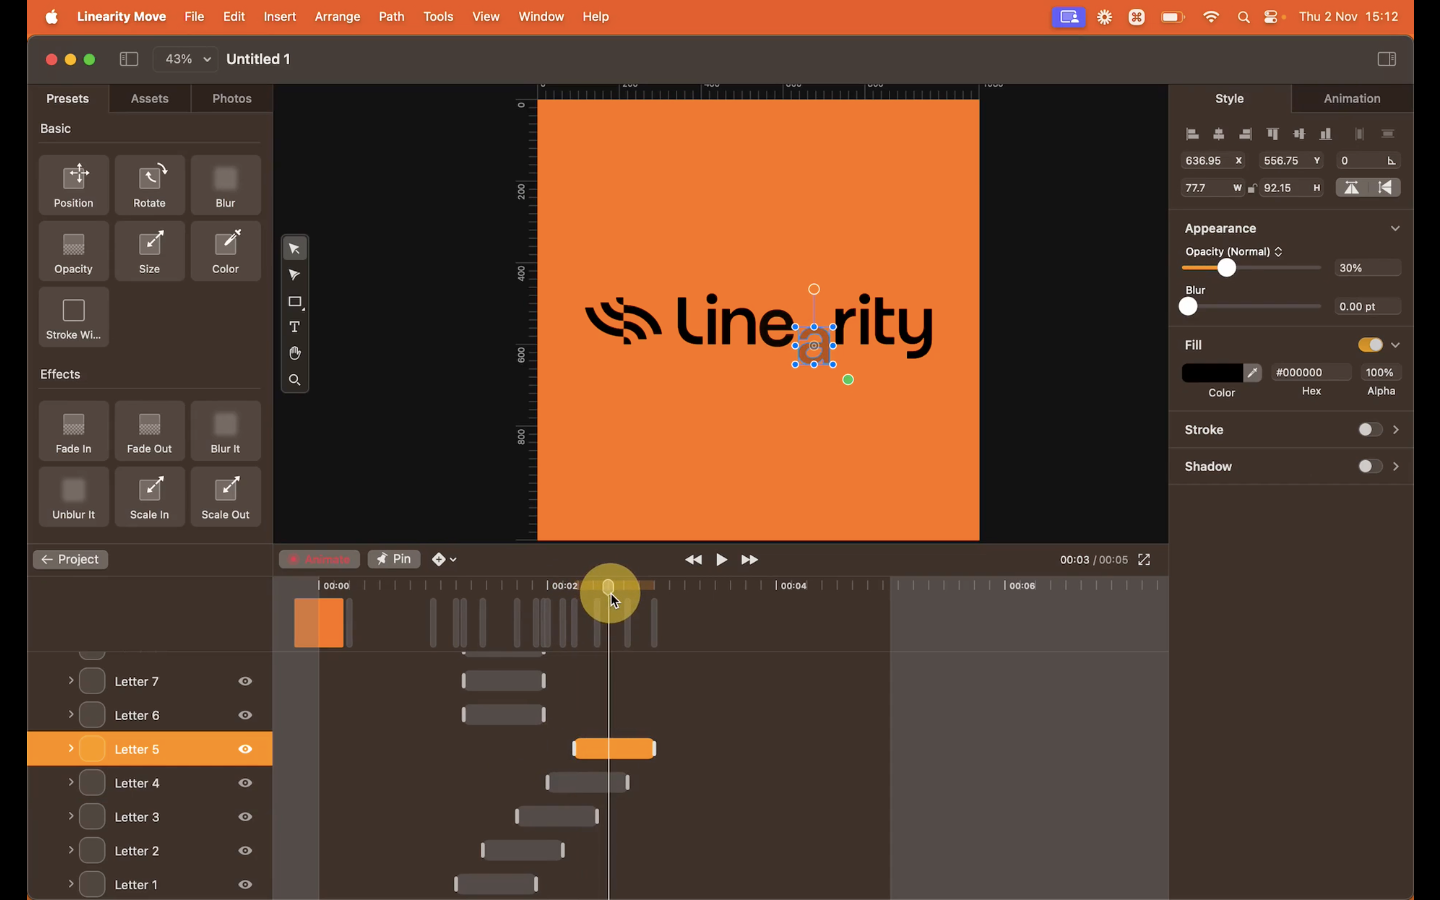
You can also slightly delay the letters' animation to reveal each letter individually. Adjust the timing of the Keyframes by moving the Playhead of each letter layer. Drag the Keyframe to line up with the Playhead, staggering each one to create a sequential effect.
You’ll see in the Preview that the letters now appear one after the other. Experiment with the timing until you achieve your animation's desired look and feel.
Add your finishing touches
We’re almost done with your logo animation. Let’s make the final touches by adding a zoom effect to the final sequence.
Select all the animation layers by clicking on the “Logo” Group in your Layers Panel. Once you’ve selected the “Logo” layer, head to the Size fields in the Style Tab to adjust the width and height of the logo.
Type 2380px into the Width field, ensuring the Lock Icon is selected to keep the adjustment proportional. We also want to change the logo's Position on the Artboard, so update the X-axis field to 240 and the Y-axis to 370.
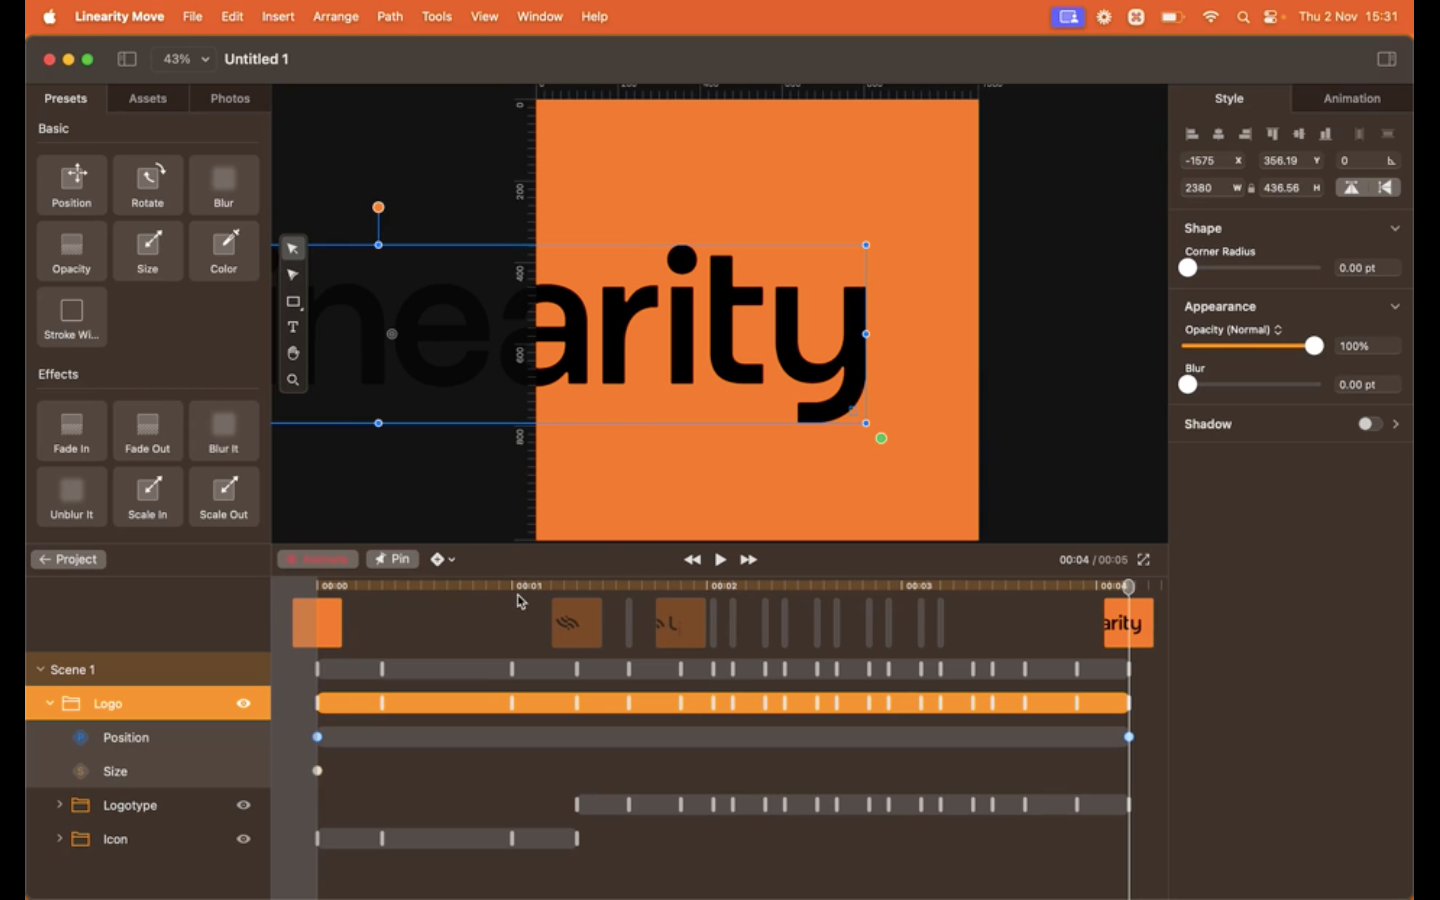
To get your logo to move from left to right, move the Playhead to the end of the reveal animations you created and update the fields again in the Style Tab. This time, only change the value of the X-axis to -1575, then click Return to finalize the adjustment.
Click Preview to watch your animation zoom and move while the reveal animation plays.
To create a good flow, you want the animation to take place after the icon has been revealed. Move the Playhead to roughly where the icon animation finishes, select the Keyframe of the Position Layer, and move it.
The final step is to adjust the scale of the logo so that the animation concludes with the full logo reveal.
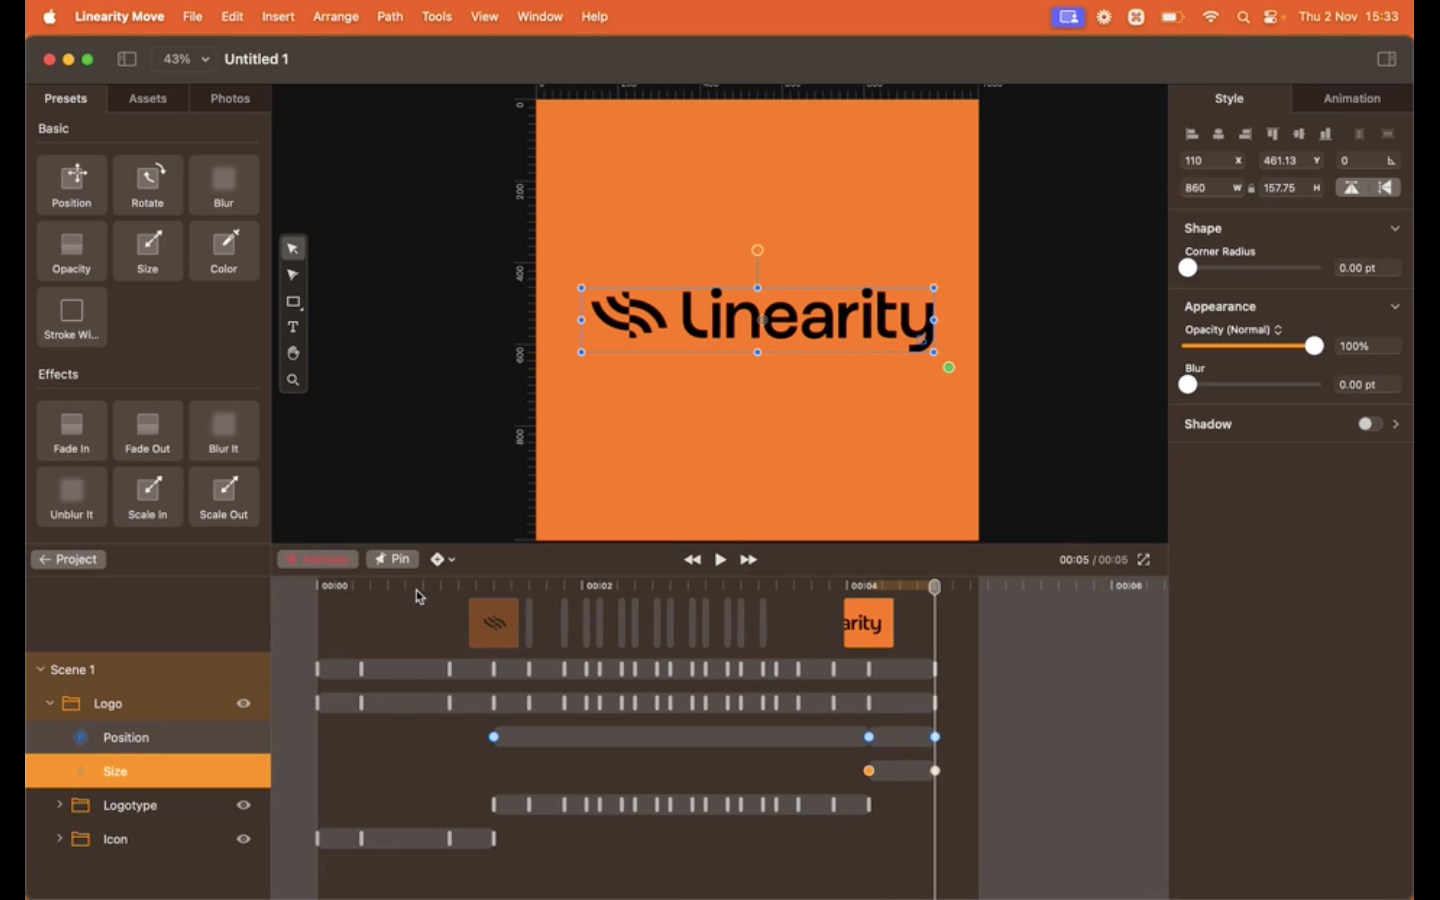
Move the Size Layer Keyframe to the end of the animation, and drag the Playhead a couple of bars forward. Change the size the same way you did before by adjusting the Width to 860px. Then, re-center the logo using the Alignment Buttons at the top of the Style Tab, selecting both Center Align options (horizontally and vertically).
Export and share
Preview your work one last time to ensure you’re happy with the animation. Navigate to the File menu item in the Top navigation toolbar and select the Export option.
Select the suitable file format and settings depending on your project's requirements and the platforms where you want to share your animation.
Then, click Export to save your logo animation file.
Moving your brand's future forward
Did you find this logo animation tutorial helpful and inspiring? You’ve probably also realized Linearity Move can do much more than logo animations.
Linearity Move puts you back in control of your company’s creative process. You'll save money by producing content in-house. No animation experience required.
It’s your team’s all-in-one graphics and animation suite, so why not try it?
Frequently asked questions
Can animated logos improve SEO and user engagement on websites?
Yes, animated logos can positively contribute to search engine optimization (SEO) and website user engagement. While the animation itself doesn't directly affect SEO rankings, it can significantly improve user experience (UX) and lead to longer visit durations and lower bounce rates.
An engaging animated logo can capture visitors' attention, making them more likely to interact with your site and explore its content further.
What’s the best size for an animated logo?
The size of an animated logo can vary depending on its intended use. For web use, keeping the file size under 2 MB is recommended to ensure quick loading times without sacrificing quality.
In terms of dimensions, aim for a resolution that maintains clarity across devices; for example, 1080 x 1080px for square logos or 1920 x 1080px for wider logos. Always consider the platform's requirements on which the logo will be displayed and optimize the size accordingly to maintain a balance between quality and performance.
How long should a logo animation be?
The optimal duration for an animated logo typically ranges from 3 to 7 seconds. This time frame is long enough to capture the viewer's attention and convey the brand's message or identity. But it’s short enough to keep the audience engaged without delay.
The length should be tailored to suit the platform it's intended for and the specific goals of your branding strategy. Sticking to these guidelines will ensure your animated logo complements the customer’s experience rather than disrupting it.
Where can I share my animated logo?
Animated logos can be shared across a wide range of digital platforms to maximize your brand's visibility and impact. This includes your company website, social media channels, email signatures, promo videos, and video content platforms like YouTube or Vimeo.
Sharing your animated logo in these spaces helps establish a cohesive brand identity and can make your brand more memorable to your audience.
Share this!
Garreth van Niekerk
One of GQ's 'Young Creatives To Watch' and described as a "Creative Force" by the Sunday Times, author, designer and marketer Garreth van Niekerk is a contributor for Linearity in Johannesburg.