:quality(75))
:quality(75))


:quality(75))


Brushes are one of the most essential tools in the graphic designer toolbox. So let’s brush up on Adobe Illustrator’s brushes: how to use them and how to incorporate Vectornator.
At Vectornator, we know that brushes are a big deal.
We’re devoted to making sure you understand our software and that it’s easy to use. But if you’re a graphic designer, you’re likely not using just one software all the time.
Some are easier to use than others, and the Adobe Creative Cloud is known for being a bit complicated to learn for beginners. That’s where we come in.
We’re experts in making design software easy to use, and we’re here to help you understand how to use Adobe Illustrator’s brushes (and our own) and give you some design tips along the way.
The Adobe Creative Cloud is a group of applications created by Adobe that can be used for graphic design, video editing, photography, and more. The Creative Cloud can be a great option if you’ve got a creative project or personal project to complete, but it does come with a pretty hefty price tag.
Vectornator, on the other hand, is free. No subscription is required, and no features are hidden behind a paywall.
But, we recommend you try out multiple platforms when you’re starting out as a professional designer. There are tons of free and paid platforms out there to pick from.
Adobe Illustrator and Vectornator can also work together for a design project. If features are missing from one that the other provides, you can simply export your file from one into the other.
You can find quality brushes for design projects on both platforms. It just depends which platform you prefer working in for your design project.
This article will discuss both Illustrator and Vectornator brush styles and how you can use them to create a digital design.
First, let’s talk about the different types of Illustrator brushes and what they work best for.
Jumpstart your ideas with Linearity Curve
Take your designs to the next level.
Types of Illustrator brushes
Adobe has tons of creative Illustrator brushes and different brush sizes and brush shapes available to create your digital designs.
There are five main brush types in the Illustrator brush pack, plus you have the ability to create your own custom brush.
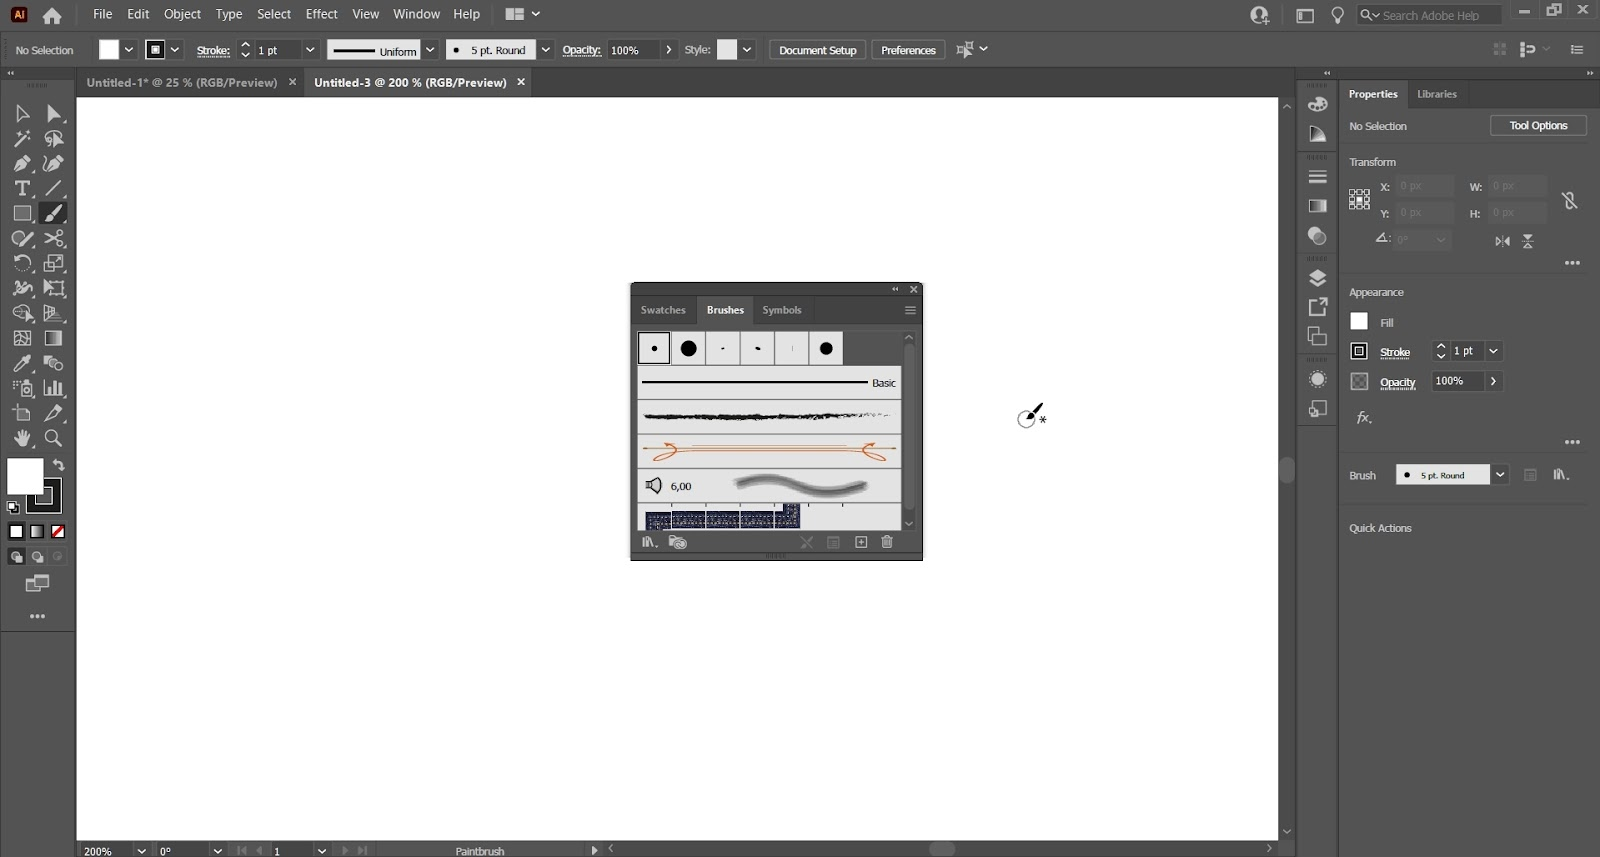
For the sake of this article, we will be focusing on the five main brush types you can use to create brush artwork. We’ll go over the basics of brushes and how each style of designer brush is different.
Calligraphic brush
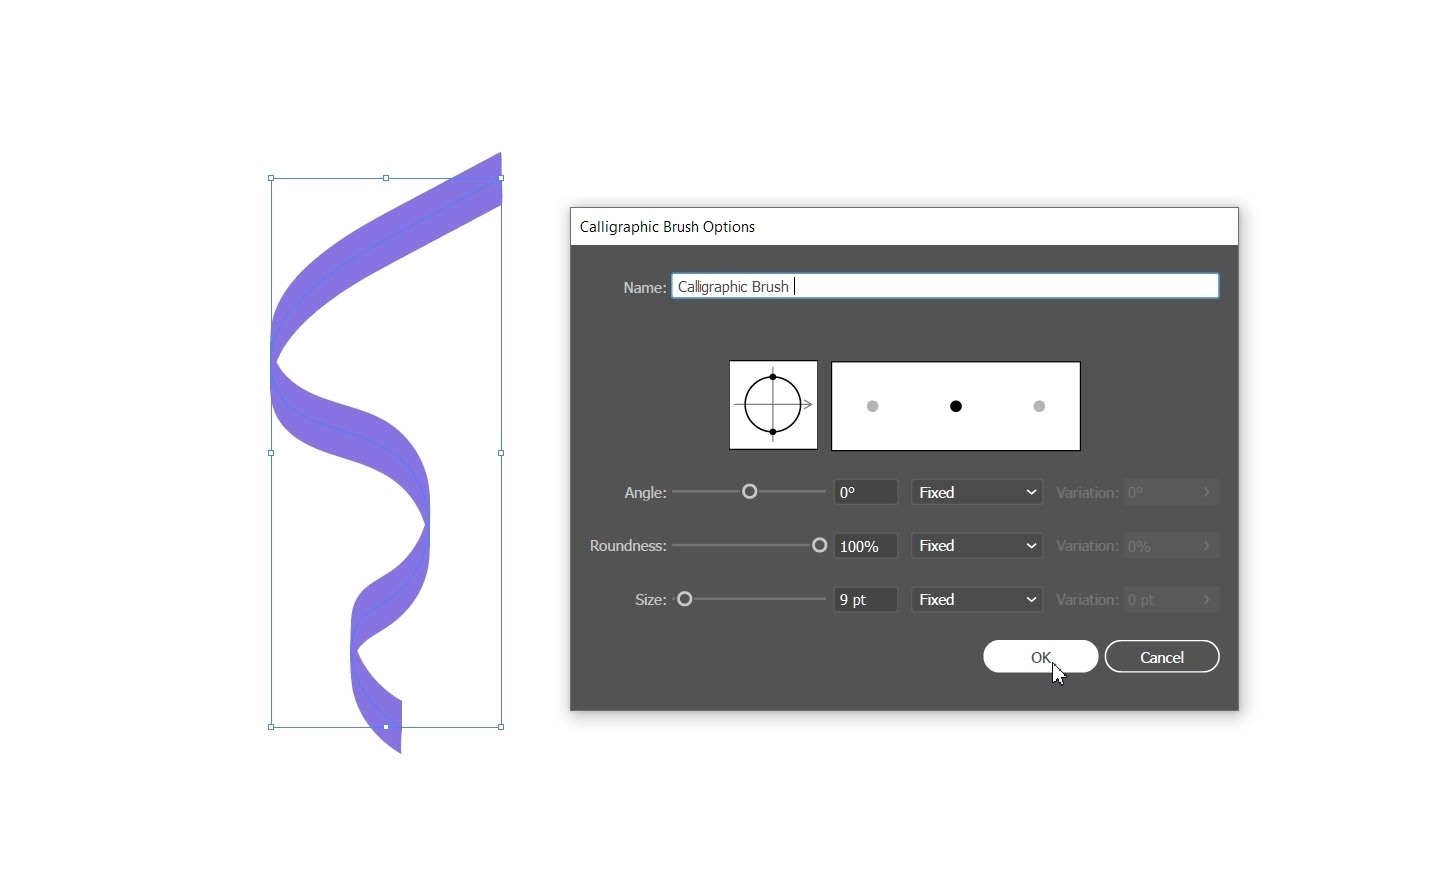
Adobe’s calligraphic brush allows you to create brush strokes that look similar to the stroke of a calligraphy pen.
Calligraphy is the art of writing out words and letters. You can learn more about calligraphy in our guide to hand lettering.
Illustrator’s calligraphy brushes have an angled point, and the brush size can be expanded or narrowed depending on your preferences. Calligraphy brushes are perfect for creating beautiful swooshes and refined designs.
Scatter brush
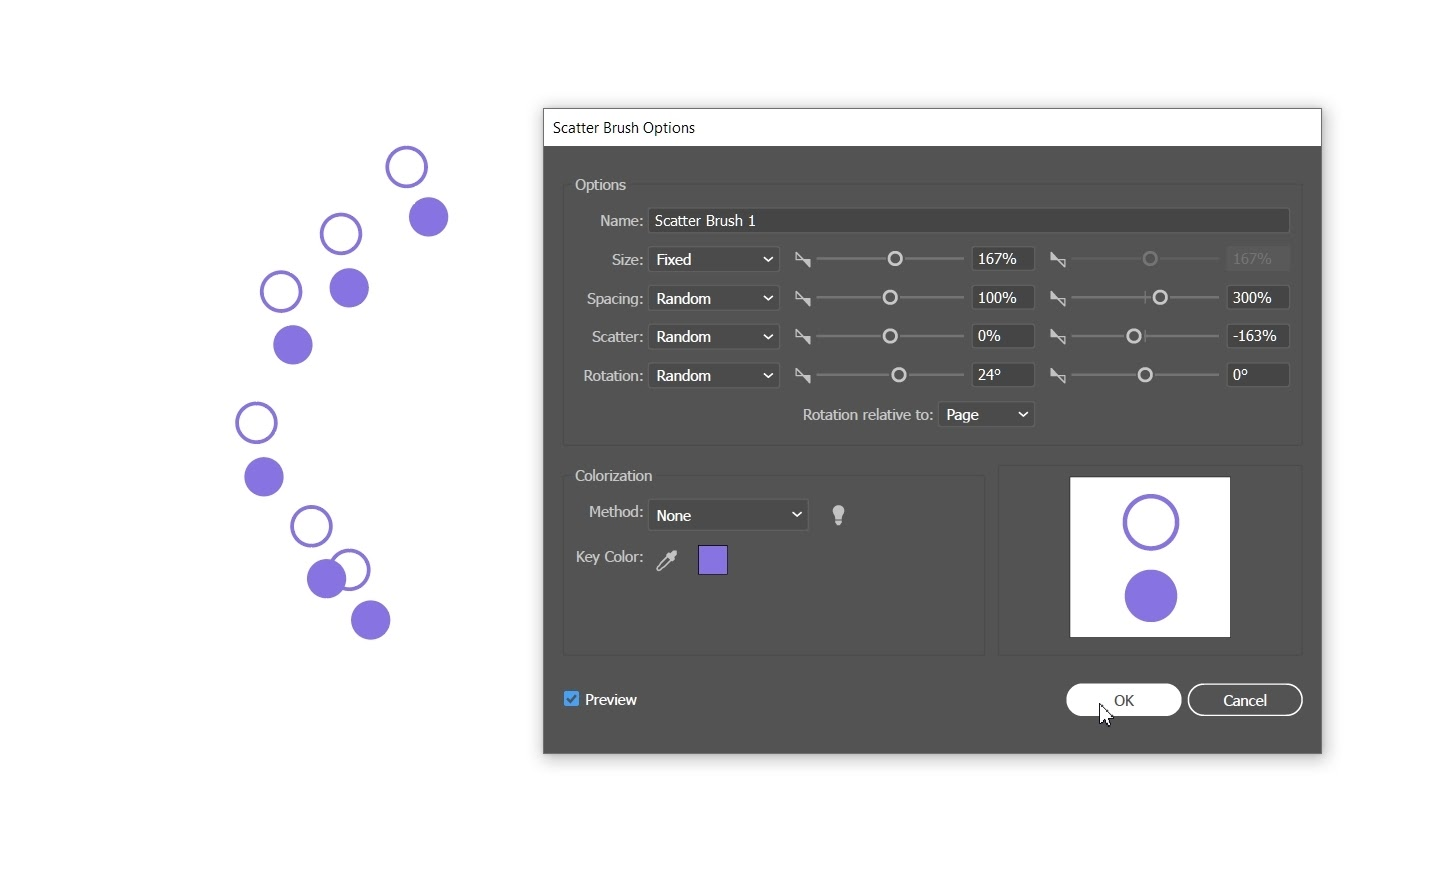
Adobe’s collection of scatter brushes is pretty impressive. It’s one of the more creative illustrator brushes.
This brush will disperse copies of an object (like a leaf or a bug) along a path. This can create a unique pattern and is perfect for edging a design or creating borders.
Again, the brush size can be altered to your liking.
Art brush
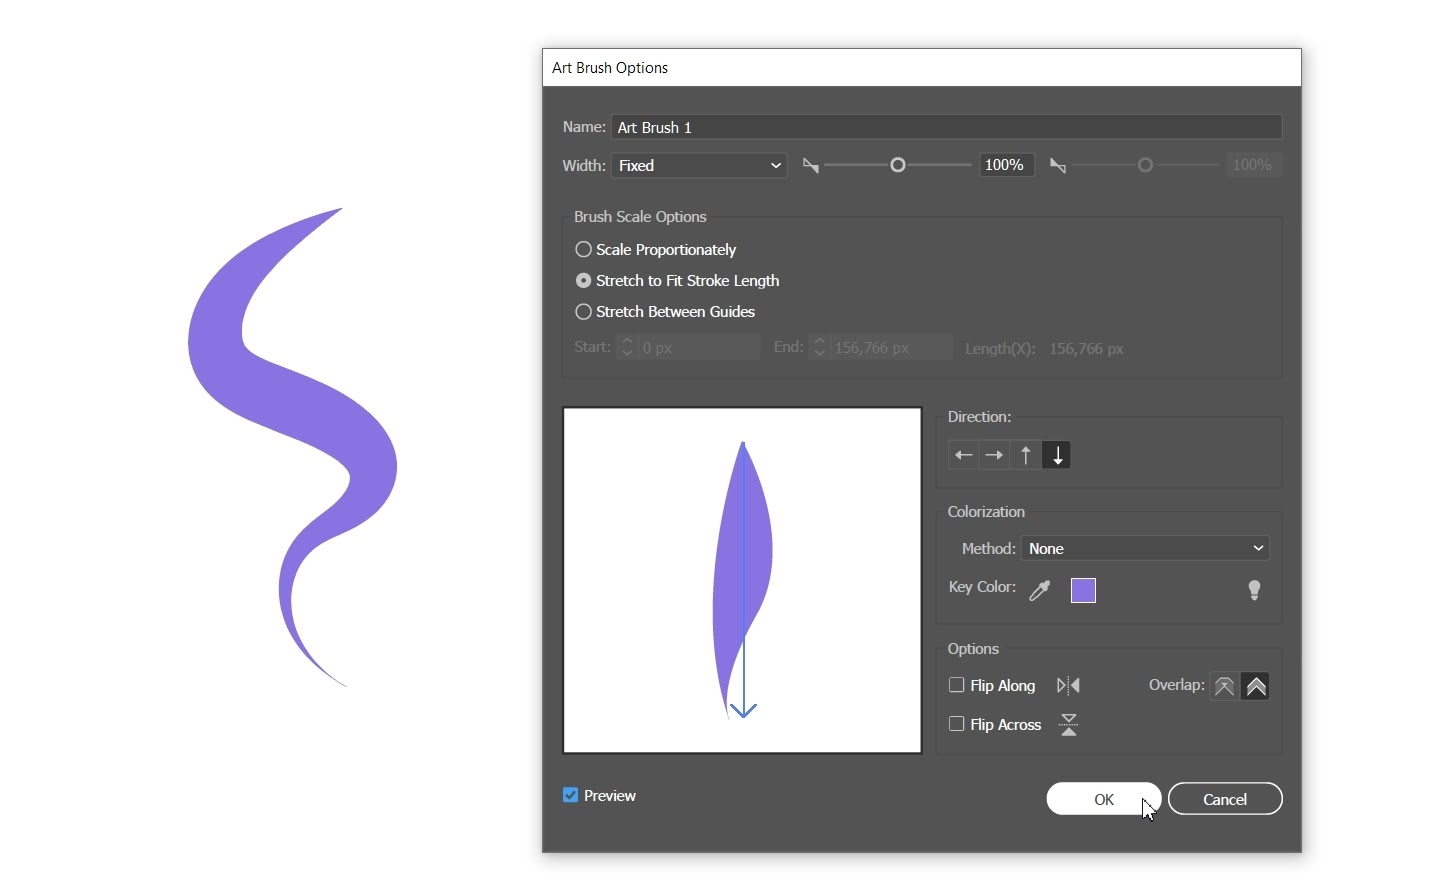
The Illustrator art brush pen allows you to stretch a brush shape or object shape and disperse it evenly across a path.
The art brush options with Illustrator are endless, and art brushes or pattern brushes are both fun ways to create dimension in a design.
Pattern brush
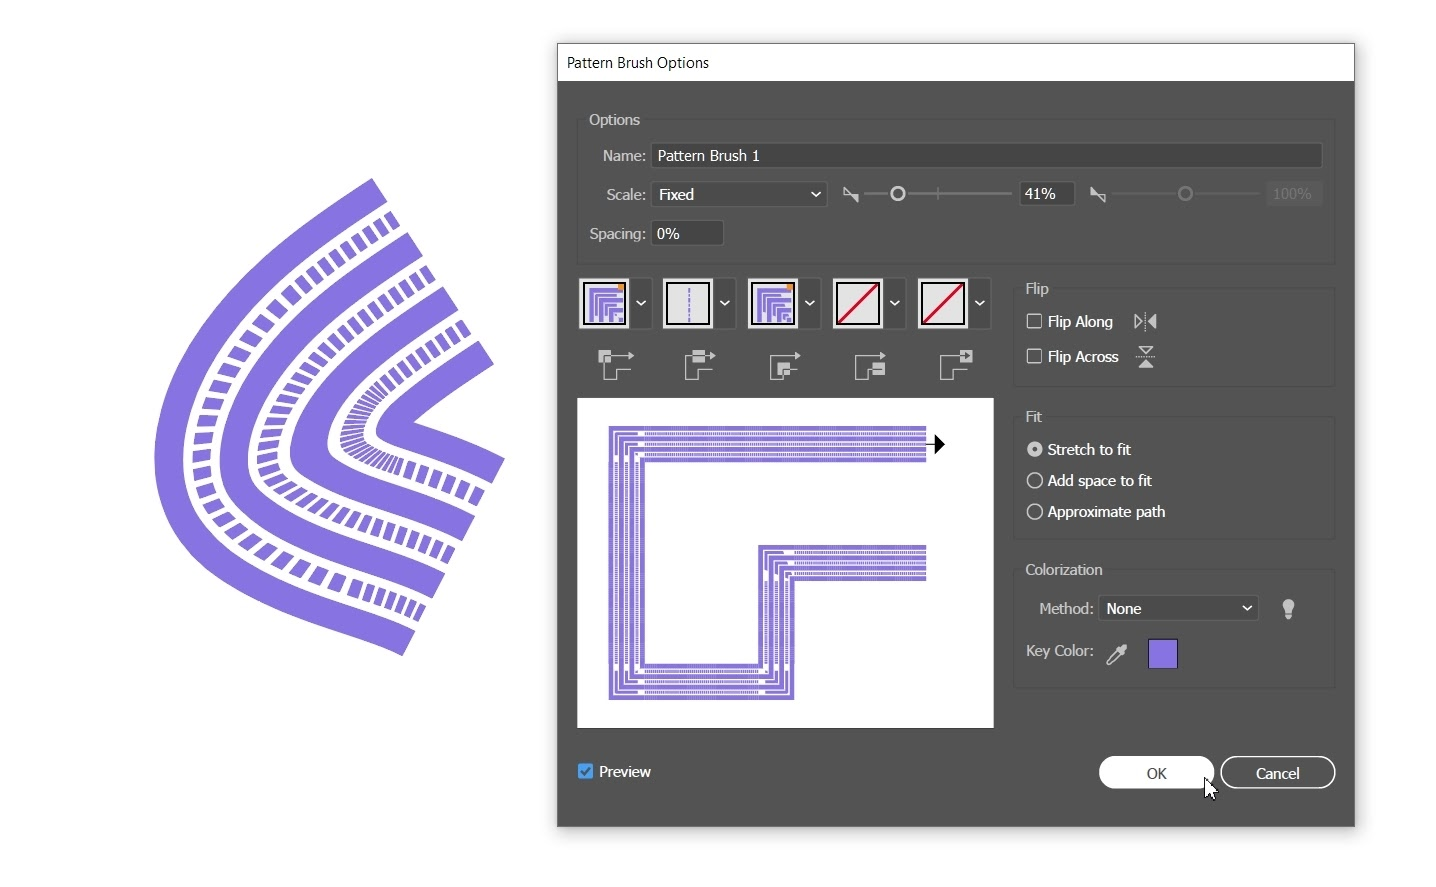
With Illustrator’s pattern brush, you can create a pattern of individual tiles that will repeat along a path. This can include up to five tiles.
Illustrator’s pattern brush options are popular among designers. They’re similar to scatter brushes and can be used to create edges or borders in a design.
Floral pattern brushes are especially popular and fun to use. Pattern brushes can be a fun addition to your brush kit and design project.
Bristle brush
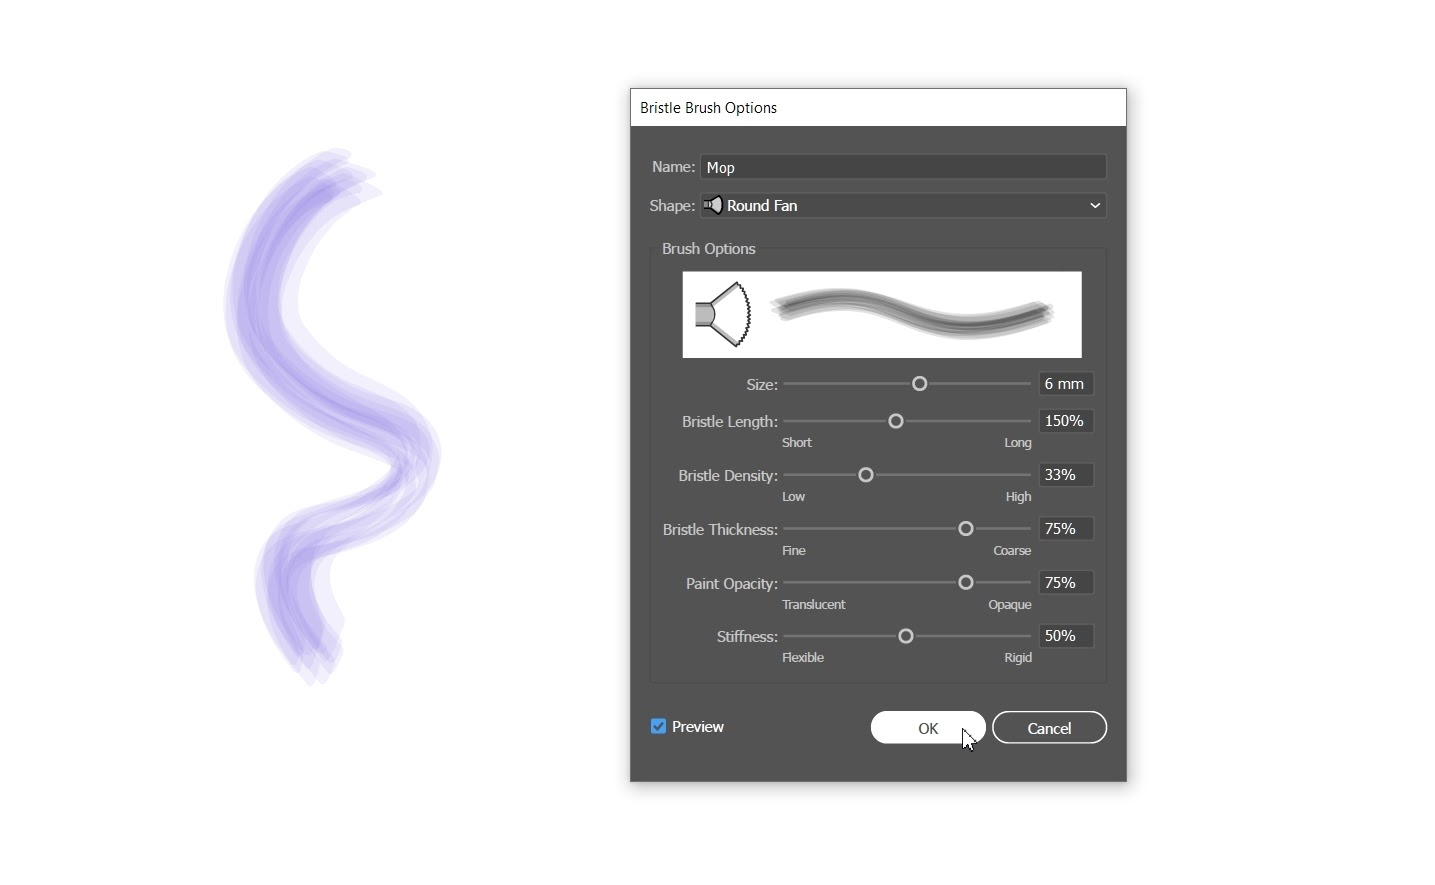
Illustrator’s bristle brush enables you to create bristle brush strokes that have the appearance of a brush with bristles like you would see with a paintbrush.
With the bristle brush, you can simulate the look of paintings with a natural and fluid brush stroke. You can also mimic watercolor brushes with the bristle brush settings.
Watercolor designs are particularly popular this year and can make your brush artwork super trendy.
The Bristle brush options in Illustrator allow you to select bristle brushes from its library or create your own custom brush (choosing from round, flat, or fan). Plus, you can set your options how you like them, like the brush length, opacity, and stiffness.
Now that you’re familiar with Illustrator’s brush pack let’s learn how to use them.
Enhance Your Designs with the Brush Tool
Unlock the full potential of Linearity Curve's brush tool. Learn how to bring your designs to life with our step-by-step guide.
How to use Adobe Illustrator brushes
Using the Creative Cloud can be intimidating for beginners, but you’re not alone. We’re here to help.
We’ll teach you how to use brushes in Adobe Illustrator and give you some pro design tips for your creative project.
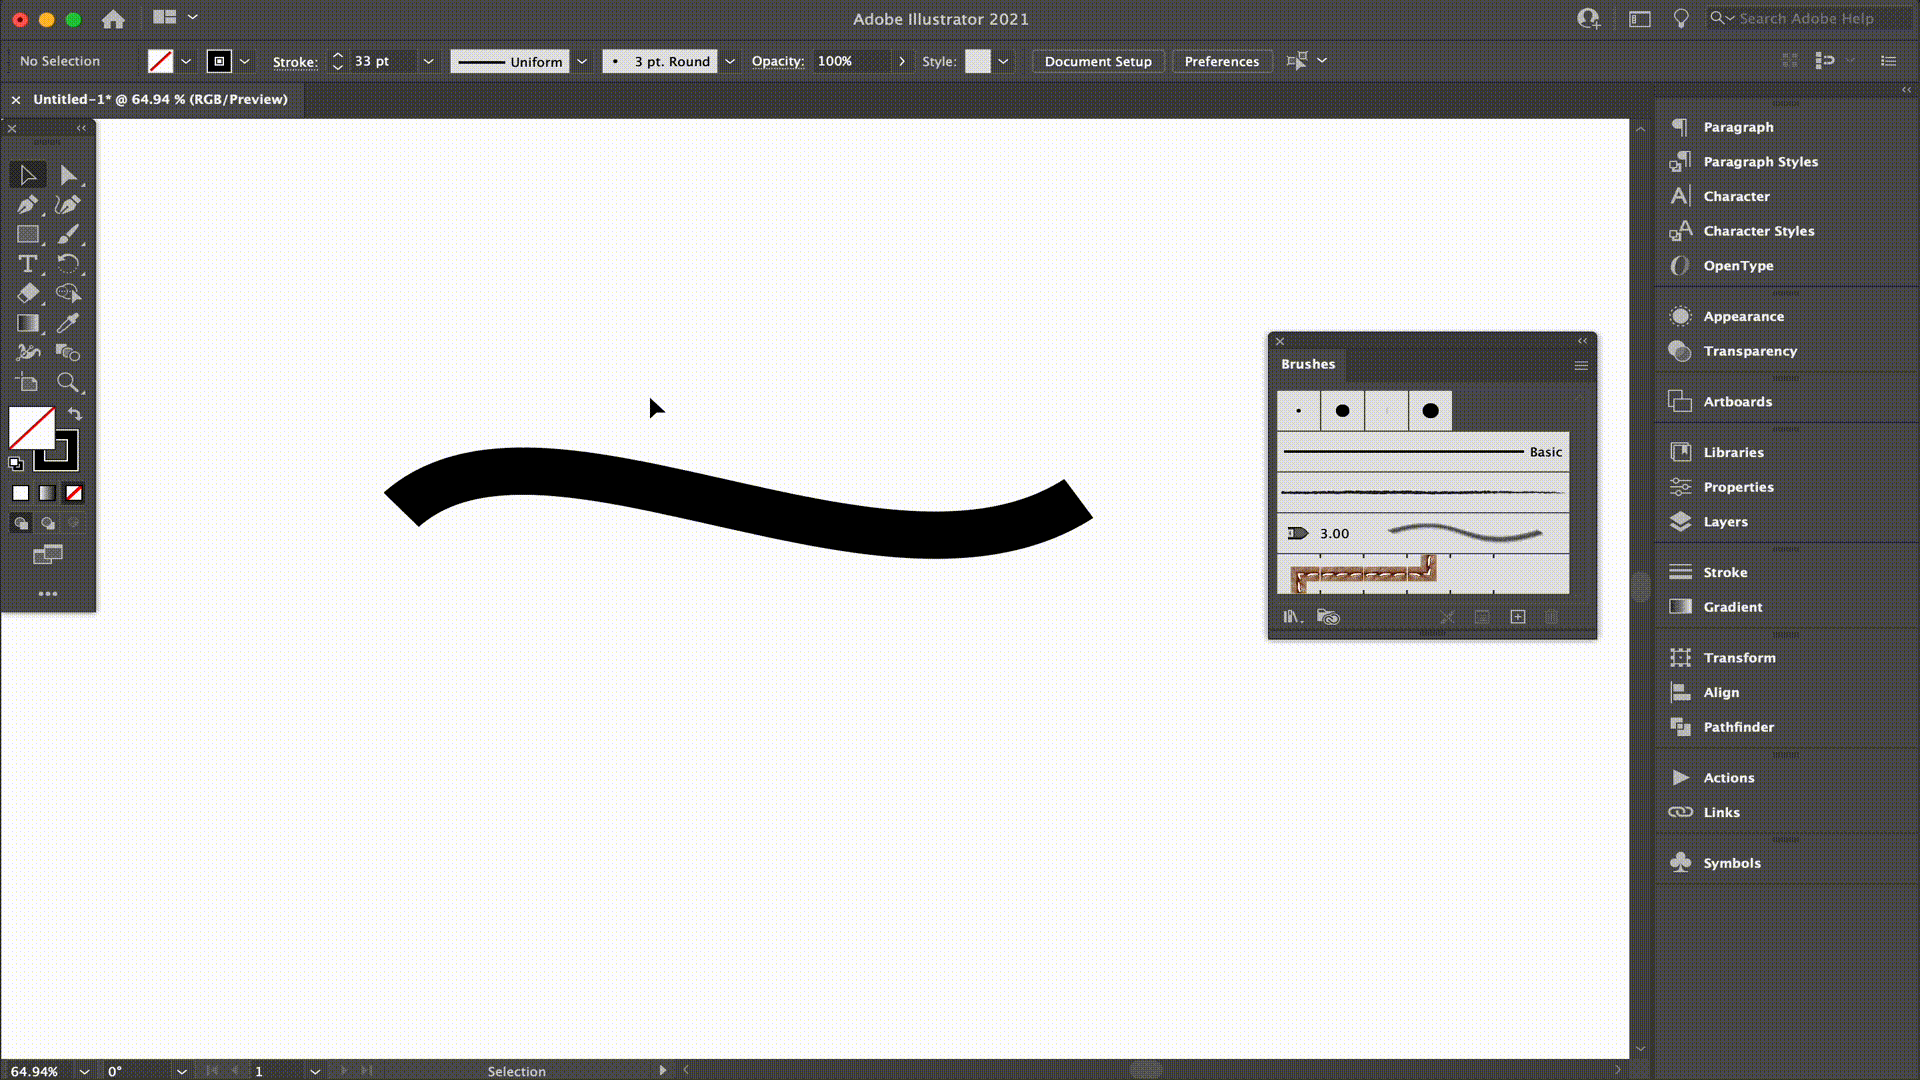
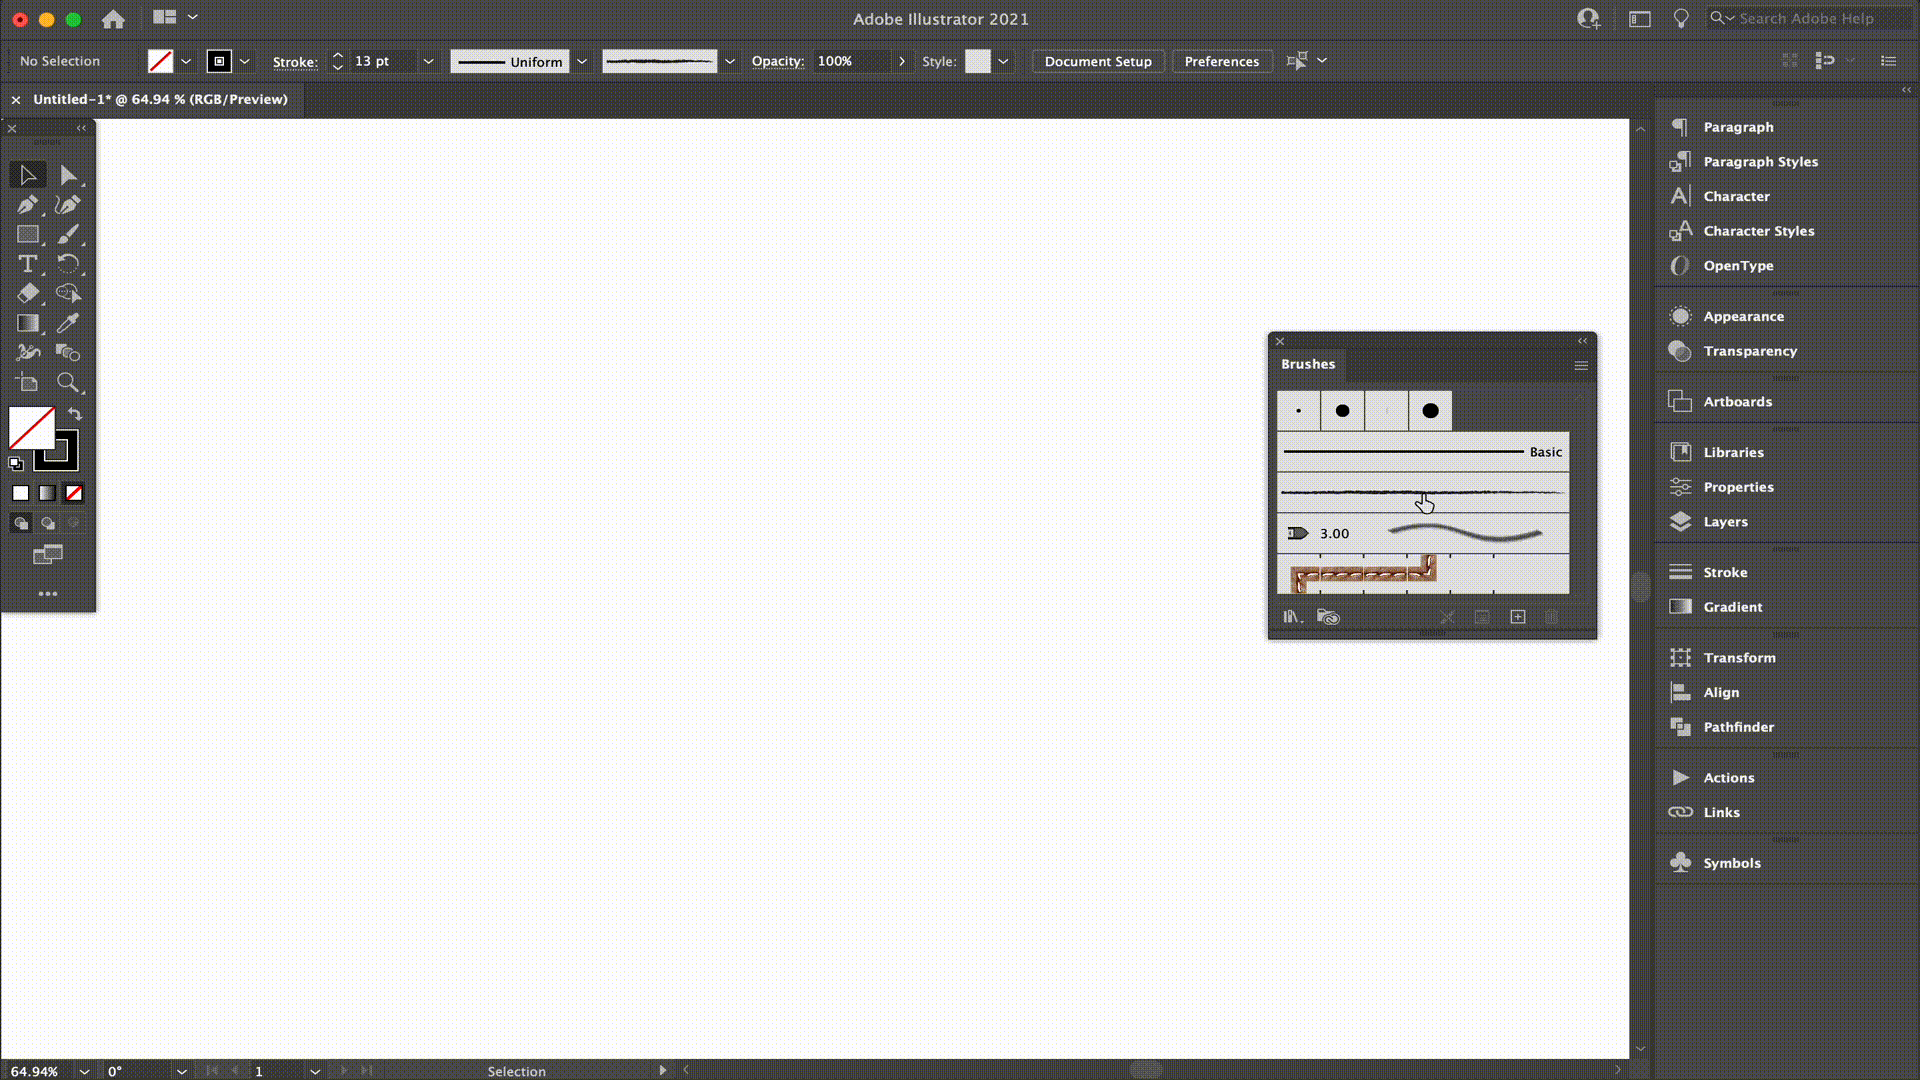
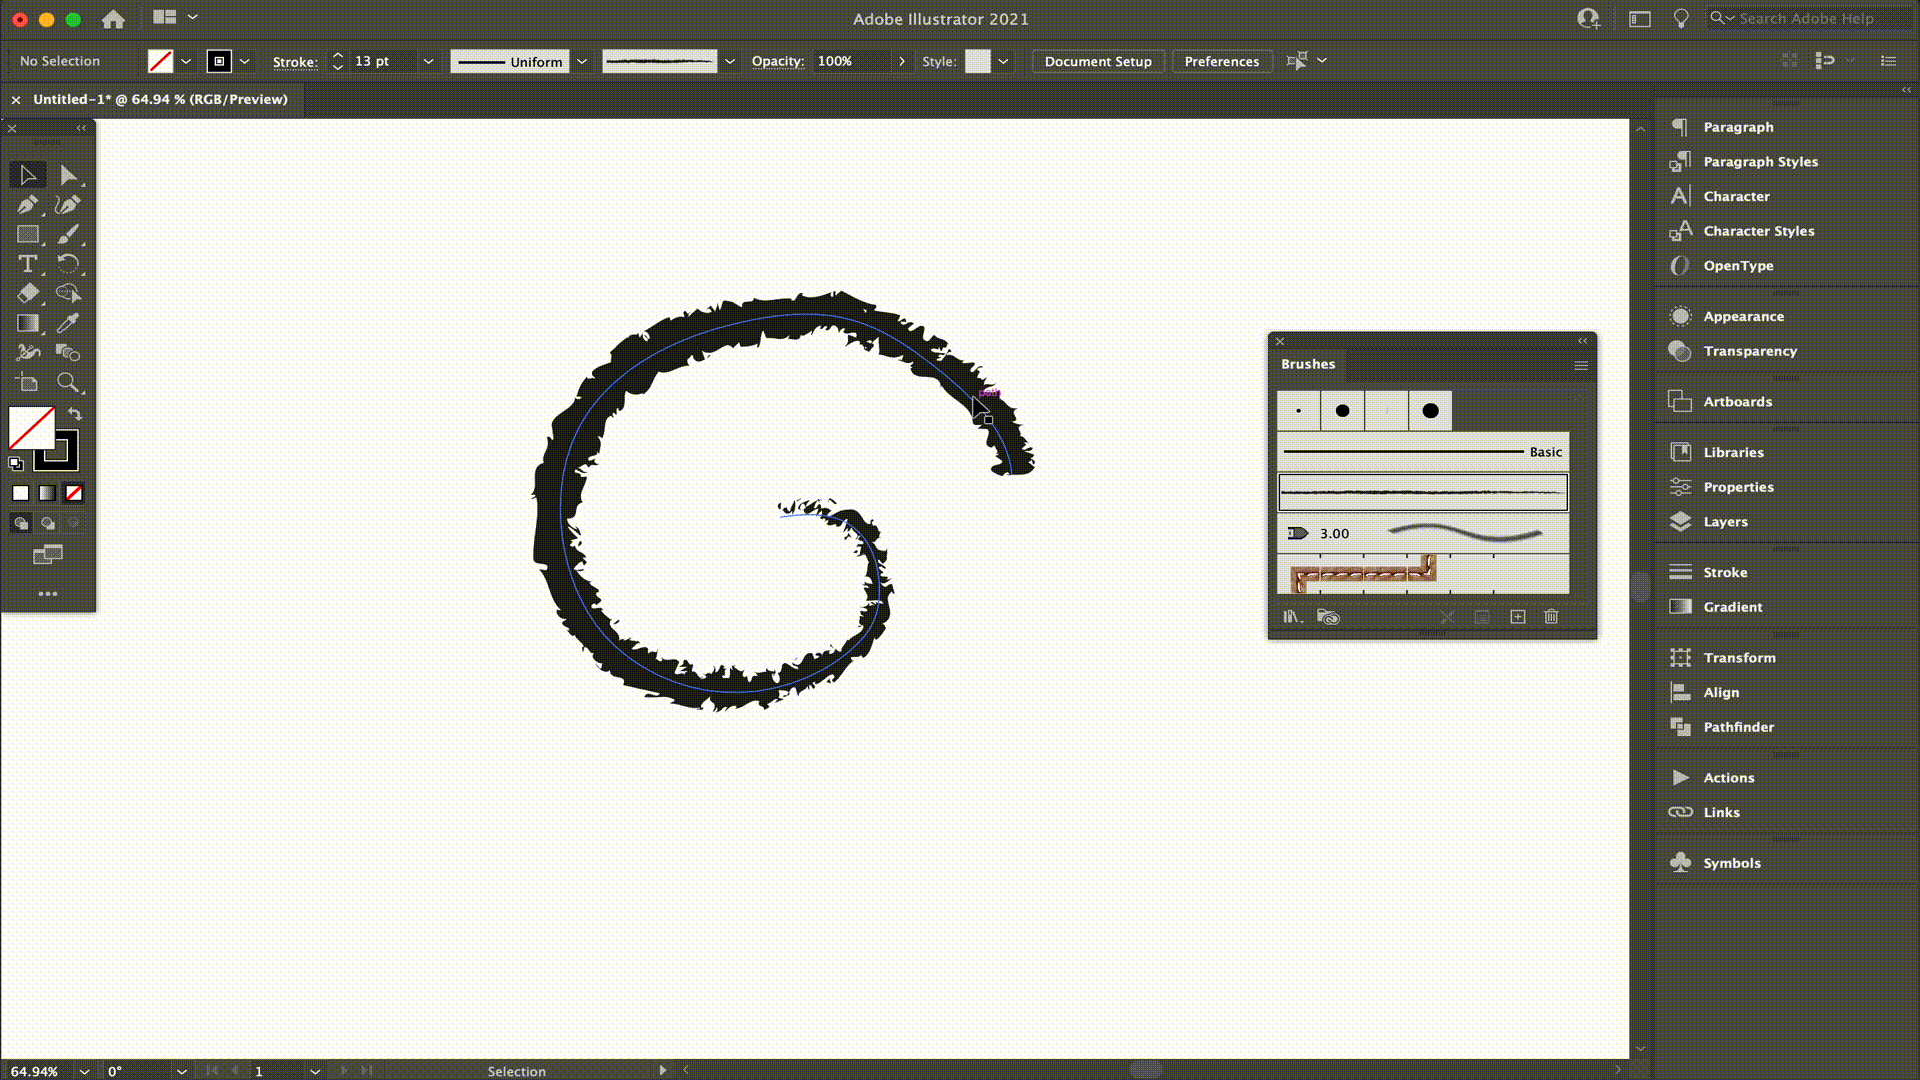
The most basic of basic brush tips, let’s talk about how to make a brush stroke.
You can create brush strokes to a path using Illustrator drawing tools such as the Pen tool, Pencil tool, or basic shape tools.
To do this, you should:
- Select the path, then pick a brush in the brush panel, library, or the Control panel.
- Drag a brush on top of the path. (Note: If the path has brush strokes applied to it already, the new brush will replace the old brush.)
Remove brush strokes

Okay, now you know how to create a stroke, so let’s talk about removing a brush stroke you created either by mistake or as practice.
- First, select the brushed path you want to remove.
- In the brush panel, select ‘Remove Brush Stroke.’
- Alternative method: Select the ‘Basic’ brush from the control panel or brush panel.
Voila! Now you can comfortably make mistakes in your brush designs and know how to remove them.
Let’s get into some of the more nitty-gritty details of designing with brushes.
Draw paths while applying brush strokes
You’re familiar with creating brush strokes now, so let’s get into some multitasking tips.
If you want to create a path while simultaneously applying a brush stroke, follow these steps.
- First, select your preferred brush in the brush library or the Brushes panel.
- Then, select the Paintbrush tool.
- Position your pointer right where you want the brush stroke to start and then drag it in your desired direction to create a path. You’ll notice a dotted line will follow the pointer as you drag.
- Depending on whether you want an open path or closed shape, do one of these two things:
- For an open path, you can simply release your mouse button when the path is in your desired open shape.
- For a closed shape, you can hold down the Alt key on Windows or the Option key on Mac as you drag. You’ll notice that the Paintbrush tool will display a small loop. Then, release your mouse button (while still holding down the Alt or Option key) when you want to close the shape.
Illustrator will establish anchor points while you draw. These points are determined by the length and complexity of the path you draw as well as the Paintbrush tolerance settings you select.
Change the shape of a brushed path
To change the shape of your brush path, simply follow these steps:
- Select the path.
- Then, position the Paintbrush tool on the path, and drag until your path is the desired shape.
Brush tool hacks
Illustrator has lots of options and hacks for the paintbrush tool. Let’s talk about what they are and how to use them to your advantage.
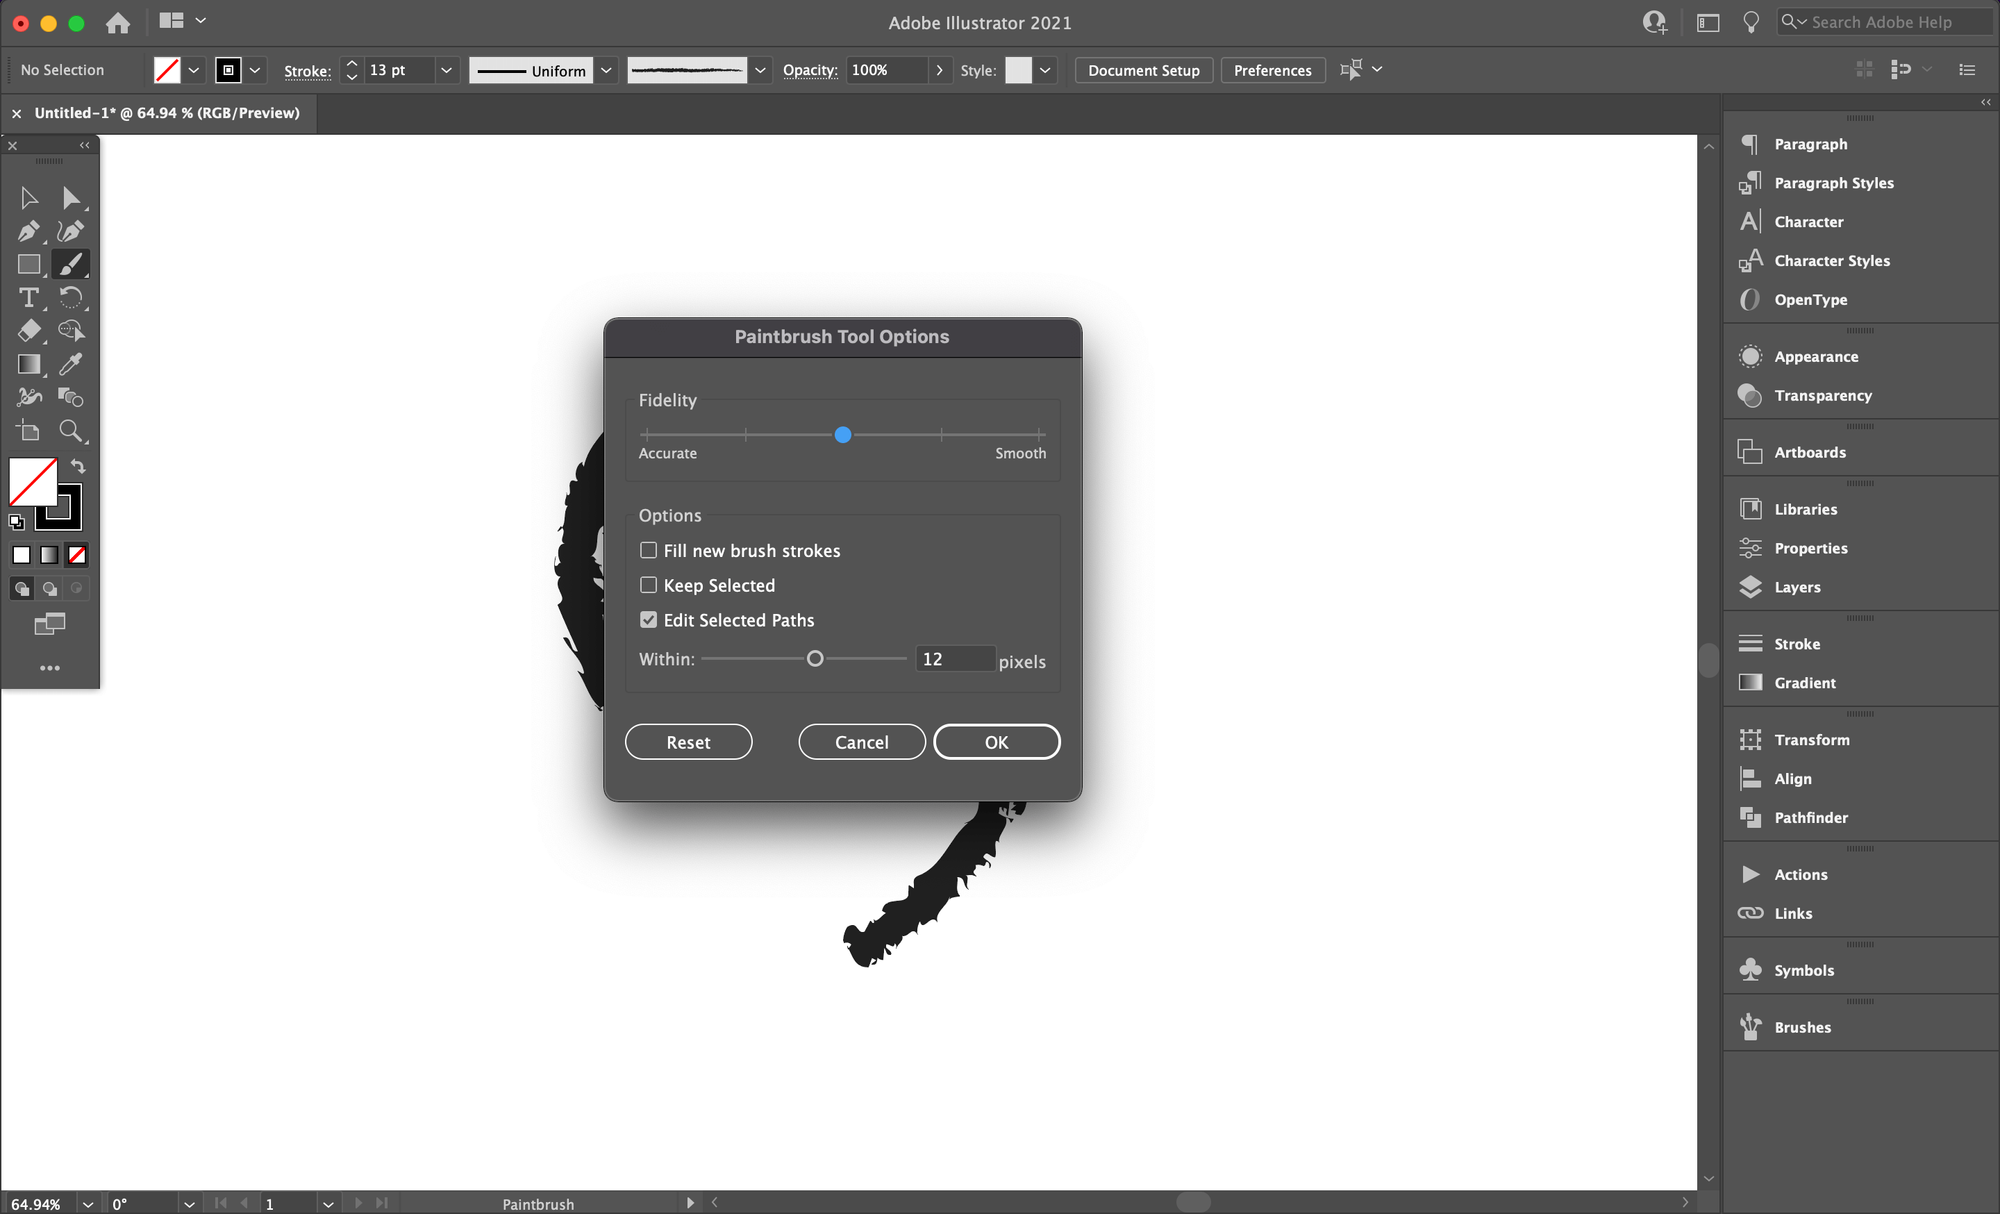
You can double-click the Paintbrush tool to enable these tools:
- Smoothness: Smoothness determines the amount of smoothing that Illustrator will apply. Smoothness can range from 0% to 100%, and the higher the percentage, the smoother the path you draw will be.
- Fidelity: The Fidelity tool controls how far you need to move your mouse or stylus before Illustrator adds a new anchor point. Fidelity can range from 0.5 to 20 pixels, and the higher the value, the smoother and less complex the path you draw will be.
- Fill New Brush Strokes: This tool automatically applies a fill to any path you draw. If you often draw closed paths, you might want to enable this.
- Keep Selected: The keep selected tool will determine whether Illustrator continues to select your path after drawing it.
- Edit Selected Paths: The edit selected paths tool will determine whether you can change an existing path using the Paintbrush tool or not.
- Within: [x] pixels: This tool determines how close your stylus or mouse needs to be to a path in order to edit it using the Paintbrush tool. This option is only available when the Edit Selected Paths option is selected.
With these tips, you should be able to make each brush stroke your own in Adobe Illustrator!
But Illustrator isn’t the only platform out there that offers brushes. Don’t forget to shop around for other platforms that can do the same thing.
:quality(75))
:quality(75))
Try Out Vectornator Brushes
There are tons of graphic design programs with great options for raster-based art brushes, but it’s harder for designers and illustrators who want to work with vector brushes to find a good tool.
We put the vector in Vectornator with our brush sets and have great brush options for designers who like to work with vector brushes.
Check out this video all about Vectornator brushes.
We’re obsessed with updating our software to improve every aspect of our design process. In our 4.4 update, we made some significant changes to our brush tool.
In Vectornator 4.4, all brush strokes are vector paths instead of vector shapes. The paths you create with Vectornator’s brush collection are incredibly customizable and easy-to-edit vector paths.
Check out our beginner’s guide to brush lettering to learn all about using Vectornator to create lettering projects.
Customize your brushes with Vectornator
With Vectornator, we have preset vector brush packs for beginners to start out with, but you can also create your own unique library of brushes specific to your projects and design preferences.
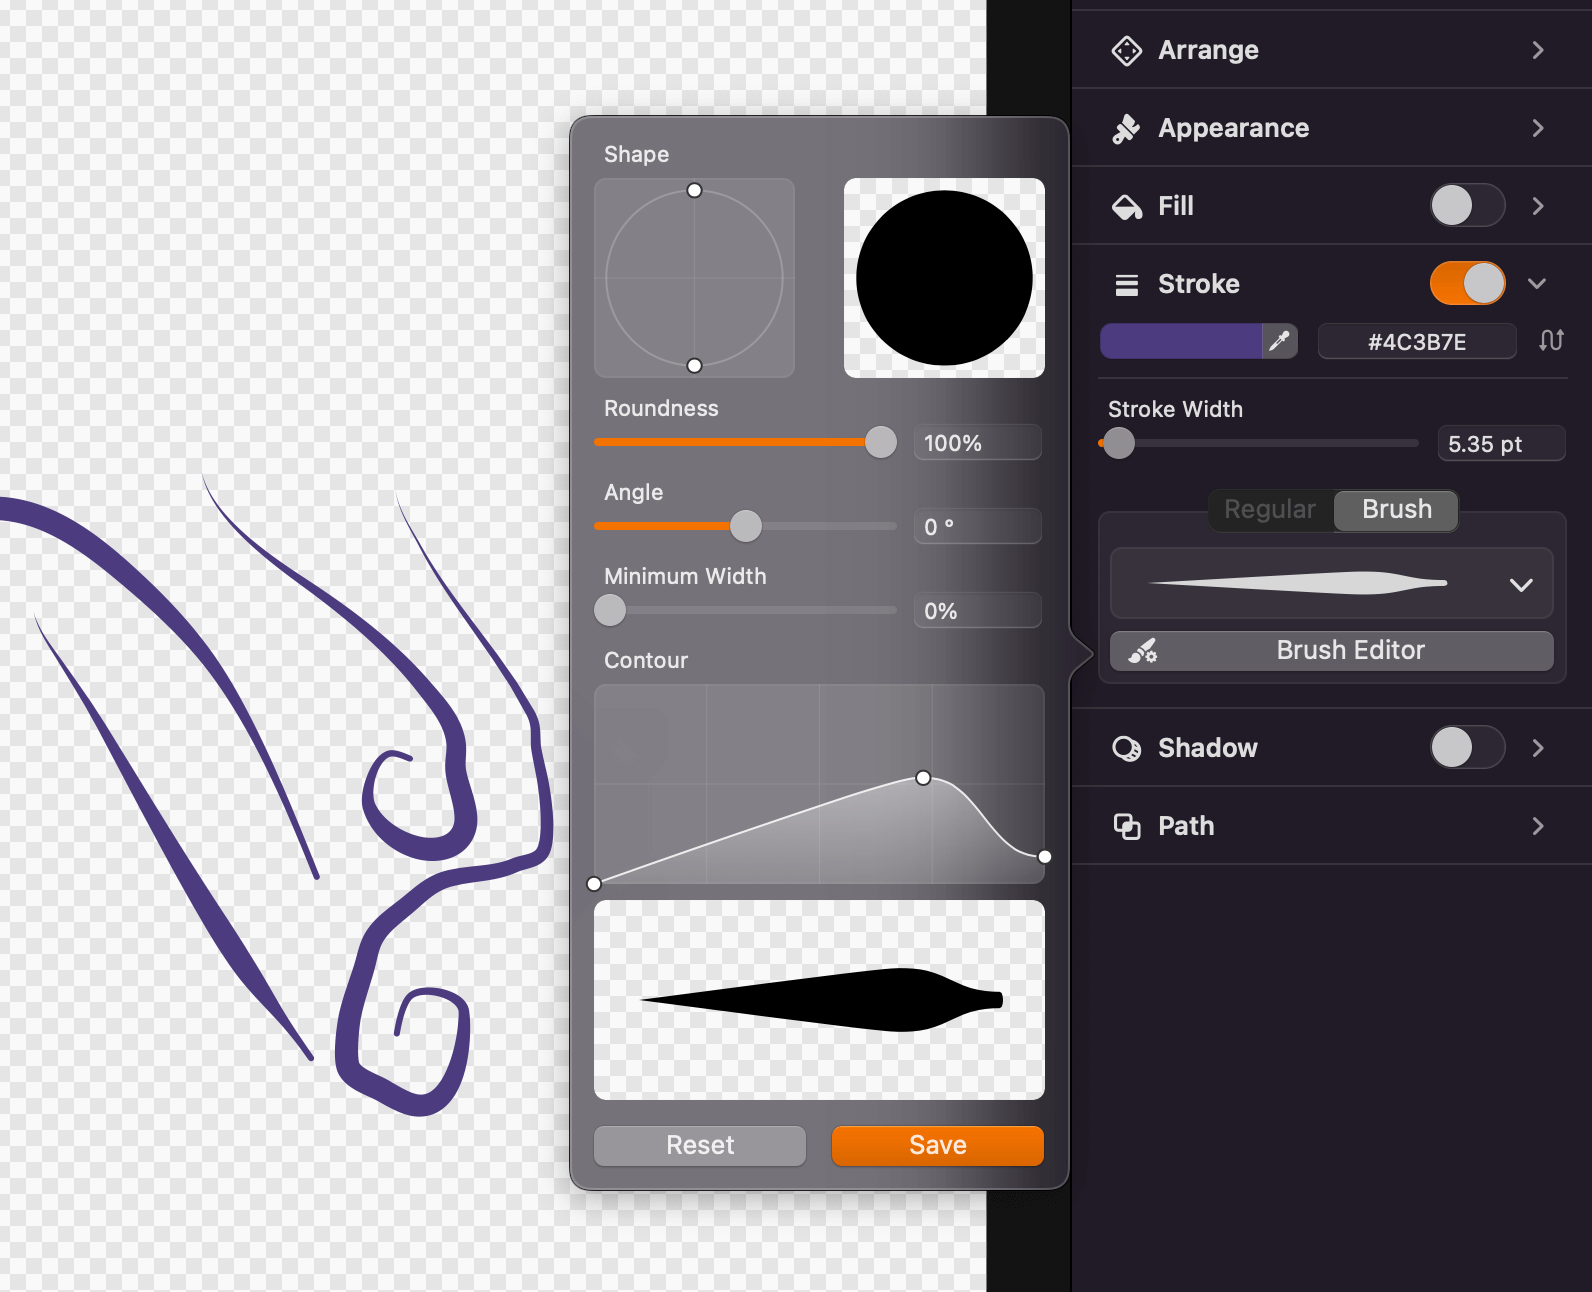
Our preset brushes are super similar to the brushes for Illustrator, with unlimited options for customization in your brush artwork.
Want your brush to have a jagged edge? Custom swoosh? Unique curl designs? No problem.
You can easily change your brush size, shape, contour, smoothness, and speed to create your brushes. Then, you can save this custom brush in the Brush Editor.
Then, you can save as many brushes as you want, and these brushes will be saved across all your working documents in Vectornator.
How to use Vectornator brushes
Create a brush stroke
There are two ways you can use brushes in Vectornator. You can draw them with the Brush Tool, or you can apply them to an existing path.
- To draw a brush stroke, simply tap the Brush icon in the Toolbar to select it or press B on the keyboard.
- Once you select the Brush Tool, the Brush Options will appear below the Stroke section in the Style Tab. You can use these settings to create new brushes, use Preset Brushes, and change the Brush Profile.
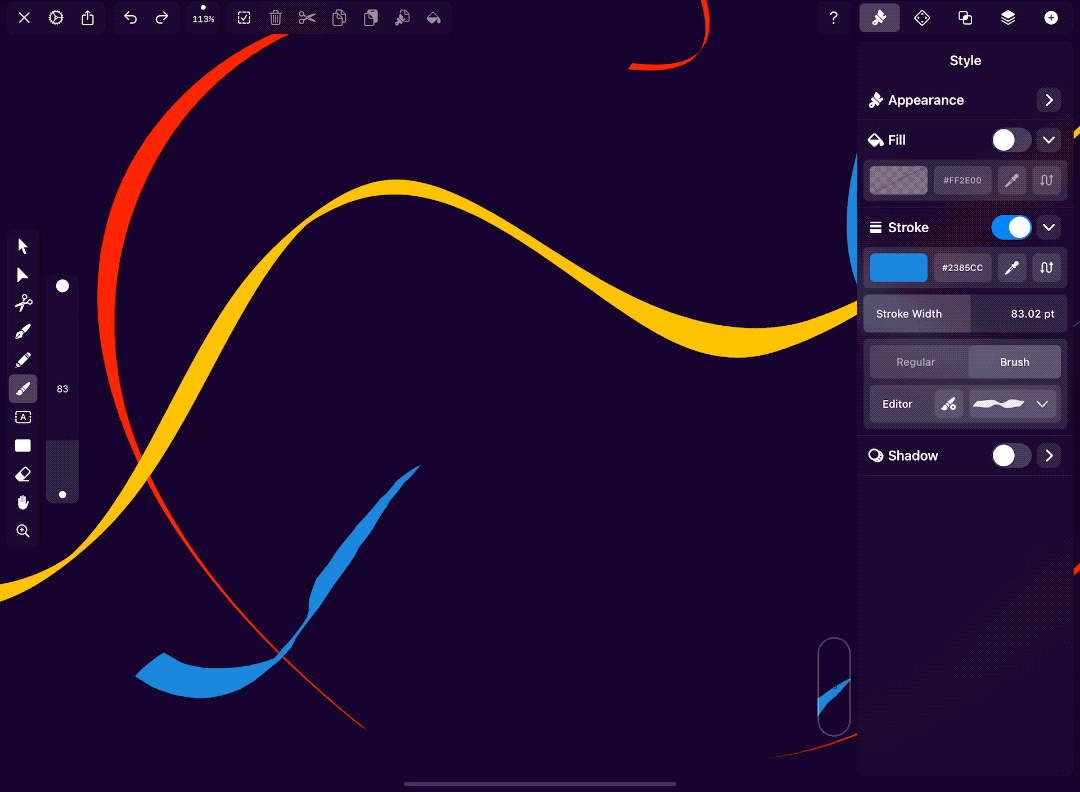
Setting the brush stroke width
The size of your brush stroke is entirely up to you! You can edit your brush stroke width by following these simple steps:
- Just to the right of the Brush Tool, find the slider tool. This will allow you to change the width of your brush.
- Move this slider up or down, depending on your preference. A lower value will make your brush thinner, while a higher value makes it wider.
Changing the path smoothness
Our brush tool works just like pen and paper, so you can freehand a new path just as you would on paper.
The vector path will follow the path you draw, with the accuracy depending on the smoothness value you set.
:quality(75))
:quality(75))
To change the Smoothness, open the Appearance section in the Inspector and follow these steps:
- Use your finger/pencil to adjust the Smoothing slider.
- If you want your brush path to follow exactly what you draw, you can set the smoothness to 0%.
- The higher this value, the more Vectornator will smooth your brush curves and simplify the path you have created.
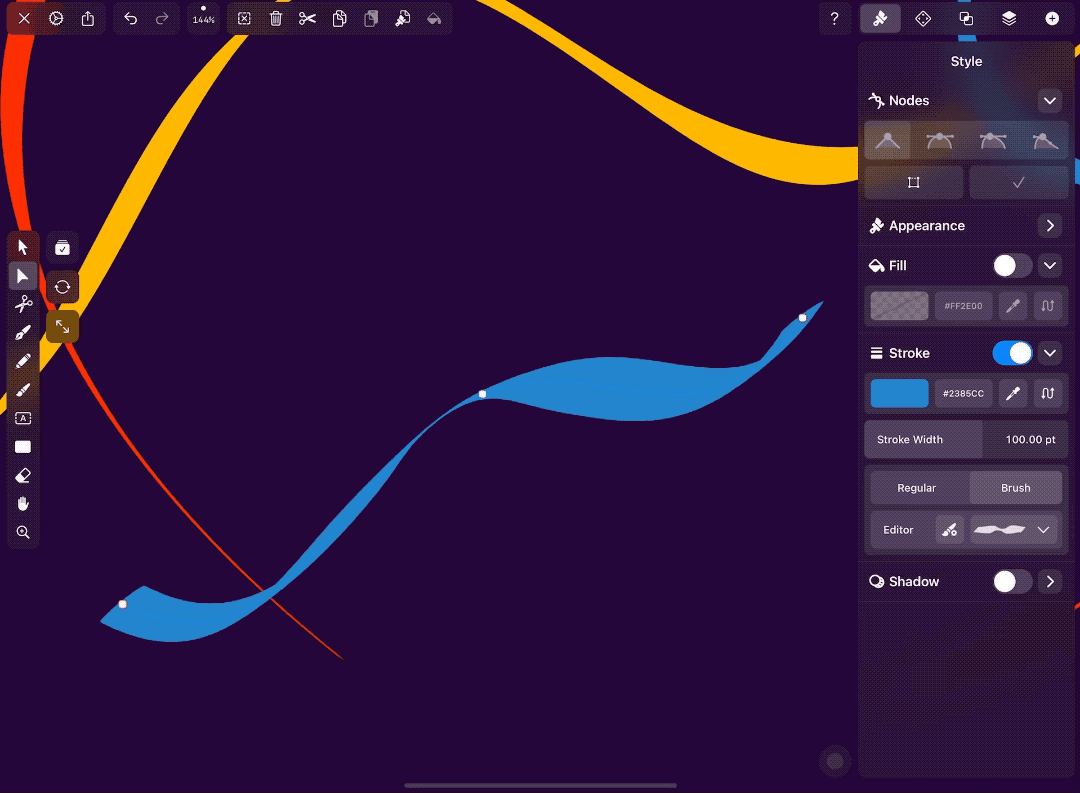
Edit the shape of a brush path
Our Brush Tool will create vector paths as you work, which means it’s super easy to edit and change them!
- You can change the position and type of the nodes along your brush paths just like you do with a typical vector path.
With our new update, brush strokes are now automatically deselected after you draw them, which helps you avoid making unwanted changes to your brushstrokes.
And if you change your brush’s color or any other property, those changes will affect only the next path you draw with the Brush Tool. But if you want to apply them retroactively, you can do that as well.
Ready to create brand assets that pack a punch?
Visit our Academy for free marketing design courses.
Congrats, brush expert!
You’re a brush expert, Harry!
By now you should be familiar with the type of brushes offered by Illustrator and Vectornator, their brush options, and how to use them to create design projects.
But you don’t have to pick between Illustrator or Vectornator for your creative project; we encourage you to try them and see what works best. Whether you use Adobe Illustrator, Vectornator, or both, we know you’ll create some beautiful digital illustrations.
We want to see your digital designs! Follow us on socials and mention us in any posts you make with Vectornator designs.
Go to Academy

Jumpstart your ideas with Linearity Curve
Take your designs to the next level.
Share this!
Ben Barnhart
Ben is a Content Lead for Linearity living in Berlin. His hobbies include board games, cooking, reading, and writing.