:quality(75))
:quality(75))


:quality(75))
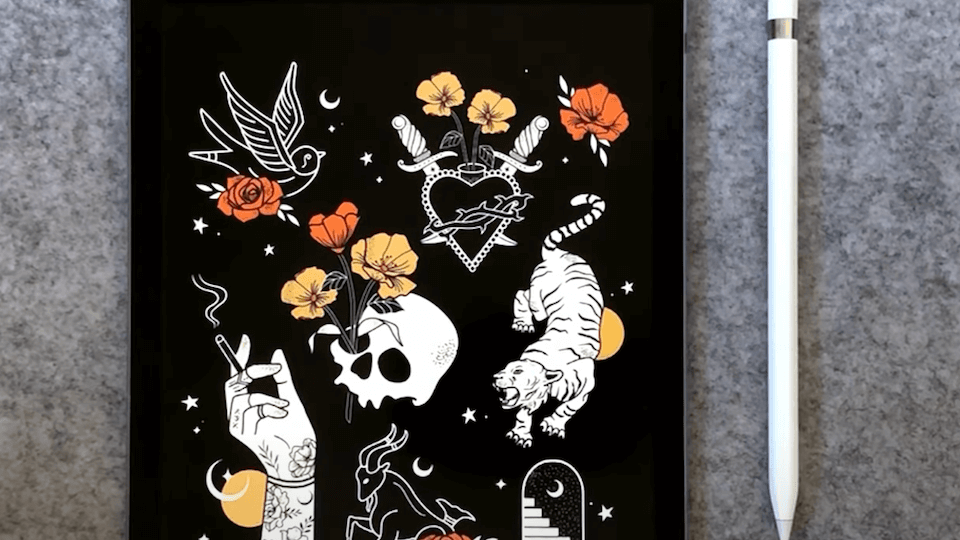
Have you ever wondered how to design your own tattoo flash sheet?
We collaborated with the amazing Sandra Staub for this tutorial so she can teach us how to do just that.
Her style is minimalistic, inspired by womanhood, nature, and many occult things, and we think that this aspect of her work makes it perfect for tattoo design. Today, she'll be creating a tattoo flash sheet using a few of her own sketches.
Jumpstart your ideas with Linearity Curve
Take your designs to the next level.
Since Sandra offers her illustrations to be licensed for tattoos, it makes sense for her to prepare them as flash sheets; and to create them with vectors, because then her client can scale them to any size they want their tattoo to be.

But even if you don't plan to sell your artwork as tattoos, flash sheets have a beautiful aesthetic which makes them perfect for so many other unique design projects, like posters, cards, books covers, and so much more.
This step-by-step tutorial will introduce to or remind you of the features, gestures, and methods needed to create a tattoo flash sheet with vector design. And better yet, Sandra Staub is going to give us an insight into her own creative process. So let's begin!
• How to set up your workspace: create a new canvas, guides, and add layers
• How to organize your canvas: import sketches, resize, and place images
• How to use the Pencil, Pen, Node, and Shape Tools
• How to use different gestures to improve and speed up your workflow
• How to use boolean operations
• How to create complex shapes
• A few tips about selling your tattoos
Before getting into this tutorial, you can check out some Inspirational Tattoo Ideas. It might be useful to know where tattoos originated and where they are now. Plus, we included some cool inspiration from different tattoo styles to get you started.
• iPad
• Apple Pencil
• Latest version of Vectornator
• Procreate (or any other sketching software, or paper & pencil)
Find your inspiration
Whether you're a beginner or a pro, finding the right references should be your first step.
Tattoo magazines, art books, Instagram, cultural symbols, and botanical drawings all make for a great source of inspiration.
Sandra loves getting inspired by other artists that create flash-sheet-inspired artwork. In particular, Daphna Sebbane, Lloyd Stratton, or Densha Tattoo are a few of her favorites. Check them out!
On the other hand, you can also get inspiration from photographs, old illustrations, or textile patterns.
You just need to follow two rules here: keep an open mind and don't make direct copies of other people's art.

Sketch your ideas
Once you've gathered your references, spend some time sketching and let the paper come alive.
Or in Sandra's case, let your imagination flow in Procreate.
Whatever idea you have, you can sketch it out or even finalize it in raster form, depending on what your process is. Sandra prefers to finish her illustrations in Procreate before vectorizing. But again, it's all up to you.
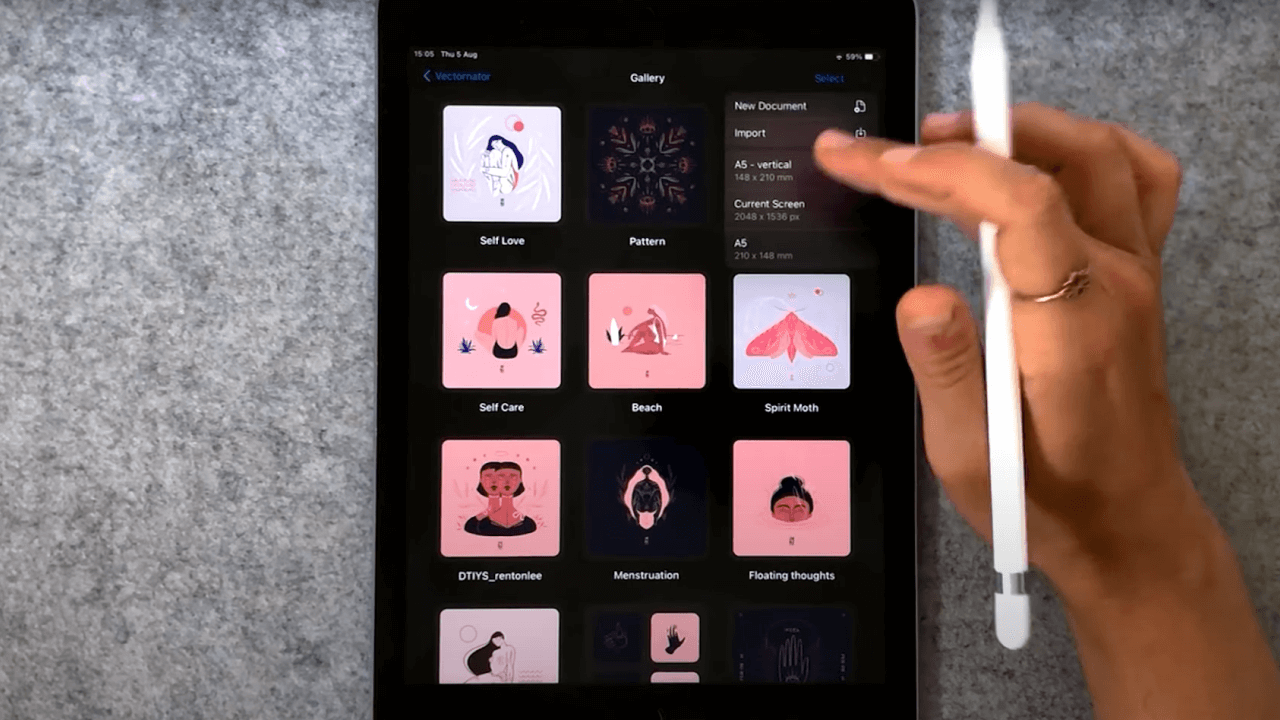
Create your canvas
Now that we're in Vectornator, the first thing you need to do is to set up your canvas.
In this case, Sandra picked A5 from the Paper Document Templates, because flash sheets make for great prints. Creating her project at this size makes it easy to instantly print it after it's completed.
Next, she switches to a vertical orientation by simply flipping the document with her fingers.
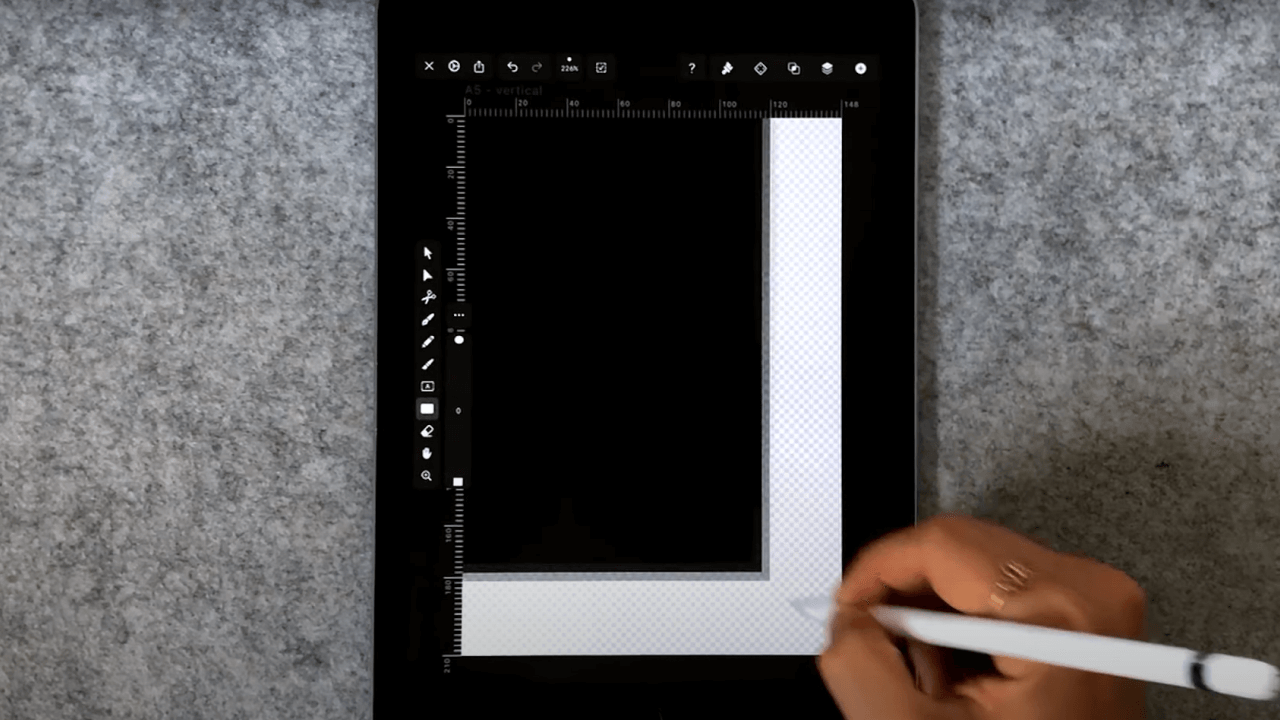
Add a background layer
Vectornator automatically starts with one layer.
To keep everything easy to find, give this initial layer a name like "Background."
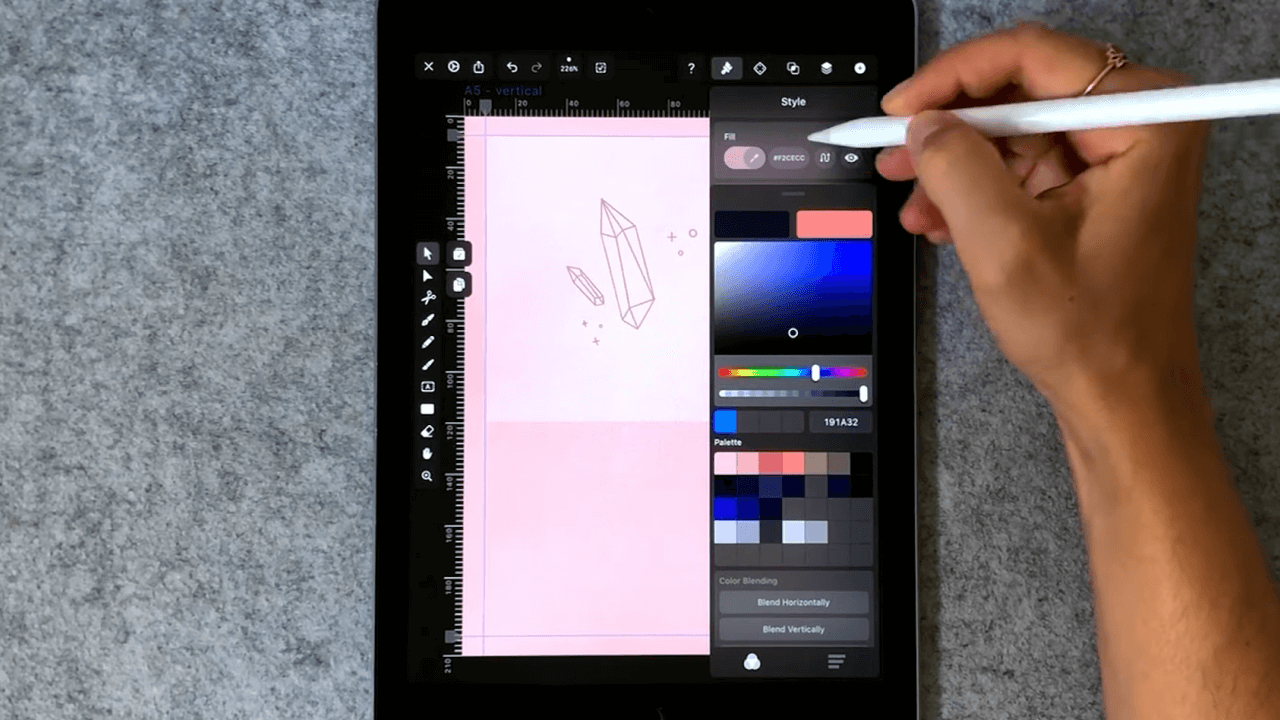
To give it personality, pick the Shape Tool and create a rectangle that covers your entire canvas. Change its color to #F2CECC (in the Style Tab) and then lock the background layer, since you won't be touching it anymore.
Create new guides
Next, add some basic guidelines on each side of your canvas by dragging your finger on the ruler.
However, a flash sheet is usually quite spontaneous and wild, so in order to preserve that, don't go crazy with this step.
Four simple guides along the x- and y-axis should do the trick! Just use these guides to create some margins—leave enough space on each side so your design won't get cropped during the printing process.

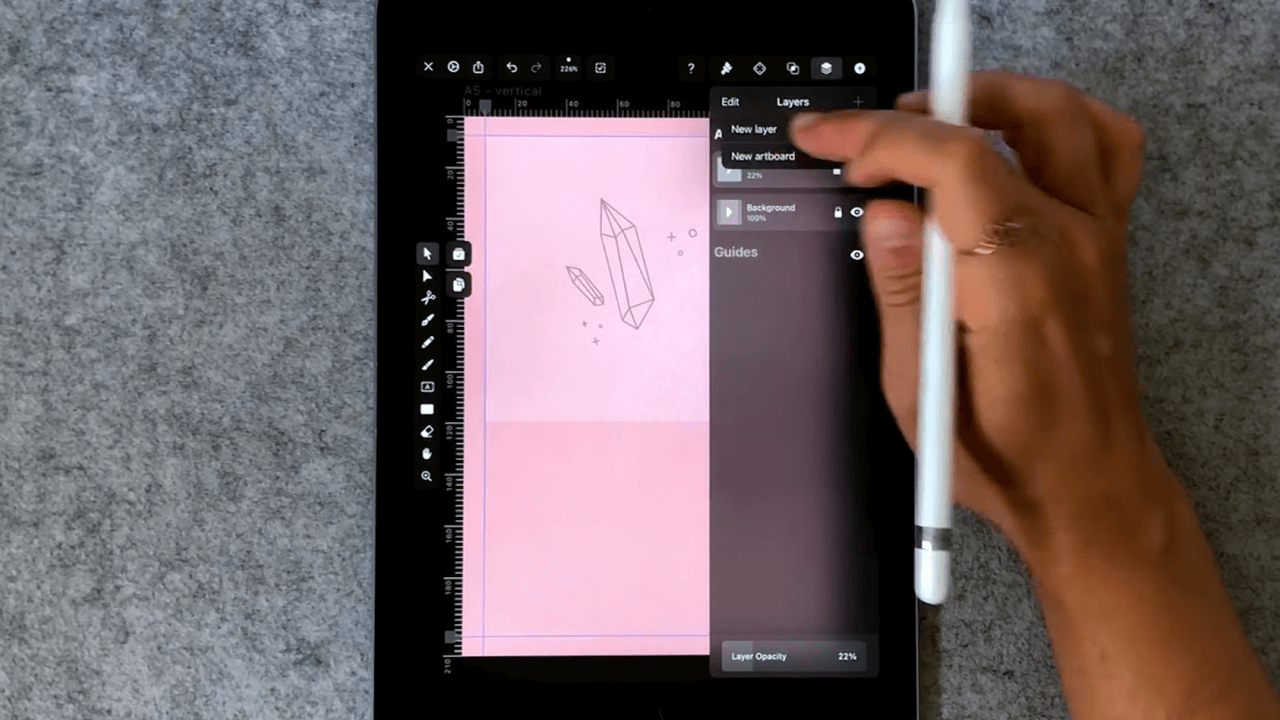
Add new layers
Be sure to layer up! They're free!
It always is a good idea to create a new layer for any major addition to your work. Sandra adds a new layer for each sketch, for example.
To create a new layer, tap on the plus button at the top right of the Layer Tab and then tap New Layer.
Import each sketch
After all this prep, it's time to transform your sketches into finalized vector designs.
Switch to the Library Tab to insert a photo of your sketch. Tap the image you want to import or drag & drop it onto the canvas.
Get creative with our ready-to-use templates.
Linearity Curve offers templates for every social media platform and various use case templates for posters, business cards, slides, app store screenshots, and more.
If you've worked in Procreate, export your .png and add it to your canvas in the exact same way.
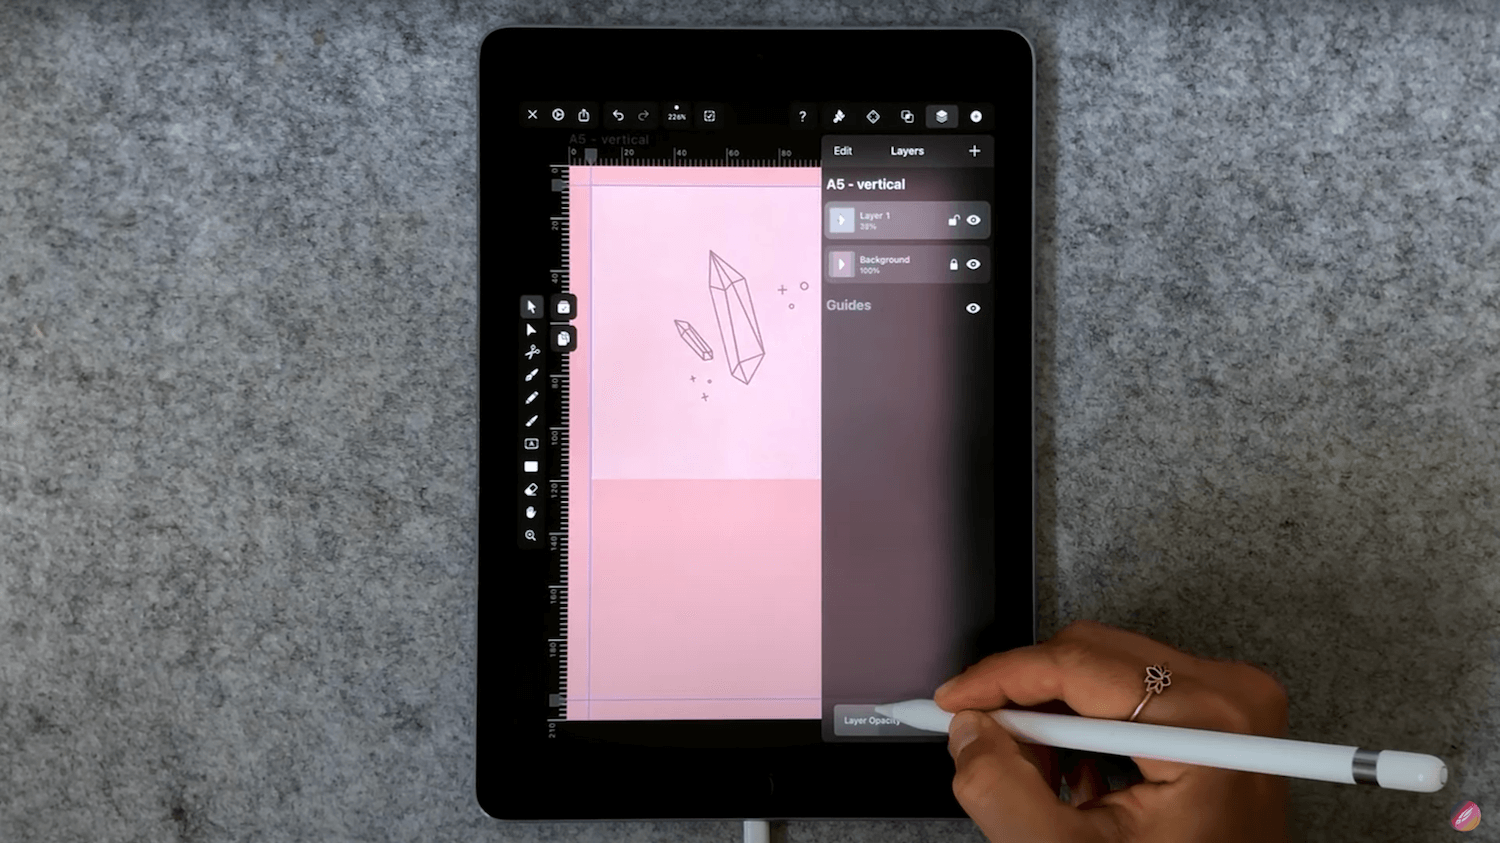
Resize and place
Now, resize your image so it fits your layout and place it in the position you want.
Then turn the opacity of your sketch layer to 20% by using the slider at the bottom of the Style Tab. This way, it's easier to see what you're drawing.
Define your color palette
You can create your own unique color palette in Vectornator with just a few taps.
You just need to think creatively and add your own style to it. Since Sandra does a lot of line work, she usually opts for dark colors, but not pure black. She picked a dark blue (#191A32) instead.
Before you go crazy with color, bear in mind how the tattoo is going to look on different skin tones, on which body part it's going to be placed, or even think of how many touch-ups a person might need to get throughout their lifetime. Light colors need a lot more maintenance than darker ones. So Sandra's choice not only matches her style, but it's also super practical as it ensures the longevity of her tattoo art on skin.
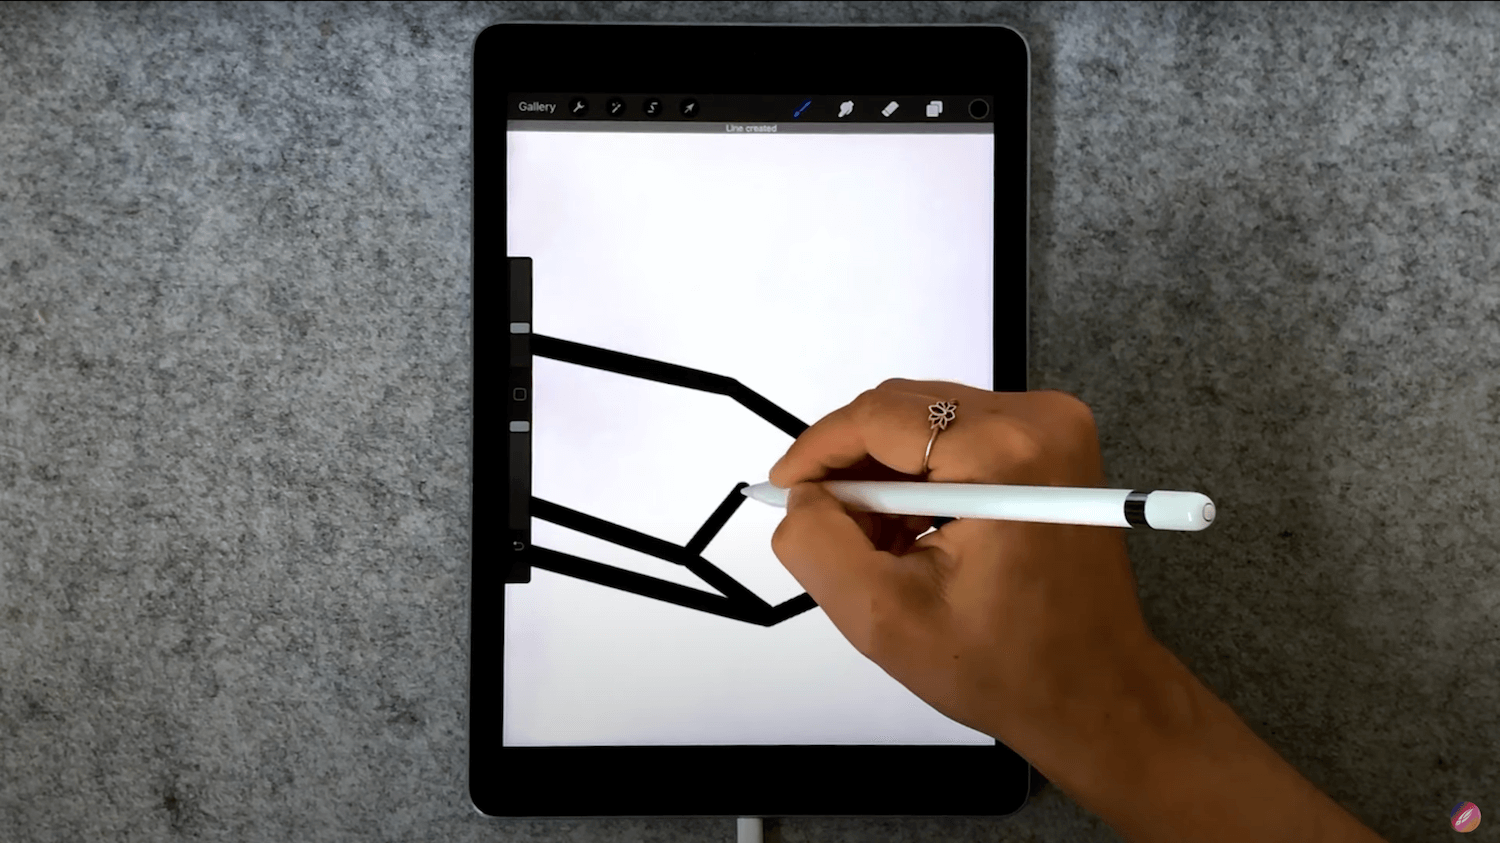
Draw straight lines
This particular tattoo is the easiest to vectorize.
Just pick up the Pen Tool and tap at each intersection to create straight lines between two points. It truly does not get easier than this!
Set the stroke width is 0.5 points, and tap, tap, tap away.

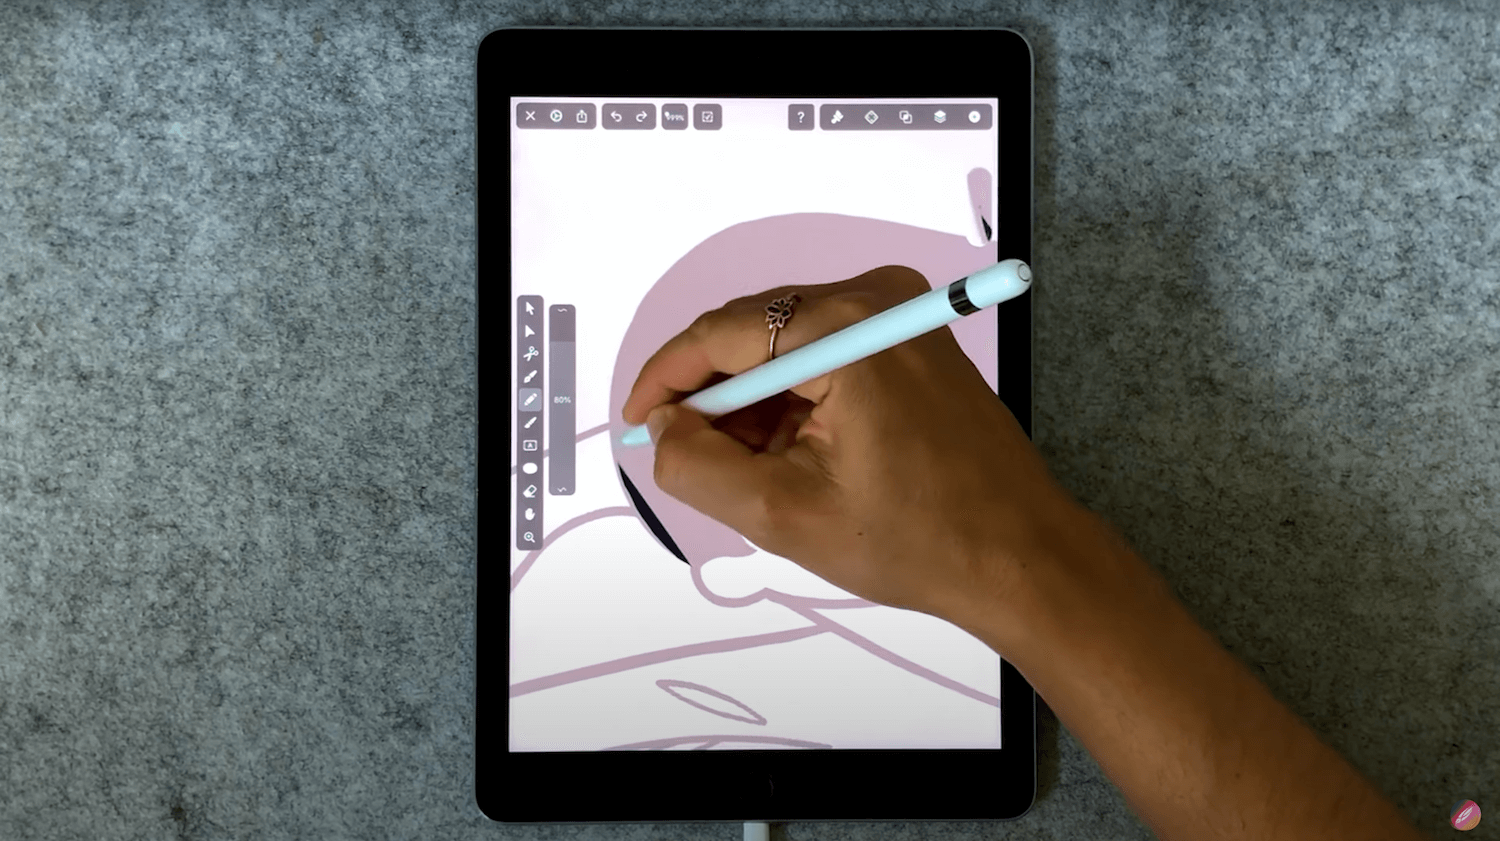
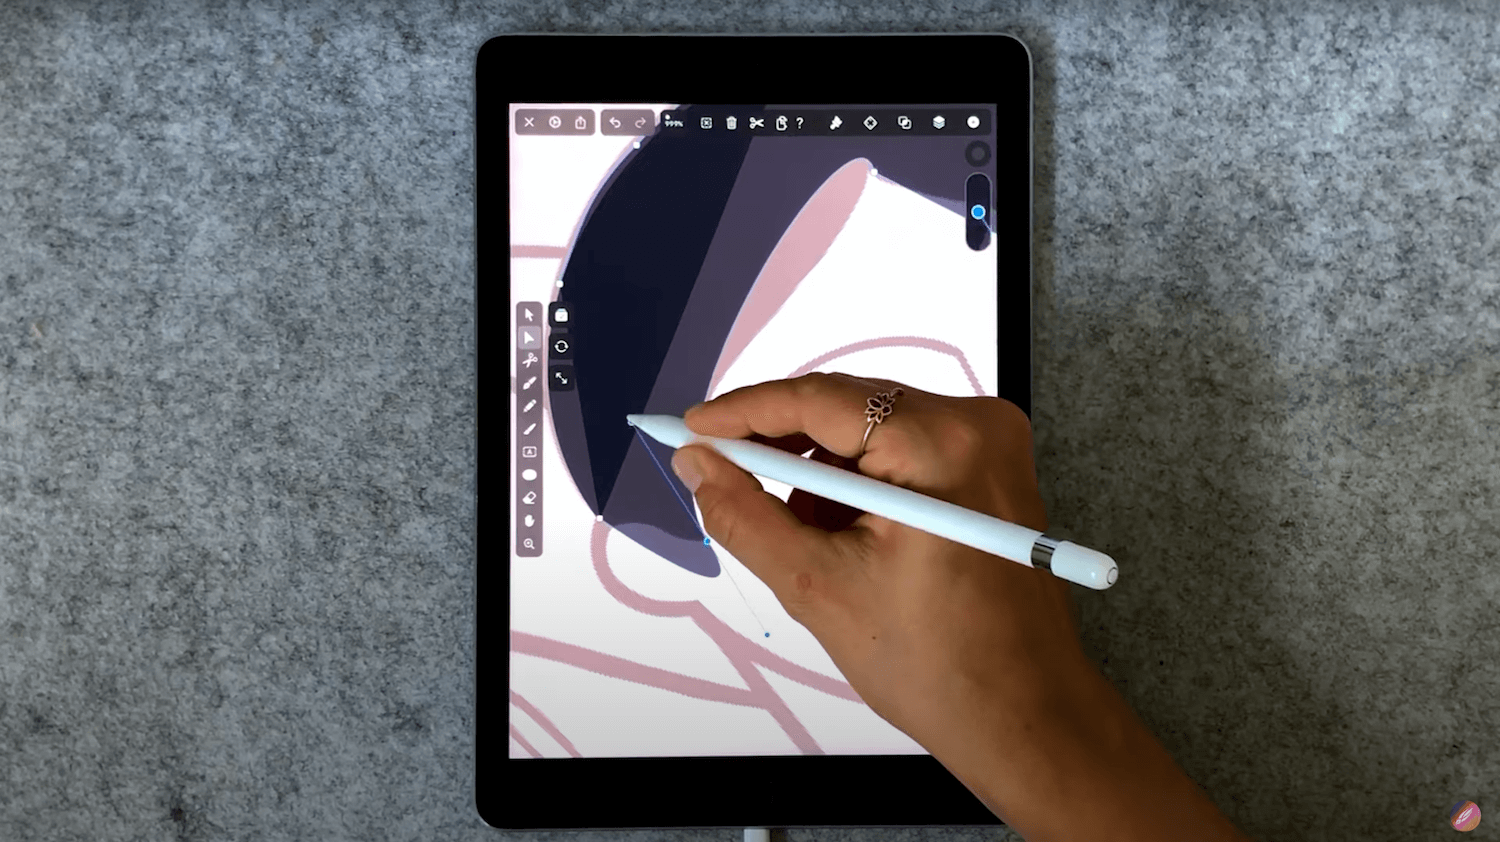
Draw curved shapes
If you know Sandra's style, you know it won't stay this simple for long. Time to move on to some more complex illustrations.
On a new layer, start working with the Pencil Tool to map out the sketch section by section. It's easier if you vectorize your designs in parts, as it gives you more control over your shapes.
:quality(75))
:quality(75))
First, set the smoothness level of the Pencil Tool depending on the area you're vectorizing. If you are working with curves, smoothed-out lines are going to work better. But if you are working on smaller details like the contours of a face, you're better off with lower smoothing since then, your Pencil Tool is going to follow your hand movements exactly.
After that, it's a matter of following the contours of your sketch. The Pencil Tool is a freehand vector tool that feels almost like pen on paper and it's the reason why Sandra loves working with it so much.
You can also use the Brush Tool to create fluid curved lines, if you're wanting a more organic, hand-painted look.
Adjust where needed
It's ok if your lines with the Pencil Tool go over the face a little bit, like below.
You can correct that very easily with the Node Tool.
If you find that you've colored outside the lines, so to speak, simply change the shape by deleting nodes, changing their position, adjusting the angle of the handles, or creating new ones that you can then manipulate as you wish.
Tap on a vector path to add nodes, double-tap on nodes to delete them, and move them or the handles around by tapping and dragging. The video at the top of this article is a great way to learn how this works.
So feel free to be quite liberal with the Pencil Tool or the Brush Tool, since you can always adjust your lines afterward.
You can undo by tapping two fingers on the canvas. Learn more about how to use different gestures to improve and speed up your workflow by reading Gestures and Shortcuts.
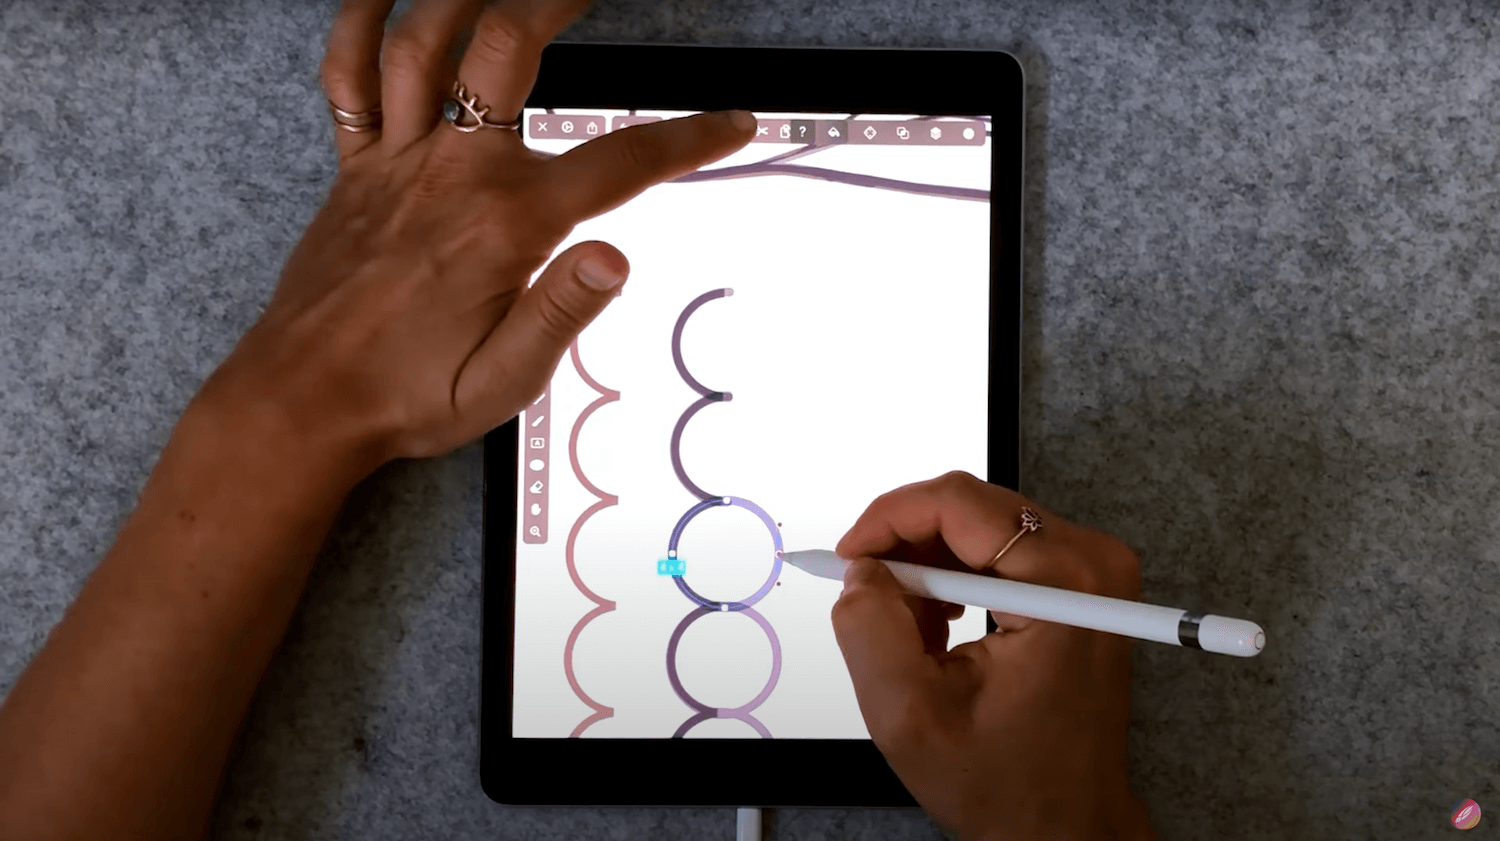
Create perfect shapes
When creating basic shapes, make use of Vectornator's Shape Tool, which allows you to draw perfect circles, lines, rectangles, and more.
To create these types of waves, for example, simply create a perfect circle by using the Oval Tool and holding one finger on the canvas to preserve the aspect ratio. Then pick up the Selection Tool and use the Duplicate function to create a few more copies that mimic the shape of waves.
Finally, tap on the upper node with the Node Tool and delete it. Just like that, we have semi-circles.
Combine your objects
Time to combine all your objects together.
While it's easier to control each shape individually when creating them, it's better to work with a combined object when you're refining your artwork.
Ready to create brand assets that pack a punch?
Visit our Academy for free marketing design courses.
Maybe you need to place it in a different spot, or you need to resize it to better fit your overall layout.
Select all your objects and use the Unite boolean operation, which you can find in the Style Tab, or in the Quick Actions menu.
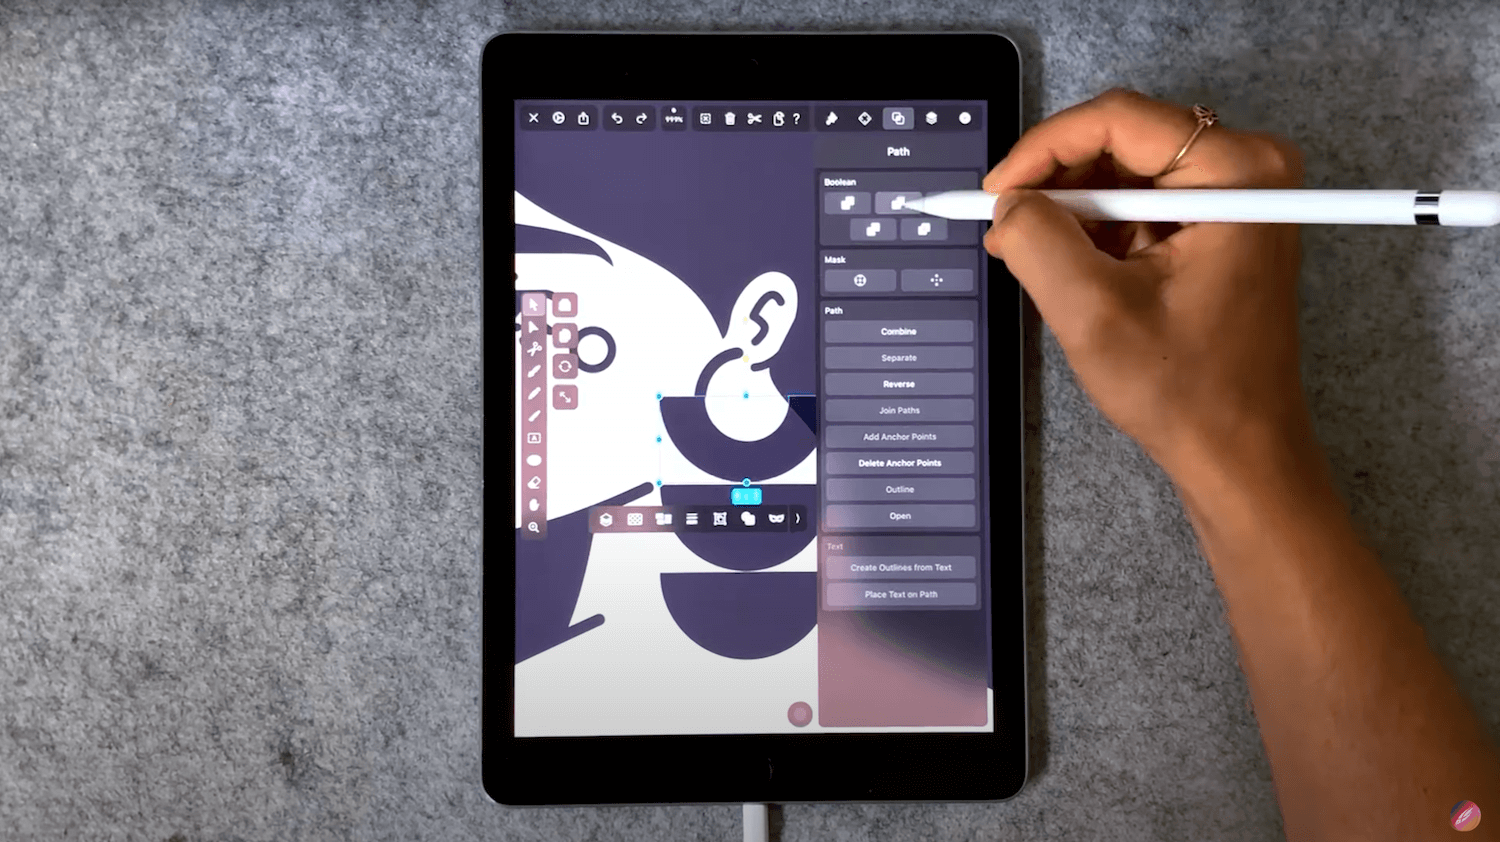
Create complex shapes
Boolean operations are amazing when it comes to creating complex shapes like logos.
There's an art to combining these five simple operations into creating the most recognizable designs in the world. Learn to use them well, and you'll find that your workflow will speed up a lot!
In this part of her illustration, Sandra makes use of the Divide operation in order to create a beautiful earring.
She started off with a semi-circle (created just like before; by deleting the top node of a full circle), and applied the Divide Boolean operation, which separated the two objects where they overlapped; creating this super interesting shape:
How to sell your tattoo designs
A great way to make your tattoo drawings more appealing is to create mockups of how they would look on your client's skin.
Or, create temporary tattoos that people can apply prior to their tattoo session in order to check if that is what they really want to get inked for the rest of their lives.
I really like the aesthetics of flash sheets, and I sometimes use them as inspiration. On top of that, I can even create temporary tattoos from this sheet and sell them as merch. It makes sense for me to prepare them as vectors so I can scale them to any size my buyer wants their tattoo to be.
– Sandra
But as Sandra mentions, tattoo designs can simply become part of your merch offerings instead of body art. They can be printed on a t-shirt, as a poster, or they can even be turned into fonts if you design tattoo lettering.
We recommend you always protect your drawings from theft by adding your personal watermark.
Final tip: Sandra added some rosé shapes to the finished illustration, purely to make her artwork pop on social media. These shapes would likely not be very visible on skin, but they do provide a pop of color for the image itself. So don't be afraid to change your design slightly for different mediums.
That's it for today! We hope Sandra inspired you to start creating your own tattoo designs! Be sure to check out our other tutorials and download Vectornator to start bringing your ideas to life!
Jumpstart your ideas with Linearity Curve
Take your designs to the next level.
Share this!
Lavinia Aparaschivei
Lavinia is a contributing writer to the Linearity Blog.


