:quality(75))
:quality(75))


:quality(75))

Truth time: you don’t really need to invest in overpriced graphic design software if you have a passionate eye for design, art, and photography.
Learning Photoshop or any other Adobe product takes time. Don’t feel bad if you have no idea what to do the first time you open it. It can be very overwhelming for most, and it can take many years to learn how to use it.
Both advanced and beginner designers learn a lot of new things or ways to use the tools that they’re already comfortable with. This can include bringing a set of colors to life or blurring out a portion of an image.
But what most users like to use Photoshop for is removing a background to allow their images to truly pop.
 Rokas Aleliunas
So, if you’d like to find out how to remove your backgrounds and bring your stills, portraits, or abstracts to the forefront – read on to find out how you can do it through Adobe Photoshop.
Have you ever heard someone say, “That is definitely Photoshopped?” If you work in the creative industry as a designer, photographer, art director, or any of the other industry roles, you know this is pretty normal to hear.
However, if you don’t currently work in the industry but are interested in pursuing a career in visual arts, then you should probably know about Photoshop.
Photoshop is a photo editing and graphics creation software that was developed by the company, Adobe. Photoshop offers a wide variety of image editing features as well as the capability to create complex graphics.
Photoshop has become the industry standard for many creatives as it is very versatile and is usually one of the first programs many learn to use.
It is used for editing photographs, compositing digital art, and animating. Adobe Photoshop comes with professional tools that make it easier for artists to bring their ideas to life.
One of the major highlights of using Adobe Photoshop is its ability to create multiple layers that can be altered independently of each other.
New tools and features are also always being added as Adobe gathers feedback from artists on ways to improve Photoshop.
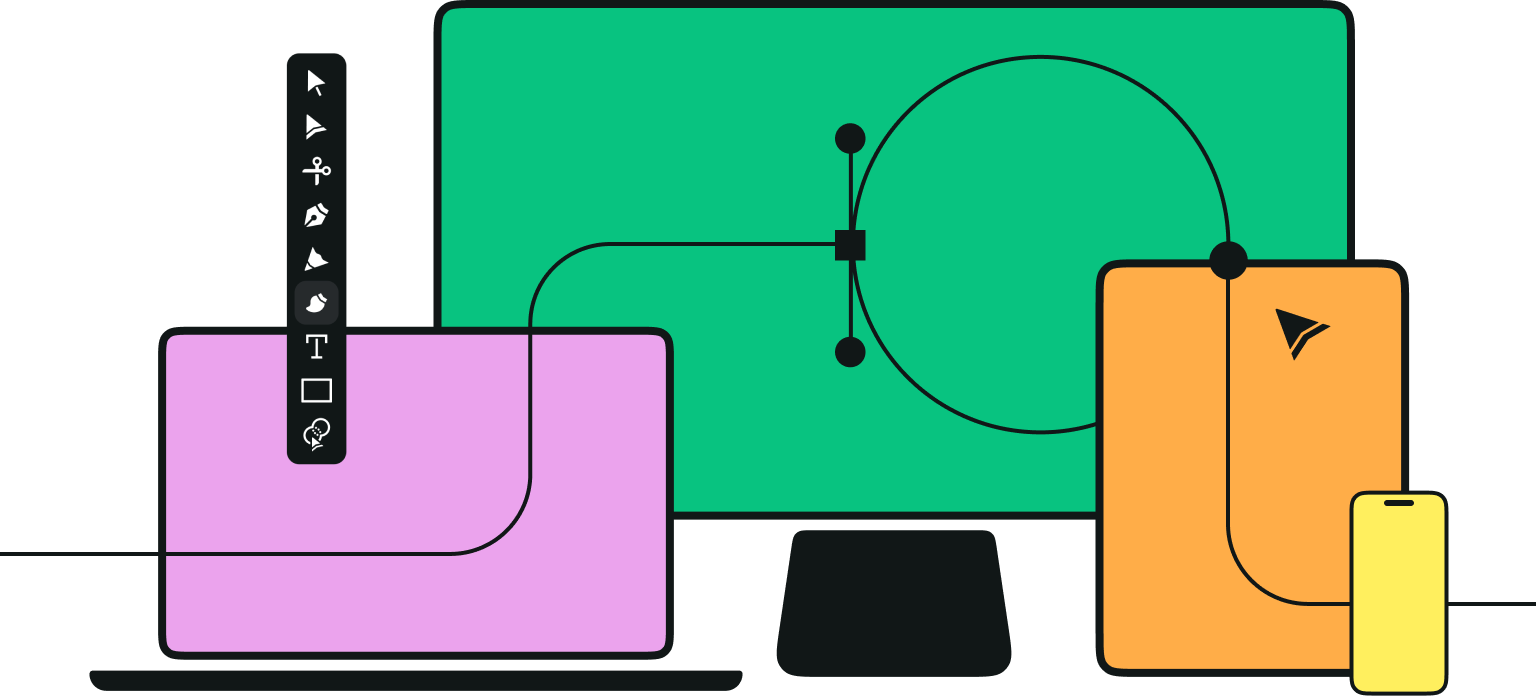
Jumpstart your ideas with Linearity Curve
Take your designs to the next level.
Who created photoshop?
Photoshop was originally created by two brothers, John Knoll and Thomas Knoll. In 1987, Thomas Knoll was a student at the University of Michigan studying engineering, but he was also interested in photography.
One day with his engineering knowledge, Thomas wrote a script on his father’s Apple computer that allowed him to turn monochromatic images to grayscale.
After this initial script, Thomas continued to develop additional processes that applied effects to his images on screen.
With Thomas and John working together on the project, they worked to further develop the application and released the first iteration of Photoshop in 1988 under the original name “Image Pro.”
How to download and install Photoshop
To download Photoshop on your system, follow the below steps:
- Step 1: Download Photoshop
- Step 2: In this step, you are required to create or log in to your Adobe account. Enter the details such as your email or password to log in or sign up
- Step 3: Now, you need to add payment details. If you have selected a trial option, it will not charge you any amount during the trial period. After that, it will charge you according to your selected plan
- Step 4: This step will take you to the 'Download' page of the Photoshop elements. Click on the ‘Download Adobe Photoshop Elements’ to continue
- Step 5: Select your platform for which you want to download Photoshop. It is available for Windows and macOS platforms. It will start downloading a zip file with the Photoshop download elements
- Step 6: To install Photoshop on your system, run the downloaded application and follow the installation prompt.
To install the platform, follow the below steps:
- Run the installer file
- It will prompt you to make changes to your hard drive – select ‘Yes ‘to continue
- Then sign in using Adobe, Google, or Facebook
- It will send a security code to the entered ID to verify your user ID. Enter the password and click ‘Connect’ to continue the process
- Accept the terms of use and click ‘Continue’
- The installation process will automatically be started in the installer window
- Select the language and installation location
- Click ‘Continue,’ and it will start installing the file
- Ensure that your system is connected to the internet during the installation process
- It will then create a desktop icon for Photoshop.
The purpose of using Photoshop
Tania Tania
Today, Adobe Photoshop is used by a variety of artists and creative professionals . Photoshop is a software that can be used to do a variety of things.
Create content for social media
Photoshop is great for creating and editing social media content for your Instagram, Twitter, Pinterest, or Facebook page.
Edit photographs
Most designers use Adobe Photoshop to color correct, sharpen, and modify images after they have imported them into Adobe Lightroom.
Adobe Photoshop allows for more granular control when it comes to editing photos. The ability to use layers for unique adjustments is key when producing quality imagery.
Create a logo
Photoshop is a great tool for creating logos. It helps to get all of your ideas down on paper. Being able to organize your layers into groups is wonderful. Also, adding and modifying text is made easy in Photoshop with the character panel.
Become a Logo Design Pro
Master the art of logo design with our comprehensive course. Perfect for all skill levels, learn to create memorable and effective logos for any brand.
Present designs
After you create designs, you can bring your exported slides into Photoshop to begin organizing your presentations. This is where Photoshop is really useful as it allows you to work seamlessly with other Adobe programs.
Create realistic packaging examples
Photoshop is a powerhouse when it comes to creating realistic packaging and mockups for your projects. This really helps when working with clients to help them understand the idea you have in mind.
Make cool posters
Combining imagery and text is exactly what Photoshop is all about. You will be able to edit images to get your background colors just right.
You can also crop the image to focus in on the subject and then add text that would complement the objective of your poster.
The benefits of using Photoshop
Restore
You can restore old photos that have been damaged. Photoshop offers special tools and filters for this purpose. Examples of useful tools are Vanishing Point and Clone Stamp.
Resize
Resizing images to a desired pixel height and width can be very easily done in Photoshop.
Animation
Photoshop has special functionality for animation. You can create frames in background layer form, which can be then combined to form animations.
Layouts
Photoshop is also popular for designing graphics and layouts for websites. It offers a wide variety of patterns and features to make an impressive website design with a website layout.
Image editing
Basic image editing such as skin tone adjustments, red-eye removal, adding and removing blur, teeth whitening, and image background adjustments are just a click away. This saves a lot of time.
Time management
Extraordinary image editing tools make it very easy to apply, which saves enormous time. Multiple formats of images can be edited with ease. You can also create and edit videos and 3D images.
Shareability
Shareability with different programs is designed for seamless transfers. This means that your files can be shared in multiple formats to suit the needs of the receiver.
Customizable
You can create customizable shortcuts for a smooth workflow.
Availability
Continuous additions of new features are added to Photoshop to cater to the needs of the artists. Photoshop can be installed on Windows, macOS, Android, iOS, iPad OS, etc.
Some Photoshop drawbacks
Dennis Cortés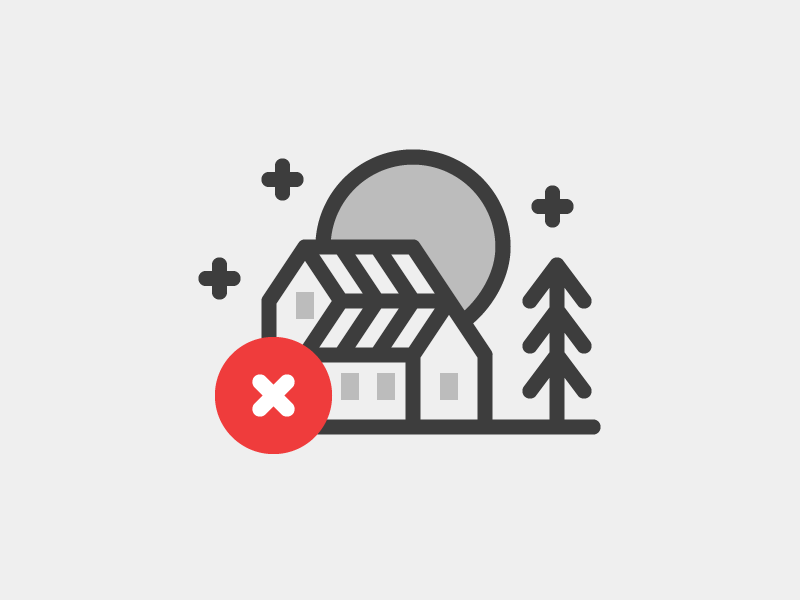
Despite being a worldwide used program and providing various advanced editing tools, there are some cons of Photoshop. Some of the major drawbacks are:
Difficulty
Being a high-end software, it may be difficult for some beginners to navigate through the user interface at first.
As there are a wide variety of features and functionality, you may want to first identify your purpose in learning Photoshop and then learn features that fulfill your needs.
Space
Running Photoshop software requires large memory space as it has updated system requirements. Photoshopped pictures also require large space for storage.
Unfortunately, there are performance issues and time lag when the system requirements do not match the graphics needed.
Updates
Continuous untested updates, which sometimes cause errors and bugs, are released, which can add an element of uncertainty to the workflow.
Productivity
Progress monitoring bars are missing in some features of Photoshop. This affects the productivity of the user.
Vectors
Working with vector graphics is sometimes difficult as Photoshop is not compatible with all vector formats.
:quality(75))
:quality(75))
Expenses
It is an expensive software that may not fit the budget for many. Moreover, Adobe Creative Cloud is a subscription-based model. This means you pay as long as you want to take their service.
For those with basic image editing needs, other alternatives will be a better option.
Ways to remove a background in Photoshop
SmileGoodHope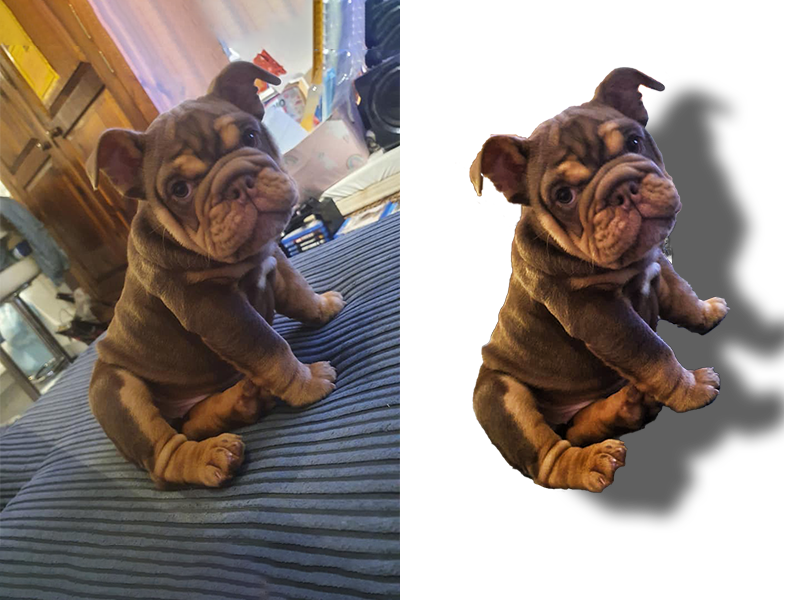
Do you ever wonder what your fluffy cat might look like without the pile of dishes you accidentally left in the background of the photo you took?
With Photoshop, you can ‘purr-fectly’ show off ‘Mr. Whiskers’ without any worry. Removing a background in Photoshop paves the way for some of the most fun uses of the software and is one of the most widely used features in the application.
Here are some ways you can remove your original background:
Magic Wand Tool
The Magic Wand Tool is used in case you need to remove a selected portion of an image. It is an ideal tool for working on a background. You can use this tool when you have a background with a single color.
To use this tool, select the Magic Wand Tool present in the toolbox. Using that tool, click on the region that you want to remove. Once you select the region, it will be highlighted with a motion outline.
Now delete the portion by simply pressing the delete button on your keyboard.
You can then adjust the selection of colors by using the ‘Tolerance’ feature, which is located below the ‘Menu’ bar.
Magnetic Lasso Tool
This tool is used to select the region you want to keep. It creates an outline as you move the cursor over the image.
To use this tool, right-click on the ‘Lasso’ tool and click on the ‘Magnetic Lasso Tool’. Then click on a starting point where you want to start the selection. Once you set a starting point, move the cursor around the image you want to select.
After moving the cursor around the image, bring it back to the starting point. As you reach the initial point, the portion will be selected, and you will see a motion line around it.
Spot Healing Brush Tool
A tool for editing anything is worthless if it can’t remove spots from any face. The Spot Healing Tool is available in Photoshop to remove any sort of unwanted spots from an image. It is highly used to develop a clear face of any person.
To use this tool, click on the Spot Healing Brush Tool from the toolbox. Now click on the spot you want to correct. The tool will automatically heal the spot according to the surrounding colors.
Gradient Tool
By default, you can fill a single color in an image. But to make the image innovative, you need to use some gradients in the image. The Gradient Tool is present in Photoshop to apply multiple colors in an image.
To use the gradient, right-click on the Paint Bucket Tool from the toolbox. From the options, select the Gradient Tool.
Then click on the screen from where you want to start the gradient, and without releasing the mouse button, drag the cursor to the point you want the gradient to apply.
After reaching the ending point, release the cursor. You will then see the gradient applied successfully.
Photoshop Remove Background Tool
This is the simplest way to remove the background of your image in Photoshop. This method is most suitable if you are not too fussy about getting clean edges on your subject.
First, open your image in Photoshop and go to the right-hand panel. Duplicate the current layer by pressing ‘Command+J’ on macOS or ‘CTRL+J’ on Windows.
For the final step, go to the ‘Quick Actions’ panel and click on the ‘Remove Background’ button, which should then finalize the process of removing the background in Photoshop.
Remove.bg’s Photoshop plugin
Remove.bg’s plugin for Photoshop is the best way to separate the background from the subject.
The plugin is better than the software in isolating complicated elements and jagged edges, such as hair. You can also use the layer mask to remove or restore regions of the original image, but you still only need to click one button.
Get started by following these steps:
- Download the plugin. Downloading Remove.bg’s plugin for Photoshop is free of charge. You can also buy credits to process images, which you can use in all Remove.bg products and integrations. Once you have installed it, you will find it in the ‘Plugins’ drop-down menu
- Log in to your Remove.bg account and click the ‘Remove Background’ button anytime you want to remove the background from the currently opened image (or selection) in Photoshop. Bear in mind, the original image is processed through the Remove.bg API, so you need an active internet connection and an API key (which you can find in your account’s dashboard).
The Quick Selection Tool
Photoshop’s Quick Selection Tool uses artificial intelligence to decide in real-time where the edges of the subject and the beginning of the background fall.
The tool works best when there is a clear difference between your foreground selection and your complex background. If there is too much similarity in the pixels, it will get confused, and you will spend hours adding and subtracting elements.
Once you’ve carried out the initial selection, you can toggle between adding to the selection and subtracting from the selection in the menu.
How to use the tool:
- Open your image in Photoshop
- Find the tool in the left-hand menu (‘Photoshop Toolbox’)
- Check ‘Enhance Edge’ in the ‘Options’ bar, which should give you smoother, higher-quality selection edges
- Click the button and move the pointer over the area you want to select. Quick Selection will then find tones that match the selection until it thinks it’s found an edge
- You might find you want to add to the selection. If so, just click and drag over another area
- If the tool has been over-enthusiastic, you can subtract from the selection. To do that, press the ‘Option’ key (macOS) or 'Alt' key (Windows), and move over to the section you want to deselect
- Or you can change the tool to deselect (minus) in the menu bar to deselect anything you mouseover.
The Pen Tool
The Pen Tool is the furthest from AI selection you can get without going freehand.
There are many images that require a complex selection due to the shape of an image. In that case, the Pen Tool is the best option to use. The Pen Tool is used to select the section of an image as per your requirement.
The Pen Tool allows you to draw around an area using a combination of straight lines and flexing curves. You can toggle between the two by mousing over a node and pressing the ‘Control’ key.
You want to use the Pen Tool to create a path (on the far left in the layer panel). Then right-click on the selection and press ‘Make Selection‘ to change a path into a selection.
If you are working with a selection, you might want to increase the feathering of edges a little bit because hard edges can look unnatural, especially against a bright background. In doing so, you will achieve a more polished look.
The Background Eraser Tool
This tool is used to remove backgrounds in images with more than a certain amount of fine detail between subject and background.
Easily Remove Backgrounds from Your Images
Master the skill of background removal with Linearity Curve for Mac. Our guide makes it simple to isolate subjects and enhance the focus of your images with precision.
It works by taking a sample of the hue at the center of the brush and selecting the same or similar colored pixels as you move the mouse.
How to use the tool:
- Open your image in Photoshop
- Find the tool in the ‘Photoshop Toolbox’
- Make sure the brush is the right size. You can use the bracket keys or adjust it in the menu bar. A larger brush is quicker, but you need precision if you are working in tight spaces. You can and should zoom in as well
- You want the brush to be nice and hard on the slider. If you have fuzzy or blurry edges, you will leave behind artifacts
- Place the center of your brush over the color you want to remove and click on it. You will get rid of any matching hue within your tolerance and leave behind other colors.
How to use an Eraser Tool
We’ve already mentioned how you can effectively remove a background with Photoshop’s Eraser Tool. However, sometimes you'll need to remove other areas of your design, such as specific brush strokes. Linearity Curve (formerly Vectornator) works differently than Photoshop, since it's a vector-based program. This means that removing certain areas from your design is done by selecting an object and simply deleting it, or when you need more precision, the Eraser Tool is best.
Linearity Curve's Eraser Tool allows you to easily remove content from your document. It behaves just like a rubber eraser on your paper canvas. It will erase any area of an object along the path you draw.


Activate the Eraser Tool
To activate the Eraser Tool, simply tap on the 'Eraser' icon inside the ‘Toolbar’ or press ‘E’ on your keyboard.
To erase something, simply activate the Eraser Tool and then draw (tap and drag around) on the canvas. Drawing fully across any shapes underneath your eraser's path will split them into multiple objects.
These objects can then be moved and edited independently.
How to erase only one object
To erase only one object on your canvas, select the object first using the ‘Selection’ or ‘Node Tool.’ In this way, you will automatically exclude any other objects on your canvas.
How to erase only one layer
Layers have an important role in this specific case: by locking a layer, you can basically exclude the elements in that layer from the erasing operation.
In other words, if you want to erase just one part of a specific element in your canvas, you need to lock the other layers so that they won't be erased when you draw with the Eraser Tool.
Other handy tools in Photoshop
Photoshop offers several editing tools that can be confusing for new editors. As a new photographer or designer using Photoshop, you may find this software too much to handle all at once.
So, to help you out, here are some of the best tools in Photoshop, which are essential to get you started with editing – especially if you are looking to enhance and remove your backgrounds.
Matt Naylor
The Move Tool
The Move Tool is essential to position parts of your image correctly. As the name suggests, you will use this tool to move elements in your workspace. You can move layers, text, and selections as needed.
To move an element on your image, make sure the correct layer is selected. Then select the Move Tool, which is at the top of your toolbar.
Once the Move Tool is selected, click on the object and drag it to the new position. You can also use the arrow keys to move the object. Holding in ‘Shift’ while pressing the arrows will move the image in larger increments.
The Crop Tool
The Crop Tool is helpful for many reasons in Photoshop. The Crop Tool will cut out elements on the edges of your image that may be distracting or that you simply don’t want.
The tool will also help you resize images for print by using ratios.
To use the tool, select it from the toolbar on the left-hand side of your workspace, or use the shortcut by pressing ‘C’ on your keyboard. The crop dimensions will automatically appear over your image. You can then drag on the edges to cut the image.
The Shape Tool
The Shape Tool allows you to quickly include general shapes on your image, such as a triangle, rectangular, circle, line, or polygon. You can then change the size, colors, and other elements of the shape as desired.
To use the tool, select it from the toolbar or press ‘U’ on your keyboard. If you would like to select a different shape, click down on the tool icon until a new drop-down menu pops up.
Once selected, click and drag over your image to create the shape to your chosen size. To create a perfectly uniform shape, hold in ‘Shift’ while creating the shape.
To change the number of sides on the polygon tool, click on the image once you have selected the tool, and a menu will appear.
You can then change the shape properties on the top options bar. The shape will be added as a new layer to your ‘Layers’ panel.
Object Selection Tool
If there is a clear object in the image, you can use the Object Selection Tool to quickly select the object you would like to isolate from the background. You can then edit the object separately or remove the background from the image.
To use the tool, click on the toolbar or press ‘W’. Once the tool is selected, click and drag on your image to create a rectangle around your object.
Once you let go, Photoshop will automatically create a selection around the main object within the rectangle you made. Once you have duplicated the layer, you can click delete on your keyboard to delete the selected object from your image.
The Marquee Tool
If your desired selection is a specific shape, you can use the Marquee Tool to easily select it. This tool works well for general selections in the shape of a rectangle.
To use the tool, select it from your toolbar or press ‘M’ on your keyboard. Now press delete to get rid of the object within your selection. The Marquee Tool is great for quickly cutting out general chunks of your image.
The Transform Tool
The Transform Tool is a great way to manipulate the size, angle, or to warp objects in different ways. You can select any layer in your project and easily manipulate it by moving around anchor points.
To use the Transform Tool, navigate to ‘Edit’, ‘Transform’, and select the method you want to use to change your image. For instance, select ‘Warp’ to pull and drag your image any way you want to.
Once that has been selected, drag on the various anchor points to manipulate the object as needed.
Adjustment layers
Adjustment layers are a grouping of all the basic editing tools such as Contrast, Levels, Vibrance, Brightness, and so much more. As you choose an adjustment, it will create a new layer in the layer panels.
You can then go back to these layers at any time to re-edit the adjustment if needed.
There are two ways to add a new adjustment. Firstly, select the icon ‘Create new fill’ or ‘adjustment layer’ at the bottom of the panel and select the adjustment of choice.
You can then change the properties further up on the right-hand panel of your workspace.
Wrapping up
Adobe Photoshop has taken the creative world by storm. This powerful image editing program has become a standard tool in career fields ranging from marketing to HR management.
While Photoshop is primarily a work tool, it can also be a rewarding hobby. If you’re looking for an outlet for your creative talents or doing something different to your everyday work, then using Photoshop can be a lot of fun. With its wide range of functions, you’ll have the freedom to work on the simplest or most detailed of projects, from making personalized birthday cards for friends to creating beautiful, arty images to decorate your home or office space.
You are also able to restore old, treasured print photos that you may have lying around your house by scanning them onto your computer, touching them up, and saving them in digital format. There is something very powerful about artistic creation and outlet that truly puts people in a different zone. In such a hustle and bustle world, where we have little time to think for ourselves, sitting down and working on your art can provide endless hours of pleasure. And, at the same time, fill the walls of your life with your ideas.
Whether you're a designer prototyping a new logo on your couch or an illustrator creating a vector painting of the Milky Way with thousands of stars, ensure you partner your designs with leading programs such as Photoshop and Linearity Curve.
Linearity Curve's smart contextual menus put the tools you need at your fingertips. Depending on the type of object you have selected, you can easily access core actions like changing opacity, stack order, boolean operations, and much more, with no additional menus. Quick actions speed up your learning curve and let you work up to 30% faster.
While these explanations are only the surface level of these tools, they can all do so much more. The best way to figure them out is to test all the options tools like Photoshop and Linearity Curve have to offer and see what you can create.
Happy editing!
Go to Academy
Jumpstart your ideas with Linearity Curve
Take your designs to the next level.
Share this!
Ben Barnhart
Ben is a Content Lead for Linearity living in Berlin. His hobbies include board games, cooking, reading, and writing.