:quality(75))
:quality(75))


:quality(75))
When and how did you begin your illustration career?
I used to draw a lot when I was a kid, I even experimented with painting at one point, which was loads of fun. But after studying Architecture in high school and Computer Graphics at University, I somehow ended up becoming a designer… drawing and doing illustration only occasionally.
After a while, I realized that design just never made me feel the way illustration did and I basically decided to ditch my career and build a new one as an illustrator (kids, don’t do this at home). Might as well start painting again if the stars align.
Jumpstart your ideas with Linearity Curve
Take your designs to the next level.
How long does it take you to finish a piece of artwork?
When I have an idea, it haunts me until I put it on paper. Since I’m a mom of a baby boy, I usually have to wait for him to fall asleep before I can actually start sketching. So I learned to draw in my head and when I finally have time to sketch, I have a pretty good idea of where I want to end up. Then it takes me around an hour to try out a couple of quick concepts. When that’s in place, I need another 2 to 10 hours to complete the illustration — depending on complexity.
What kind of advice do you want to give to those starting out in art?
I found out that for me, continuity is the most important thing. You need to be able to quickly explore multiple ideas, you need to be able to ditch the bad ideas even if they are almost complete and you need to be able to quickly start over. The ability to do this fast is what I see as the best way to improve, and you can’t get fast unless you have continuity. So my advice would be to try to devote at least one hour a day to draw, no matter how tight your schedule might be but show up every single day.
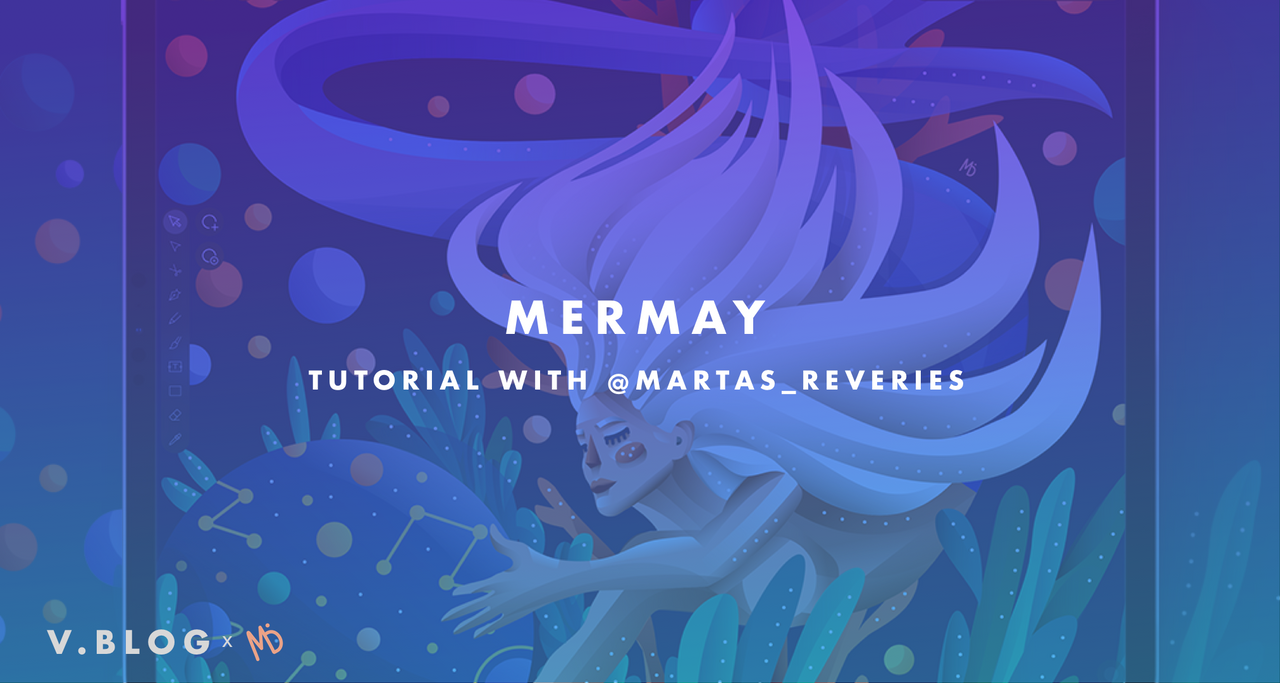
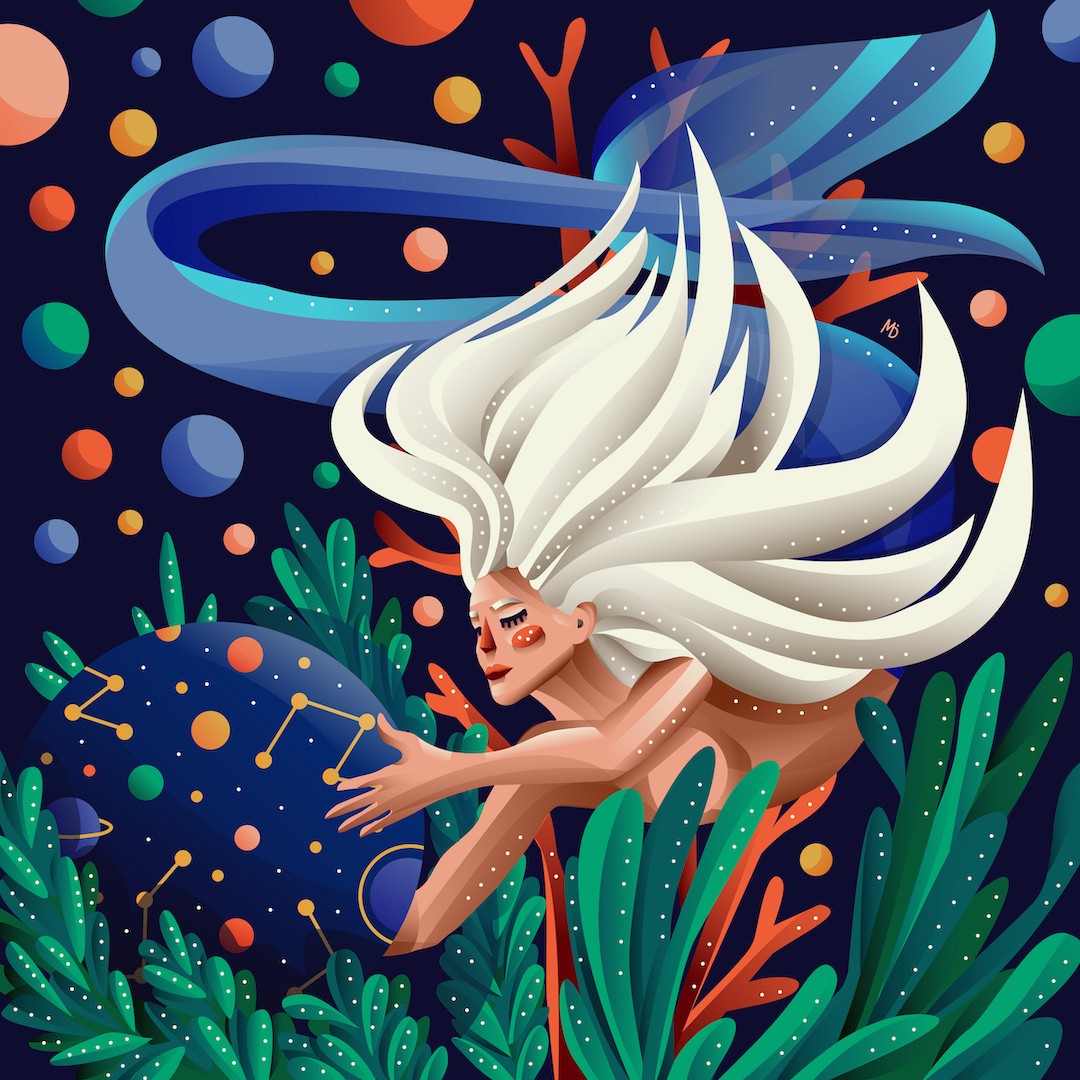
We hope that you enjoy Marta’s tutorial on her illustration entitled ‘MerMay’.
The strong concept

Every illustration I make starts with a quick hand drawing. I used to do this on paper but lately, I go straight to the iPad (paper doesn’t have an undo).
I don’t care about precision here, my only goal is to quickly explore many concepts and find a composition I like. If the composition is bad to begin with, you are unlikely to fix it later in the process. Stay at the sketching step as long as it takes. You’ll thank yourself later.
I usually use a dark background and my sketch is in 20% opacity white fill (on a separate layer). I keep the sketch at the very top of the layer list so that it stays completely visible if I need to reference it later.
Map it out
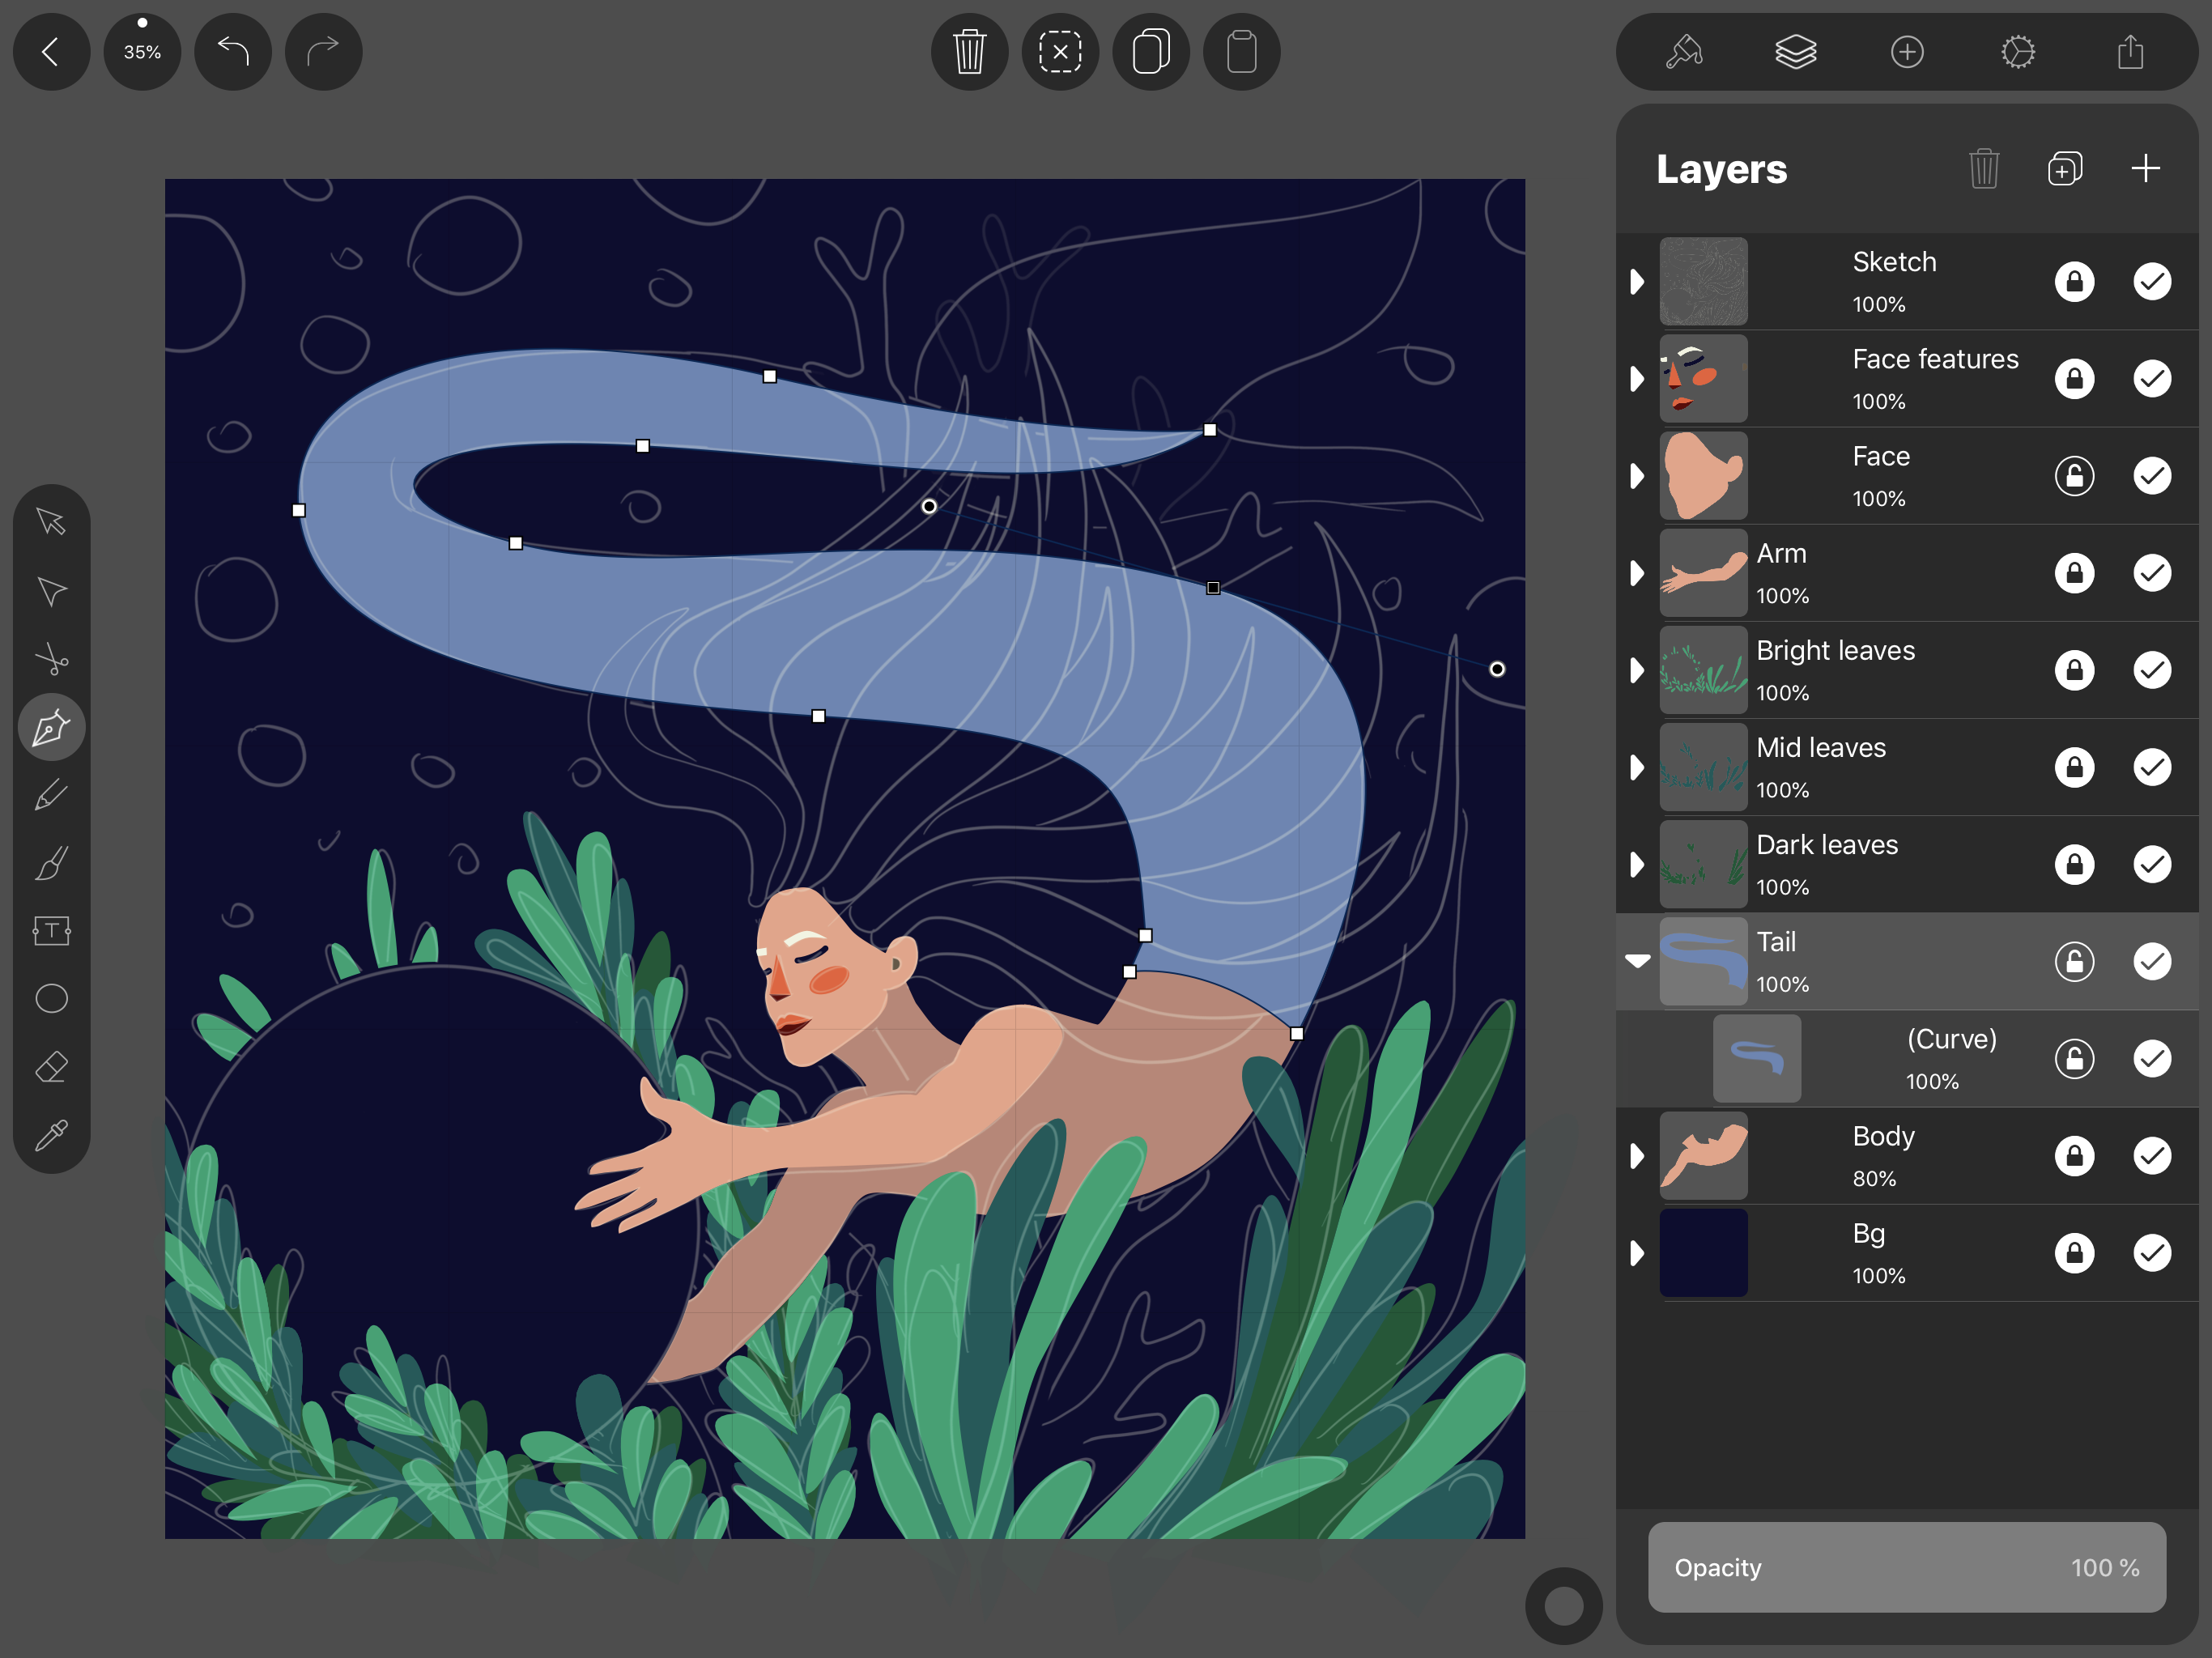
Once my sketch is in place, I start mapping out the shapes. I mostly use the Pencil Tool — it feels organic, and that’s what I’m after, but when it comes to big curves, I switch to the Pen tool for a smoother result.
Master the Art of the Pen Tool
Step into the world of precision design with the Pen Tool in Linearity Curve. Our expert tutorial covers all you need to know for creating fluid, intricate designs with ease.
I keep every part of the illustration on a separate layer. This helps me stay organized. Plus, it makes adding shadows and lights a lot easier later on. For example, I use one layer for the face, another one for the upper body, and another for the tail and so on. In case of repeating elements such as a bunch of green leaves, I keep them together on one layer.
Zooming in / Zoom out
Zoom out and take a look at the whole illustration. Search for the shapes that look weird and unnatural. Fix them using the Node Tool (gives you control over all the points of the shape).
Zoom in and look for all the small bumps and imperfections. If you’ve been using the Pencil Tool, you will probably have quite a few. Remove all the unnecessary points using the Pen Tool.
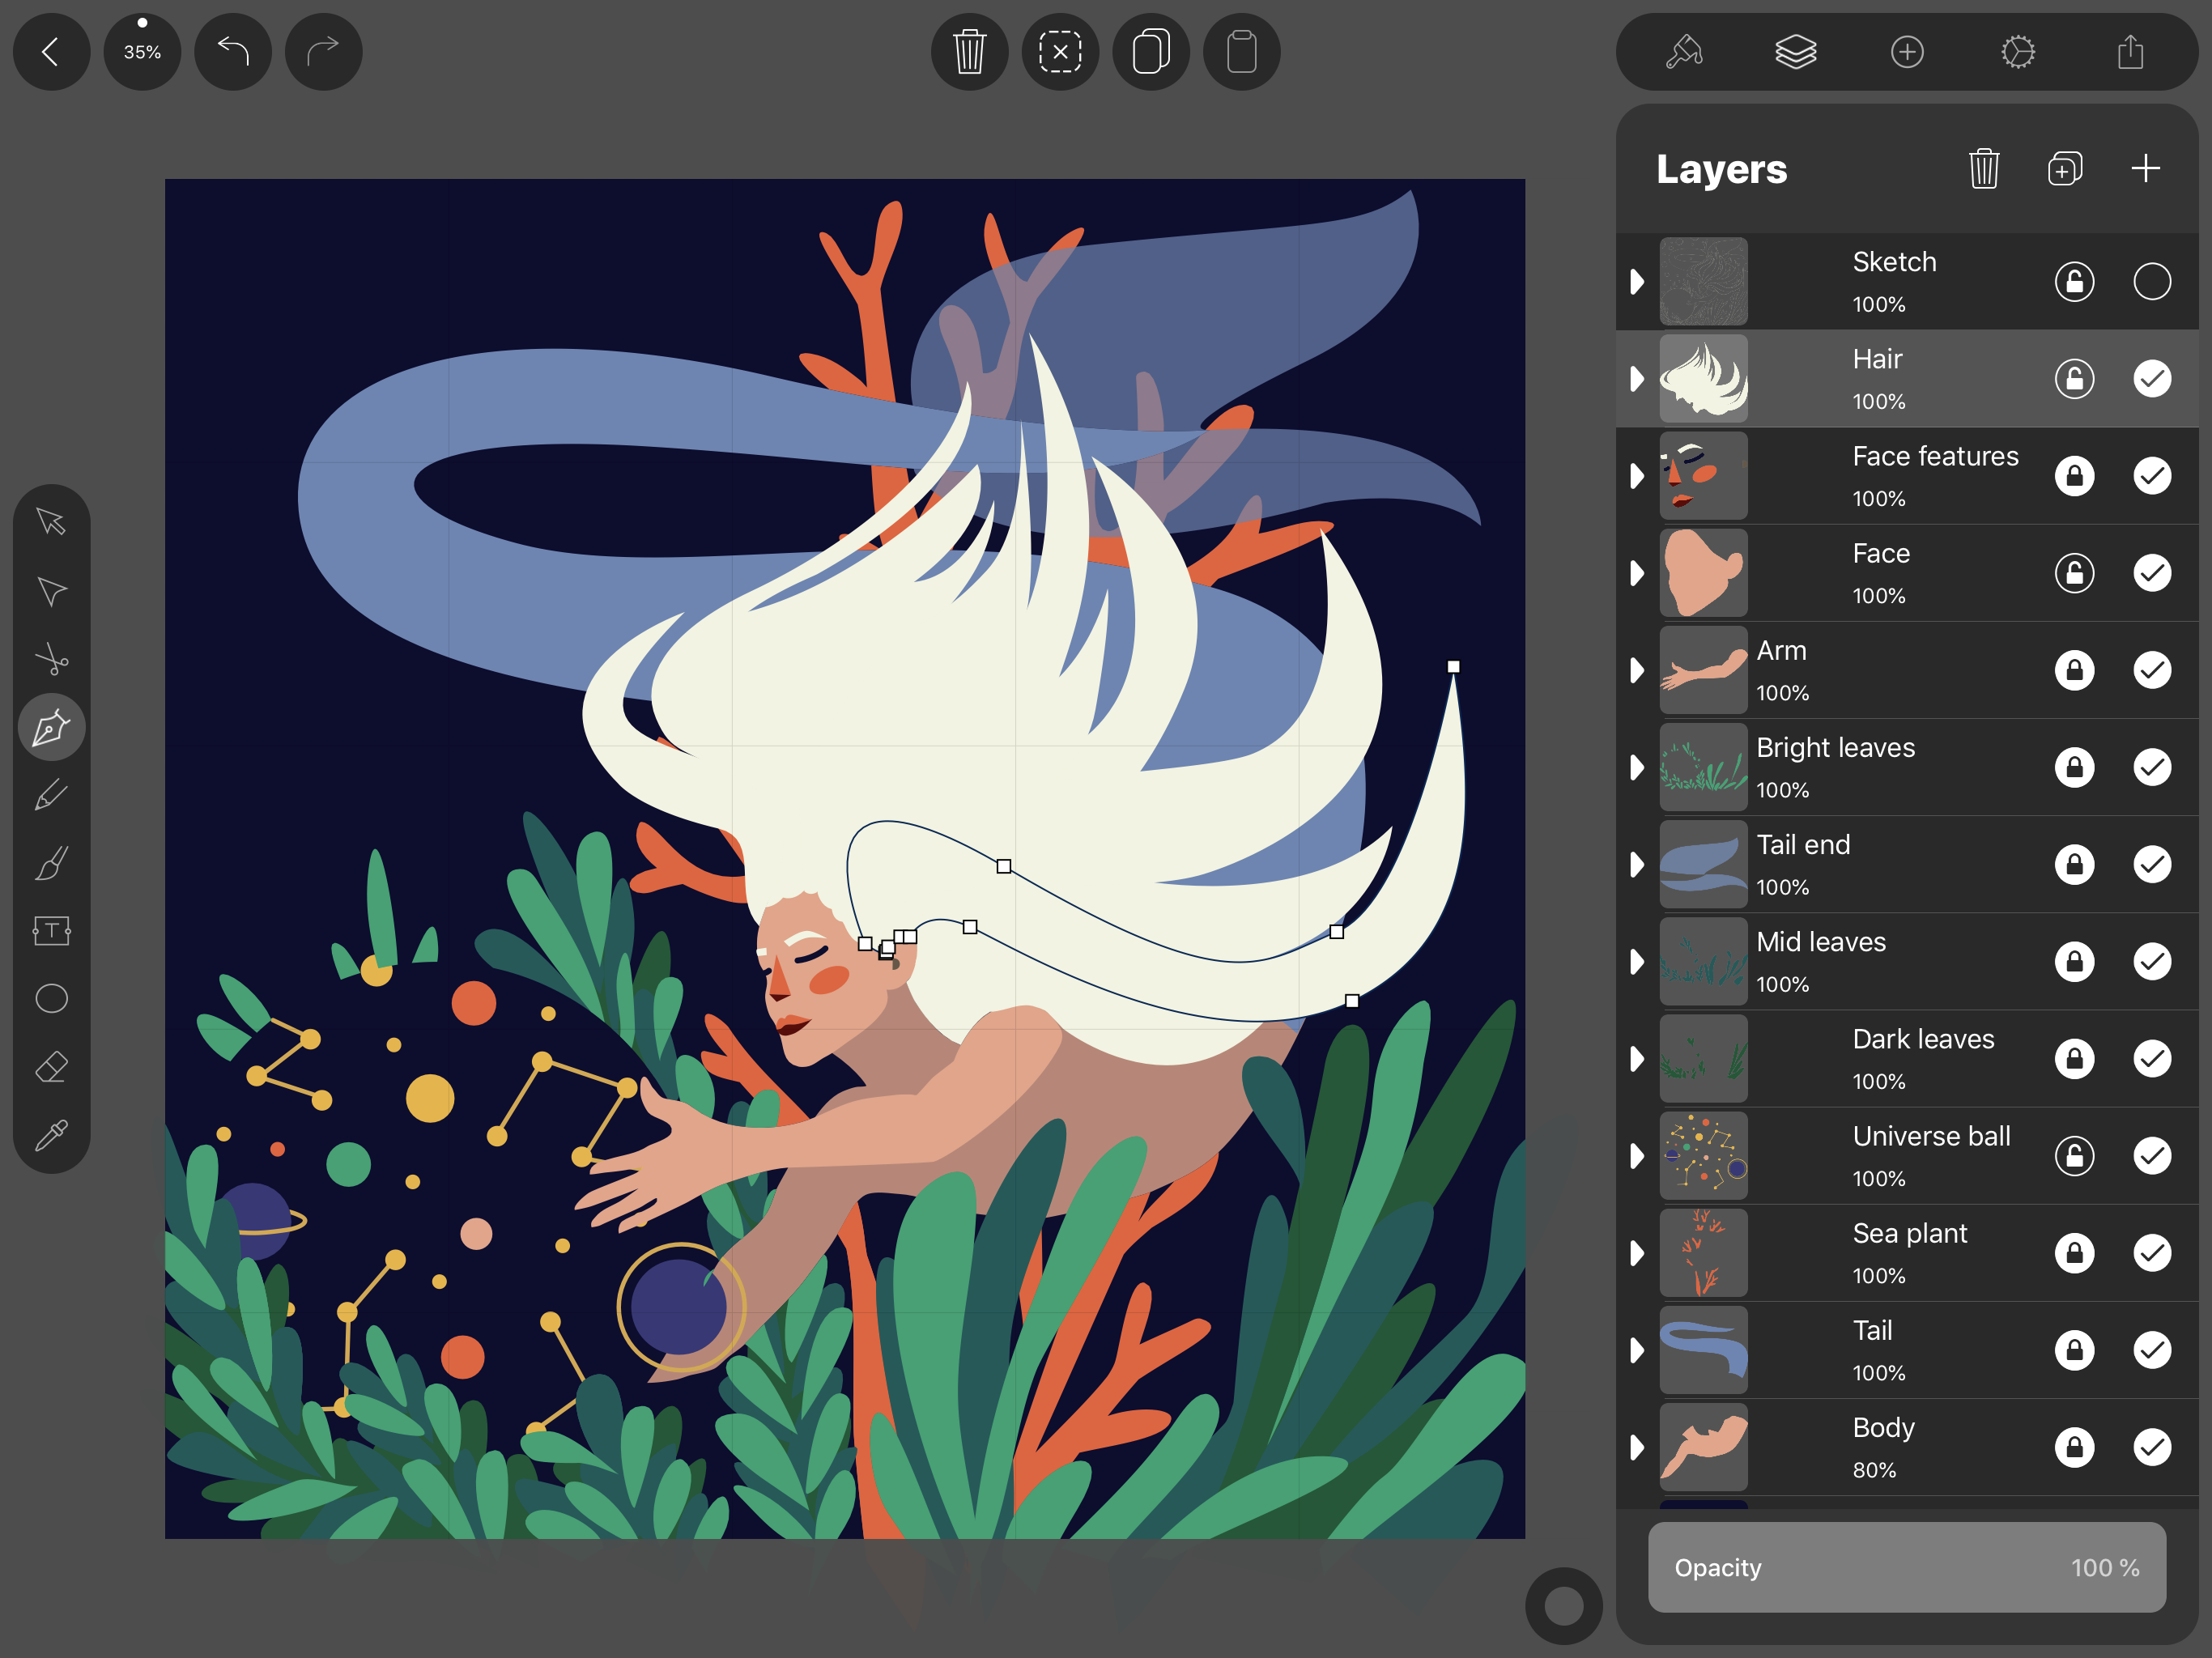
Make it pop
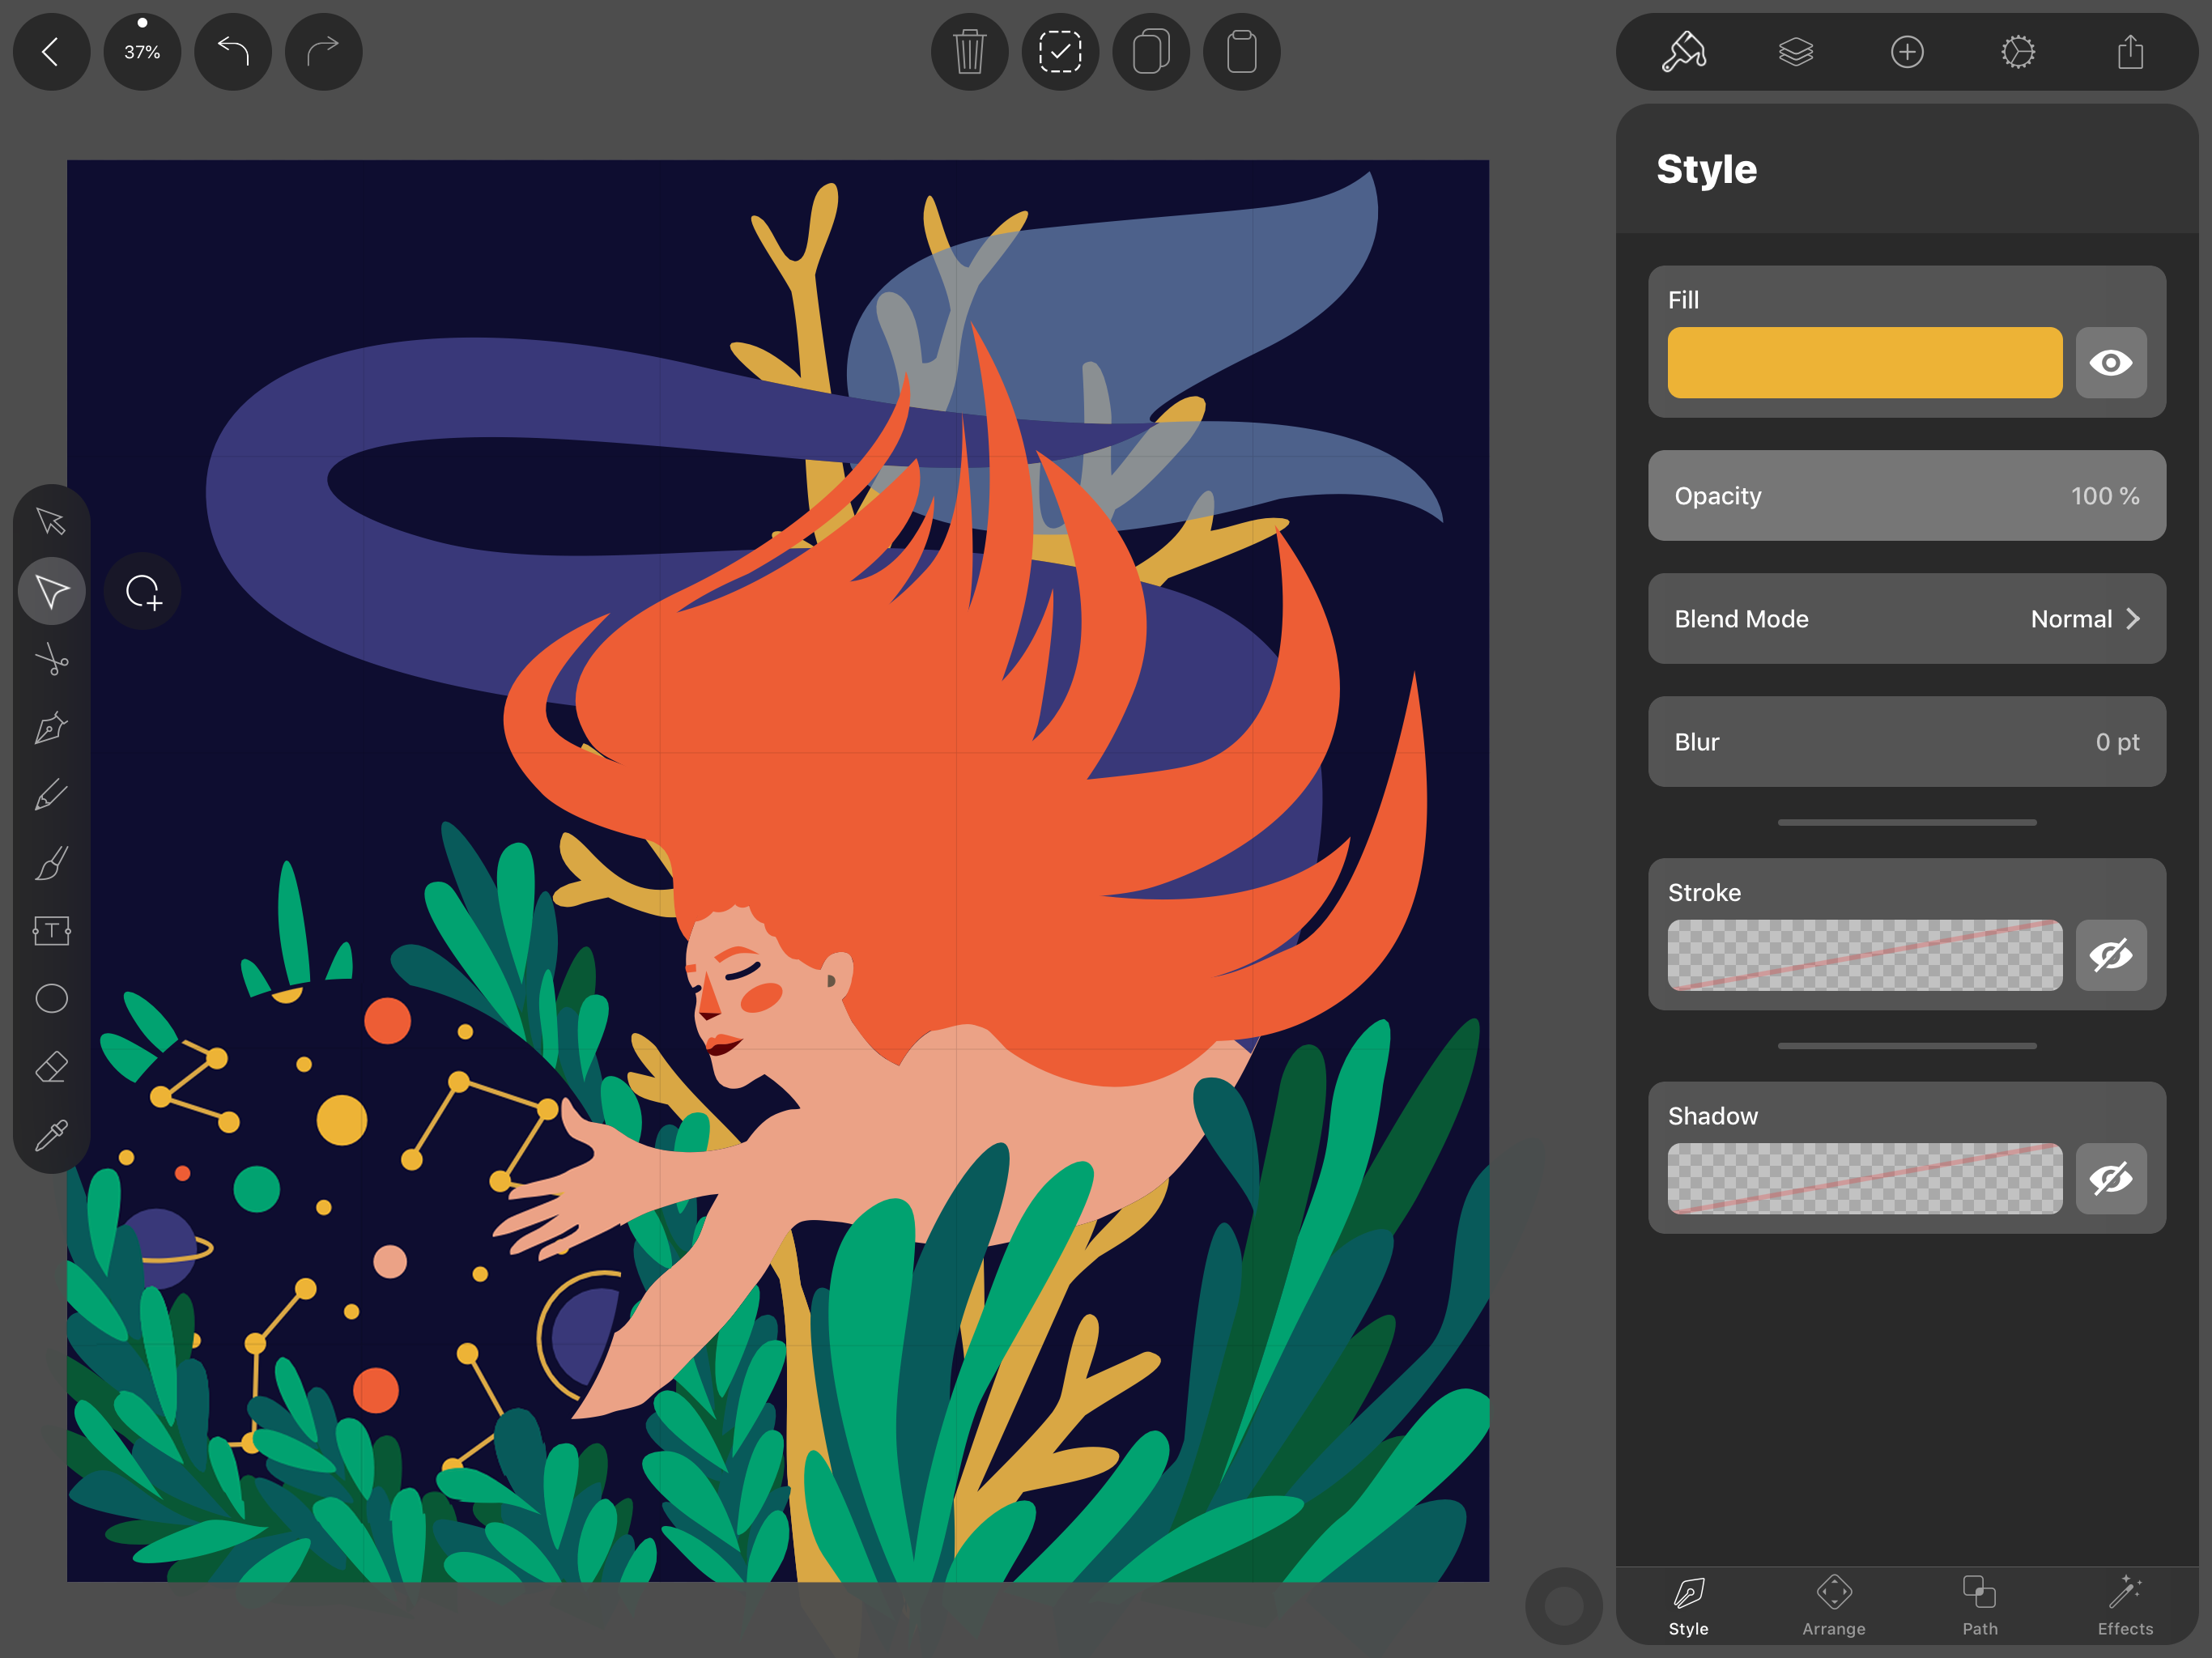
If you have your signature color palette, now it’s time to put it to use! Allow yourself some time to play with color. Try out several combinations, it’s a lot of fun.
Should the hair be white? Why not red? What about the leaves? Does the tail look better in dark blue?
Take a pause and think about your composition once more. Do you still like it? Take a good look at your color choices. You still have time to fix it, but once you start adding shadows, it becomes much more difficult.
Hello darkness, my old friend

Where does the light come from? Is there something blocking the light source? Think about this and you’ll know where to place your shadows. :
My shadows have a rough look resembling a wide brush stroke- They are square and chunky. I start by drawing all the shadows using a solid fill and I add gradients later.
Remember those layers you separated in step 2? Now the layers come in handy. When I’m creating a shadow for the arm, I place it right above the arm layer. Shadow for the face goes right above the face layer… you get the picture.
This way I stay organized and I always know where to find my shadows.
The devil in the details
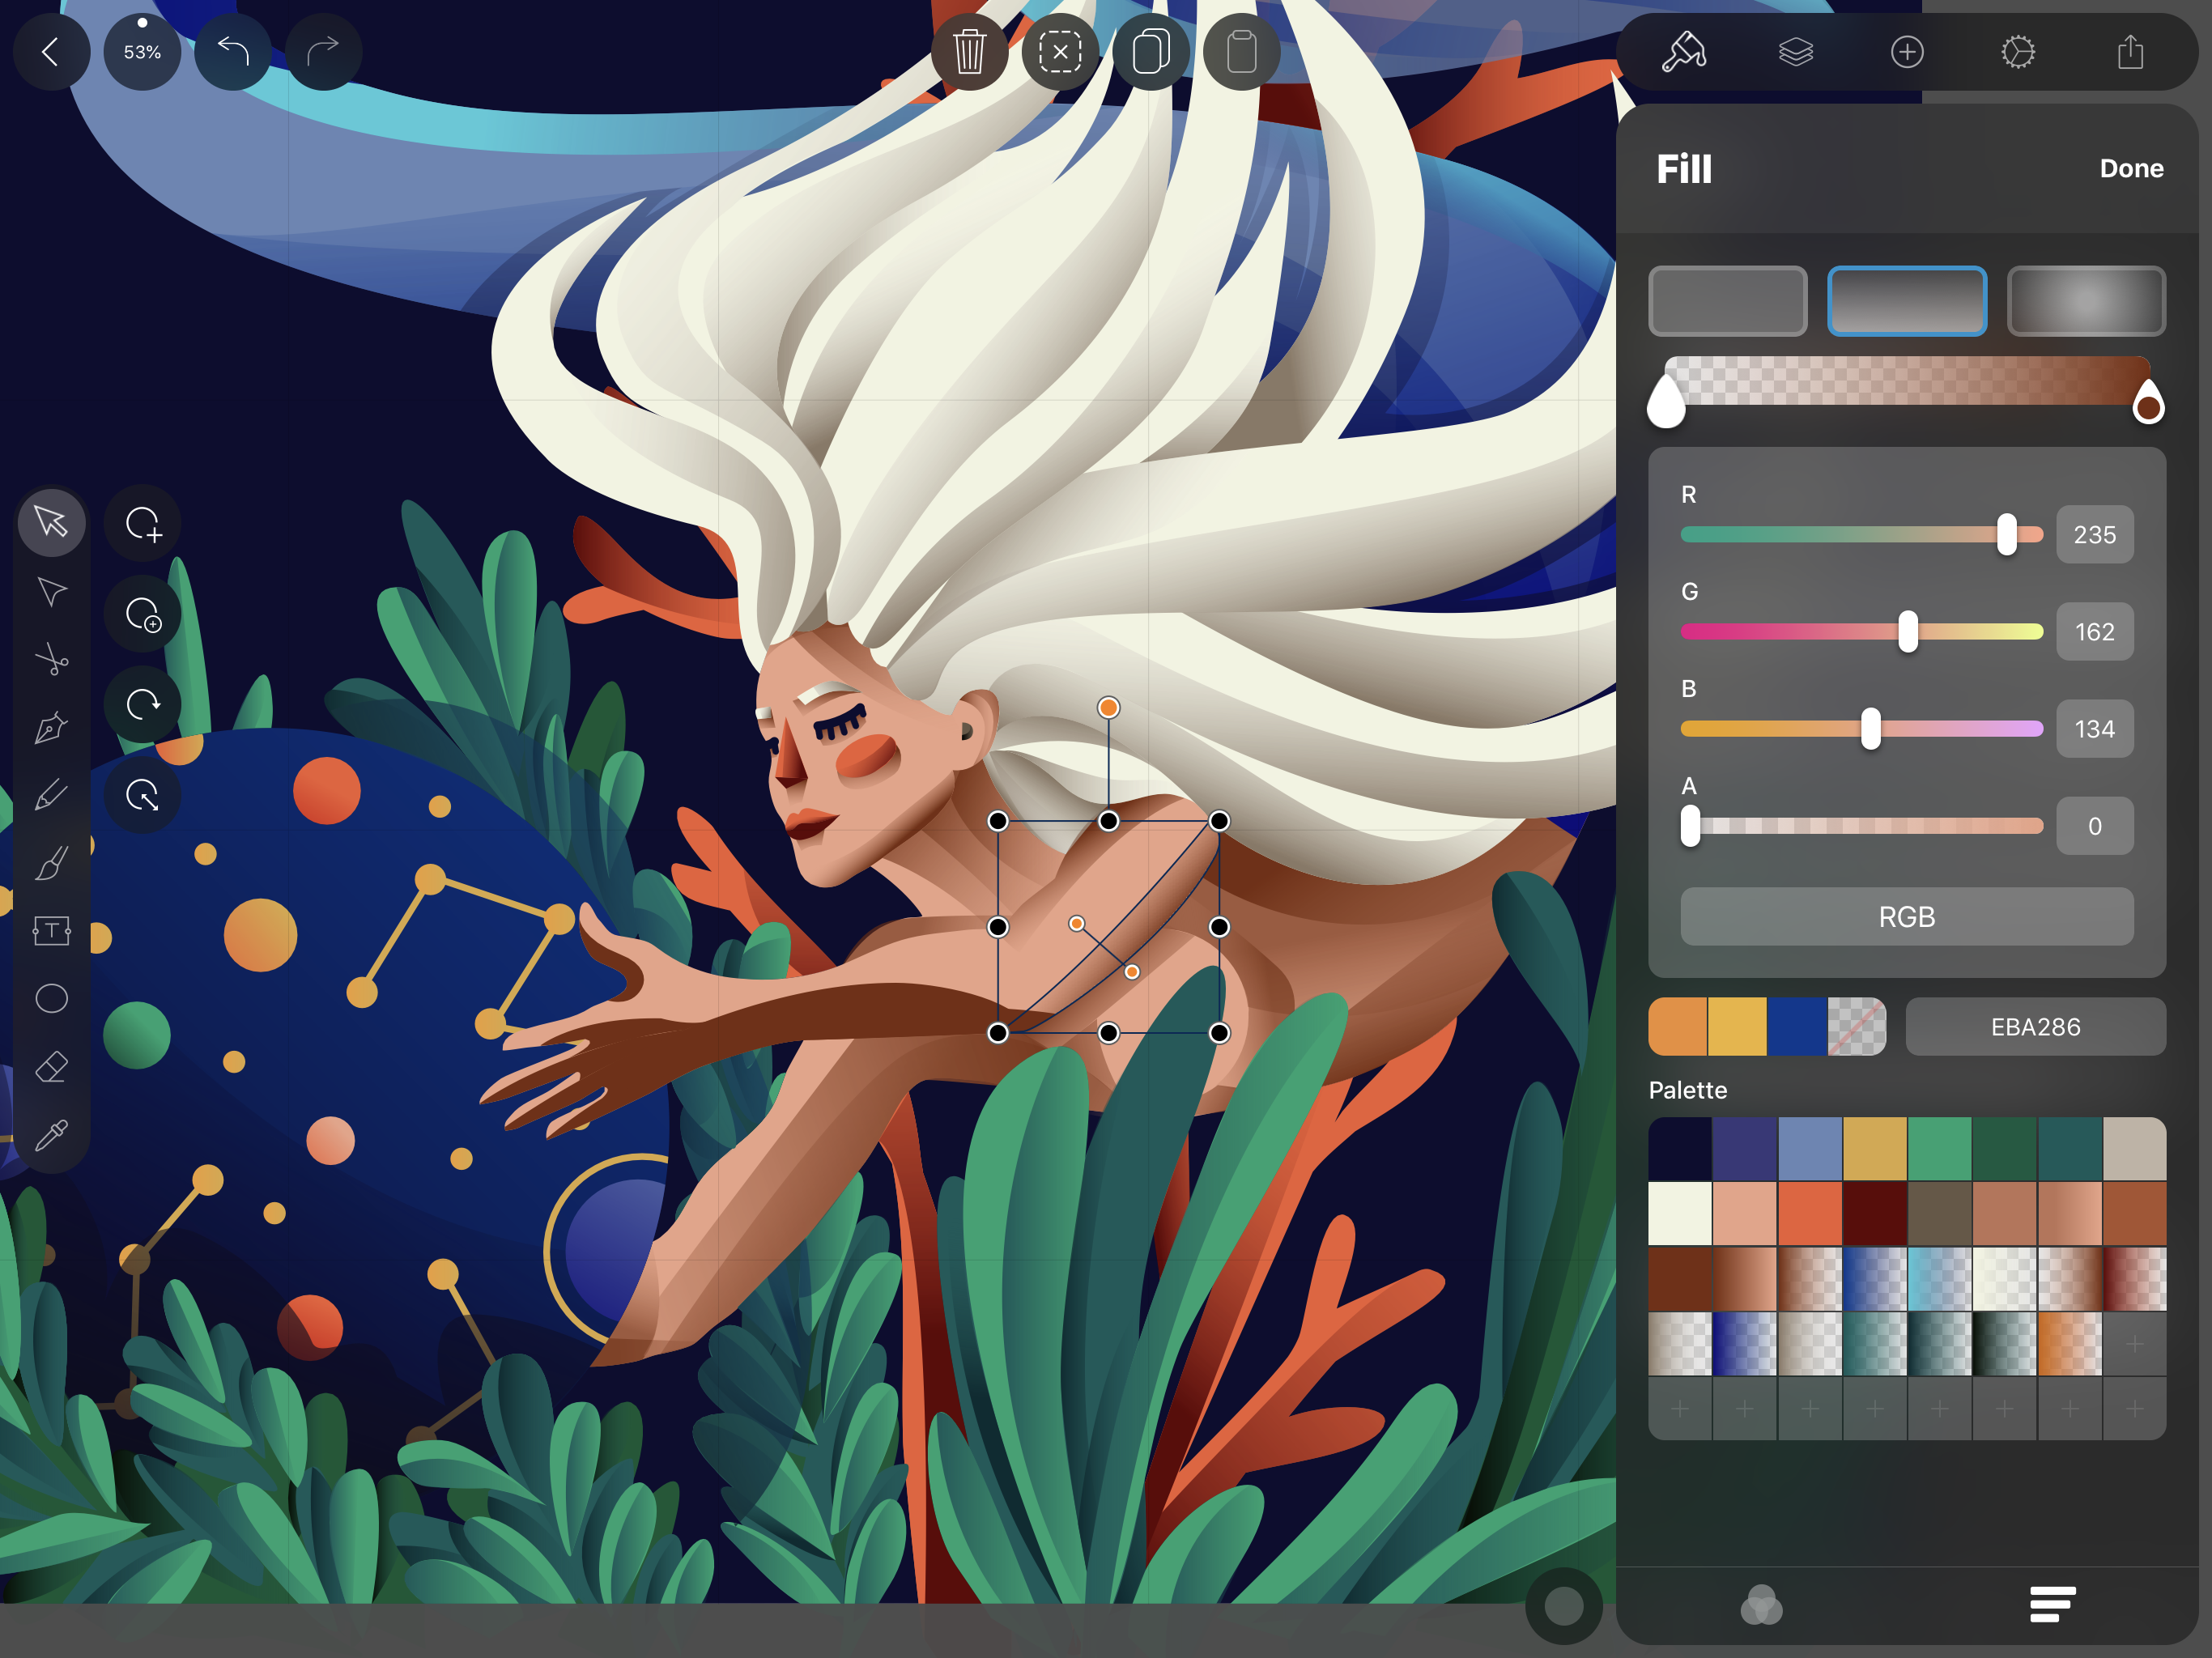
I select each shadow and I replace the solid fill with a gradient. Each gradient goes from the dark skin tone to transparent white. I like to make my shadows look a bit unrealistic, so when it comes to adjusting the direction of the gradient, I don’t strictly stick to the rules of nature… it’s a nice way of saying that “I just eyeball it.”
Let there be light
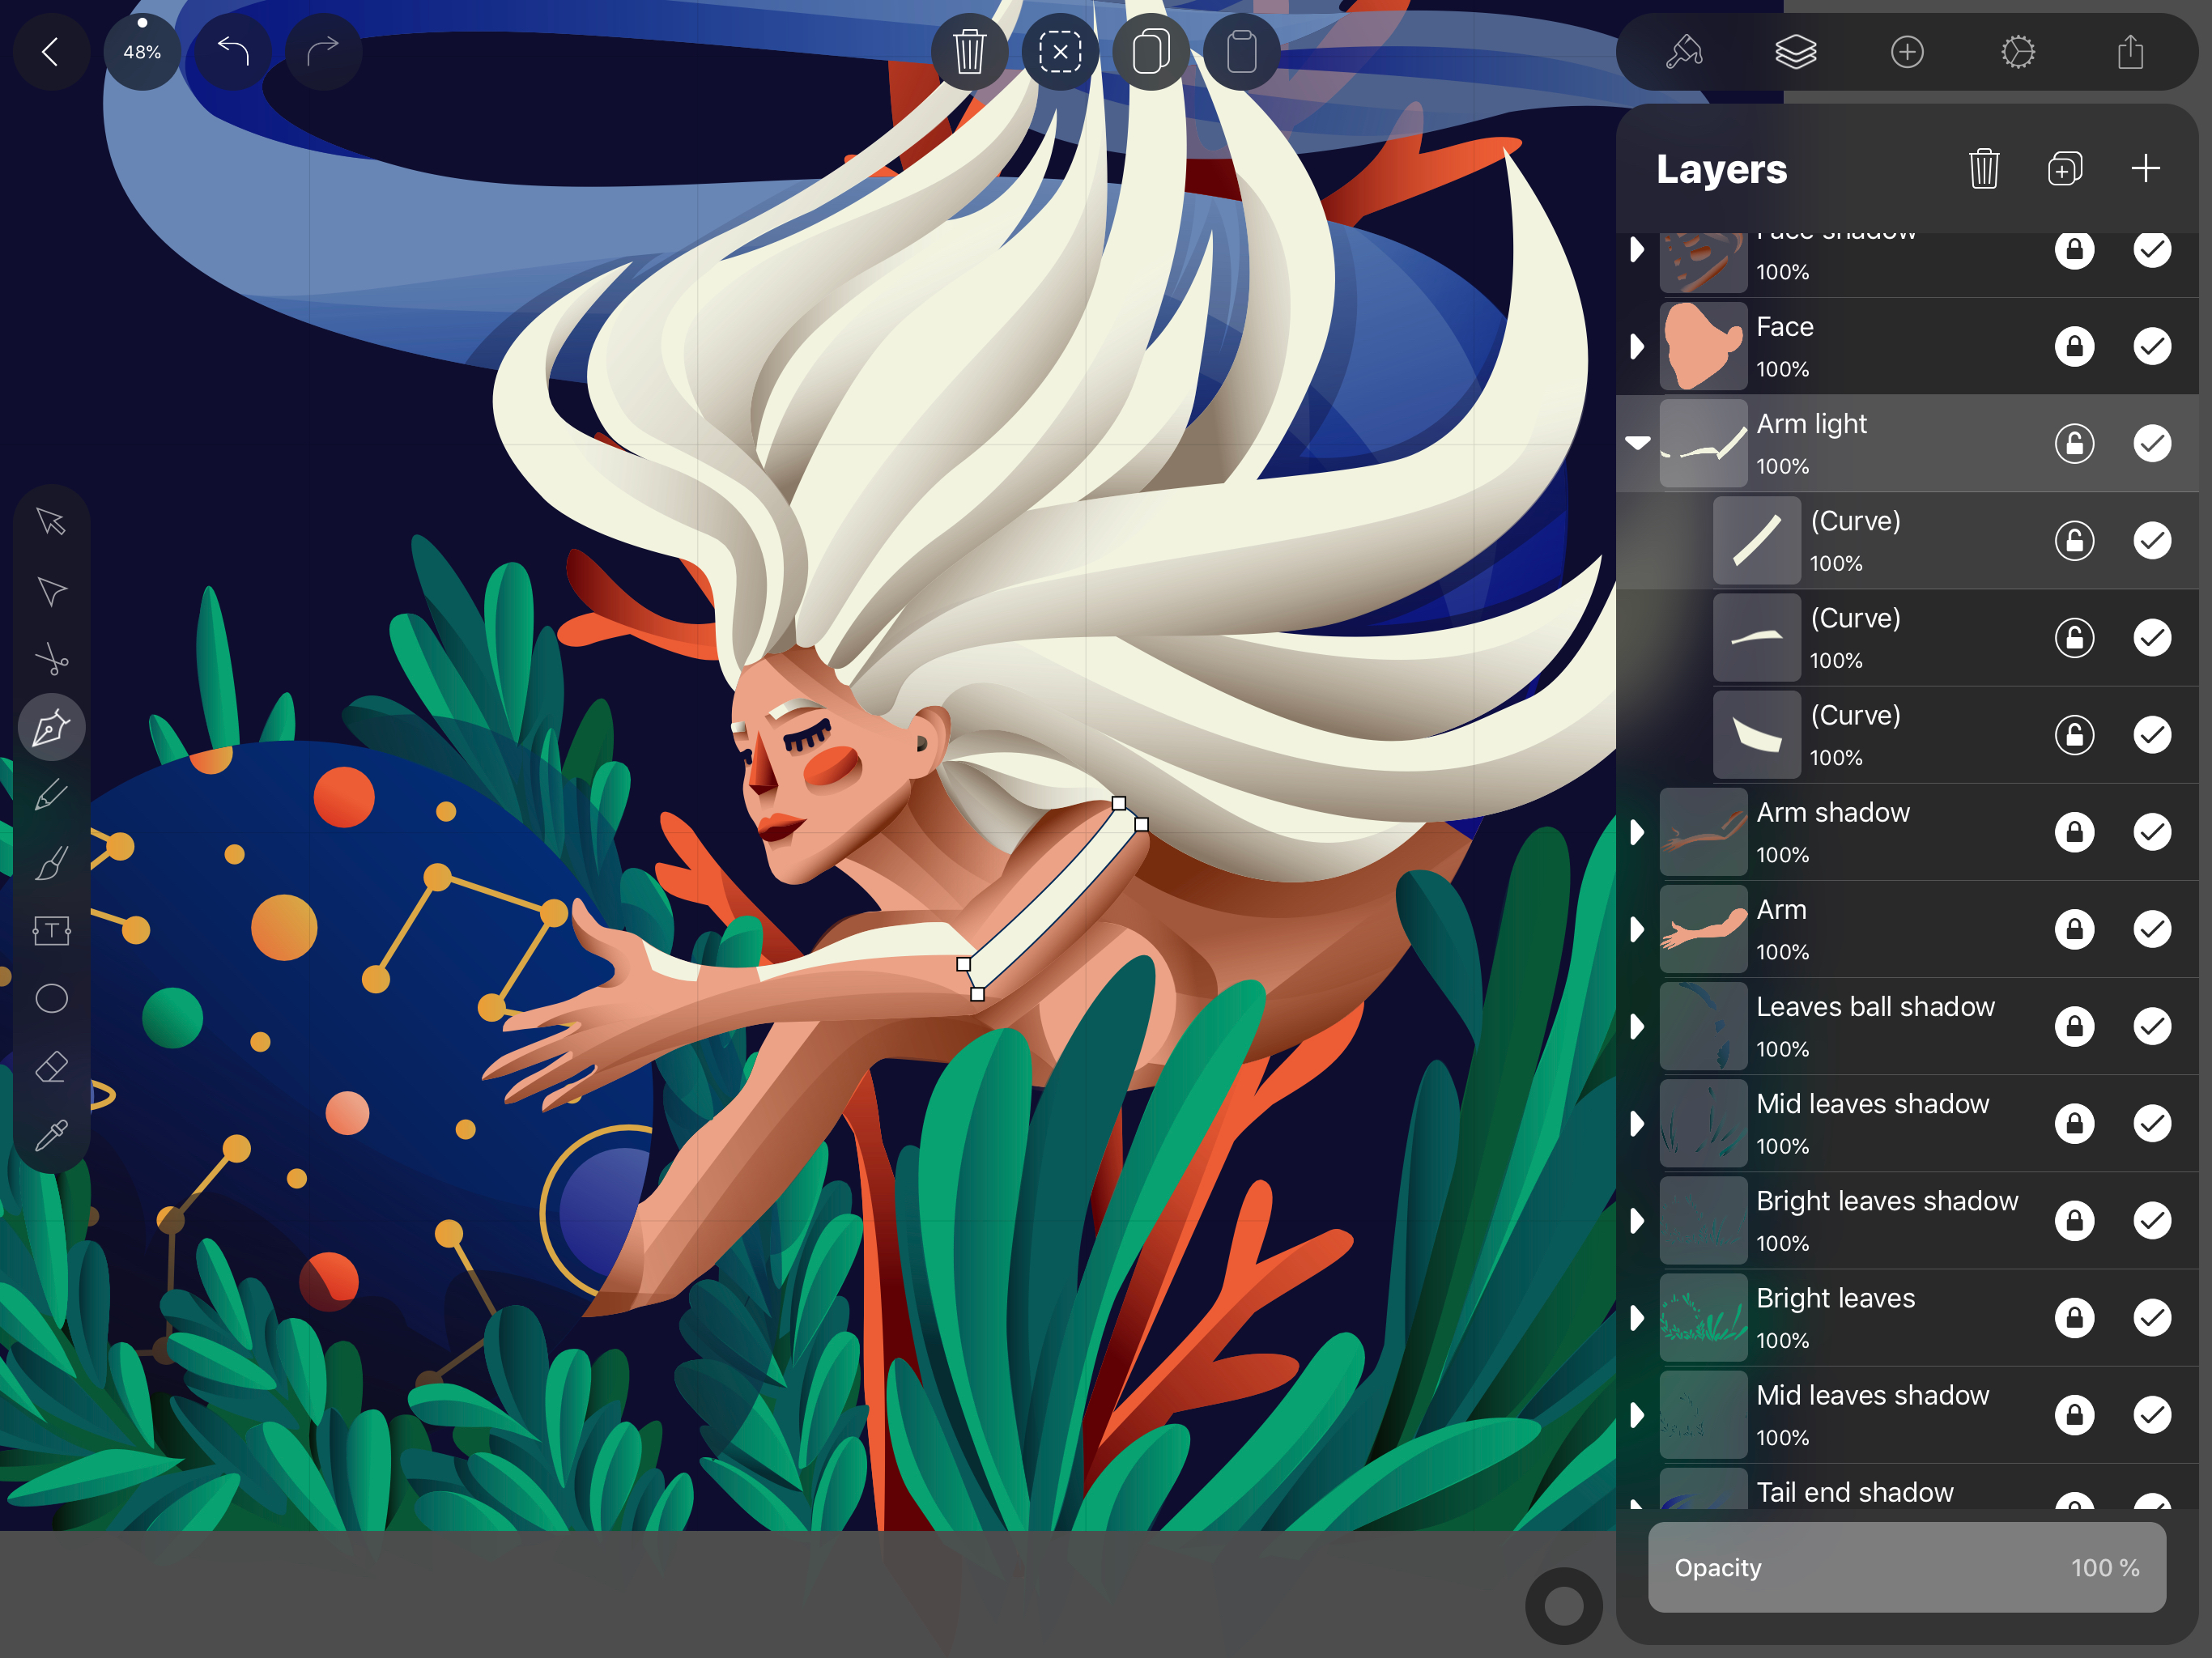
When it comes to adding light I basically follow the same approach described in step 5, “wide brush stroke” and the layer placed on top of the corresponding shadow layer (arm light > arm shadow > arm layer).
Ready to create brand assets that pack a punch?
Visit our Academy for free drawing design courses.
For adding light to the skin, I almost always use pure white color, but when dealing with stronger colors (such as the one on the mermaid tail), I like to go wild and use some radiant nuances of the base color.
Blending the lights
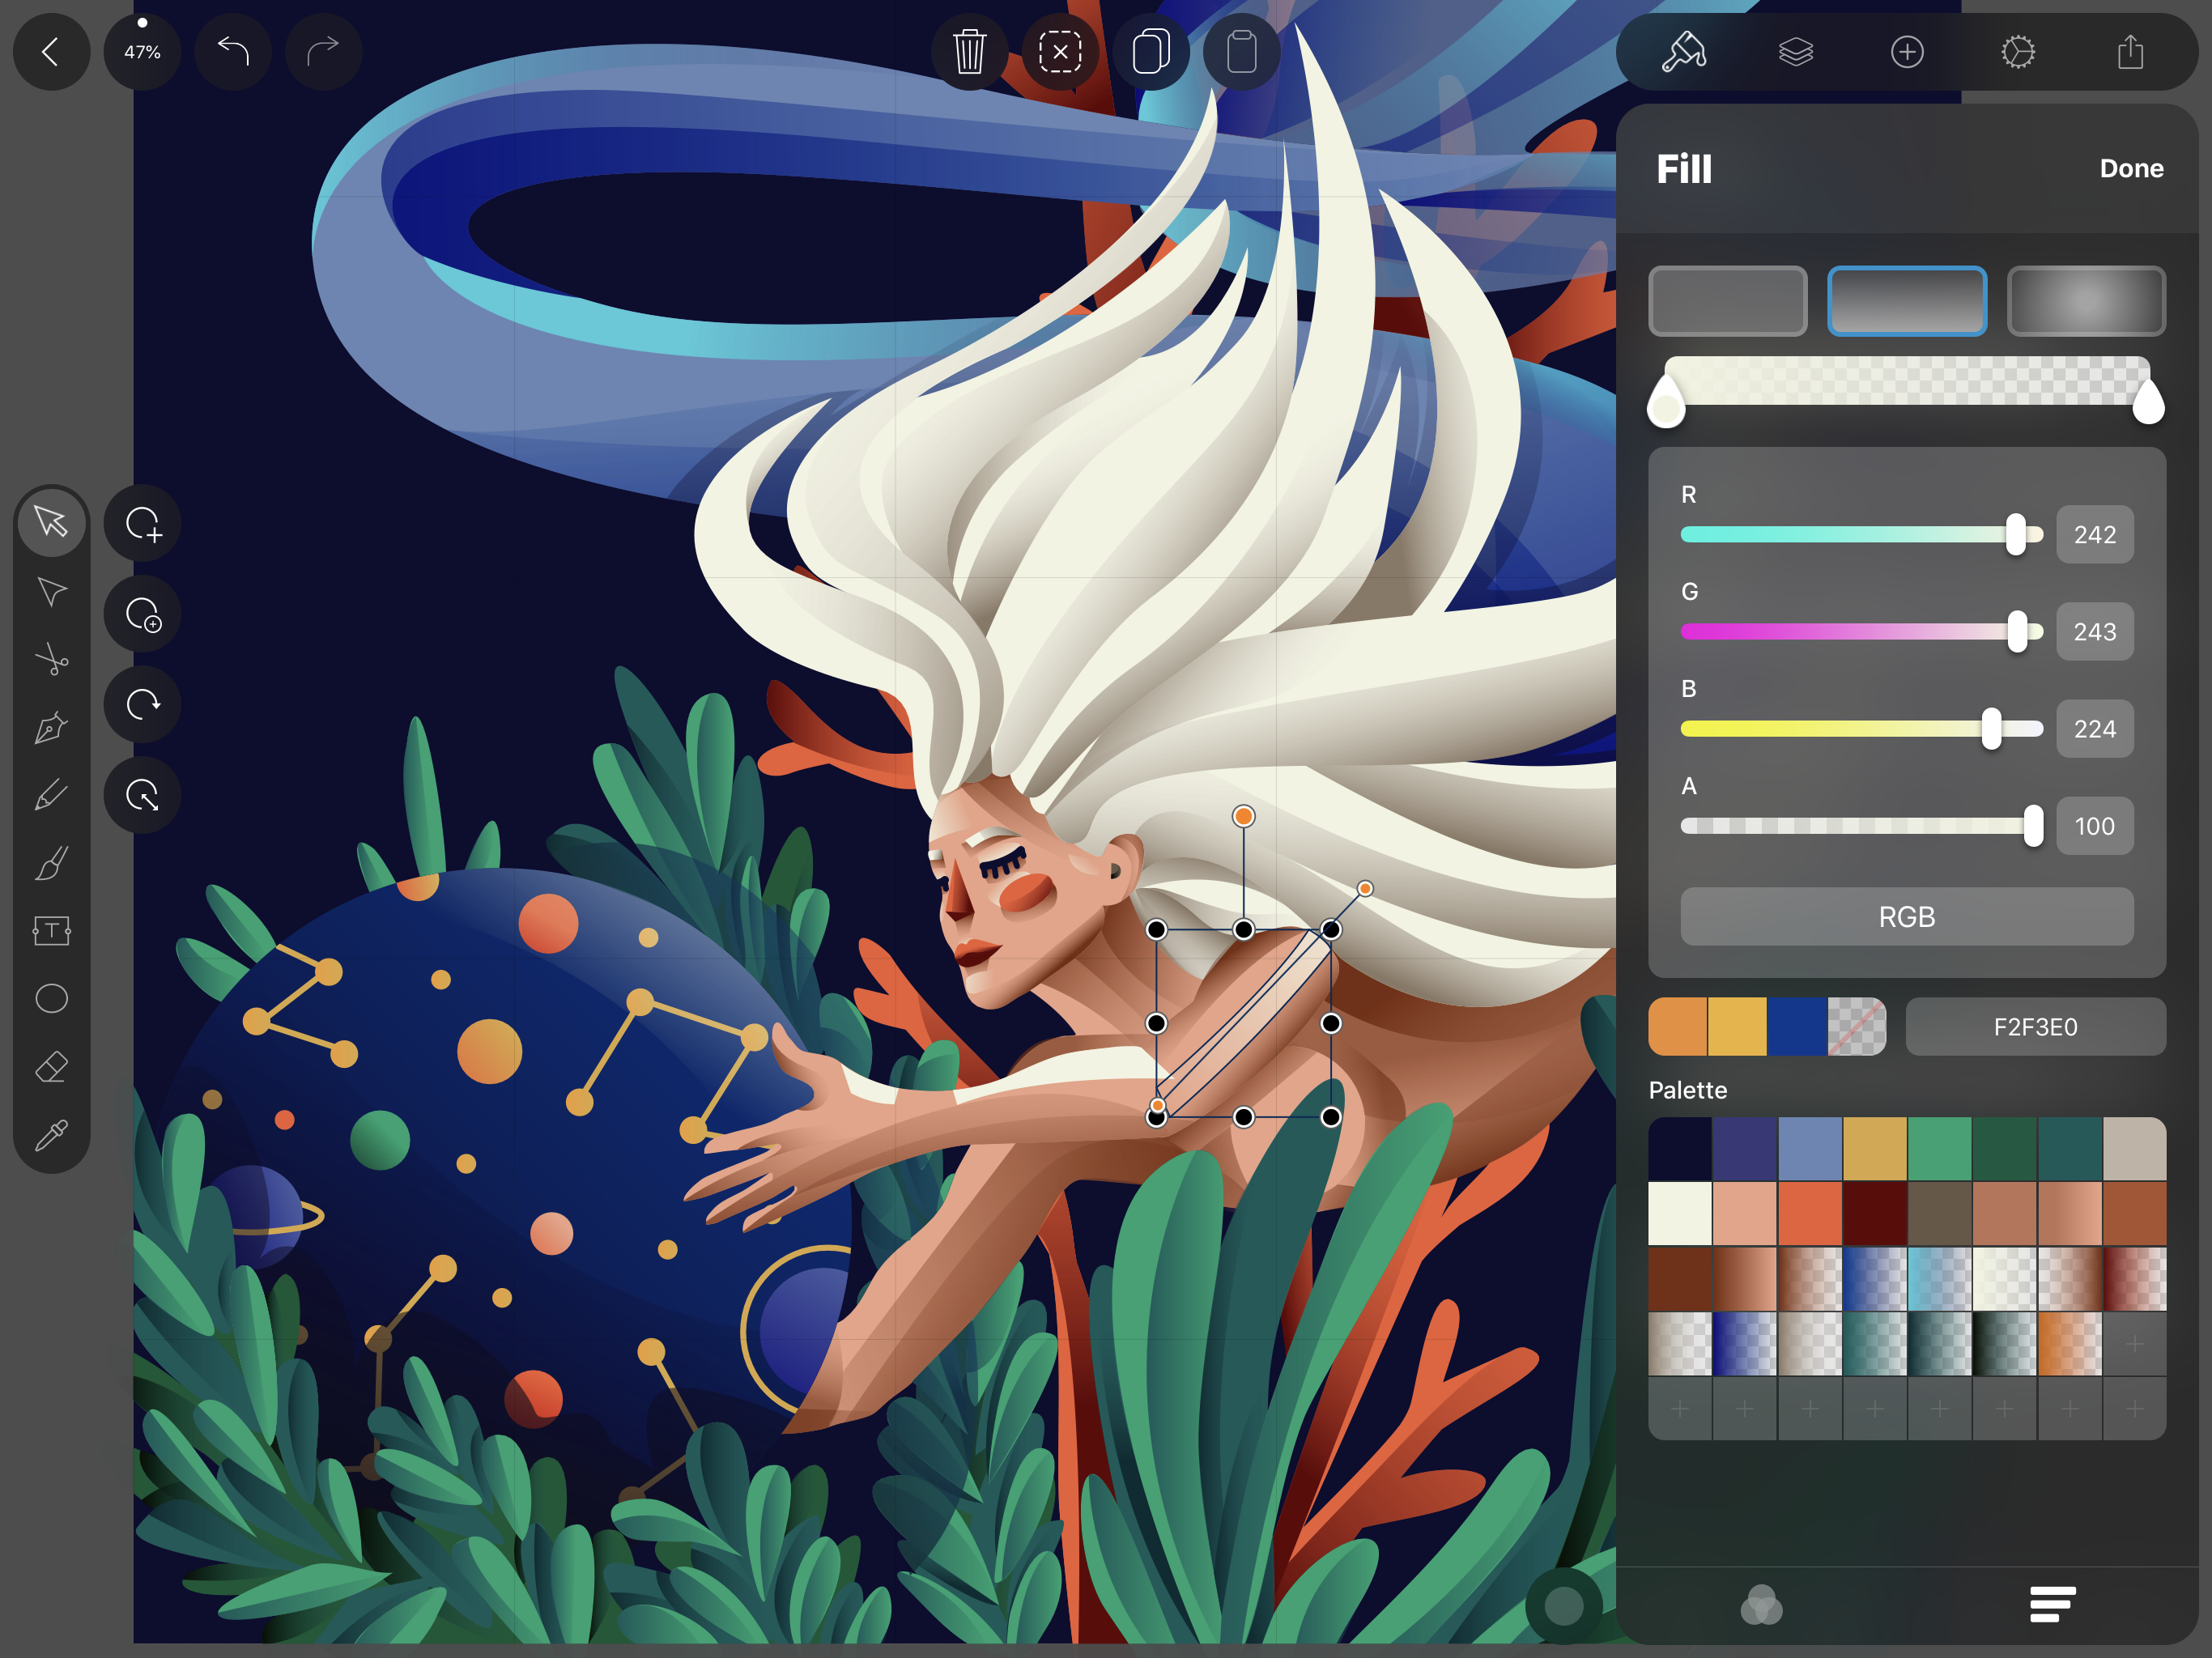
I select each highlight and I replace the solid fill with a gradient. Each gradient uses the same color on both ends ranging from 100% opacity to 0 opacity. I follow the same “unrealistic” rules, and as mentioned before I just eyeball the direction of the gradient.
Wrapping it up
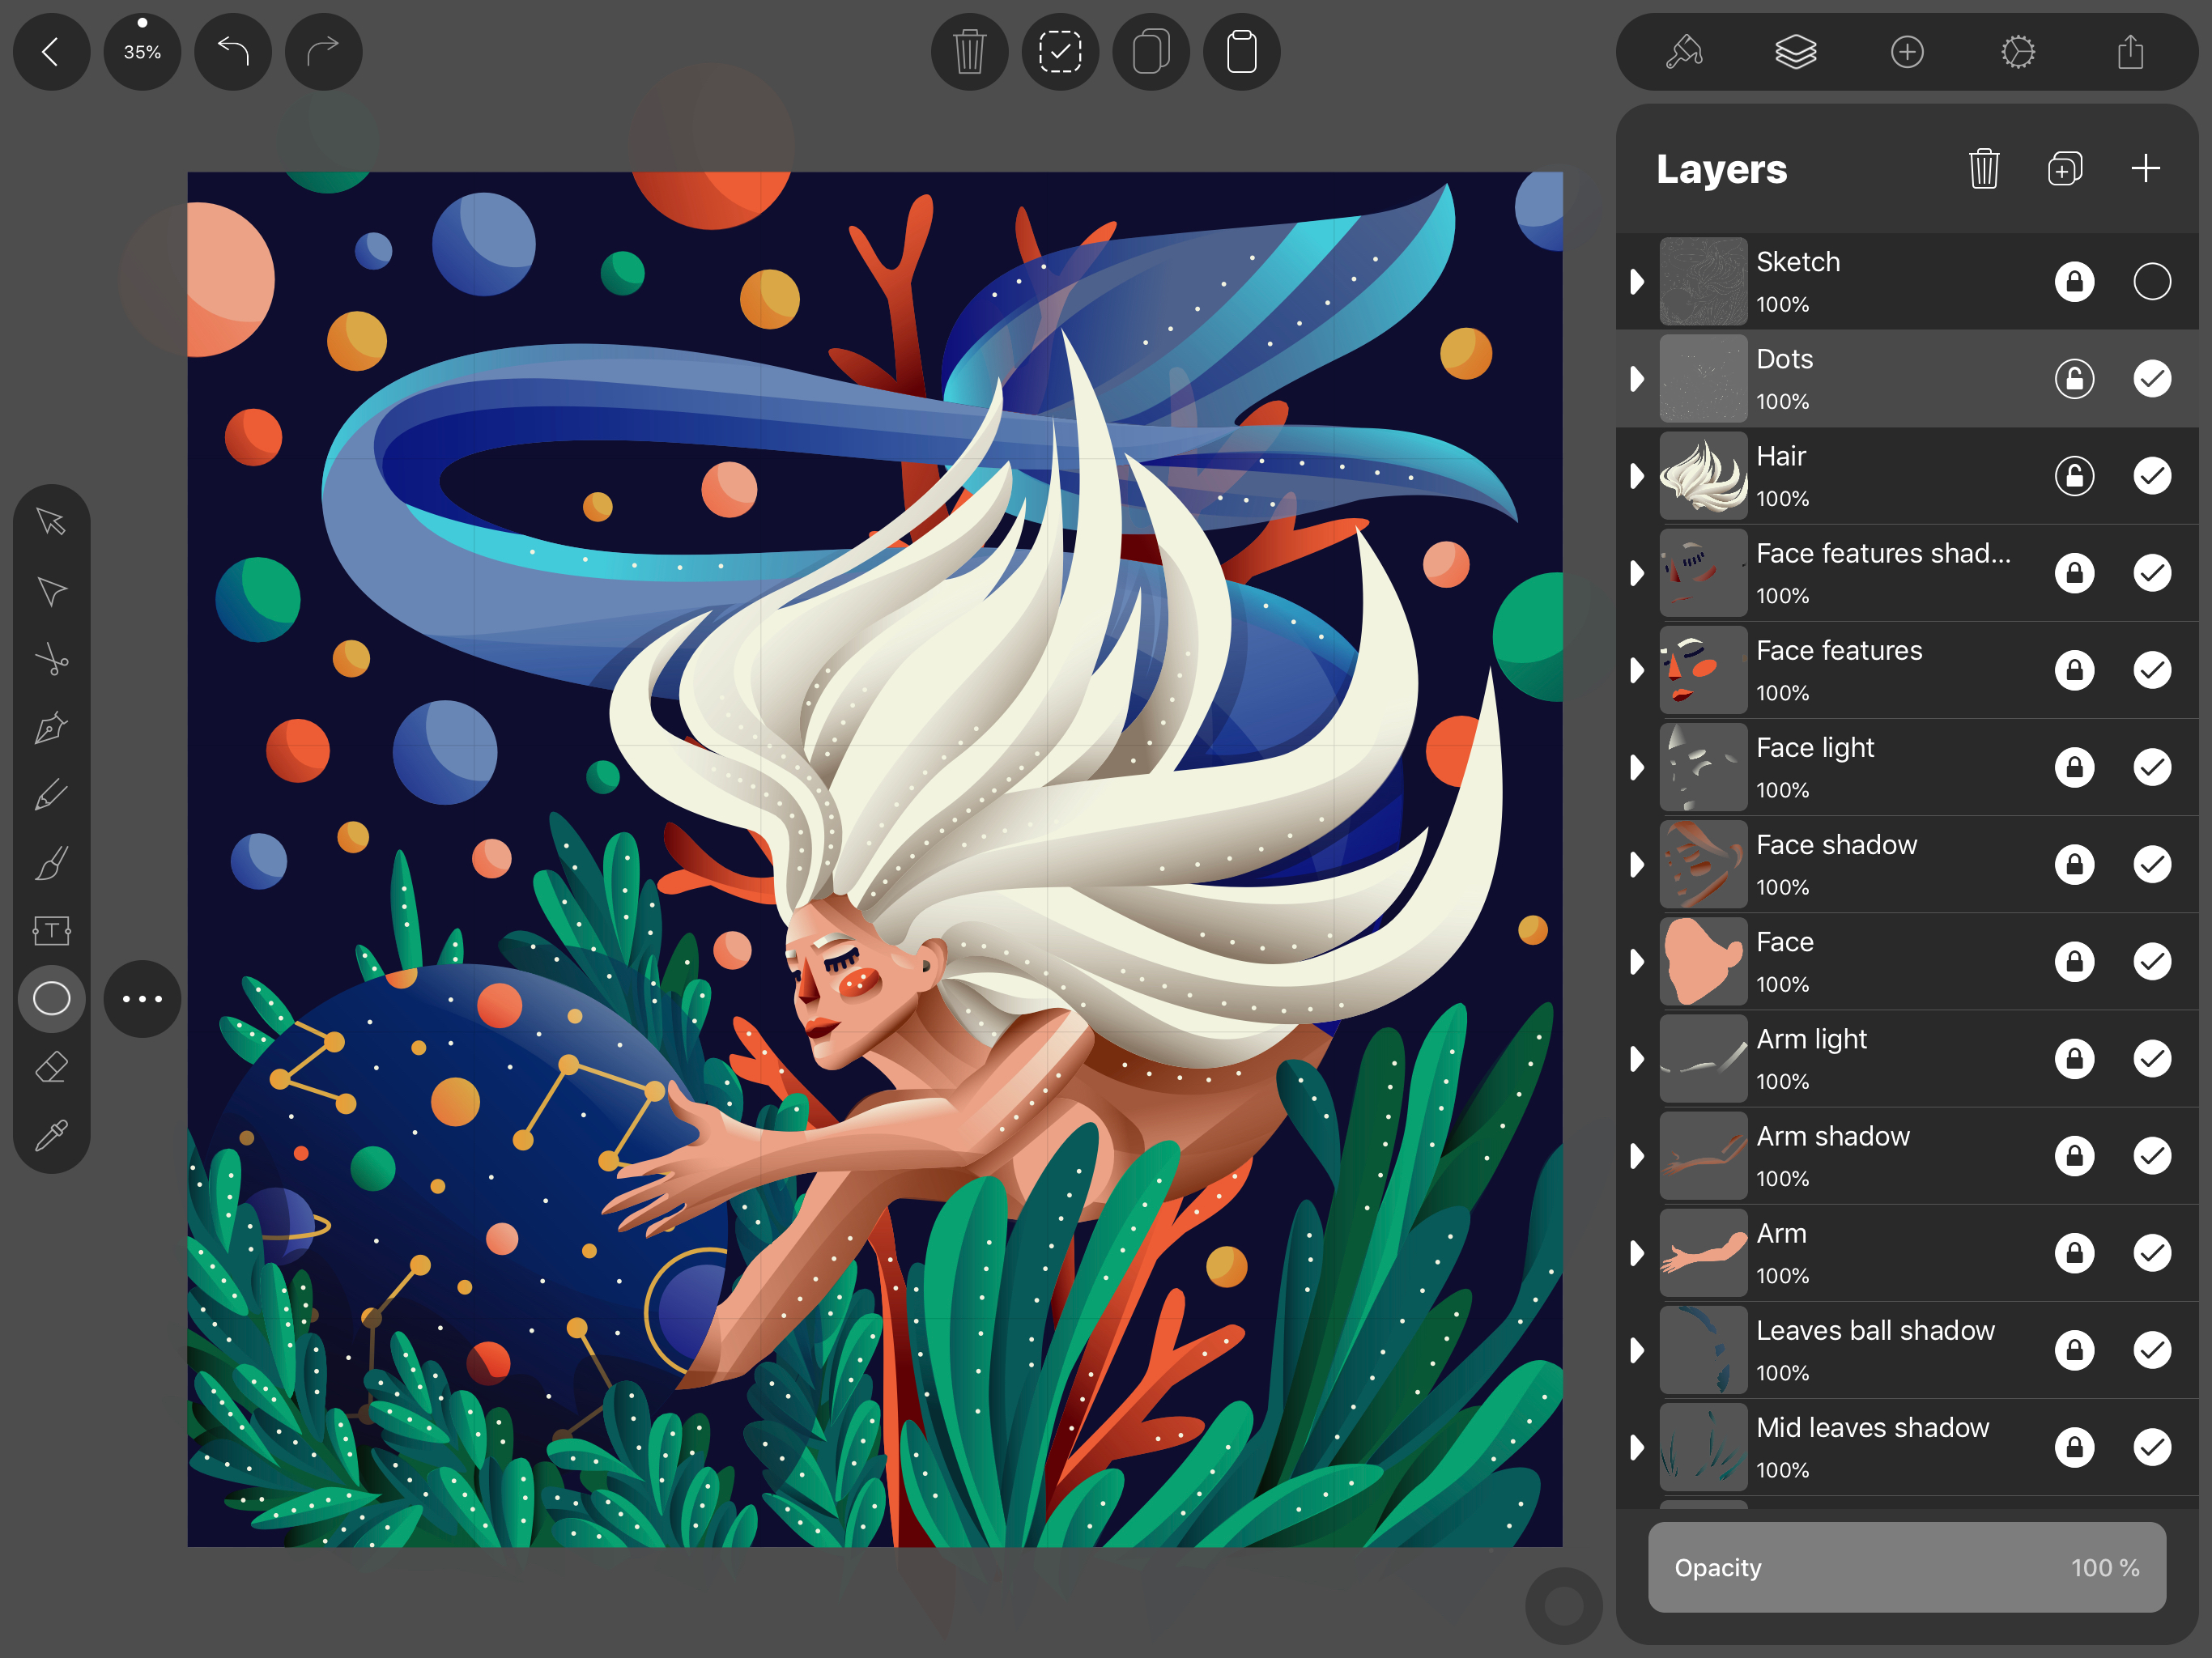
My characters are usually placed in “spacey” scenery and I use backgrounds only to add a bit of depth and interest to the image, so as not to actually illustrate where the character is. For this, I use a bunch of abstract shapes (in this case circles) and I place them without any particular order.
And voilà, my character has been brought to life using Vectornator!
Make sure to visit Marta’s online shop on Big Cartel. There you purchase beautiful prints.
Also, you can see her latest works by following her on Instagram.
Jumpstart your ideas with Linearity Curve
Take your designs to the next level.

Share this!
Emma Taggart
Emma is a Content Writer for Linearity in Berlin. Her hobbies include making ceramics, roller skating, drawing, and 2D animation.