:quality(75))
:quality(75))


:quality(75))
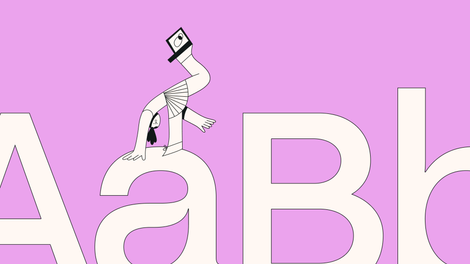
Masks are enigmatic because they conceal and reveal certain parts of a face. The concept is the same with digital image masks: they hide and show parts of an image, which makes it more interesting to look at.
Image masking is a core feature offered by digital image editing software such as Adobe Photoshop, Illustrator, and Linearity Curve (formally Vectornator).
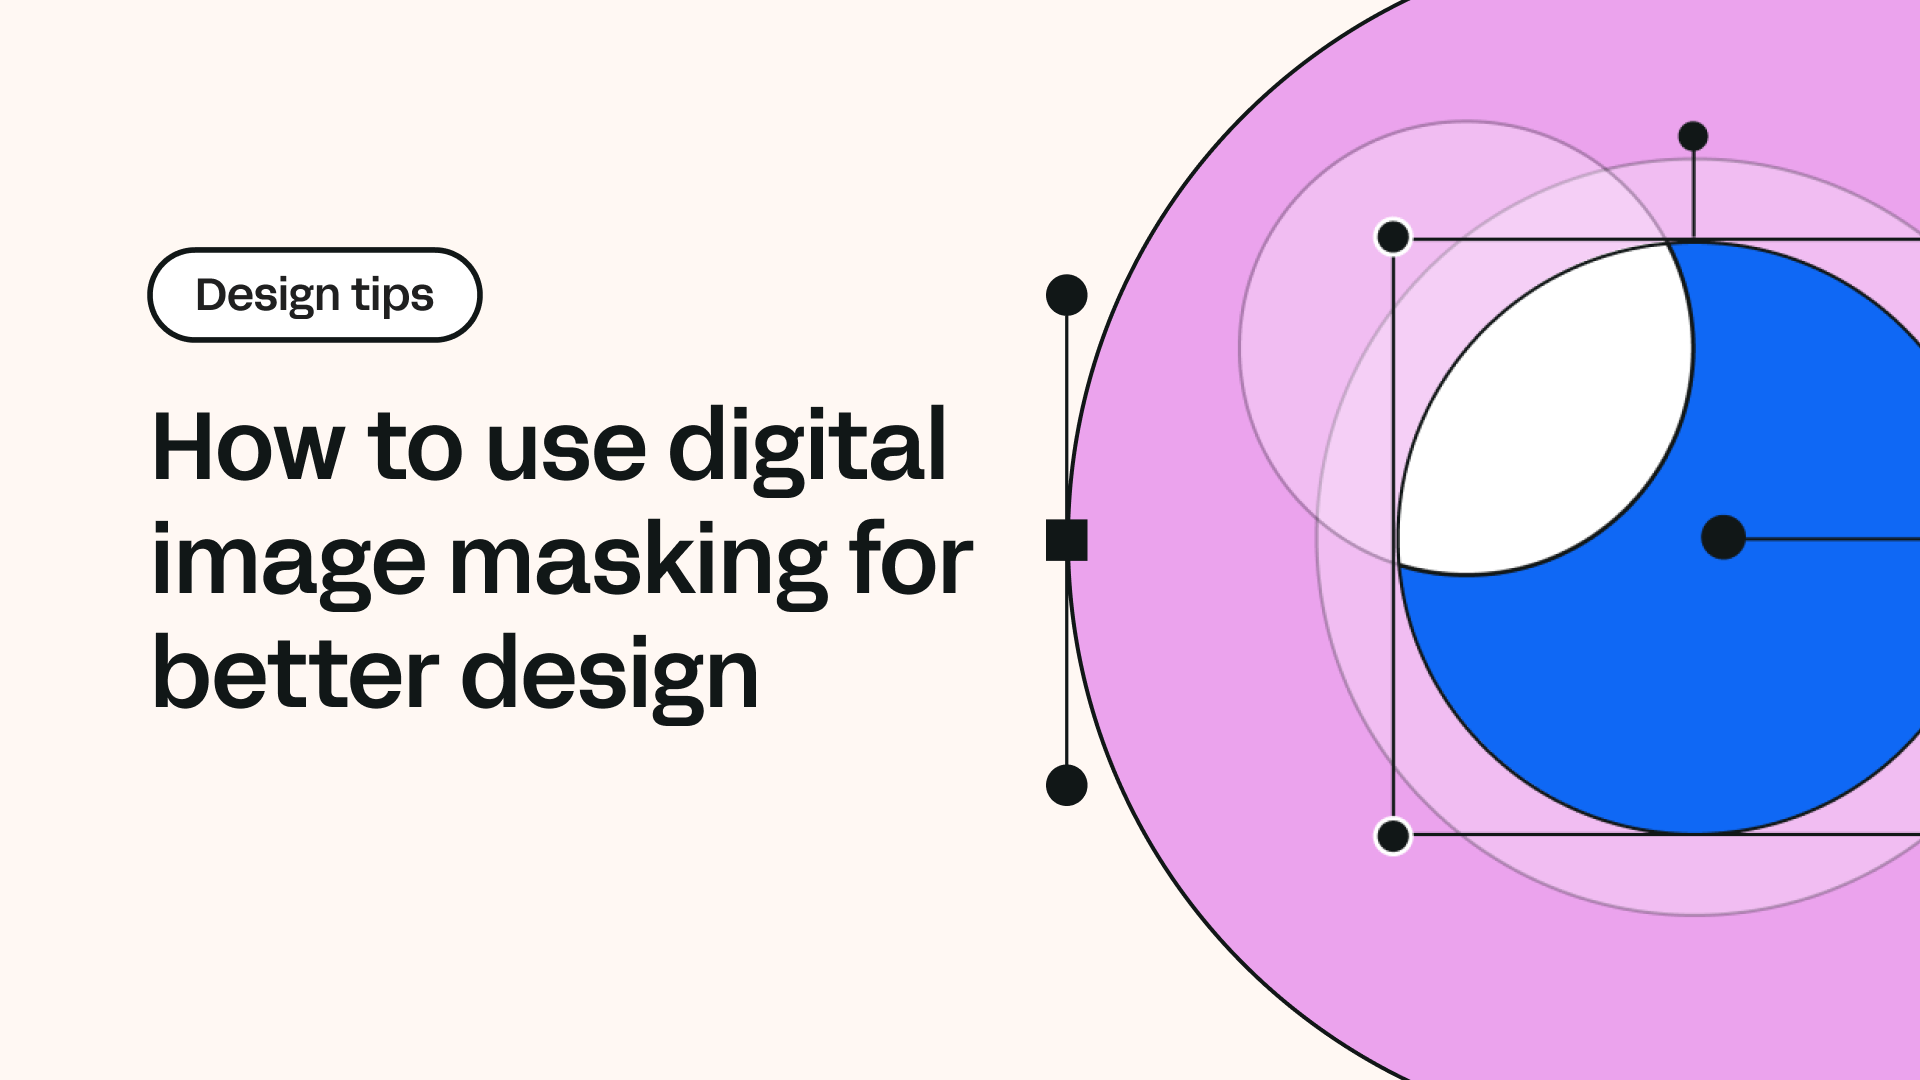
To mask an image or create an image mask means that you overlay the image layer with a detailed grayscale layer or a path that filters what parts of the image get shown.
Sounds a bit complicated, right? Let's break it down.
What's an image mask?
Simply put, an image mask is a filter created with code. The code determines how much and in which areas the image is filtered.
For example, imagine you have a photo with a pane of glass in front of it. The glass has been covered with black paint, and it's not letting through any portion of the image.
That pane of glass is a mask.
Jumpstart your ideas with Linearity Curve
Take your designs to the next level.
Now, you start removing the black paint on certain parts of the glass, and it's letting through some of the image behind. You can choose which parts of the image to show without cutting, painting, or altering the original image.
The glass can be moved freely over the image to change which areas of the image are let through.
You can use that pane of glass with other images, too, and if you want to, you can create another glass pane mask and place that over your masked image.
Pretty cool, huh!?
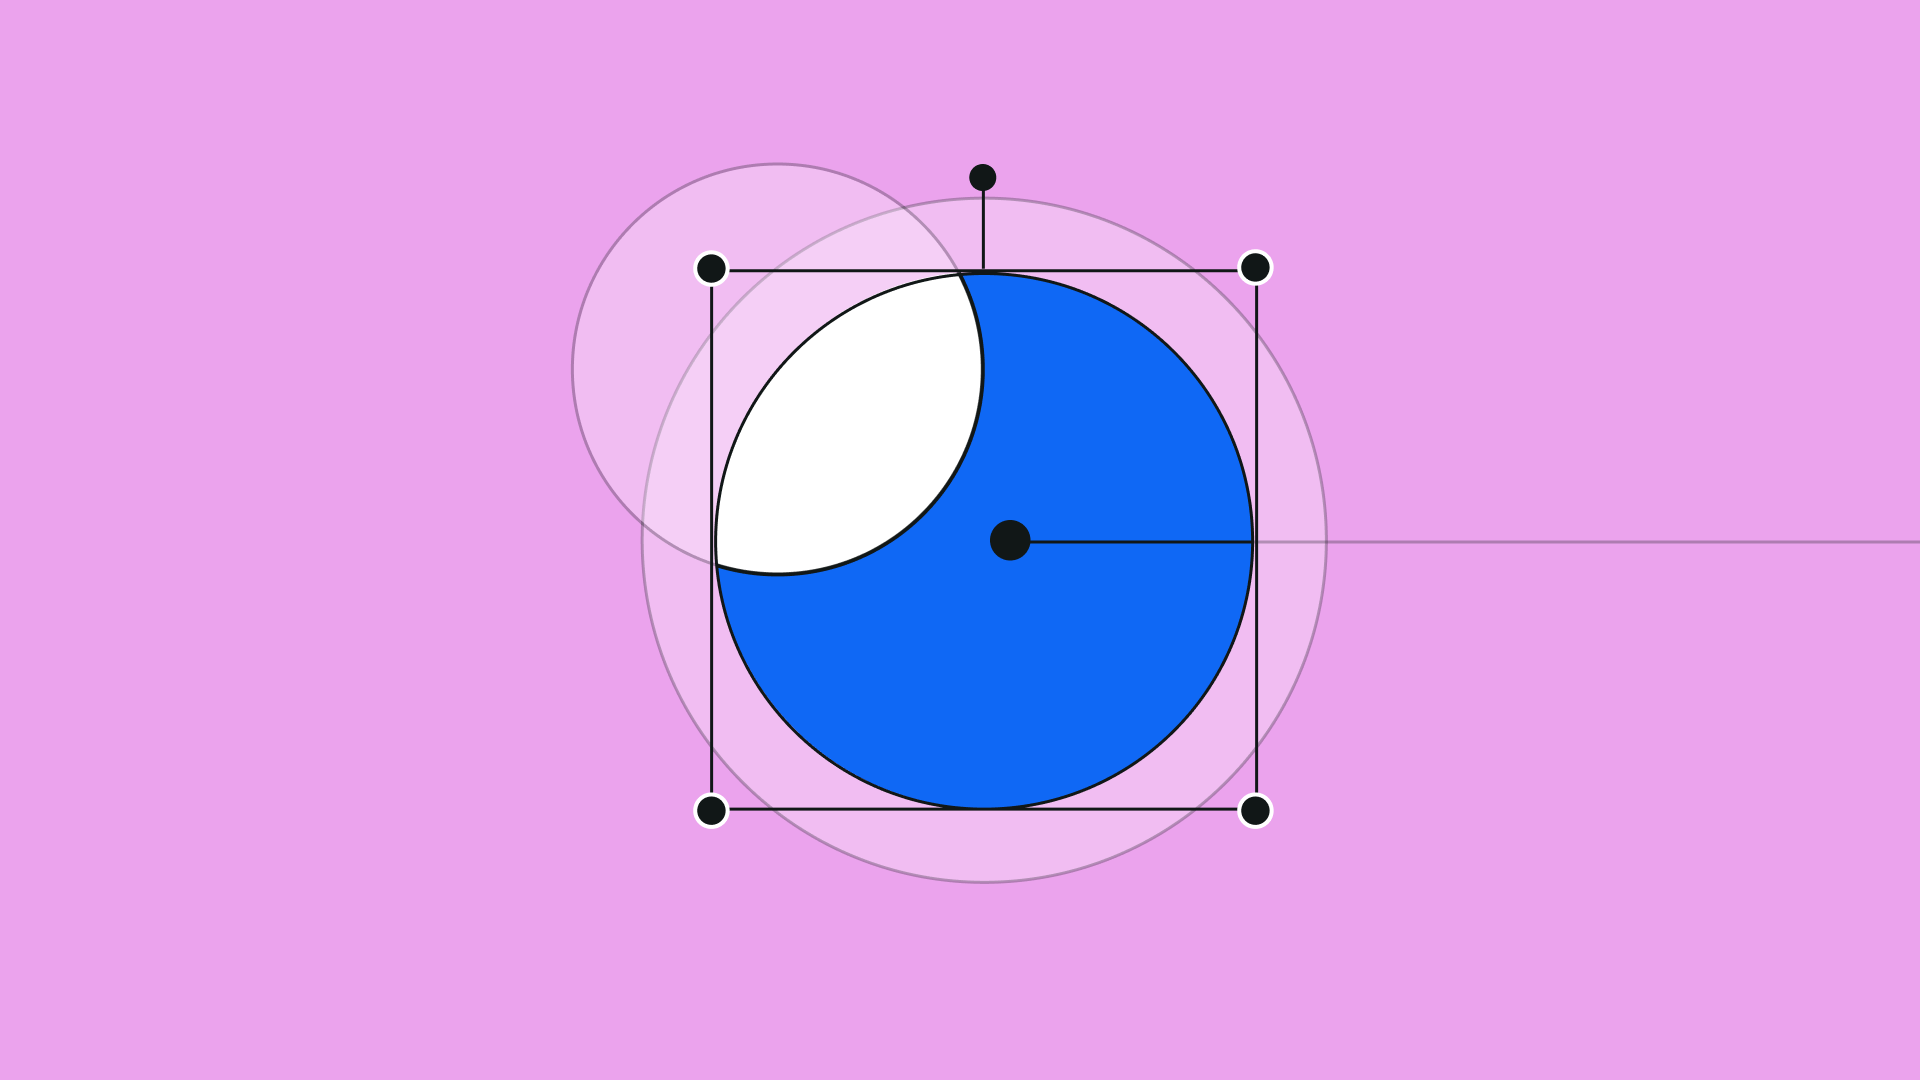
Here's how it works in digital image masking:
- Numerical values are assigned to the individual pixels of an image
- These pixel values can be read as binary, typically with 0 being black and 1 being white (these are called the binary intensity values)
- The pixel values can also be read as grayscale, with 0 being black and 255 being white
- These pixel values can then be used to set the opacity of the various areas of the mask layer, typically with 0 (black) being opaque and 255 (white) being transparent
- The grayscale pixel intensity values between 0 and 255 indicate various levels of transparency that control what percentage of the original image underneath the mask is shown
In this way, you can use an image mask to manipulate the original image without actually editing the image itself.
The mask and the image also act as one, so you can freely move it around your Artboard and edit it when necessary.
What’s the difference between image masking and clipping?
Standard image masking (or layer masking) lets you create a dynamic mask image over the photo or design you're editing. It's like scratching into that black paint on the pane of glass.
Image clipping is a form of masking that uses a vector shape to hide parts of the image. Every part of the image that falls outside the vector shape is not shown, and the vector shape can be edited at any time. This is more like putting the image in a custom frame.
Read on to get an in-depth understanding of what image masks are used for and the different types of image masking.
What are image masks used for? (with examples)
The real magic of image masking is that it enables you to create absolutely anything you can imagine.
A sunset in space, the Eiffel Tower in the desert, mermaids having a tea party – your only limit is your imagination and the image editing tools you have available.
Designing with image masks is non-destructive, meaning the original image is preserved, and you don't lose a single pixel.
With image masks, you have more control over hiding and showing certain parts of the image and can use various tools and effects.
Below are some of the most popular ways image masks are used in graphic design.
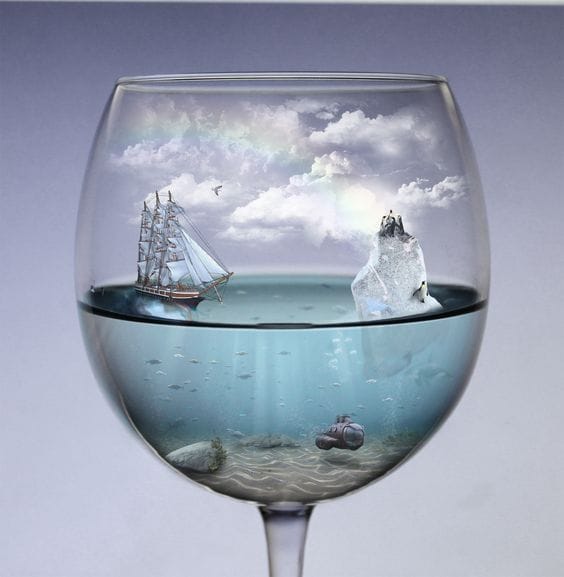
Creating custom frames
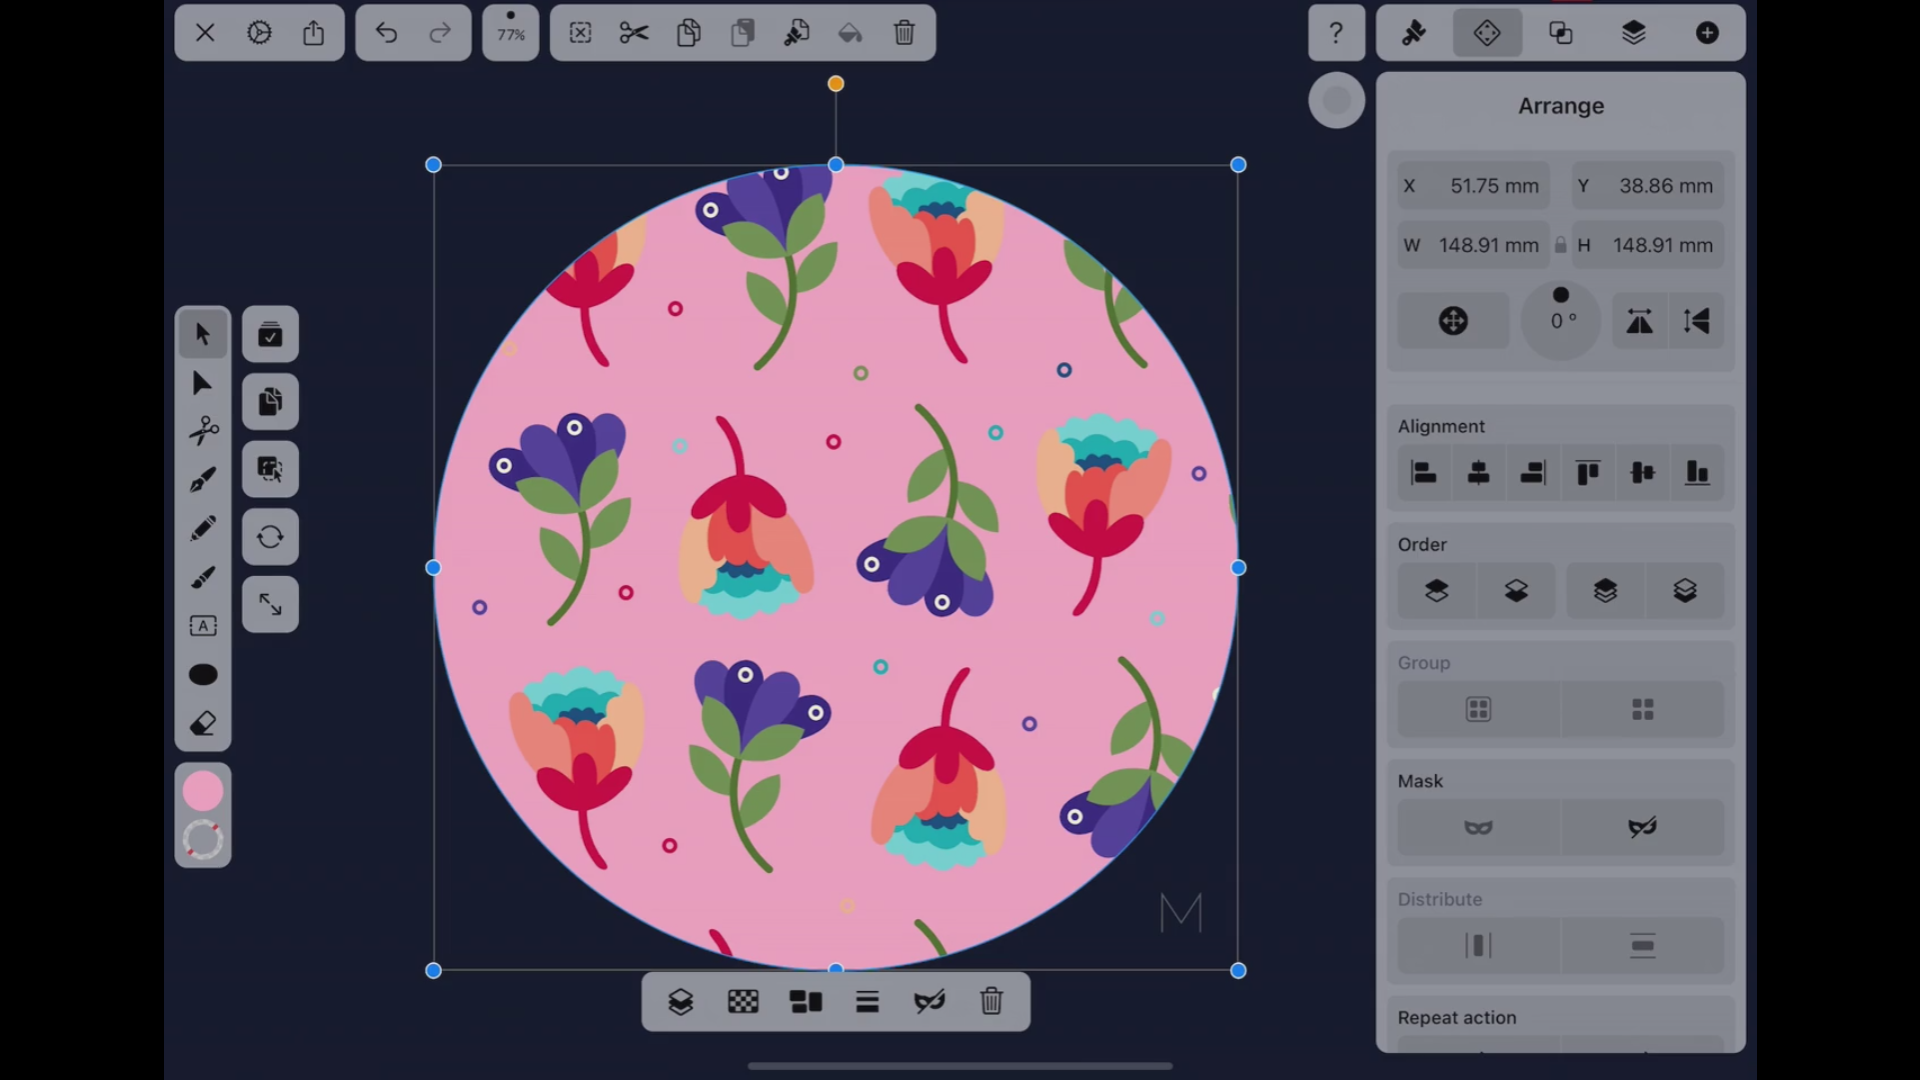
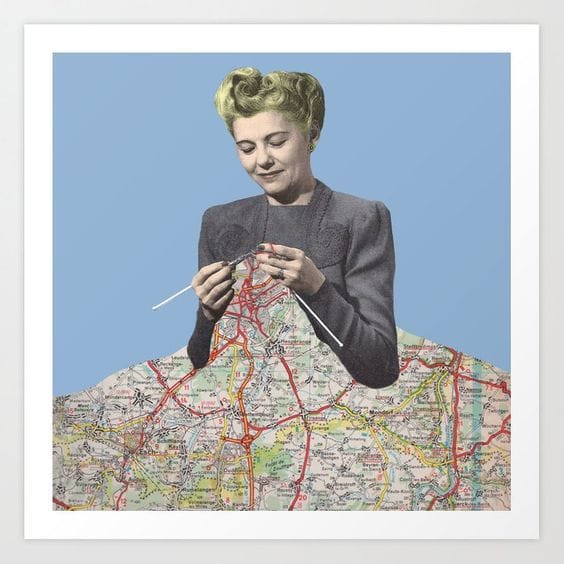
A standard image has a rectangular shape. You can make images more interesting by using any custom shape you wish to non-destructively crop them.
Custom framing is particularly useful for creative marketing designs, combining images with illustrations.
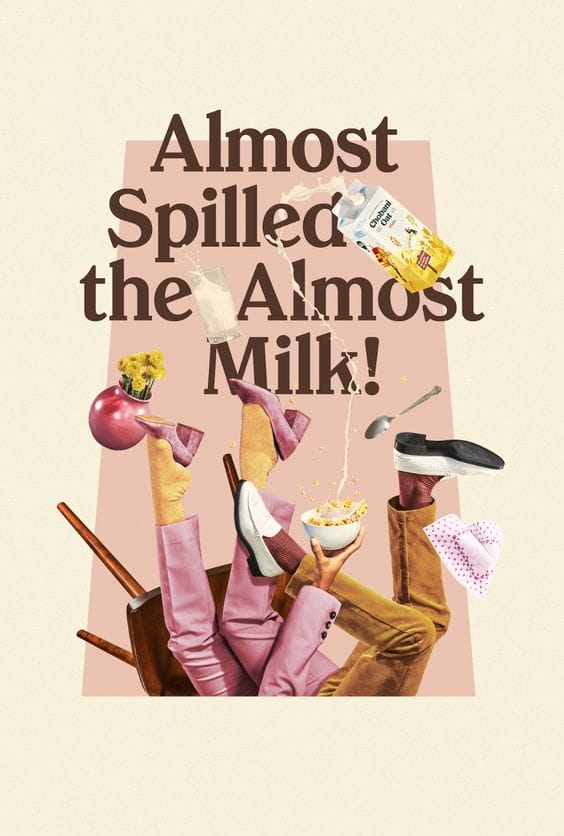
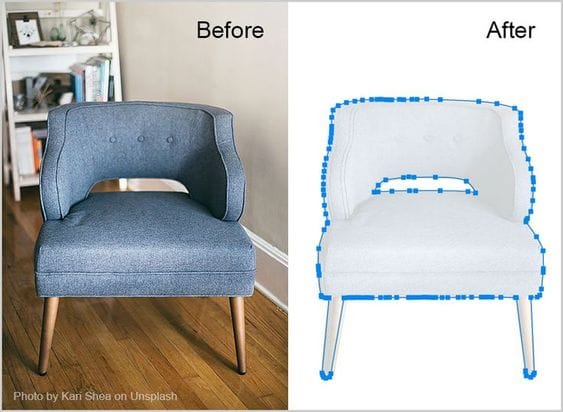
Check out the example below, where the artist used an interesting curved vector shape to crop out a photo of a person's face.
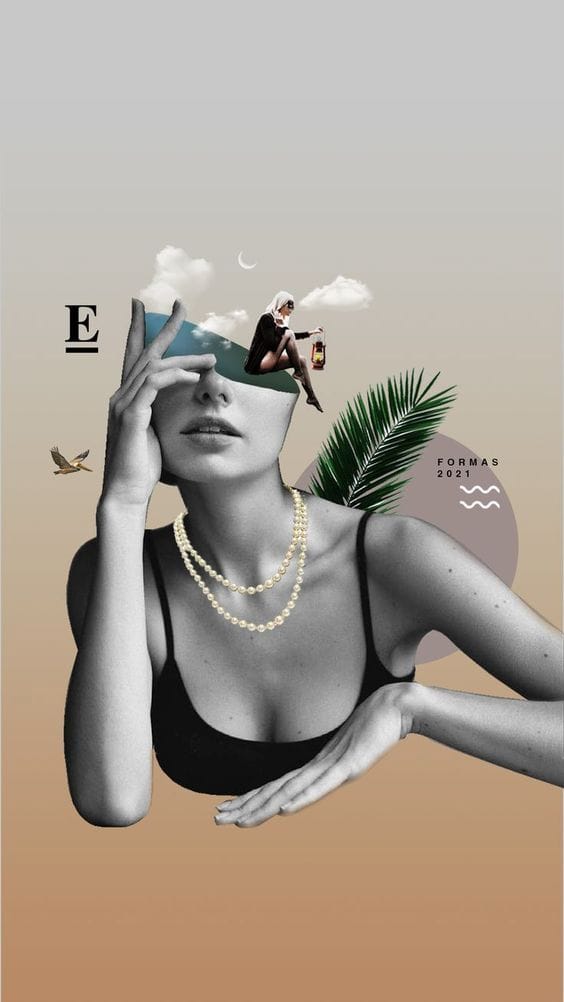
They also cropped a few other interesting photos and combined these images with vector shapes while adding a few minimal drop shadow and glow effects.
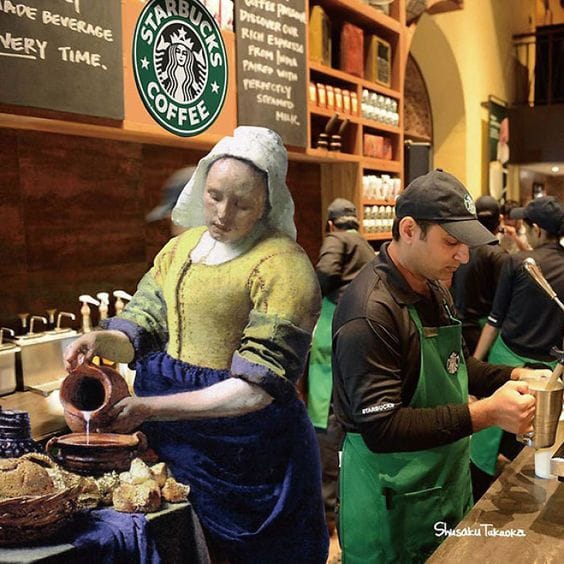
Background removal
Image masking lets you remove the background from images with a wide array of tools to get it right.
Background removal is great for several reasons.
It lets you clean up a busy background without having to re-shoot the entire scene, and it also enables you to extract interesting subjects from photos to use in other designs.
This also removes the need for hiring a professional photography studio or lightbox – with today's image editing software, you could get away with a quick snapshot taken on your phone that you enhance with post-processing.
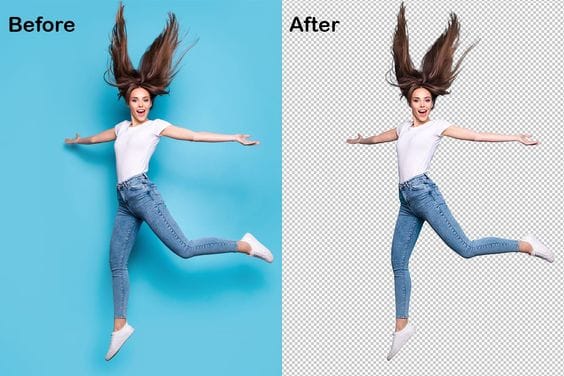
This process also lets you create images with transparent backgrounds, which you can export in image file types that allow transparency, such as PNG and SVG.
For example, you can remove the background of a classical painting and give it a contemporary application, such as producing cool merchandise.
Background removal is essential for creating good-looking product catalogs because you can arrange the products in relation to each other on a layout design.
This creates a uniform look that's pleasing to the eye, as opposed to a grid of rectangular or square photos on the page.
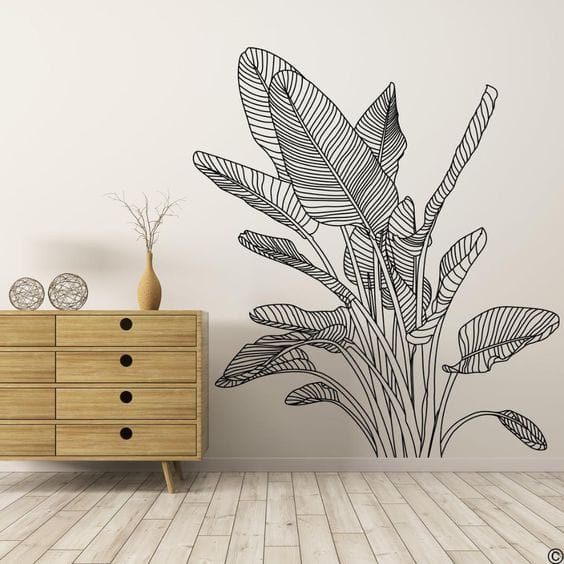
Another great way to use background removal is when you want to create a vector from a photo using Auto Trace.
Removing the image element's background eliminates the need for extra editing once Auto Trace has been completed.
Look at the beautiful plant decal below. Whereas you could draw and close all the paths yourself, you can use a found photo, remove the background, and then rely on Auto Trace to do the heavy lifting.
Dynamic image transparency
In graphic design, you're oftentimes using multiple layers and image elements in one design. The beauty of image editing and vector design is how you can make all these elements interact with each other to form a new, uniform image.
Elevate your designs with easy image replacement
Learn the simple and efficient way to replace images in Linearity Curve. Enhance your design workflow with our user-friendly guide.
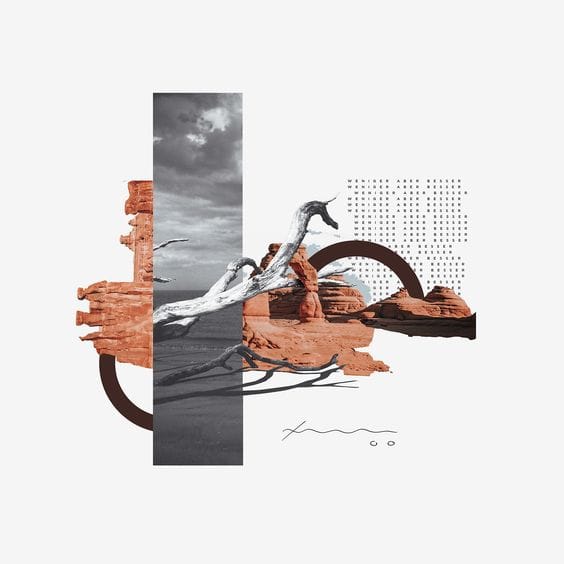
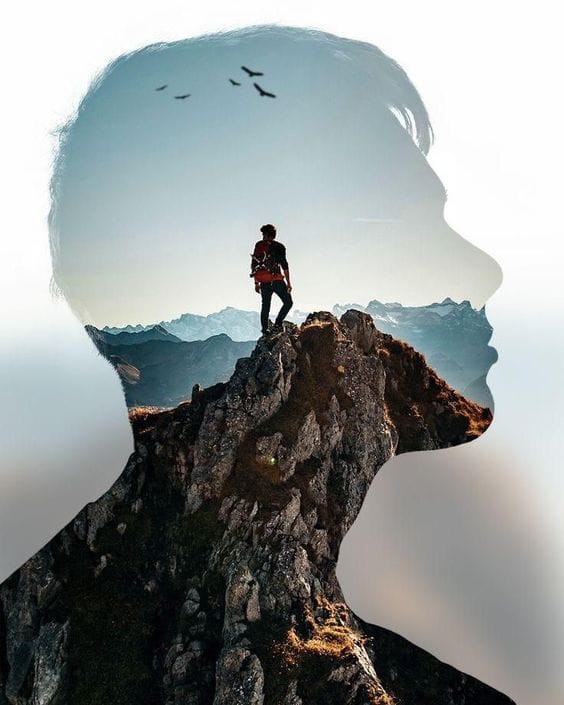
With image masks applied, you have more control over how image transparencies are overlaid to create layered effects.
This means you can produce some pretty powerful and poetic images, like the one below that illustrates a statistic about plastic waste in America.
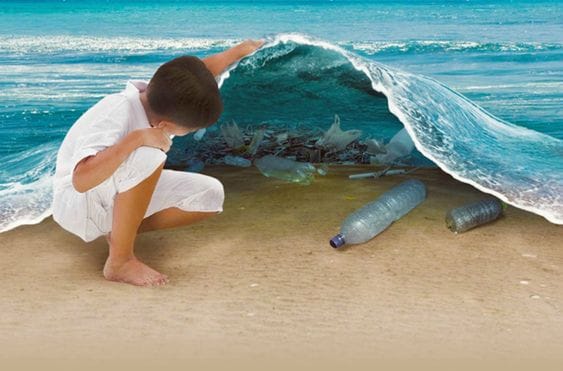
You can also apply basic gradients (such as a radial gradient or linear gradient) to image masks to fade images in and out of your design.
This creates double-exposure effects that a highly-skilled photographer would achieve with high effort and trial and error.
Filling text with an image or pattern
Combining display fonts and textures or patterns is one of the easiest ways to make custom marketing designs that really stand out.
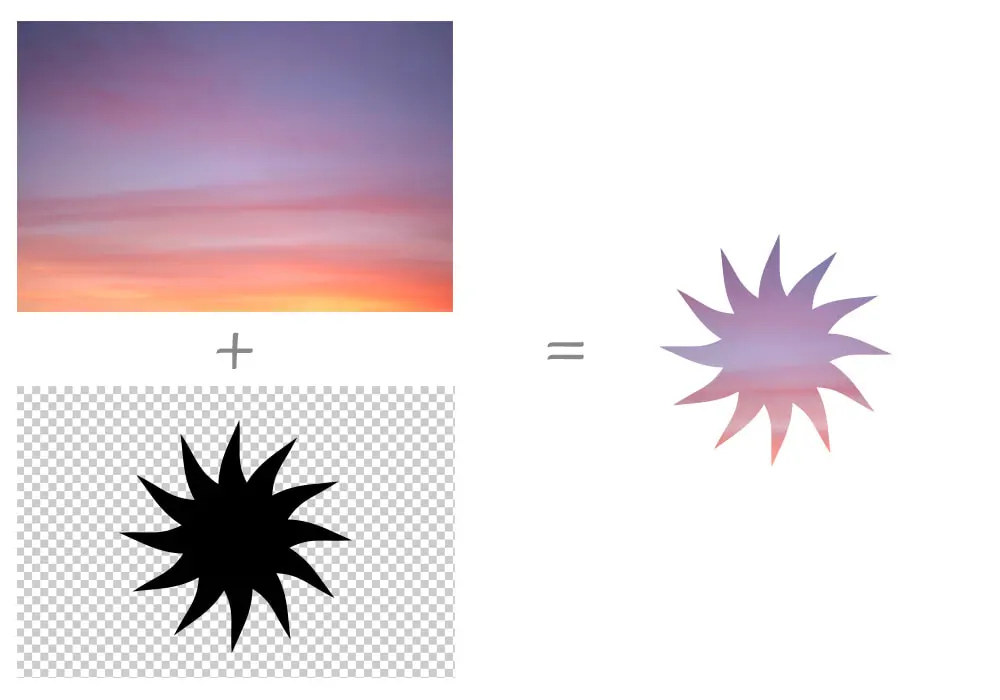
You can turn type into paths and then use a clipping mask to fill your letters with the image.
In the example below, the designer went a step further and altered the text after turning it into paths, stretching the words and making them wavy.
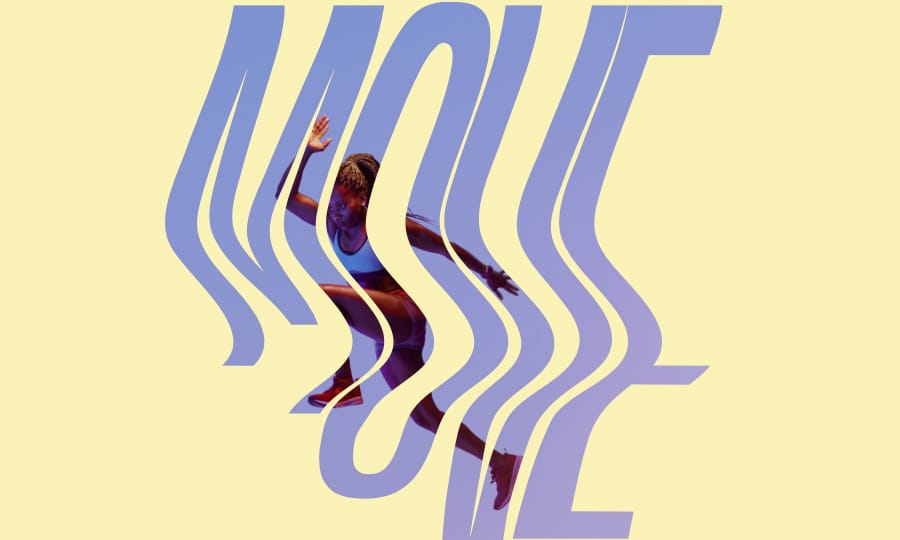
Without the masking feature, you would have to manually outline text to create a path for each letter, crop the image to that letter's shape, and do the same for each letter in the word. Doesn't that sound super counterproductive?
Types of image masking
You should have a good idea of what image masks are and why you need to use them. It's an important tool to take your graphic designs to the next level.
As you've also seen from the examples above, image masking isn't only useful for creating elaborate and beautiful designs. If you're creating marketing materials, event invites, posters, catalogs, and so on, masking and clipping features make churning out those custom designs much less labor-intensive!
Now, let's look at the different types of image masks in depth.
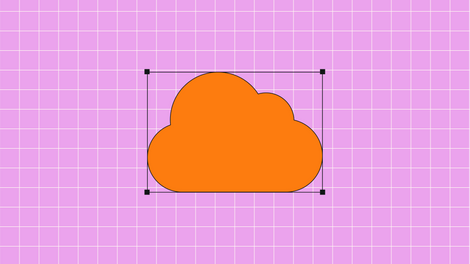
1. Vector masks (aka clipping masks)
Vector or clipping masks are created with vector paths instead of raster-based image masks.
You use your design software's pen and shape tools or similar to create a vector clip path. A clipping path is a line that you draw with your vector tool that can be used to punch out a part of an image once you close the shape of the path.
Pros of vector masks
- The simplest, easiest way to clip images and remove backgrounds
- Highly editable and adjustable
- Best suited for framing images and designs with custom shapes
Cons of vector masks
- Not so great for retaining edge details in images such as photographs
- Fewer sophisticated editing options in terms of colors and effects compared to layer masks
2. Layer masks
A layer mask is the standard image mask you'd use to conceal and reveal the parts of an image.
Layer masks are raster- or pixel-based and are usually edited with the painting or selection tools.
Pros of layer masks
- The best way to non-destructively edit highly detailed images, such as photographs
- Offers a lot of control over various effects and brushes to create dynamic digital collages
Cons of layer masks
- Raster- or pixel-based, so the mask is not easily scalable
- Not easy to go back and edit your work or change the mask design
3. Alpha channel masks
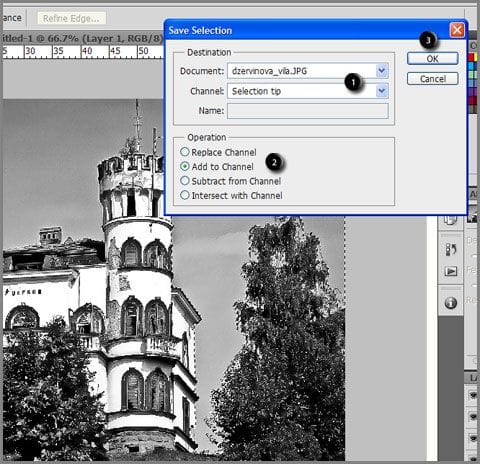
Alpha channel masking is done when you first make a selection on your image and then turn that selection area into an alpha channel.
You can then edit the alpha mask as if it's on a layer of its own, applying image masks and effects to the selected area only without affecting the rest of the original image.
:quality(75))
:quality(75))
Pros of alpha channel masks
- Makes it possible to isolate certain areas of an image to mask
- Adds transparency to your image when you remove parts of it
- Enables saving selections and transparency settings for use on other projects and software
- Great for enhancing specific features and colors of photographic images
Cons of alpha channel masks
- Using alpha channels is a bit more advanced and requires some skill and training
- Making the initial area selection can be time-consuming and tricky
4. CSS image masking
If you dabble in web design, you might already know you can create sophisticated image masks using code.
The mask-image property in CSS allows you to use a transparent PNG or SVG image to mask an image file on your website. For example, you can use your company logo as a mask over an office building image to fill the logo.
CSS allows you to create image masks with shapes, paths, gradients, and text, just as you would when using your design software.
The difference is that the masking effects live on the web page itself and can't be exported as standalone image files, such as JPEG or PNG images.
It's also more difficult to add and edit multiple layers, and you can only see the results of your edits in a live web viewer tool or a web browser.
Pros of CSS masks
- No need for premium image editing software
- Potential saving on image size because effects are handled by code instead of being stored in an image file
- Original image file is still accessible on the user interface
Cons of CSS masks
- Only works on web browsers
- Produces basic effects
- Can't export the original image and mask effects as a single image
- You need to be highly proficient in CSS
Other code-based types of image masking
Have you ever considered the other ways masking is being used in technology?
For example, when you choose a background image or blur in a video meeting, that's dynamic alpha channel masking in the video.
Using coding languages like C and Python, you can attribute the pixels in image objects with values and then apply masking effects. This is called spatial filtering.
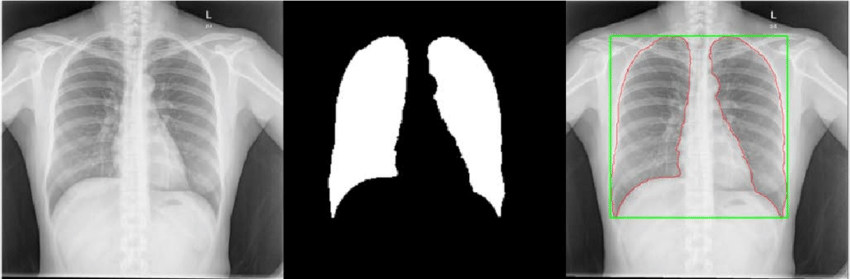
These masking effects can be used to reduce blurring and noise and improve the sharpness of images. In the medical field, image masking helps make X-rays clearer and more easily analyzed.
Now that you know the types of image masks and how they're used, let's check out how to use Curve to create better designs.
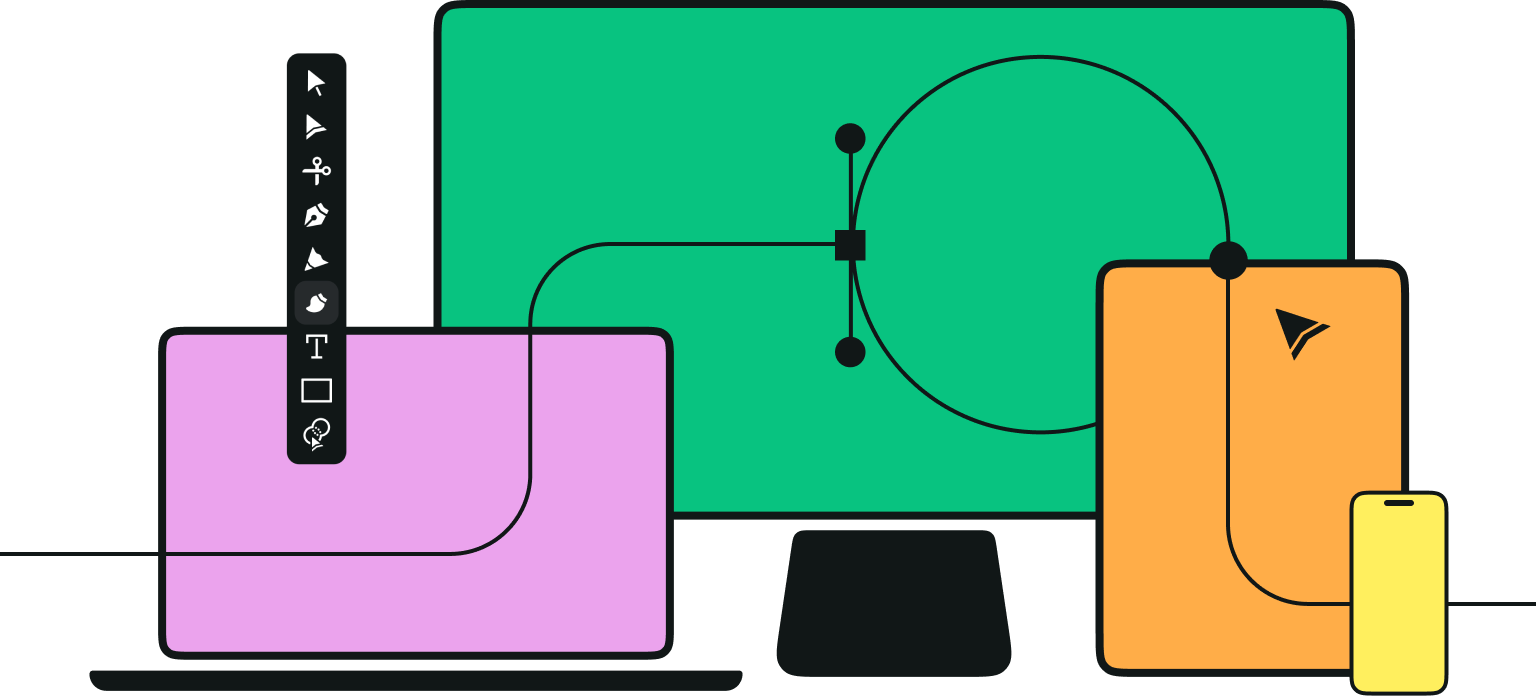
How to create image masks with Linearity Curve
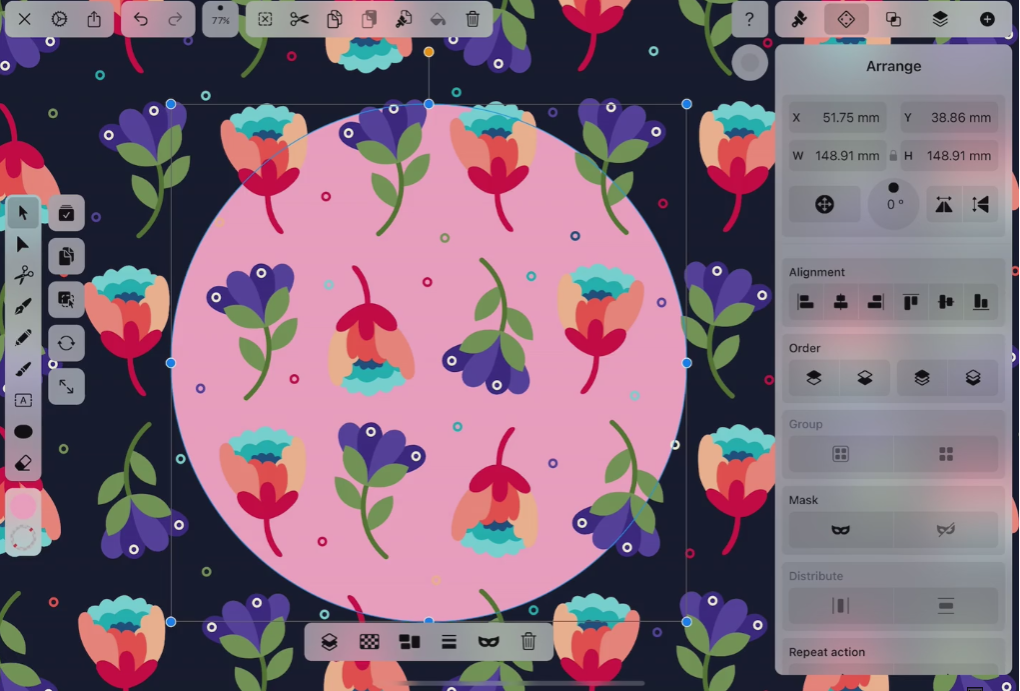
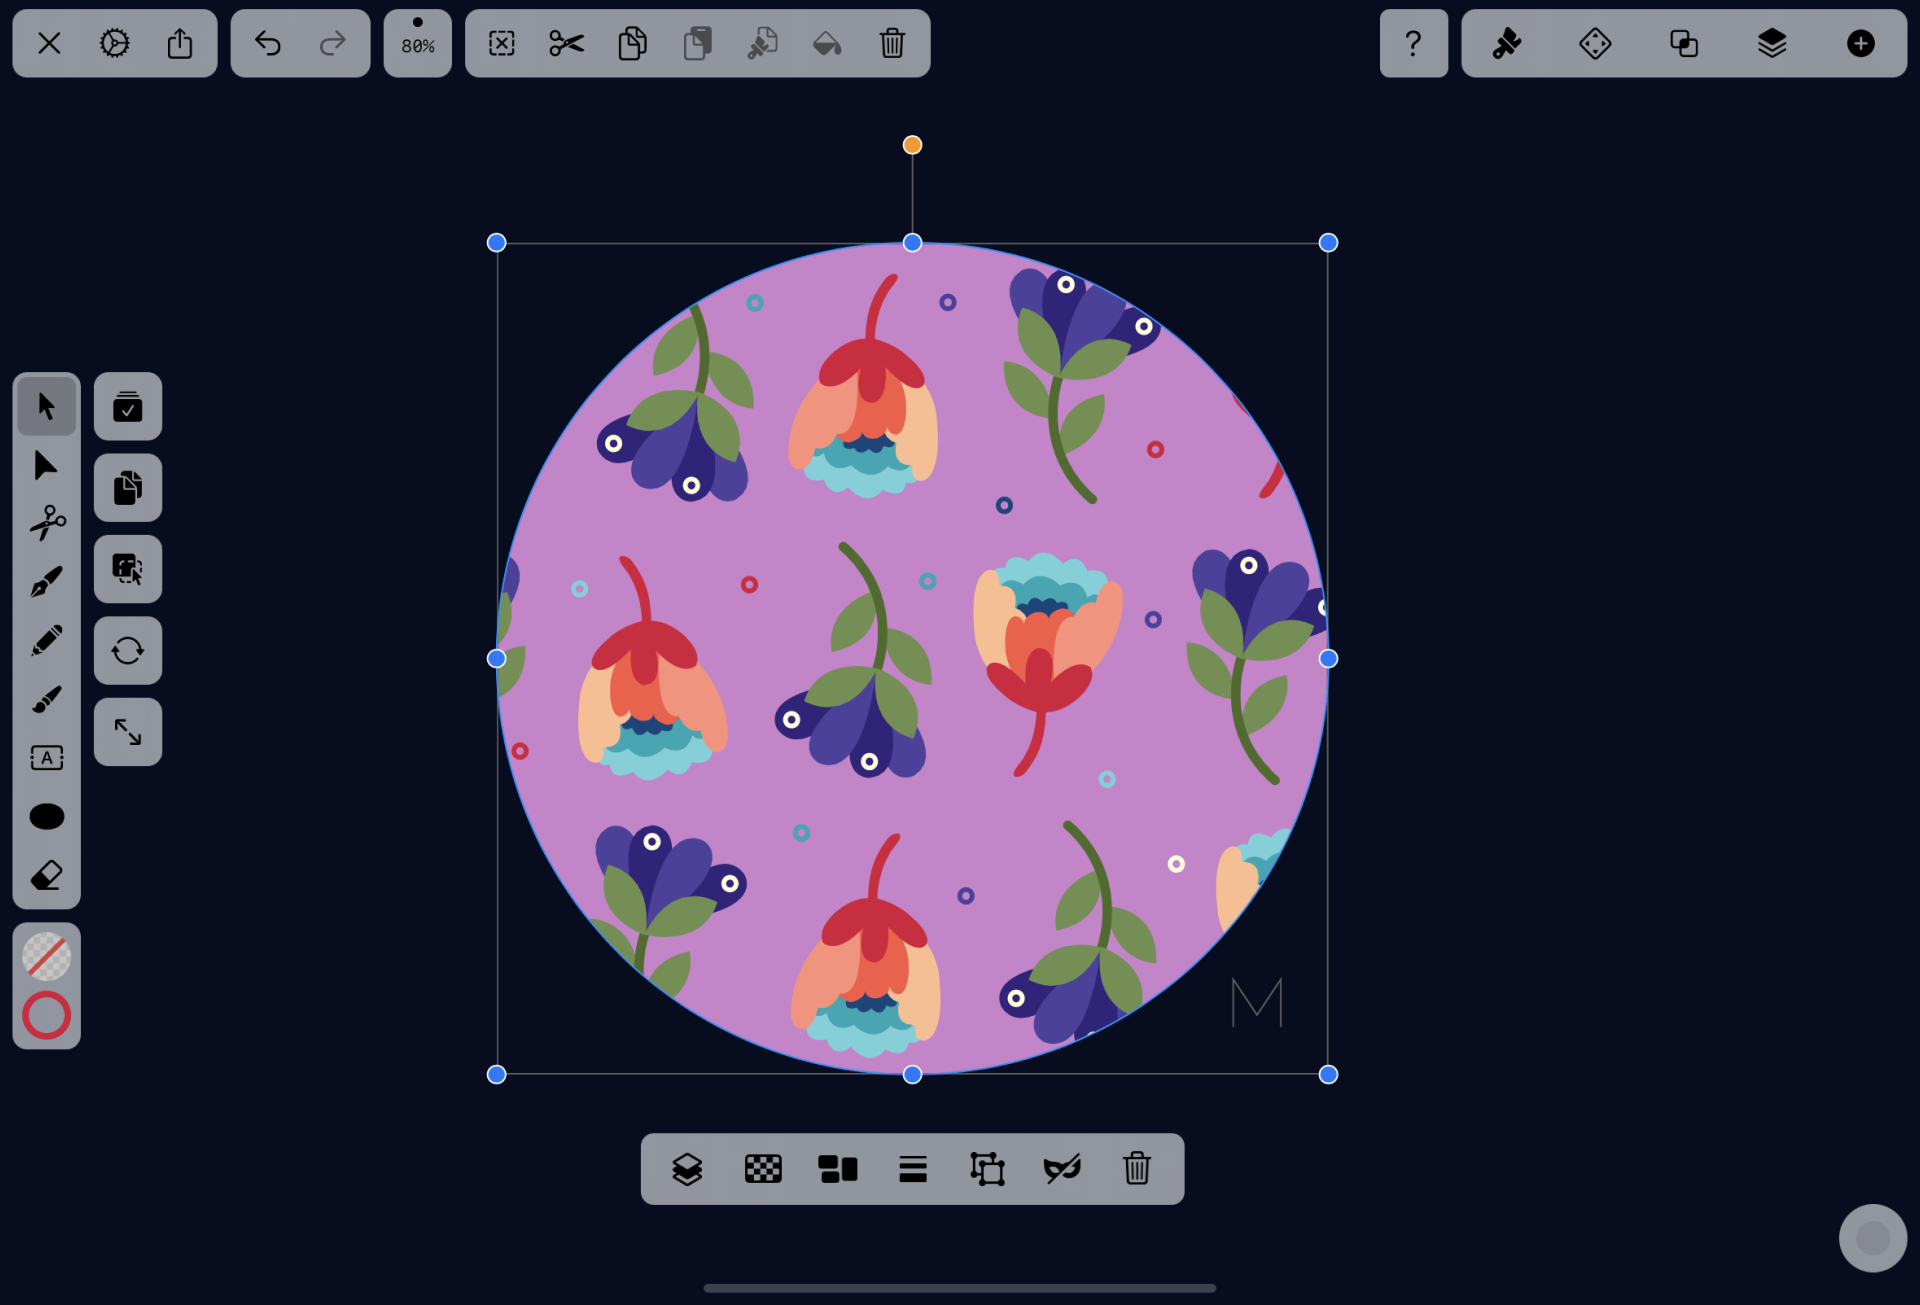
With Linearity Curve, the mask layer is at the bottom and the image clipped is above it. A clipping mask clips the image or image group above it to the vector path you created.
Advanced image masking in Linearity Curve is super easy and can be done in three ways. We'll take you through the basics here, but if you'd like to get an in-depth tutorial check out our step-by-step guide on how to mask objects.
Easily transform images with Auto Trace
Discover the simplicity of converting images into vector graphics with Linearity Curve's Auto Trace feature. Perfect for designers of all skill levels.
1. Create your objects and layers
Draw the vector shape you'd like to use as the clip path. In Linearity Curve, you can use the Pen Tool, Pencil Tool, Brush Tool, Text Tool, or Shape Tool to do this.
- The Pen Tool is best for creating precise shapes with smooth Bézier curves.
- The Pencil Tool lets you draw a freehand shape and turns it into a vector path. You can control the amount of smoothing you want.
- The Brush Tool lets you use different brush strokes to create a free-form vector path.
- You can type out a phrase using the Text Tool, then choose the Create Outlines from Text option in the Style Tab.
- The Shape Tool lets you easily create basic vector shapes like rectangles, circles, polygons, stars, or spirals.
Once you've created your desired vector shape, go to the Layers Tab in the Inspector and move its layer underneath the object(s) you want to clip.
2. Make your selection
Tap the Selection Tool, choose Multi Select Mode, and select the vector shape you want to use as a mask together with the object(s) you want to clip.
3. Use the mask tool
Now you can use the Mask Tool to create your clipping mask. Here are your three options for doing this:
Option 1: via the Quick Actions Tab
This is the quickest way to create your clipping mask.
Once you've selected your objects on the artboard, the Quick Actions Tab will pop up. Tap the Mask Icon in the tab to quickly turn your vector shape into a mask.
Option 2: via the Layers Tab
When your design is quite complex, selecting all the objects from the Layers Tab is easier than tapping each element on the artboard.
In the Inspector, tap the Layers Tab. Scroll down your Layers panel until you find the vector shape and object(s) you want to clip.
In Multi Select Mode, select all the layers that must be clipped along with your vector shape, and then tap the Mask Tool in the Quick Actions Tab that pops up.
Option 3: via the Arrange Tab
With your vector shape selected, tap on the Arrange Tab in the Inspector and scroll down to the Mask option.
Tap on the Mask Icon to create your clipped image.
4. Edit your image mask
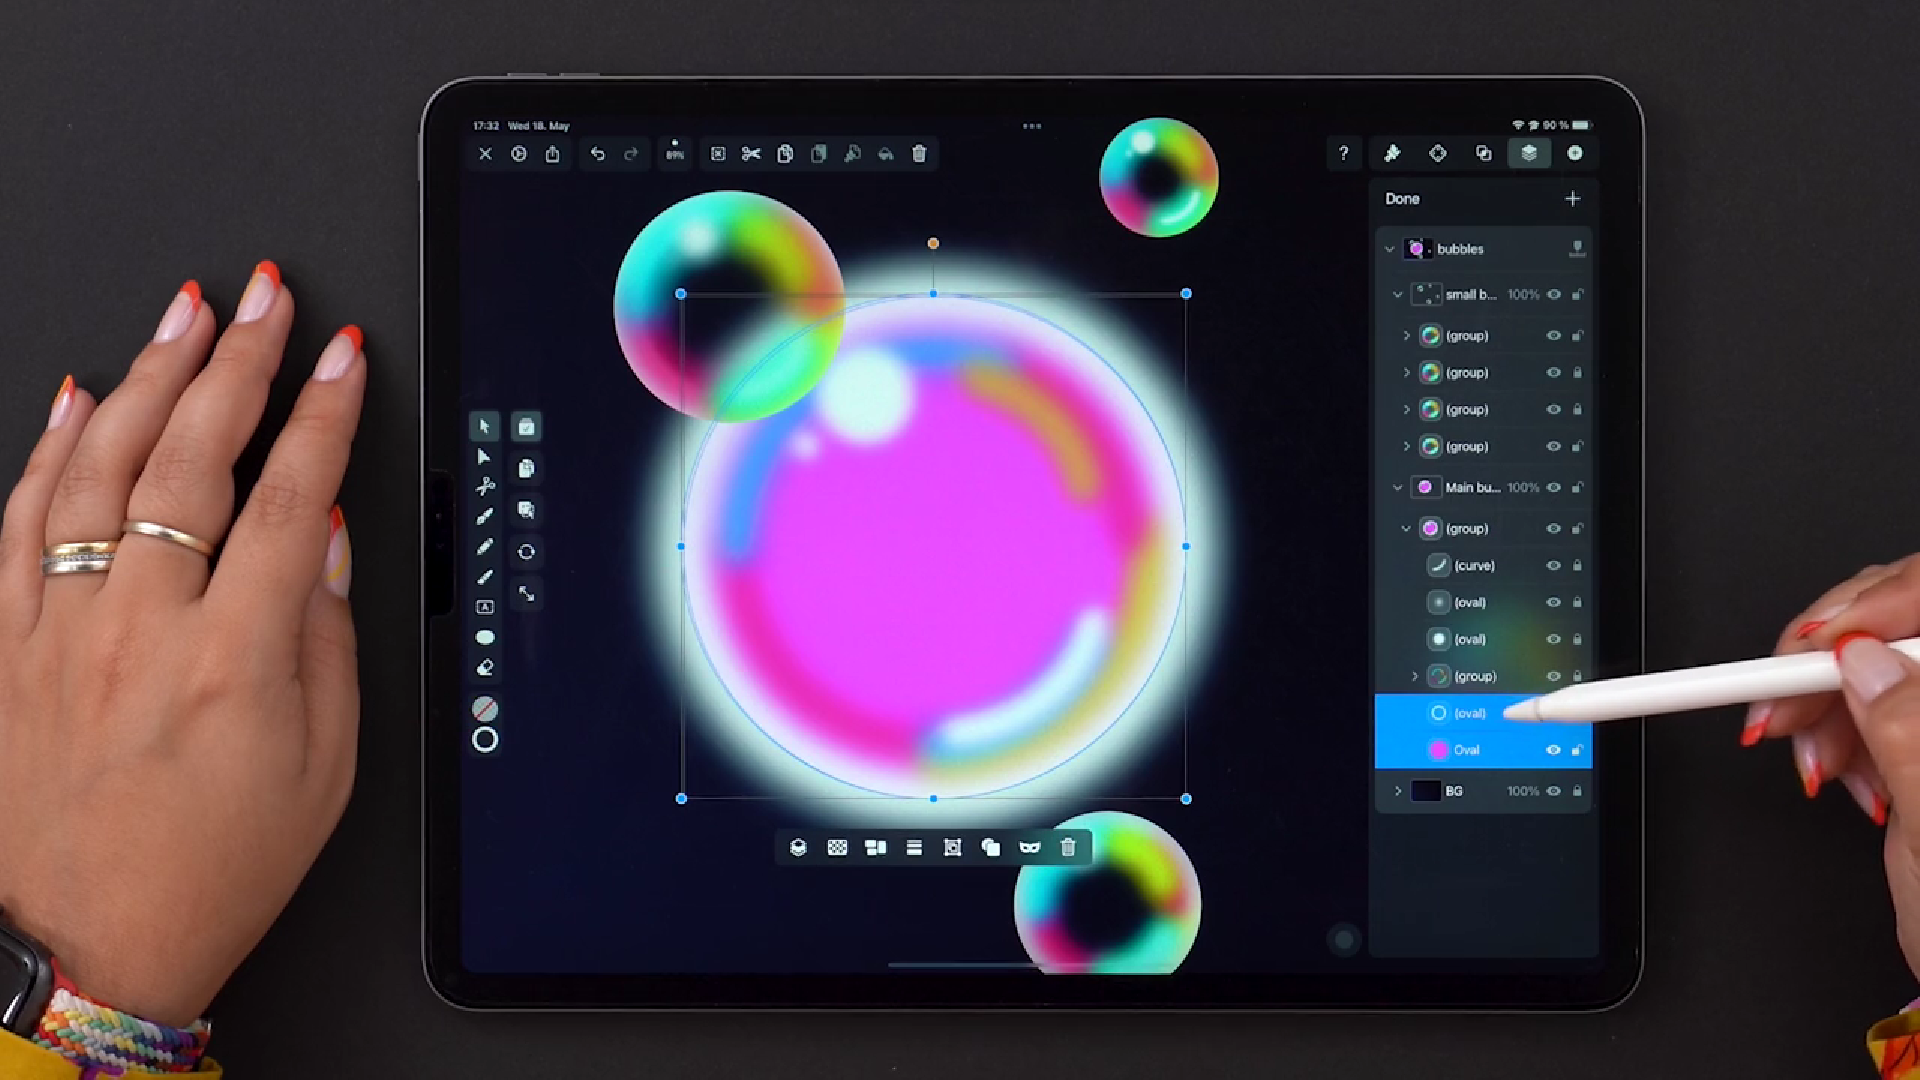
Once you create a Mask, a new Group will appear in your Layers Tab. When you tap on the Layer Group to open it, you'll see the Mask Icon next to the clipping mask layer underneath the object(s) you clipped to.
Whenever you'd like to edit your clipping mask, you can select the vector shape from the Layers Tab and use any tools to edit it, such as the Node Tool.

Another option is to double tap on the clipped object itself on the artboard to enter Isolation Mode, then select the vector path from the Layers Tab and start editing.
Wrapping up
Image masking is an incredibly powerful tool for creating detailed and dynamic images far from the standard rectangular photo.
With image masking capabilities at your fingertips (literally, if you're designing on an iPad!), you can manipulate any photo or illustration image file to create elaborate and unique designs.
Imagine having to crop or draw complex images within a particular shape, only to realize later that you'd like to shift the entire image to the left. Image masking enables you to easily move and change images without losing the previous work on the design.
Moreover, image masks allow you to create elaborate image effects, such as gradients and various brush strokes, without altering the original image. You can keep editing the mask layer or even start a new mask to try different techniques and filters.
Another great benefit of layer masks is that you can easily duplicate your masks to use multiple times on different images or drawings on your Artboard.
If you were adding your crops and effects on the image itself, you couldn't easily replicate it elsewhere on the Artboard with a different image.
In essence, image masks help us designers to work smarter, not harder.
If you're ready to try image masking or want to check out a new design software, try Linearity Curve – we offer all the powerful tools you need within a much more intuitive and user-friendly vector design interface.
Jumpstart
your ideas with
Linearity Curve
Take your designs to the next level.

Share this!
Sharné McDonald
Sharné is a contributing writer to the Linearity Blog. She has 10+ years' experience in graphic design and marketing and holds a Master's degree in Art Education.
