:quality(75))
:quality(75))


:quality(75))

Hey, designers! We've been listening to your feedback and understand your font frustration. We get it—using Fontinator to import your custom fonts into Linearity Curve isn't as smooth as it should be. And while we're planning to work on a permanent fix eventually, we don't want you to miss out on the opportunity to enhance your designs with unique lettering. In this blog, we'll explore alternative methods to seamlessly integrate custom fonts into Linearity Curve, empowering you with the creative freedom you've been looking for.
Jumpstart your ideas with Linearity Curve
Take your designs to the next level.
What are custom fonts?
Custom fonts are meticulously crafted sets of characters that differ from standard, readily available fonts. These fonts are tailored to specific design needs and can include variations in letterforms, styles, and even kerning. They inject unique personality into your work, enhance brand identity, and evoke emotions effectively. Whether you're a pro seeking consistency or an individual adding a personal touch, custom fonts empower you to craft compelling, stand-out designs.
Where can I find custom fonts?
When it comes to sourcing custom fonts for your design projects, the internet offers endless options. Many websites provide a wide selection of fonts for free or for a premium. Some fan favorites include Google Fonts, Adobe Fonts, FontSquirrel, and Dafont. These platforms offer a diverse range of fonts in various styles and themes, making it easy to discover the right typeface for your design.
Here are more websites we like for finding and downloading fonts:
How can I use custom fonts in Linearity Curve?
Linearity Curves comes preloaded with a large library of diverse fonts, but when you can’t find a fitting typeface, you can also import your own fonts as .TTF or .OTF files.
Personalize Your Typography with Custom Fonts
Learn how to customize fonts in Linearity Curve to give your designs a unique touch. Our guide makes it easy to modify and personalize typography to your style.
On Mac
To add your chosen font to Font Book (your integrated font manager on Mac), you have three convenient options:
- Double-click to install: Easily install the font by double-clicking on it.
- Copy and paste: Copy the font and paste it into your fonts folder located in the Finder (~/Library/Fonts/).
- Drag and drop: A seamless method is to drag and drop the new font directly into your Font Book.
After completing this step, all that's left to do is to restart Linearity Curve. Once you've done that, your newly added font should be readily available in the dropdown menu when using the Text Tool.
On iPad and iPhone
Installing custom fonts on iOS and iPadOS is a little more complicated due to Apple restrictions. You’ll need to download a third-party app for managing your fonts before it can be downloaded to your device. We launched Fontinator to do the job back in 2020, but we understand that it currently doesn't quite work as it should, and for that, we're sorry. We’re planning on delivering a better product in the future, but until then, we're here to provide you with another solution.
Step 1: install a font manager
There are various options are available, including FontsManager and AnyFont. Our top recommendation is iFont, and the best part is it's free! Get it here.
Get creative with our ready-to-use templates.
Linearity Curve offers templates for every social media platform and various use case templates for posters, business cards, slides, app store screenshots, and more.
Step 2: download your font
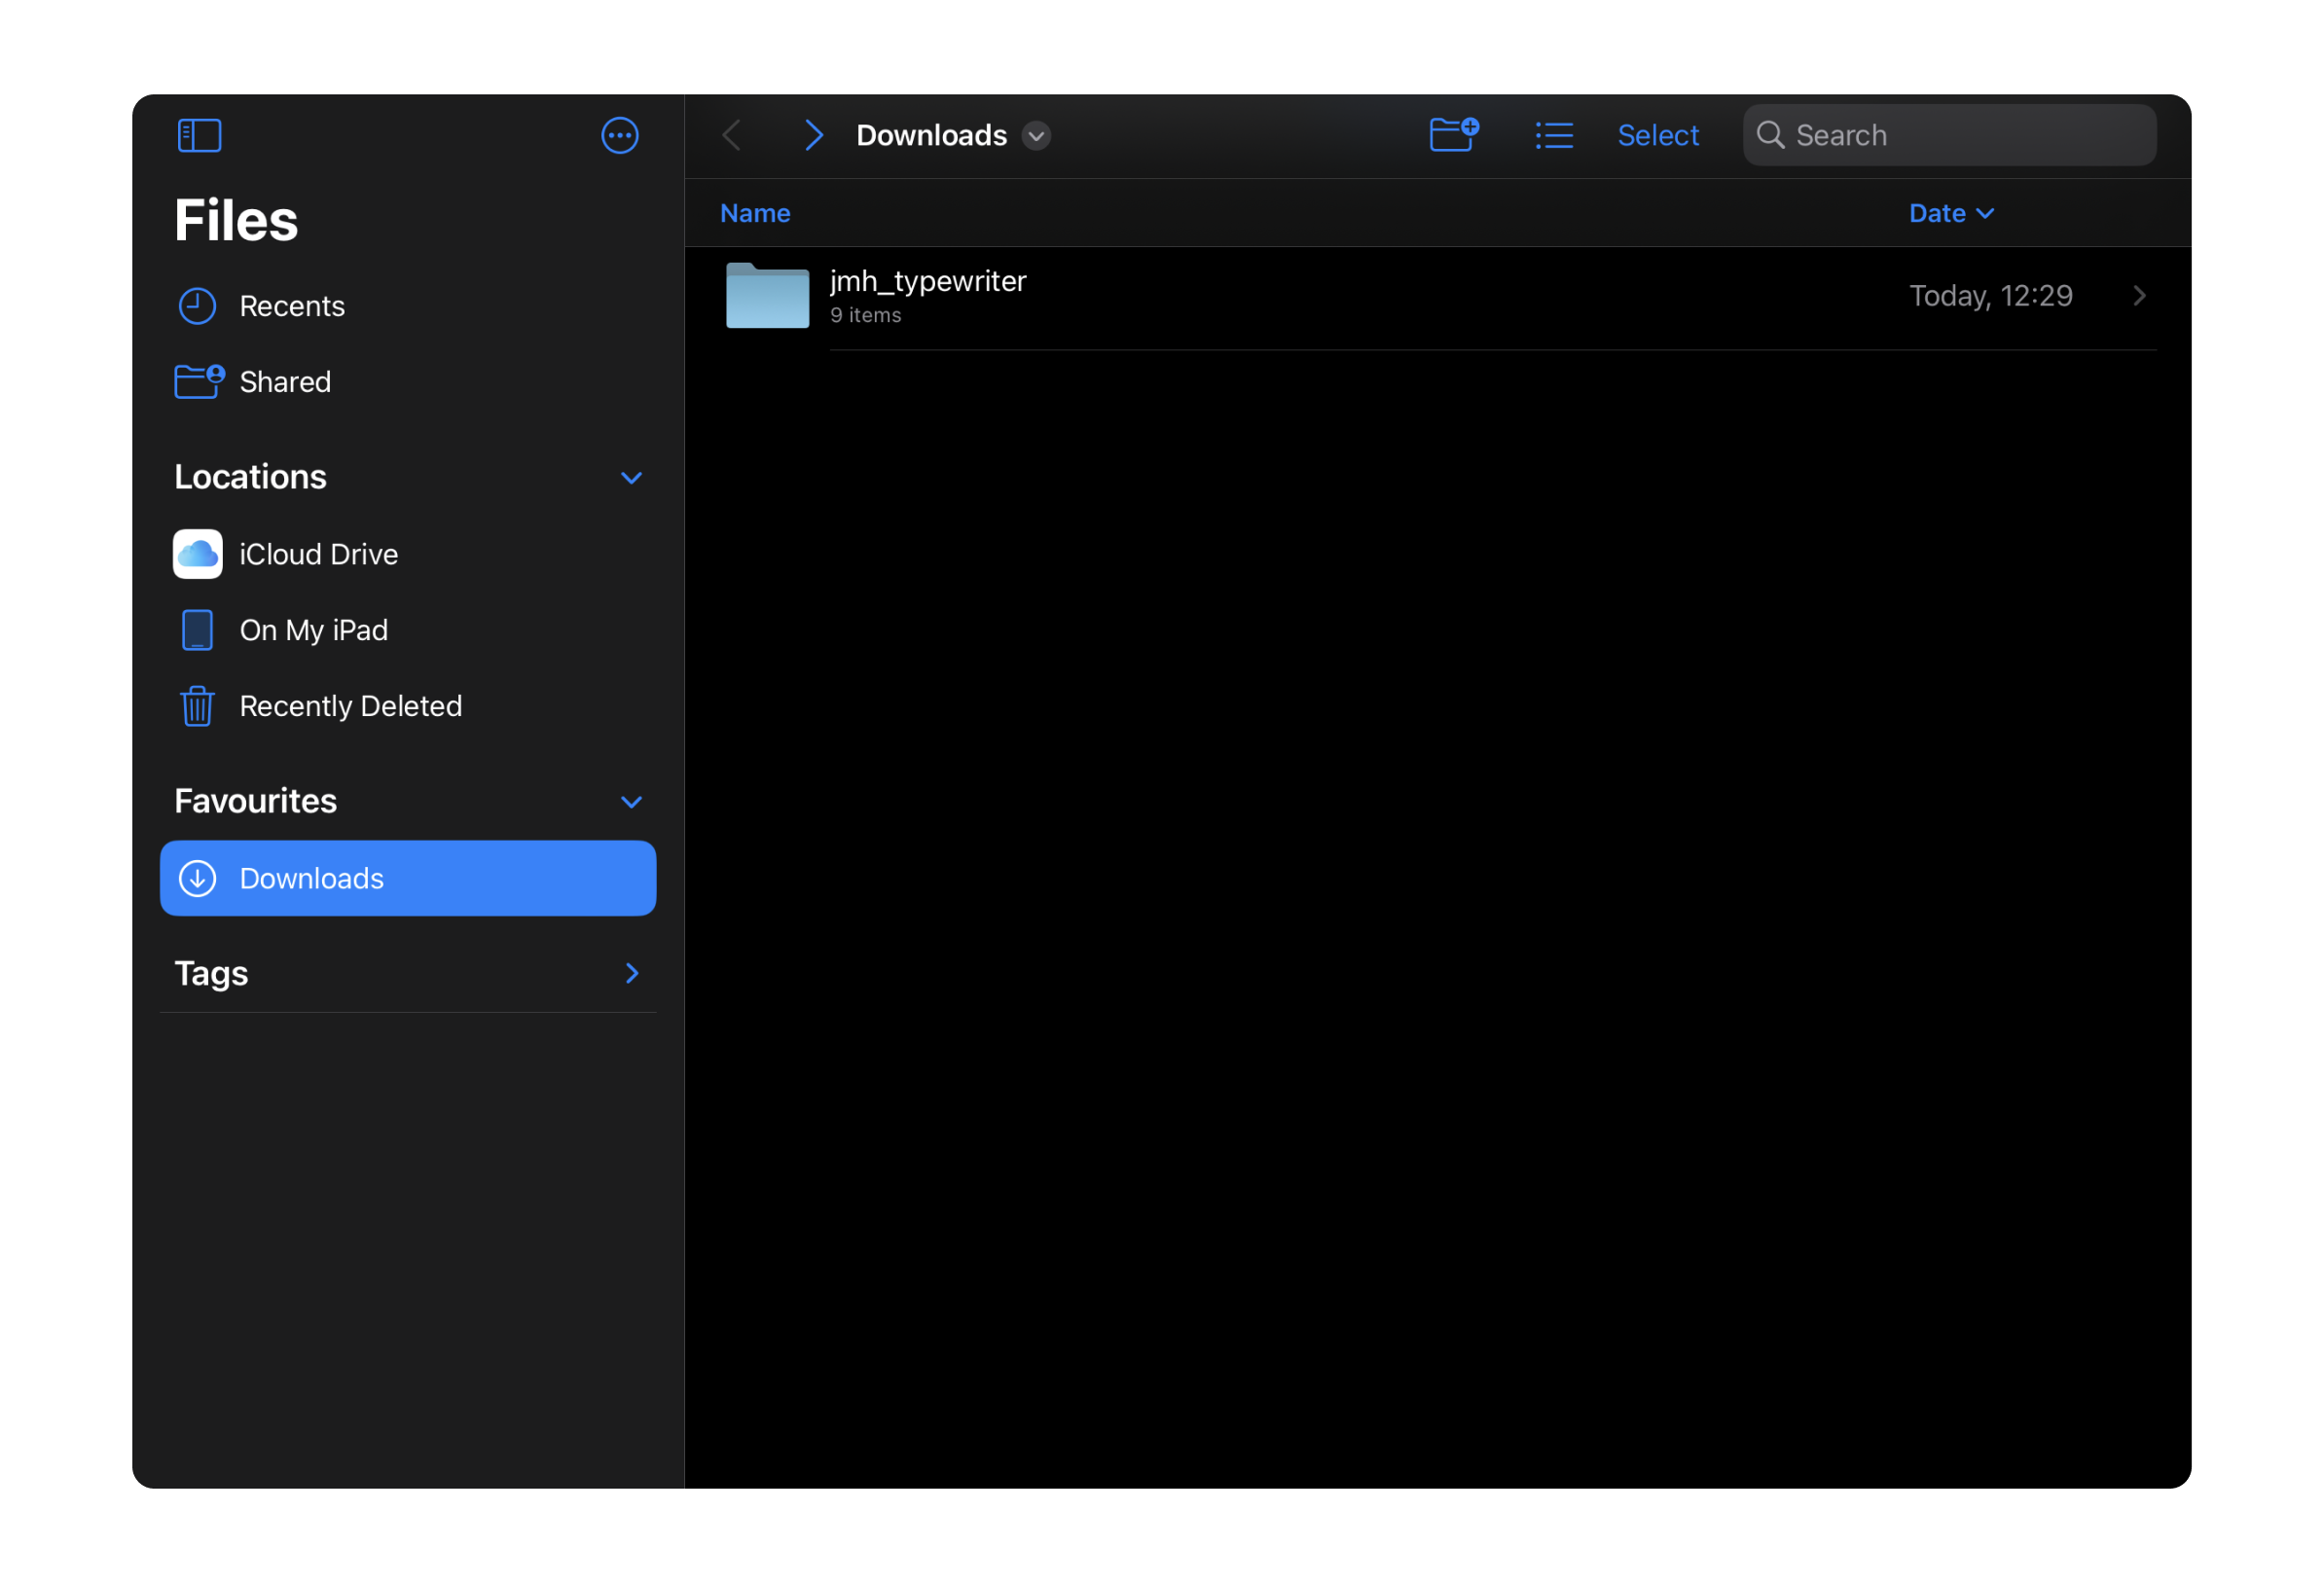
In Safari, find and download a custom font in .ttf or .otf format using one of the websites we mentioned earlier. Download the font to your device. Tap the download icon in the top-right, and then select the font in the download manager. You'll be directed to the Files app where your downloads are stored.
Step 3: install the font on your device
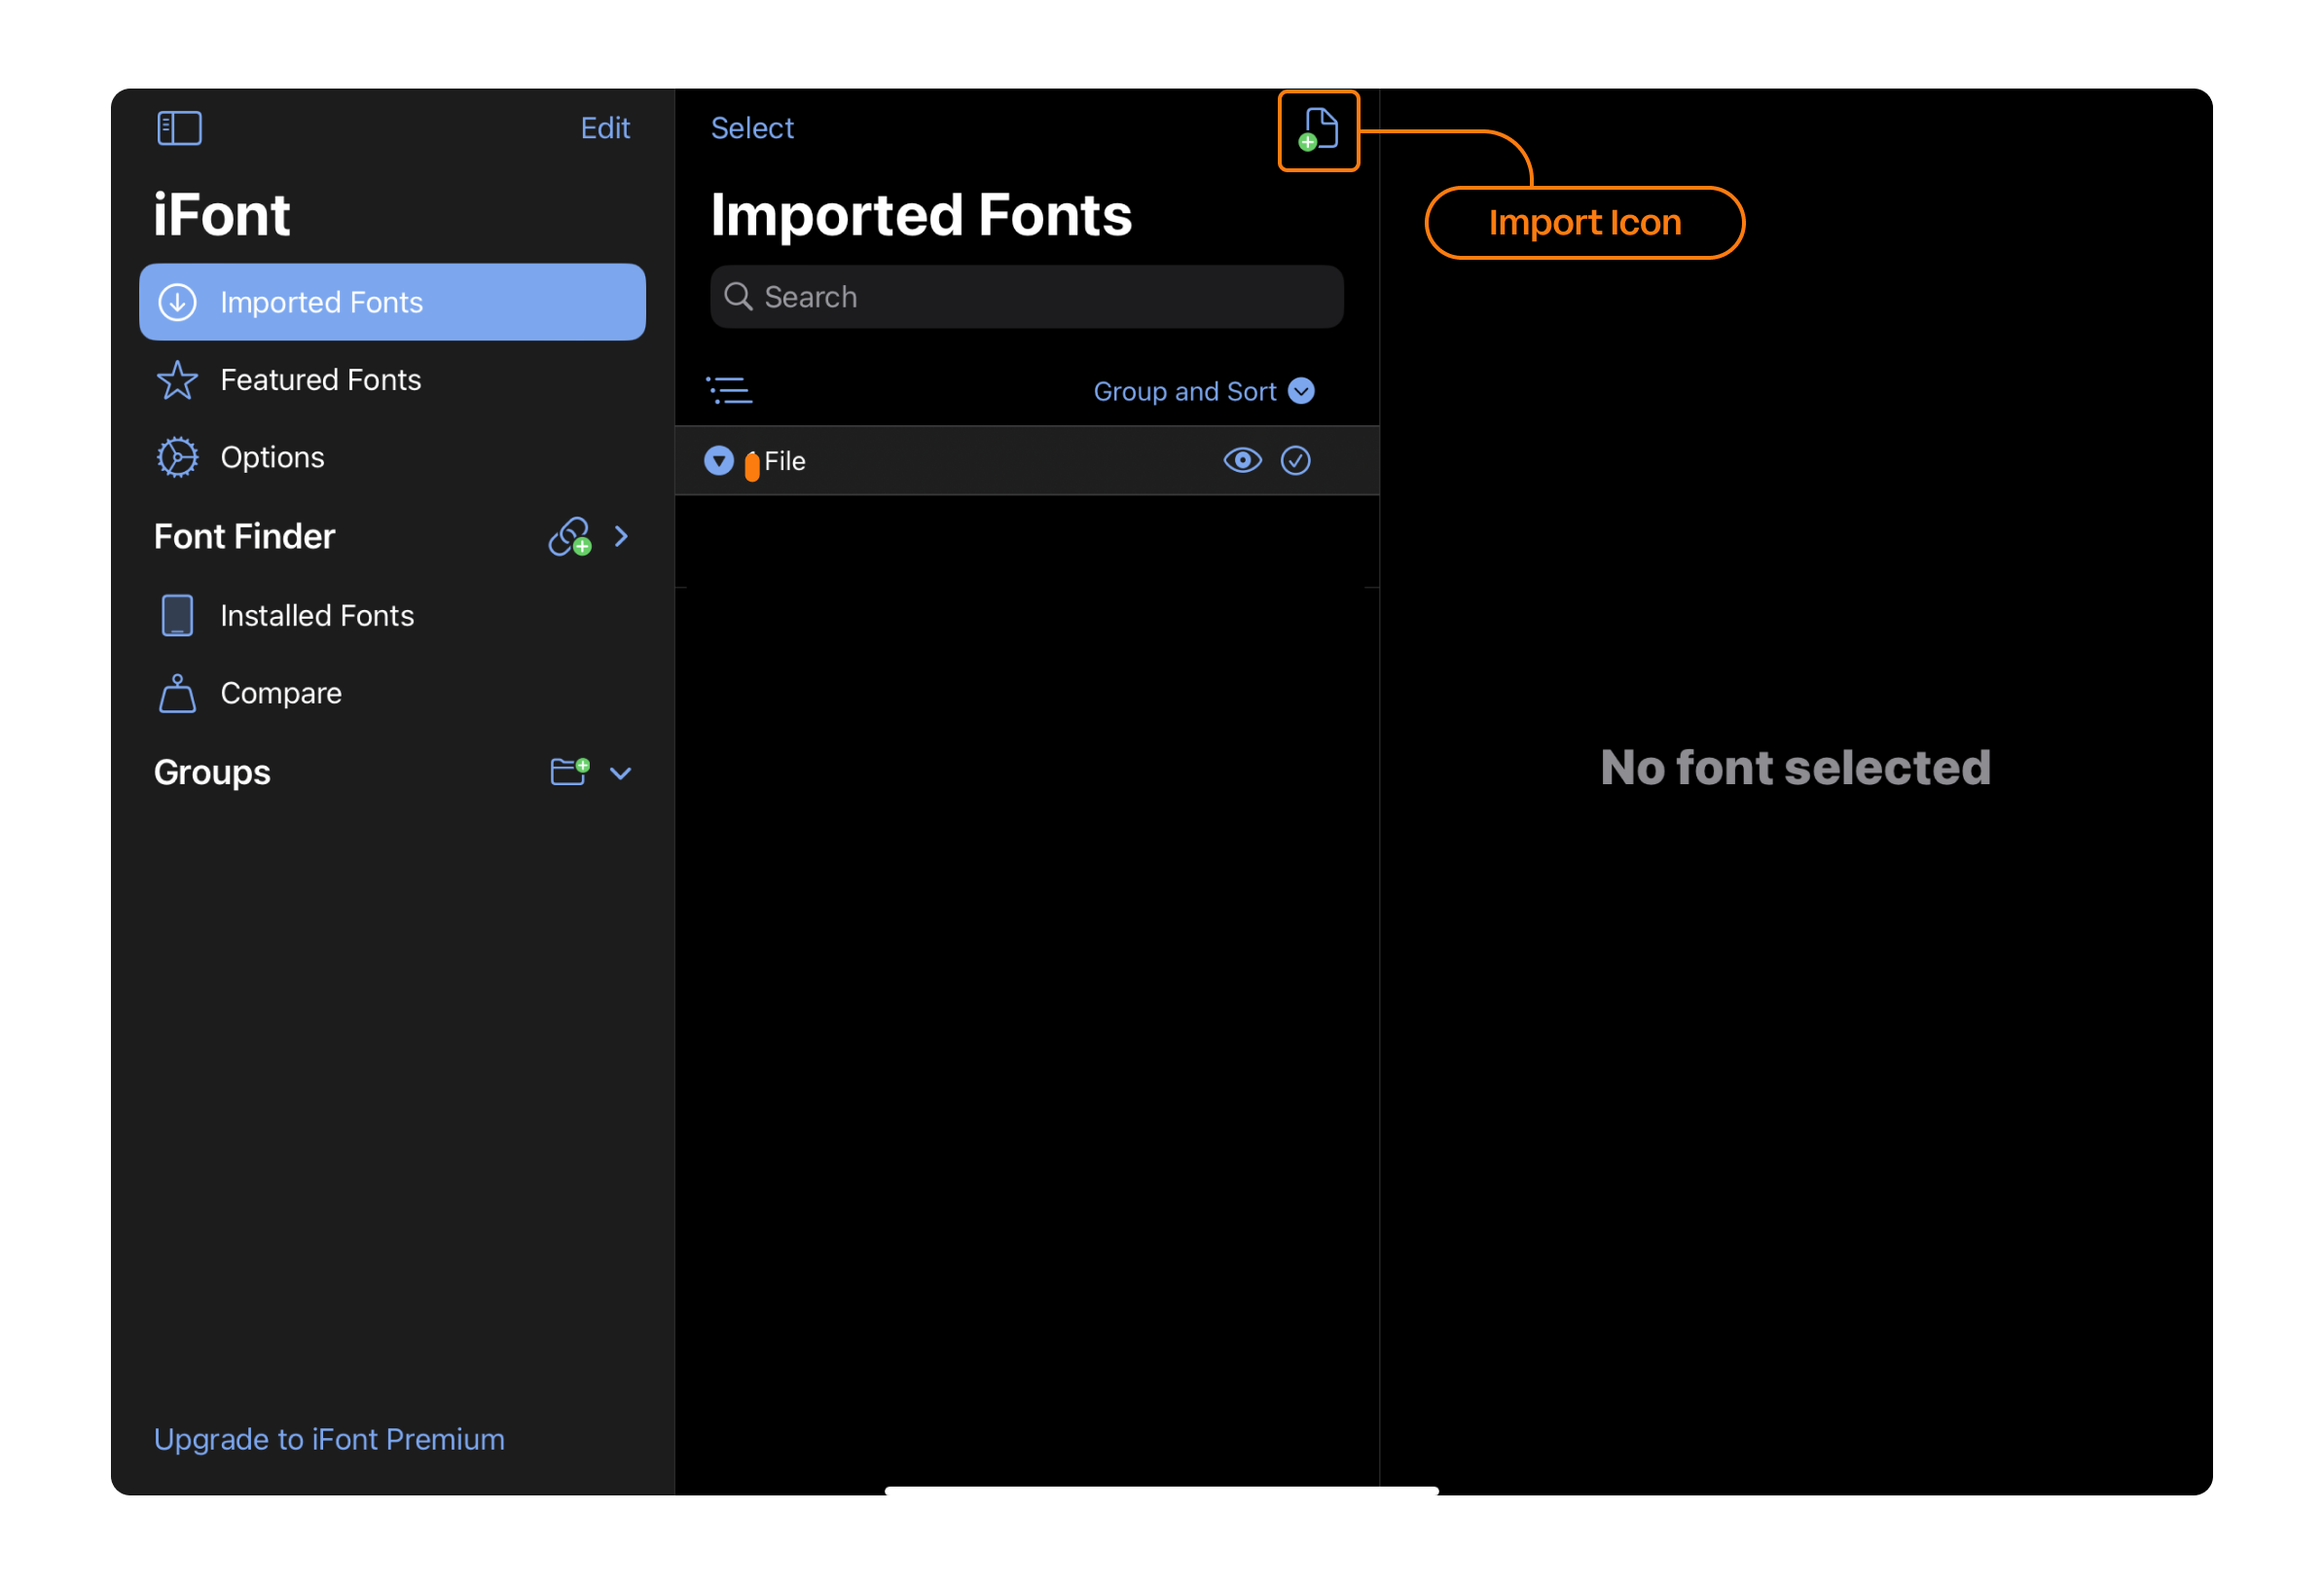
Leave the Files app and open iFont. In iFont, click on 'Imported Files' in the left-hand-side navigation bar. Then, tap the import icon in the top-right corner, and choose the font when you're taken to the Files app. Next, hit open, then select 'Install' next to the custom font file. You'll see a tutorial, which you can skip.
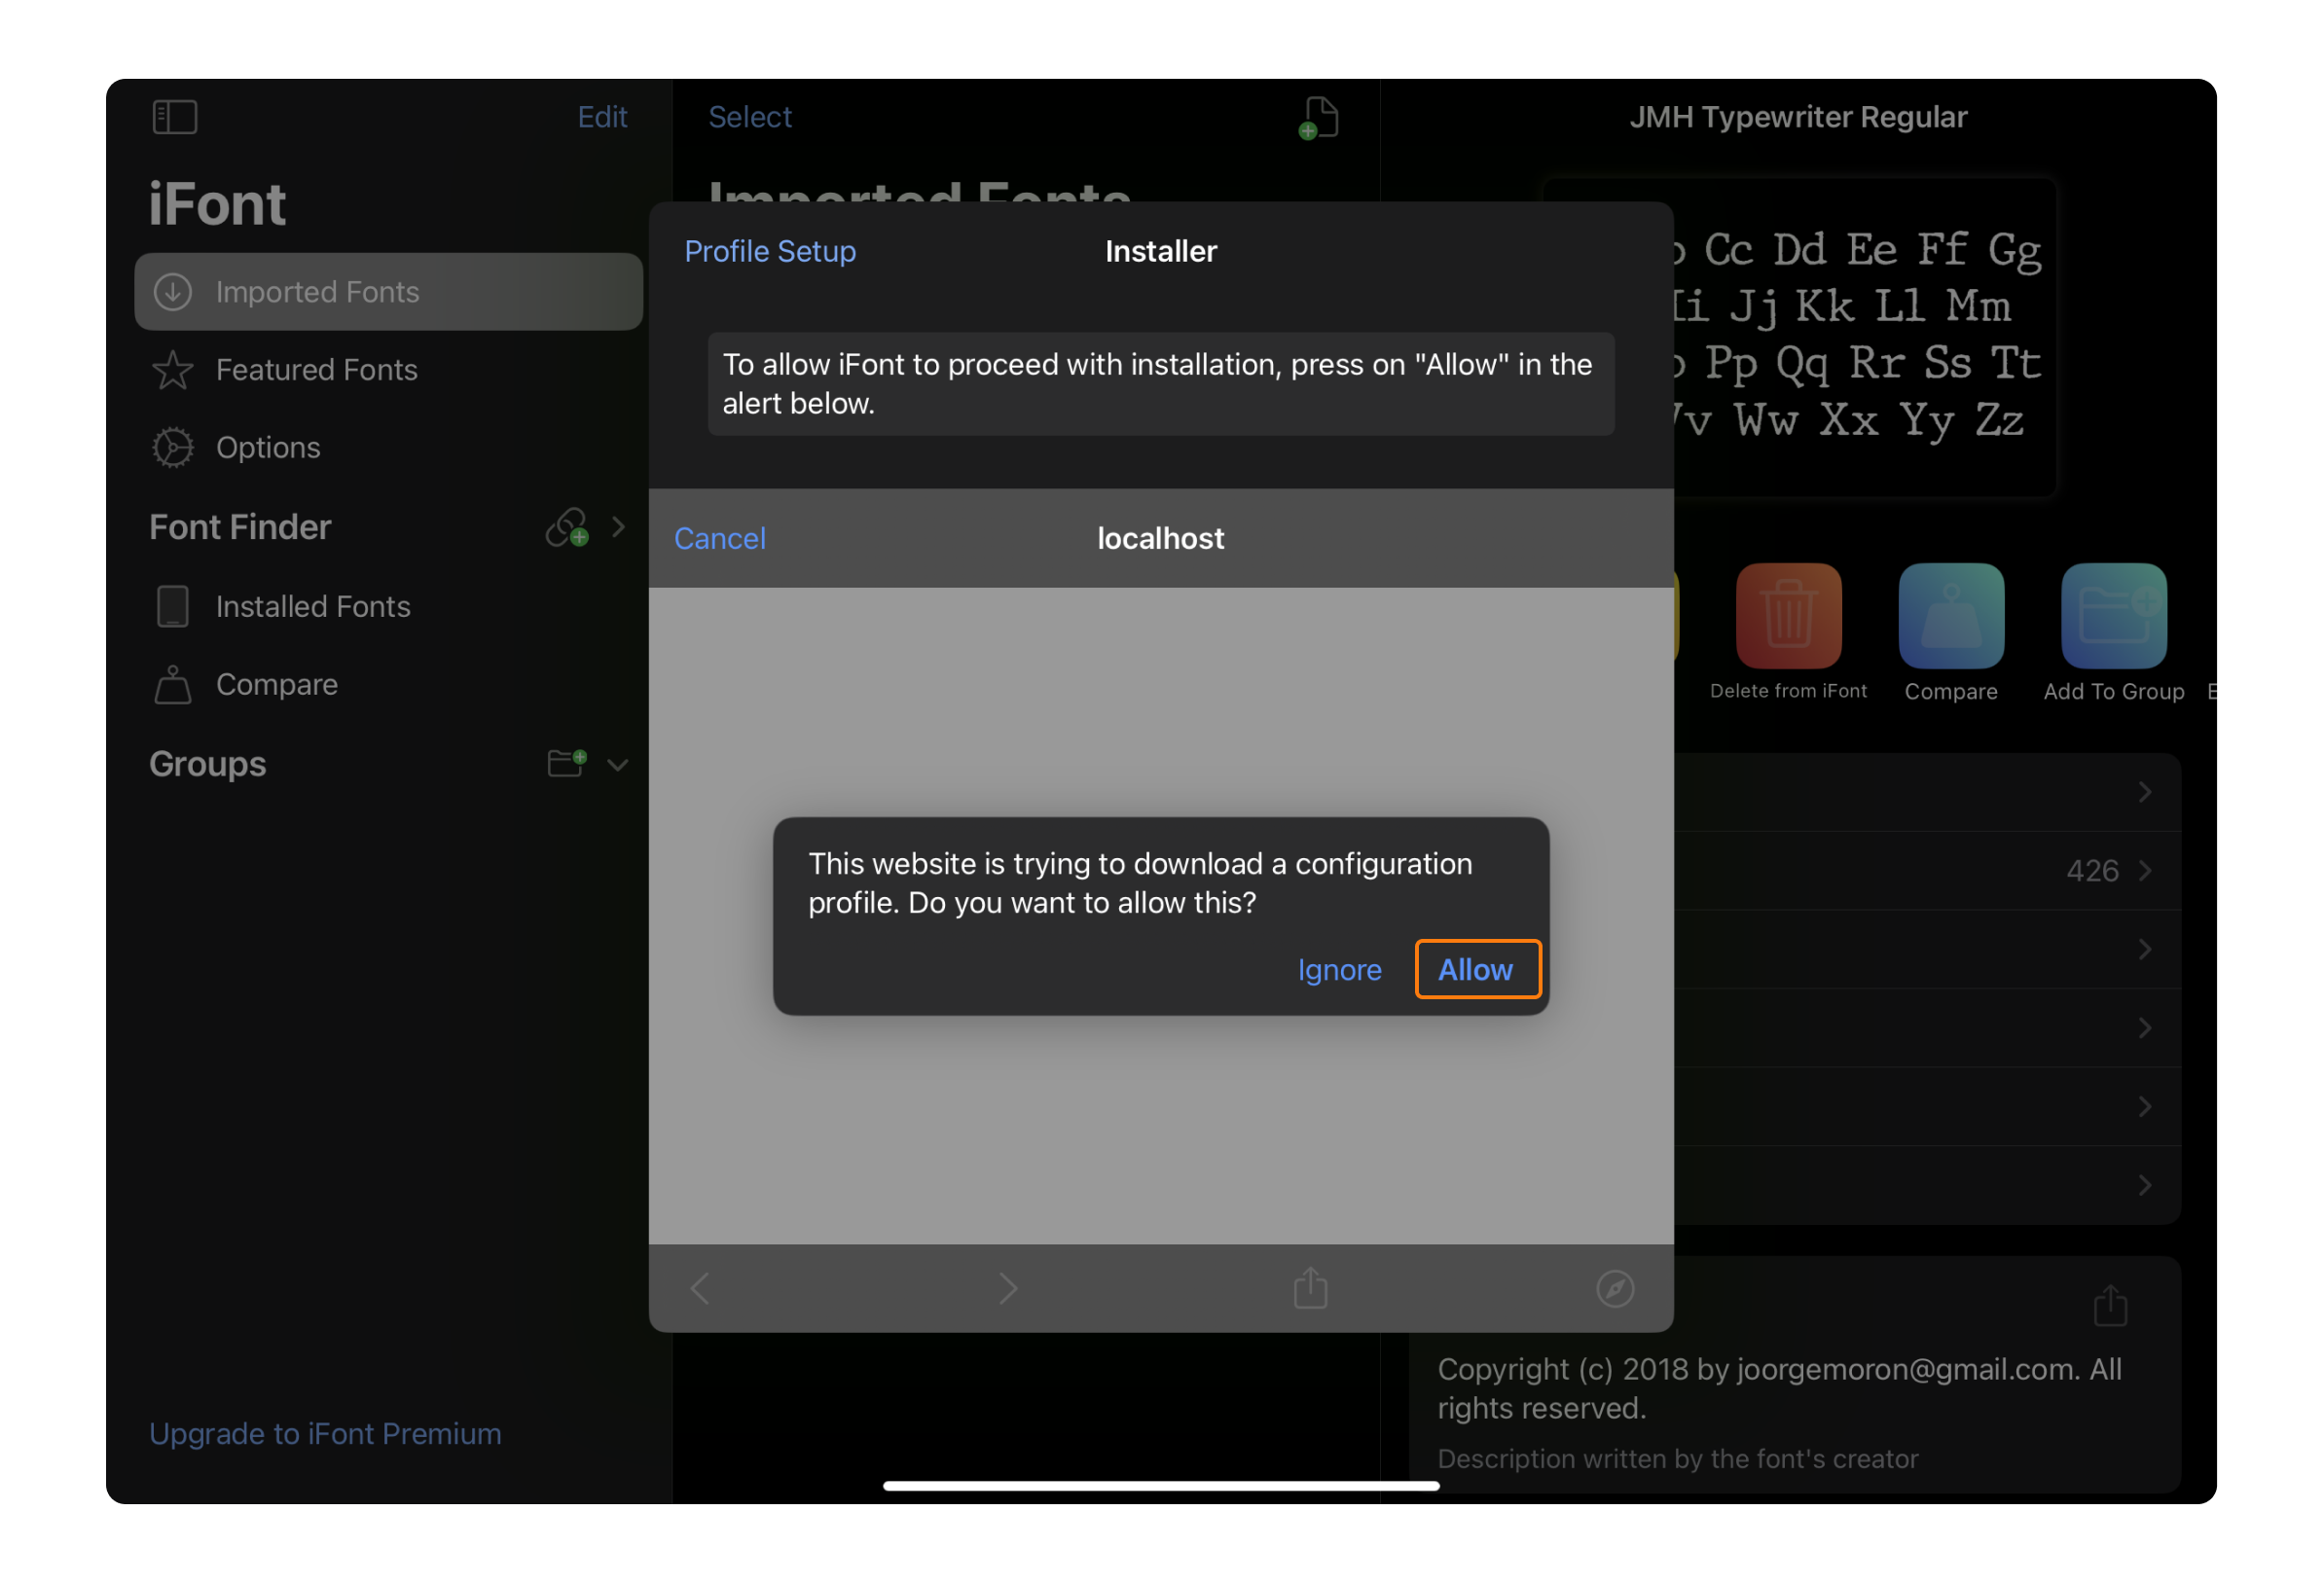
Step 4: download configuration profile
You'll need to download a configuration profile by tapping "Allow." Note that this process must be repeated for each custom font, requiring individual configuration profile downloads for each one.
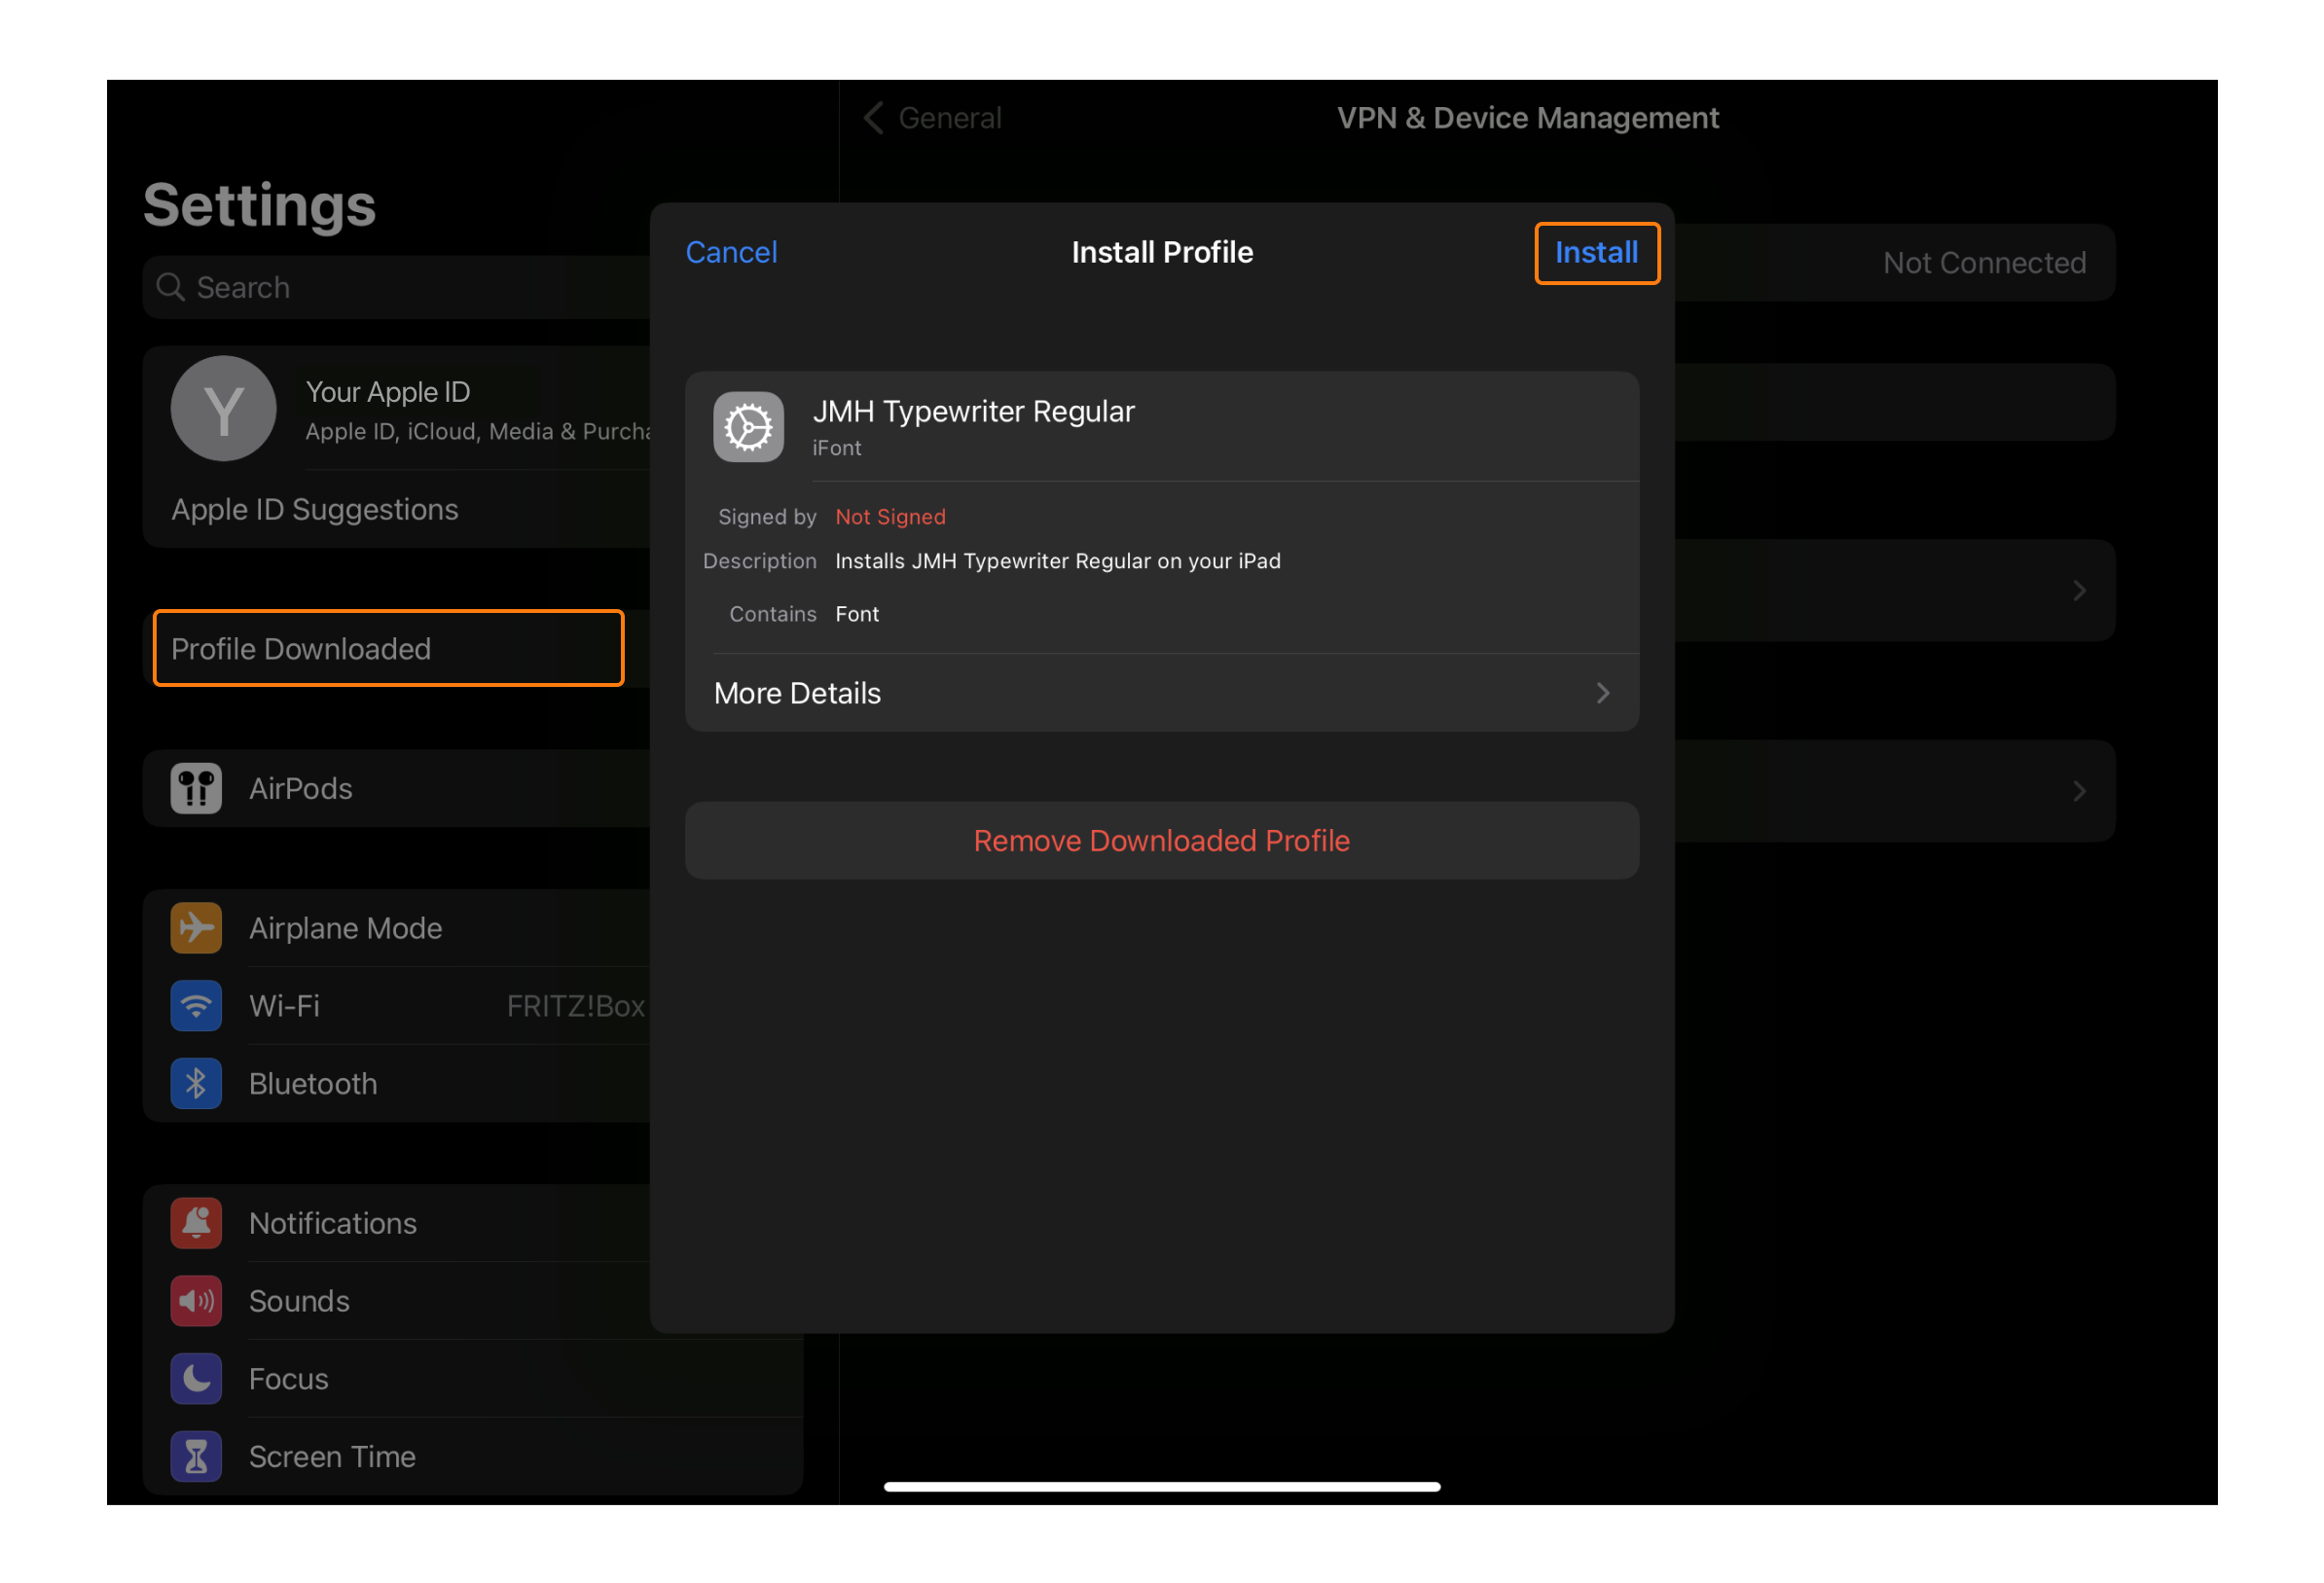
Step 5: install configuration profile
After downloading the configuration profile, it's not yet installed. To do so, open the Settings app, navigate to General -> Profiles, and select the profile for your custom font. If you can’t see your profiles, you should see a “Profile Downloaded” button at the top left, under your Apple ID details.
Next, click on "Install" and input your device password. You'll then have to tap "Install" two more times to complete the installation process. Finally, select "Done."
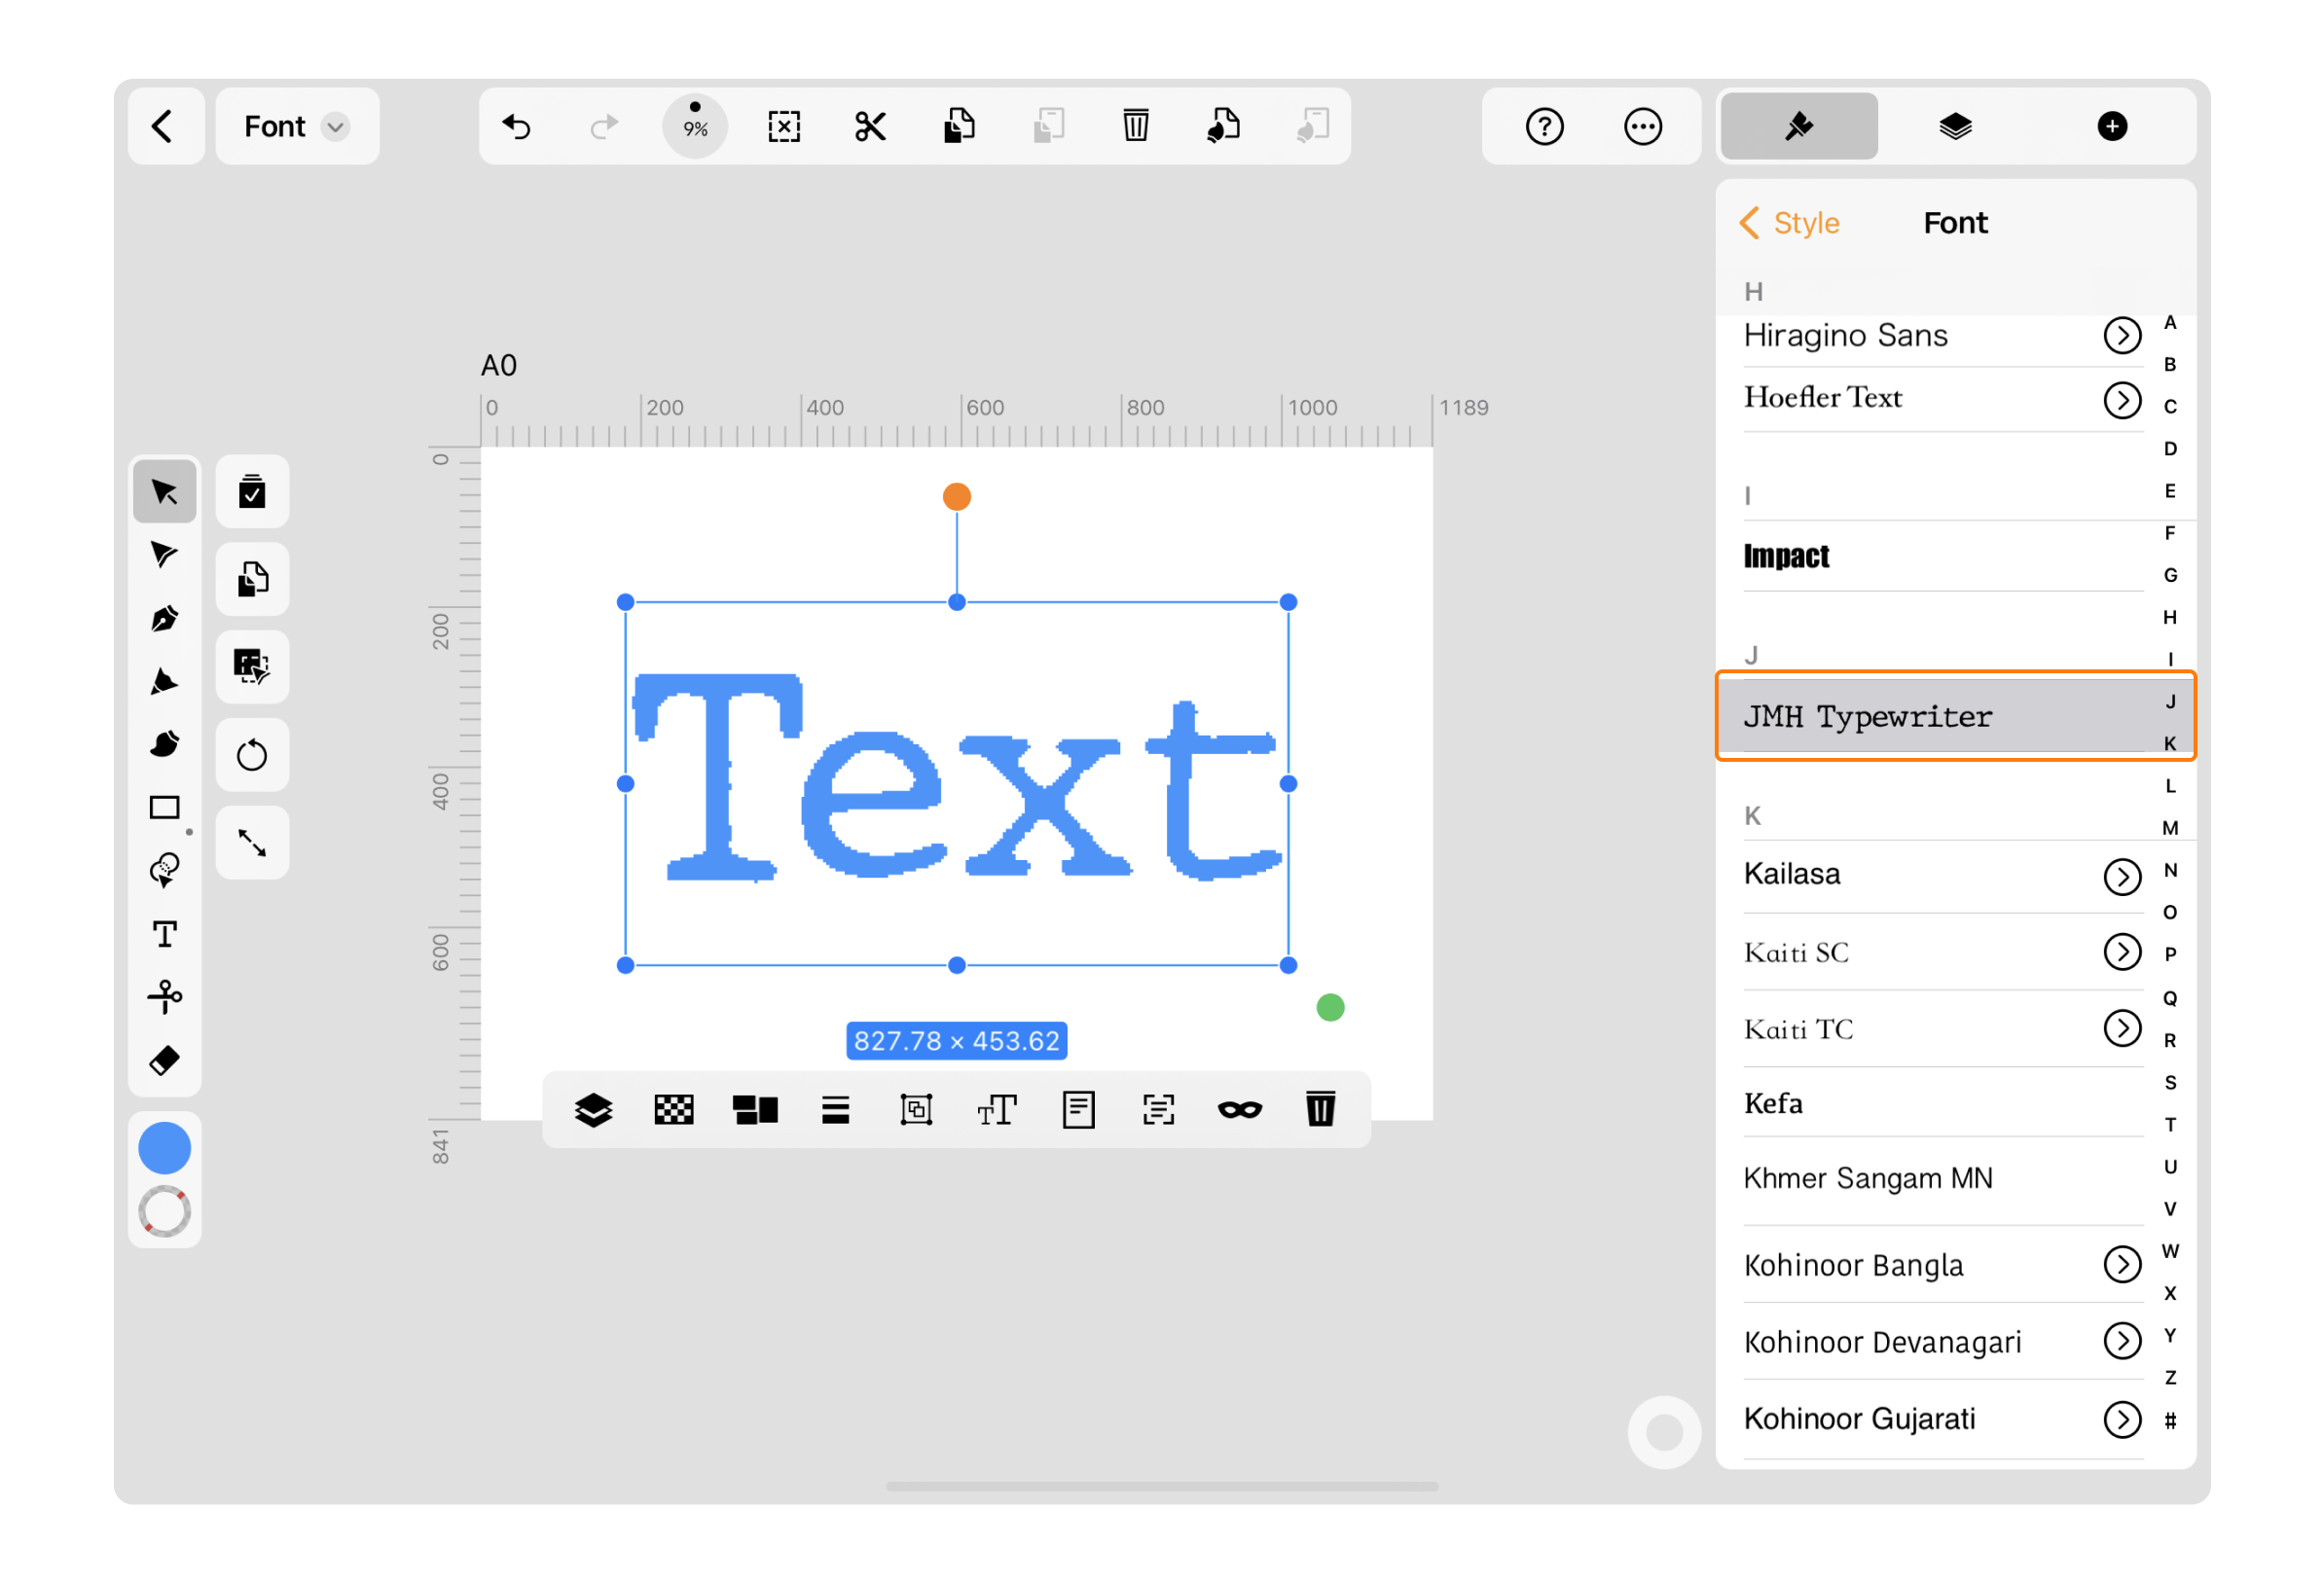
Step 6: use the font in Linearity Curve
Open Linearity Curve and select the Text Tool. You’ll find your new font ready to use in your designs!
While importing fonts on iOS devices may require a few extra steps, we hope this guide has empowered you with the knowledge and tools you need. We'll keep you updated on any developments regarding Fontinator. In the meantime, happy designing!
Jumpstart your ideas with Linearity Curve
Take your designs to the next level.
Share this!
Emma Taggart
Emma is a Content Writer for Linearity in Berlin. Her hobbies include making ceramics, roller skating, drawing, and 2D animation.