:quality(75))
:quality(75))


:quality(75))
Turning images into an editable vector format is one of the most-needed skills for graphic designers and illustrators. With image tracing in your design toolkit, you can manipulate photo-realistic images in your vector designs.
Adobe Illustrator is a popular graphic design software known for its powerful vector drawing tools.
In this comprehensive guide, we'll provide step-by-step instructions on tracing an image in Adobe Illustrator. We'll also show you how easy it is to create traced images using Linearity Curve's AI-powered Auto Trace feature.
If you've been following our previous Illustrator guides and how-to’s, you probably know that we'll follow the same process in this guide. We'll show you how to:
- Use Illustrator’s Image Trace feature
- Trace a logo step-by-step
- Trace high-resolution image files
We'll also give you tips on choosing types of images and experimenting with the logos and pictures you've traced.
Jumpstart your ideas with Linearity Curve
Take your designs to the next level.
The tools you need for accurate vector tracing in Illustrator
There are three key ingredients for you to be able to follow the steps in this tutorial:
1. Adobe Illustrator (obviously)
If you don't have an Adobe Creative Cloud (CC) subscription, you can get a seven-day free trial before purchasing Adobe Illustrator. It allows you to test the Image Trace and other features and see if it's what you're looking for.
A free trial will also give you time to navigate Adobe Illustrator's various options and advanced settings.
You may find its interface a tad tricky to get used to at first. Keep this guide handy to return to the steps until you get acquainted with the main and tracing options menus.
2. A simple logo image file
Feel free to use any simple icon or logo you like to follow these steps. You can pick a modern logo with simple forms and straight lines or one with smooth, curved lines to achieve great results.
Selecting a simple logo will be especially helpful if this is your first time trying Illustrator's Image Trace tool.
3. A digital photo
Pick any raster image you like. It can be one of your own photographs or a color image found online.
But again, if this is your first time using the Image Trace tool, look for a picture with few colors and simple shapes.
Another tip is to choose photo images in the .jpg or .png formats to trace. If you use an uncompressed photo file (.raw, .tiff, and other formats) and convert it to vector format, you'll have a large file that can become challenging to manage in Illustrator.
Once you have all three of these ingredients ready, you can proceed with the steps below to turn a logo and a photo into editable vector designs. Let's get started.
Ready to create brand assets that pack a punch?
Visit our Academy for free marketing design courses.
How to trace a logo in Adobe Illustrator
Let’s begin with the steps you need to trace a logo in Illustrator.
We're going to turn a simple logo into a black-and-white vector design using Image Trace.
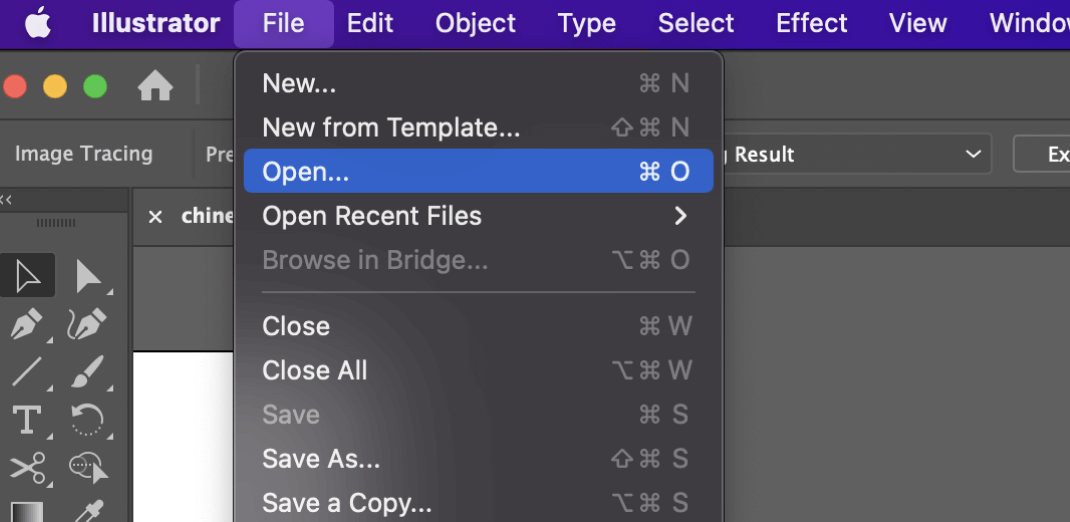
Open the Adobe Illustrator software and go to File > Open in the top main menu to select your logo file and open it in Illustrator.
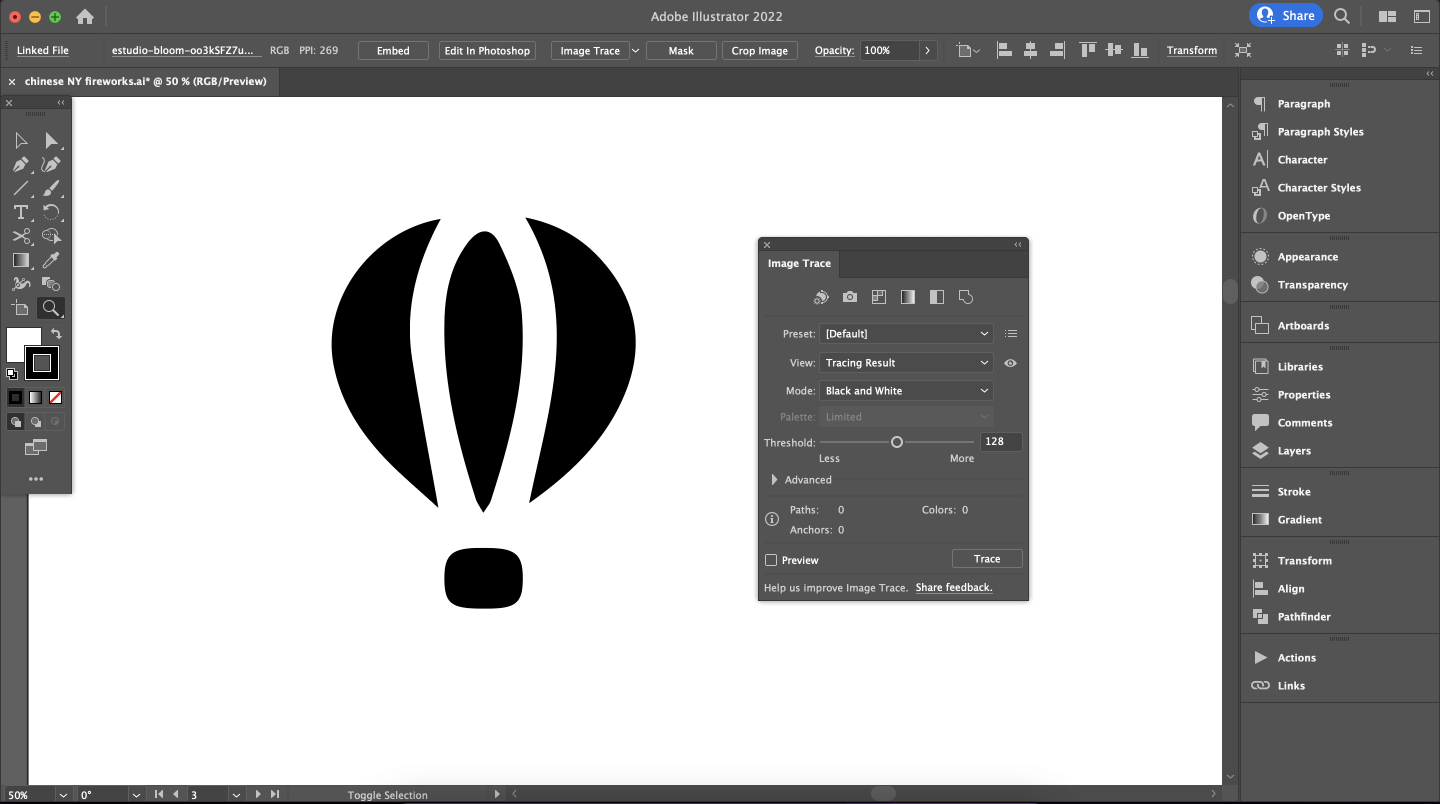
We've chosen an air balloon icon for this exercise.
With the logo open in your Illustrator document, go to Window > Image Trace to start the process of tracing the original source image.
This will open the Image Trace Panel.
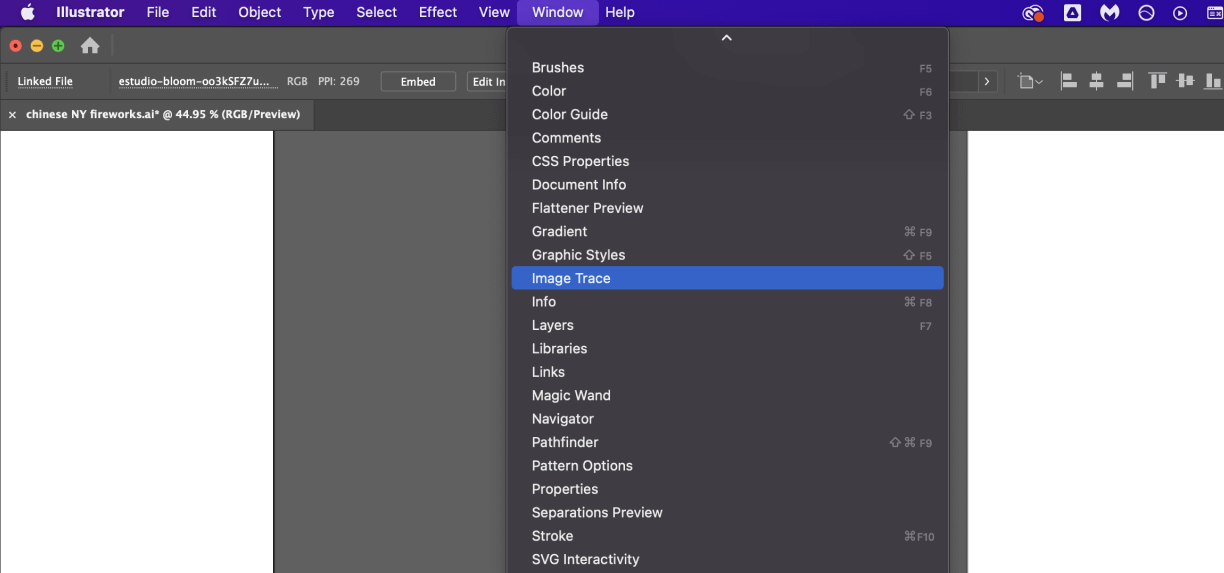
Once the Image Trace Panel appears, click the logo image to select it. To know whether your image is selected or not, check if the tracing options are grayed out.
If they are, it means you haven't selected your image. Ensure you've activated the Selection tool (V) and clicked on the image before proceeding with the next steps.
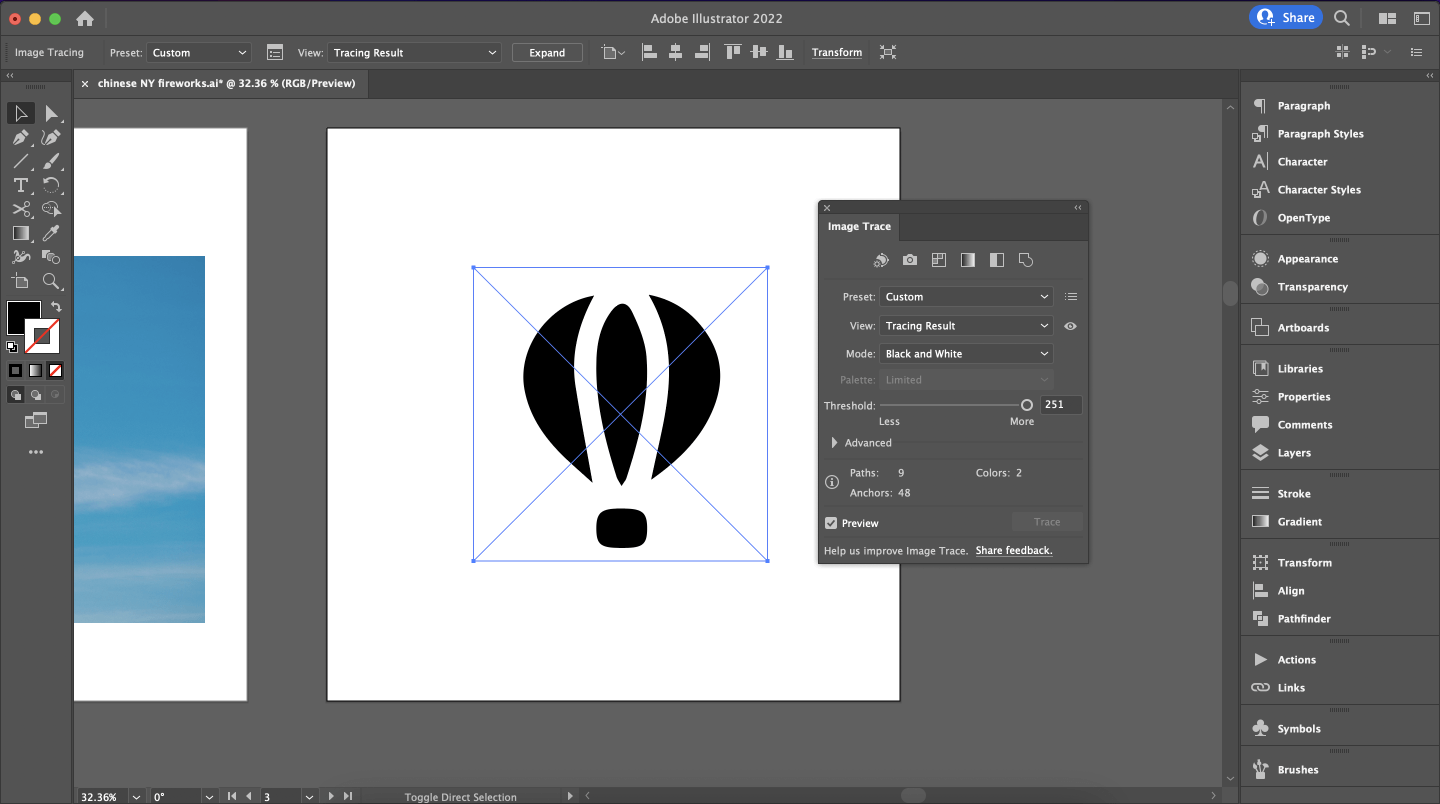
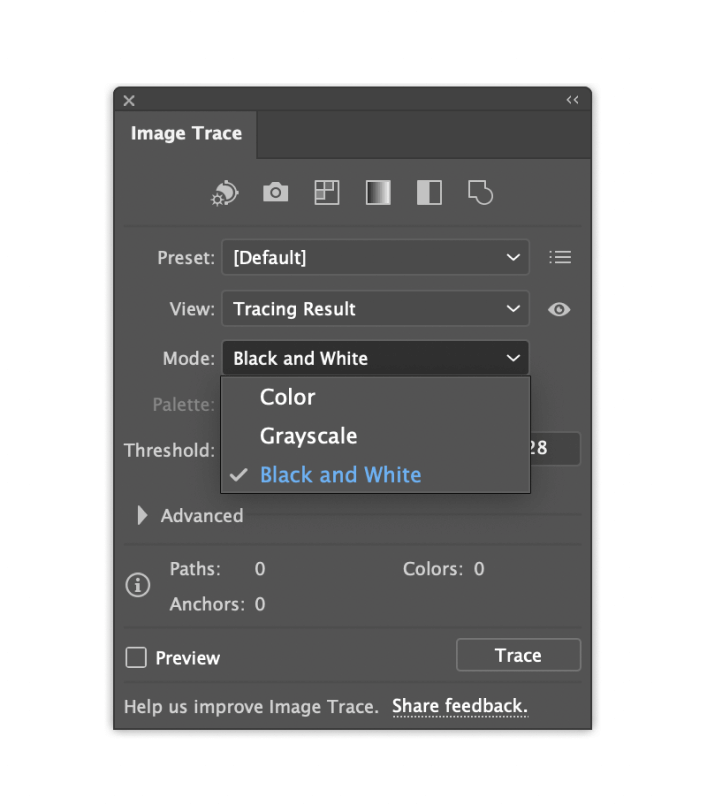
The next step is to go to the Adobe Illustrator Image Trace panel, and select Mode > Black and White from the dropdown menu.
If you're using a color logo, you must decide how many colors you need for your vector image. Why is this important? Because the fewer colors you use, the less vector shapes you'll have and the smaller your file size will be.
Selecting only a few colors also helps you simplify colorful designs and makes it easier to edit them in vector format.
The built-in preset options for Black and White Mode should be adequate, but you can also set the Threshold lower or higher.
A higher Threshold will create larger black areas, while a low Threshold will create smaller black areas. This is because Threshold controls how Image Trace selects the darker pixels to be traced into the Black and White design.
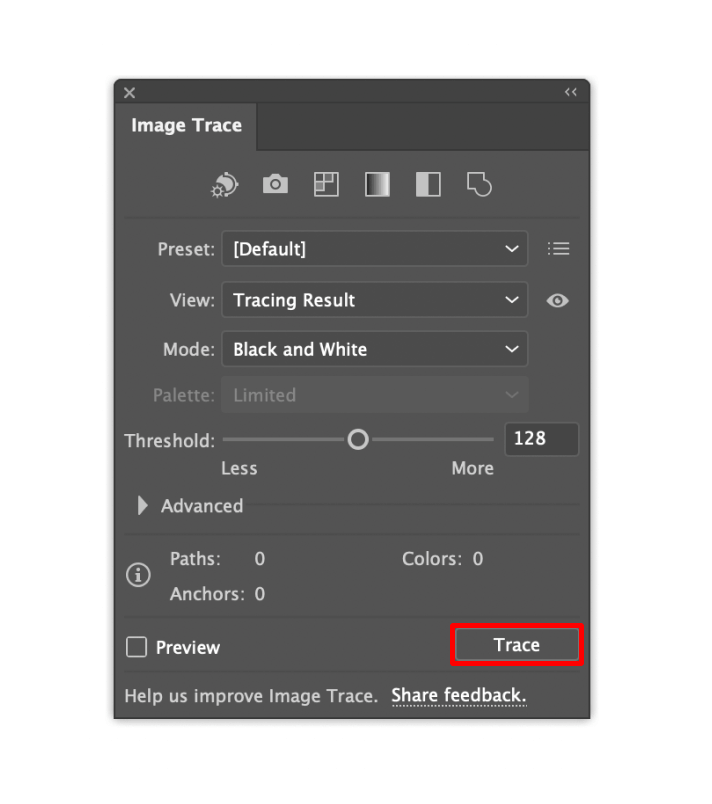
Click the Trace button in the bottom right corner of the Image Trace window once you're happy with the Threshold.
Your logo will now be traced and turned into an editable vector image.
You can scale it up and down as you wish, and its image quality will remain unchanged. So, you won't have to worry about quality loss whether you scale down your logo for business cards or scale it up for posters or billboards.
This step is optional and depends on whether you'd like to be able to edit the vector logo.
If you'd like to use the Pen (P) or Direct Selection (A) tools to make some changes to the vector paths, choose to Expand your traced image. This option will be at the top Dock section underneath the main menu bar.
This will create editable paths so you can manipulate the shapes and change the colors of particular parts of your logo design.
Get creative with Linearity Curve.
All the tools you need to create and share with your team.
How to trace a photo in Illustrator
The process of tracing photos in Illustrator is similar to the steps above. However, you'll notice that you'll need to follow more steps to trace a complex image file than to trace a simple logo or icon.
This change in the tracing process starts from Step 4 below. But let’s not get ahead of ourselves.
Before starting with the first step, remember to choose one of the raster image formats that'll work best for image tracing.
Go to File > Open and open your chosen image file in Illustrator.

When your image appears in your Illustrator document, open the Image Trace window by going to Window > Image Trace.
All the tools you'll need are in the Image Trace panel menu.

Ensure your image is selected with the Image Trace window open. Like the process of tracing a logo, the tracing options menu will be grayed out if your image isn't selected.
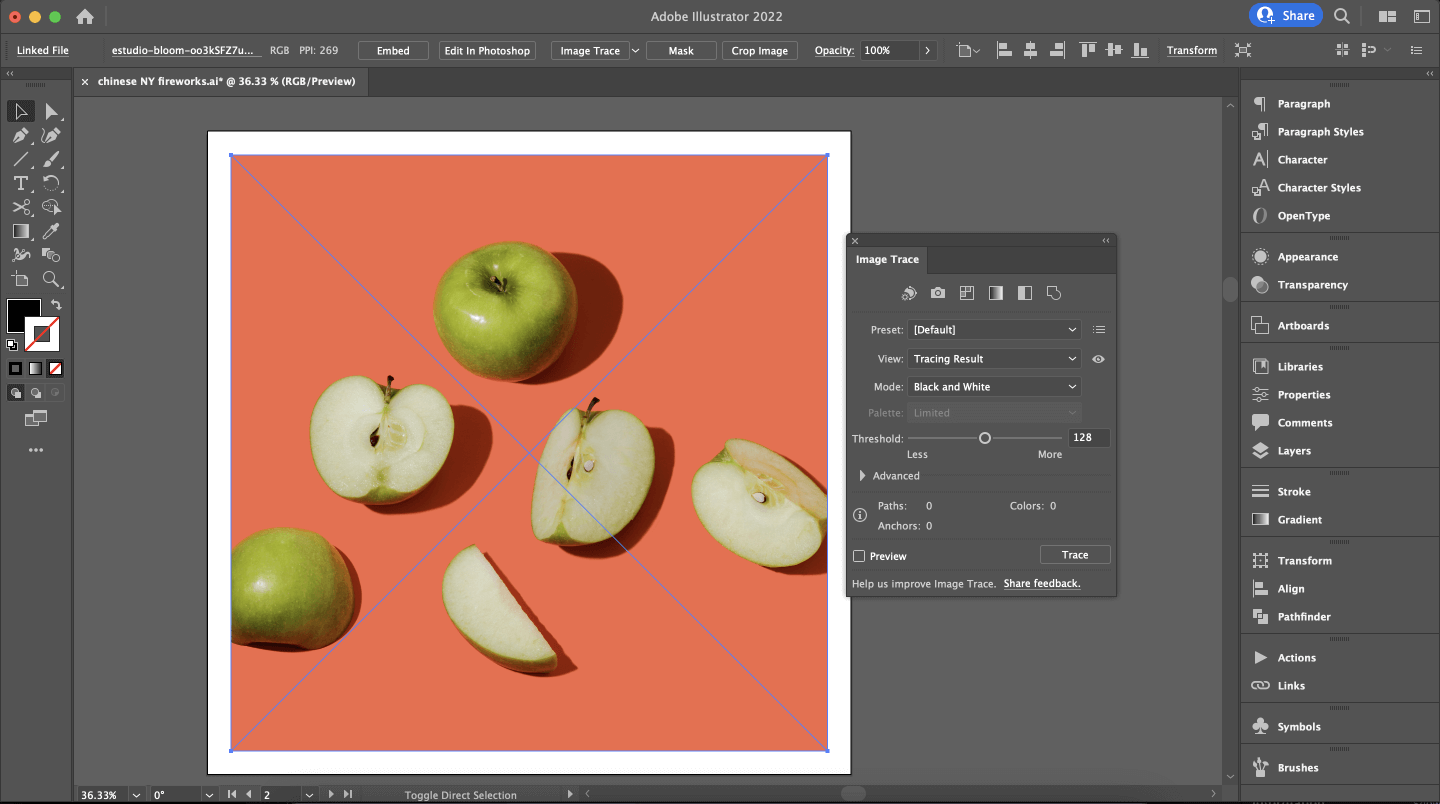
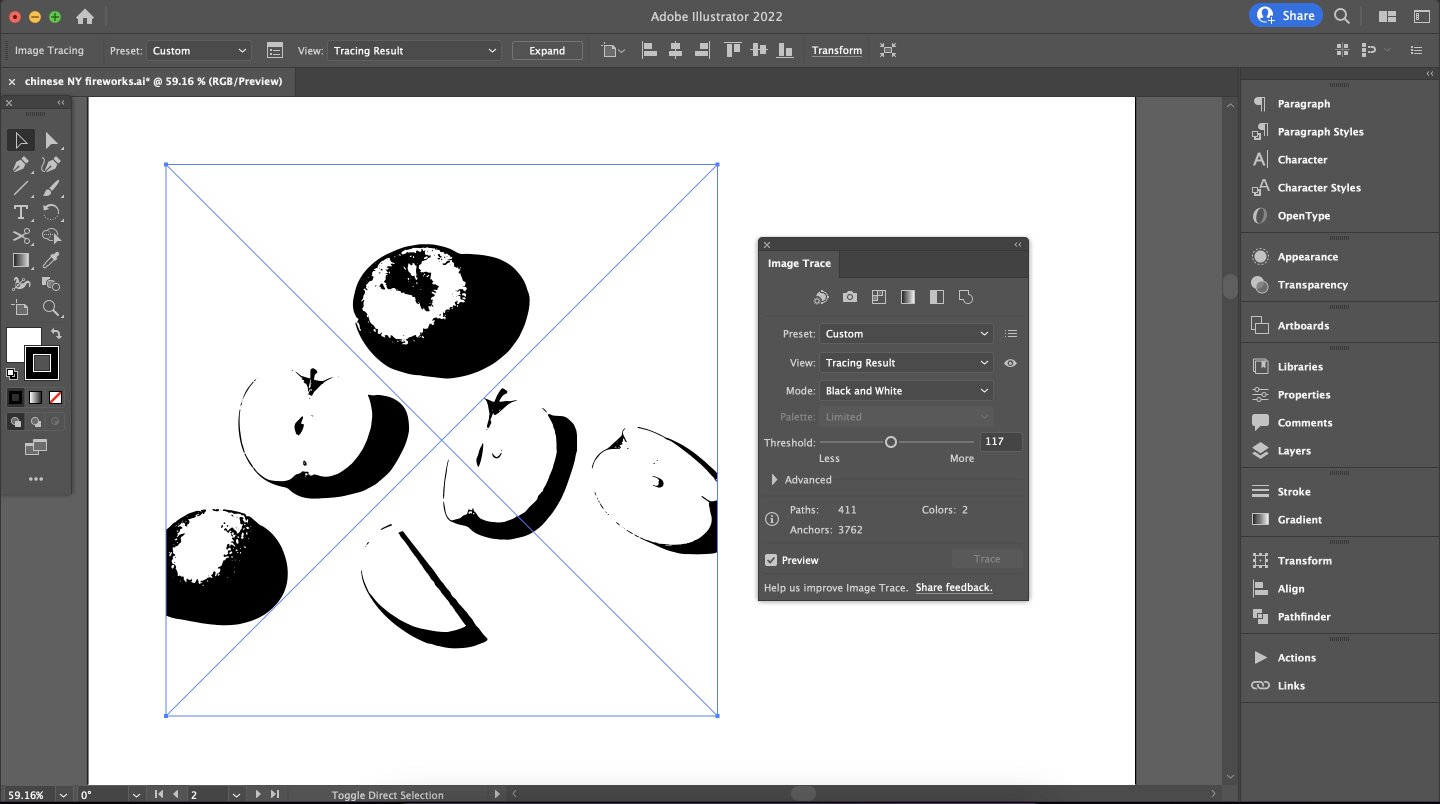
Now we can begin the tracing process. First, let's convert the image into a Black and White vector to see what it'll look like as a monotone design.
Go to the Image Trace panel and select Mode > Black and White from the drop-down menu, then click Trace.

Done—you should now see a black-and-white vector image of your photo. But our tutorial doesn't end here.
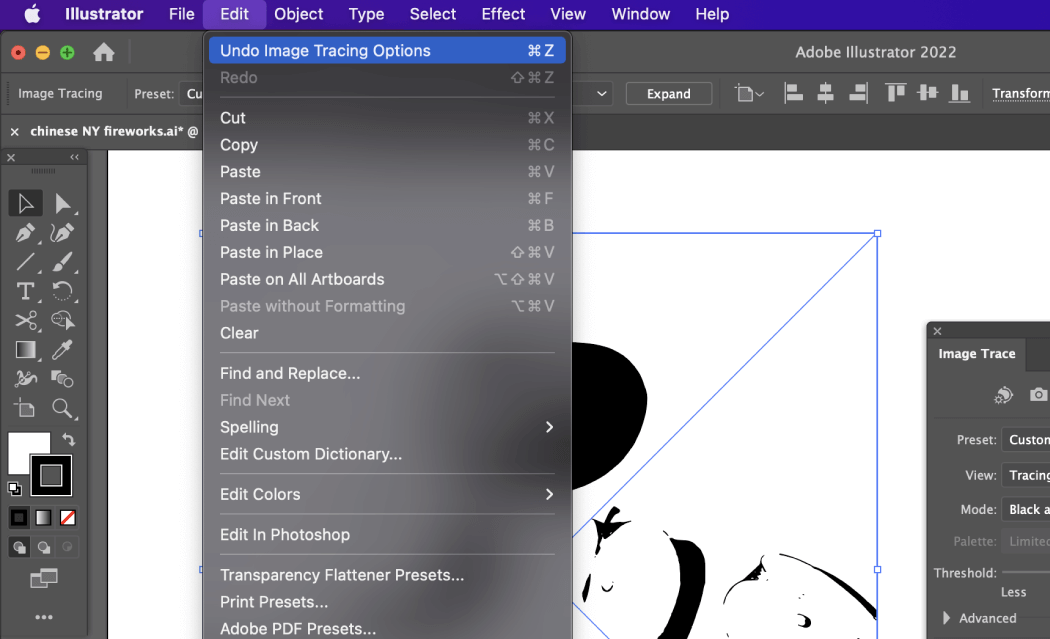
Let's make a limited-color version of the picture. You'll need to Undo the black-and-white Image Trace by going to Edit > Undo Image Tracing or pressing ⌘+Z on your keyboard.
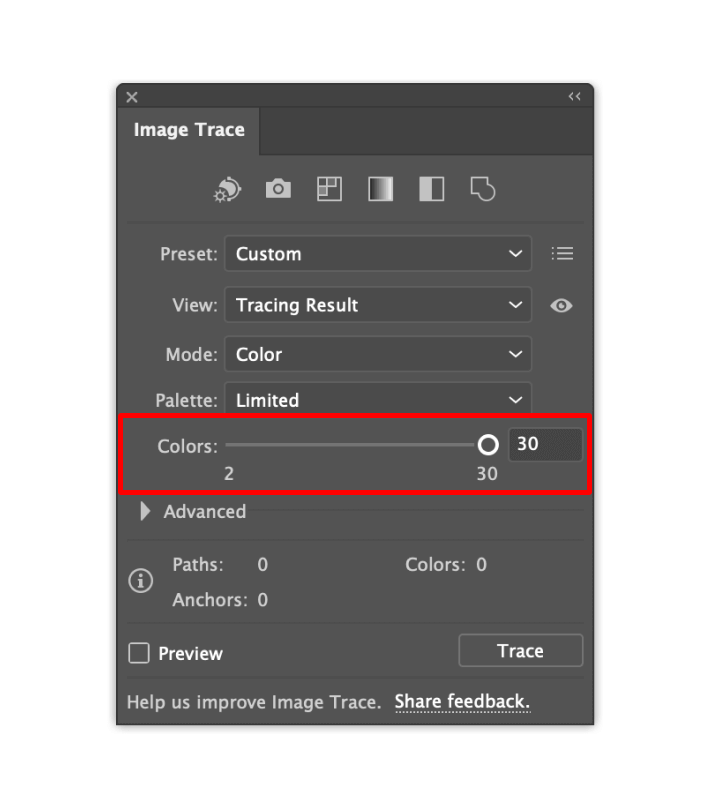
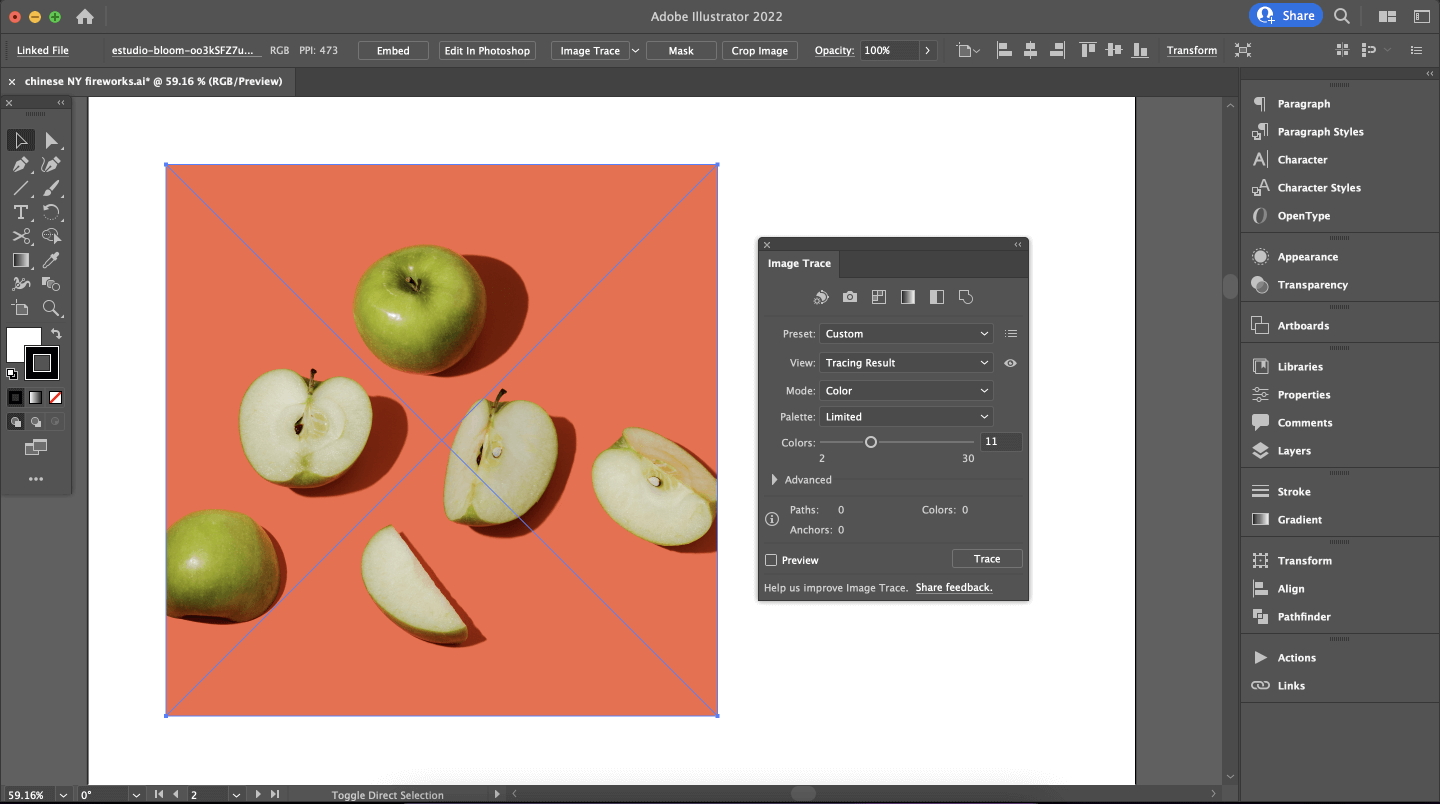
Now, go to the Image Trace panel again and select Mode > Color from the drop-down menu. This setting lets you trace your image in color.
With the Limited Palette selected, test the Colors slider with your image to see how many colors you'd like to include. To simplify the image, we recommend selecting 20 colors out of the default preset of 30.
With the logo tracing process you followed earlier, we increased or reduced the Threshold depending on the amount of detail you want to include in the black-and-white Image Trace.
Click the Trace button in the Image Trace panel.
Keep in mind that an Image Trace may take some time, especially with more complex and colorful images. So, before panicking and clicking on other settings, give Illustrator some time to process and trace the image.
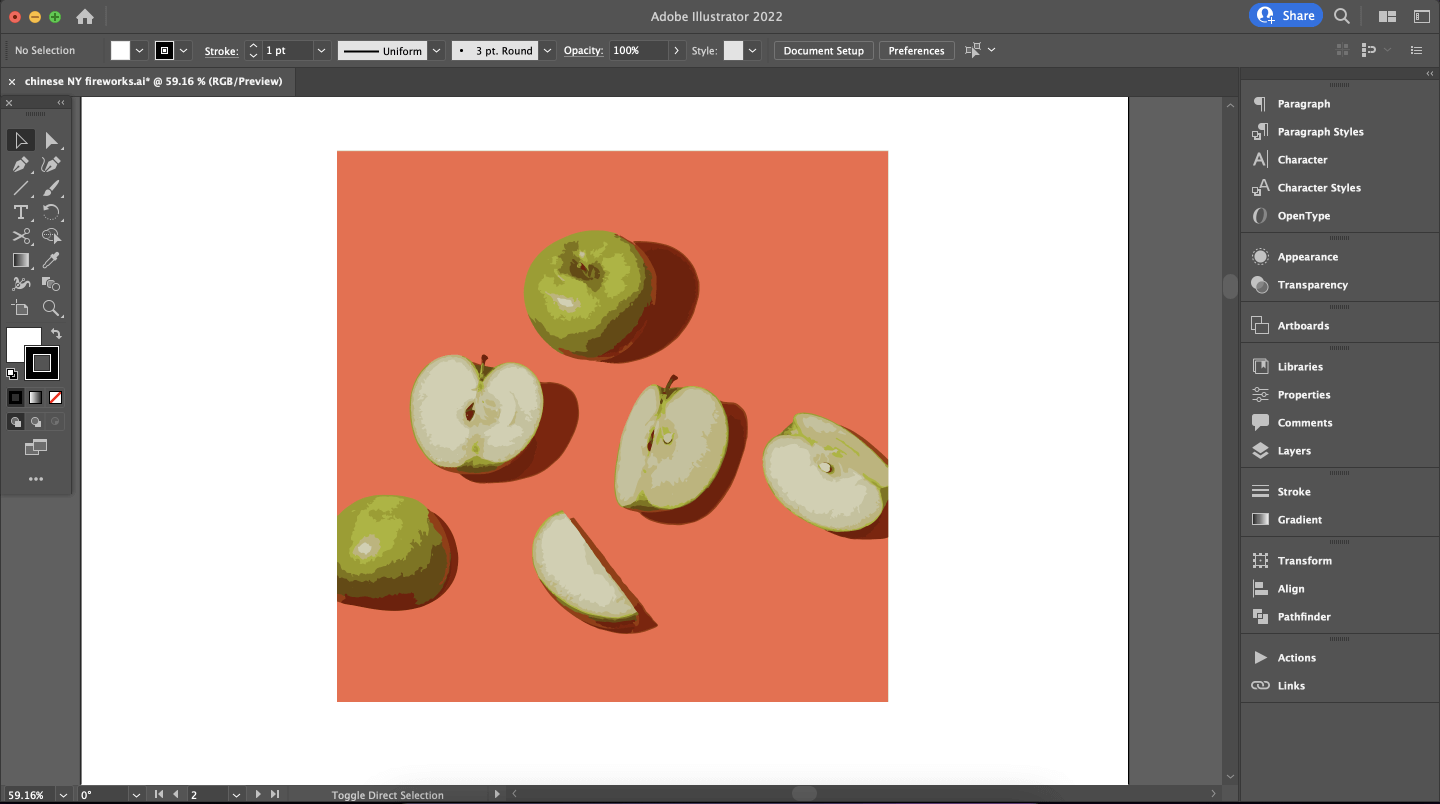
Once the trace has been done, you should see an accurate vector version of your color photo. You may still need to adjust the vector result and refine it, but the important thing is that you can use the scalable nature of vector graphics to your advantage.
If you want to tweak some of the shapes, curves, and colors, click on Expand to start editing the paths.
Don't forget to save your Adobe Illustrator file so you can keep your traced images for other projects and Export them later. Go to File > Save or press ⌘+S on your keyboard.
:quality(75))
:quality(75))
How to trace an image in Linearity Curve (formerly Vectornator)
Did you know you can use Linearity Curve's (formerly Vectornator) Auto Trace feature to achieve the same result? Linearity Curve (formerly Vectornator) is a competitive alternative graphic design software that offers all the tools you need.
What's Auto Trace, and how to use it?
The Auto Trace tool on Linearity Curve (formerly Vectornator), just like Adobe Illustrator's Image Trace feature, automatically converts raster images into vector shapes.
If you want to create a vectorized version of an image, you can use Auto Trace to do that quickly and efficiently.
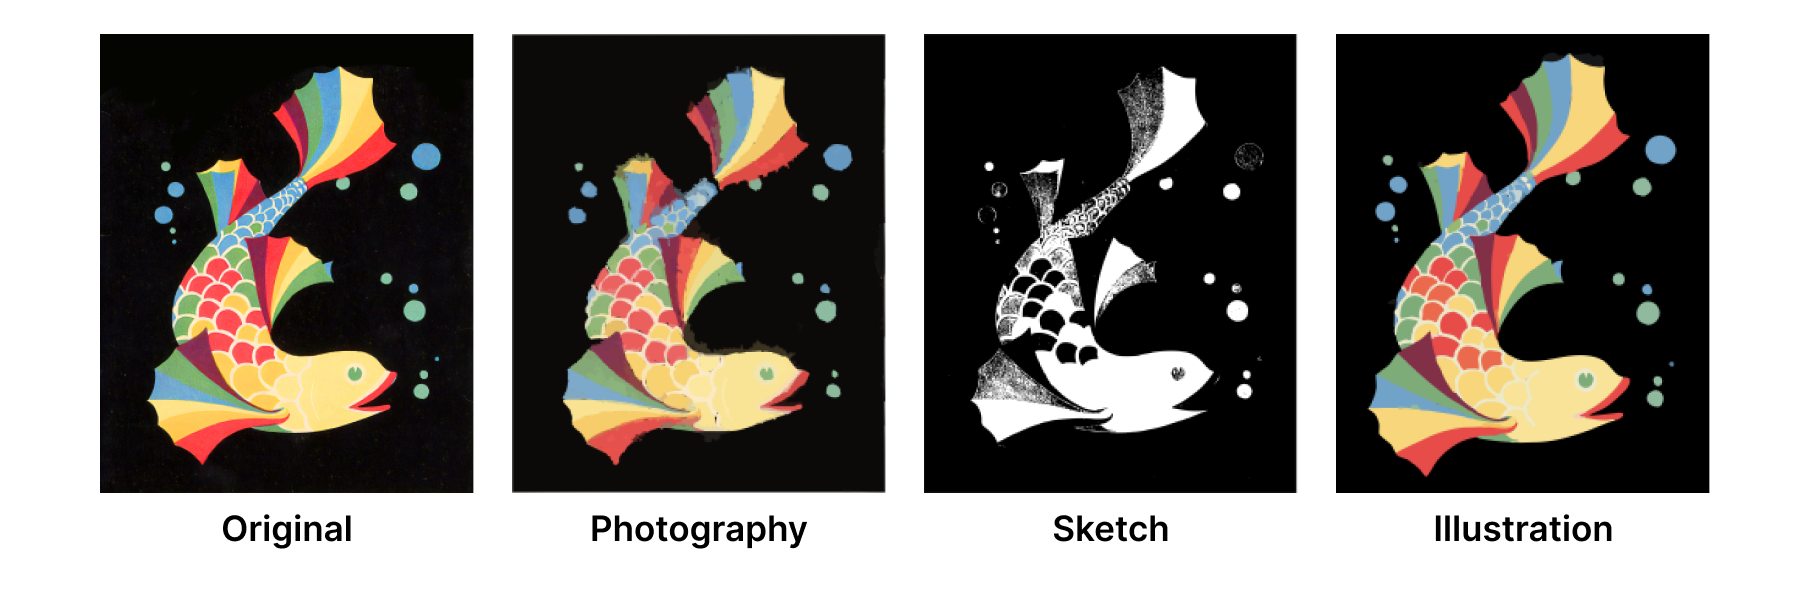
There are three Linearity Curve Auto Trace modes:
- Photography Mode for turning photos into painting-like portraits
- Sketch Mode to convert your sketches into black-and-white vectors in seconds
- Illustration Mode to vectorize your color illustrations
Let's go through a quick step-by-step tutorial on how to do accurate tracing using Linearity Curve (formerly Vectornator).
Import the image into your document
Open a photo using the Document Picker, or import a photo into your document using the Import Tab inside the Inspector.
To select the image, remember to unlock it in the Layers panel.
Open the Auto Trace Menu
To access the Auto Trace Menu, go to the Style Tab.
As soon as you select your image, you'll see the Auto Trace Panel in the Style Tab.
Adjust the Complexity and Min Path Size
If you've chosen Photography mode, you'll find two settings sliders in this panel:
- Complexity slider: Determines the number of paths your traced vector image will have. More paths mean more detail.
- Min Path Size slider: Determines the distance between points in your paths. A larger Path Size means smoother curves.
Before performing the Auto Trace, you can adjust the Complexity and the Min Path Size settings.
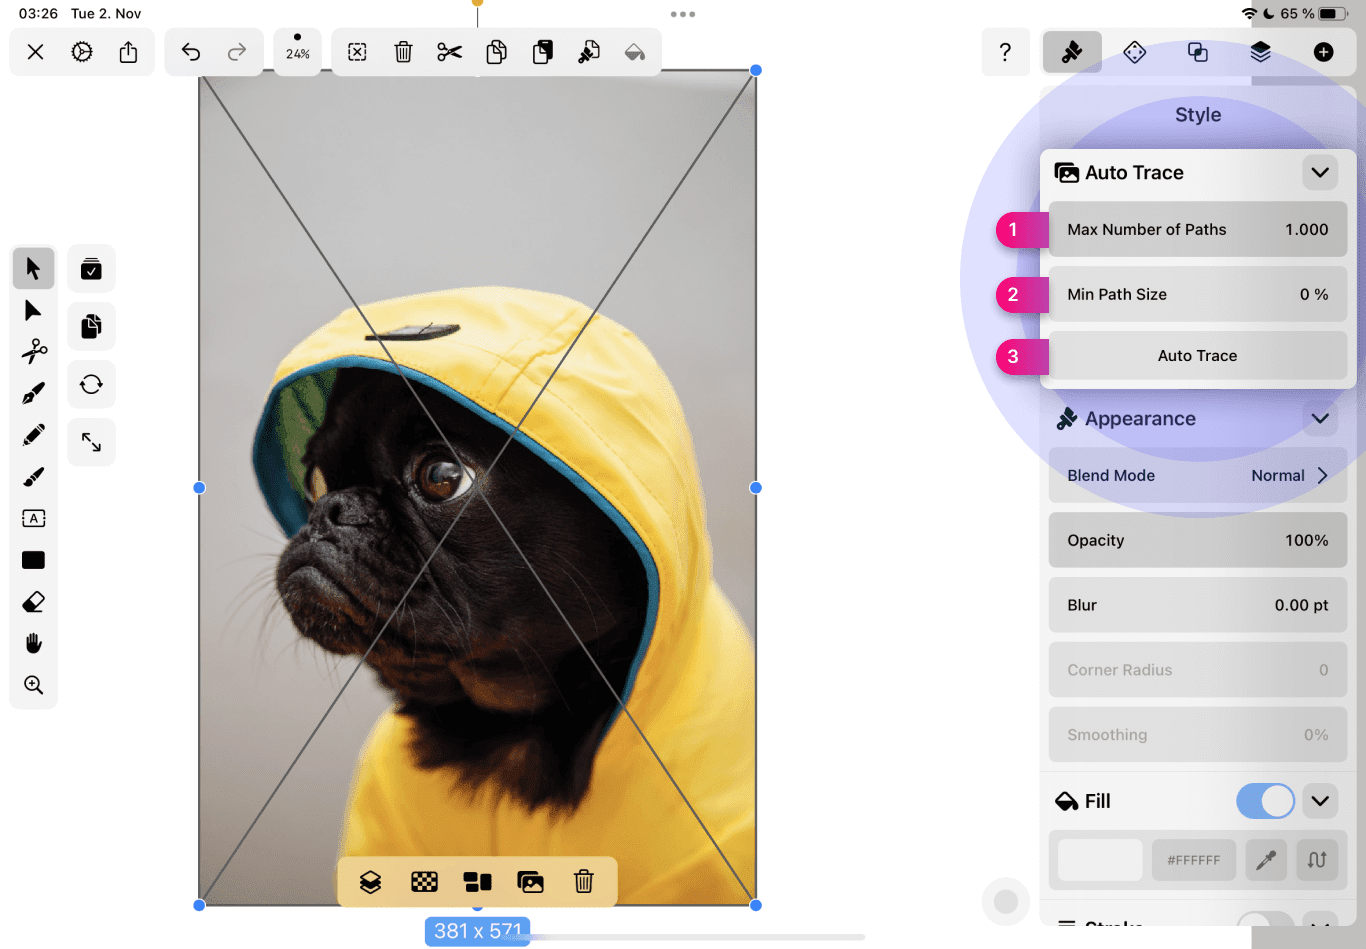
Auto Trace your image
Now, you're ready to tap the Auto Trace button. Give it a few seconds to process the image according to your settings and you'll have a vectorized version of your image.
Edit the traced image
After your image is converted into vector shapes, you can go ahead and edit the paths using the Advanced Options.
Wrap up
We hope this comprehensive guide inspired you to experiment with image tracing in Illustrator and create stunning vector images and logos.
Bear in mind that Illustrator offers a limited free trial and is relatively costly. You'll need to purchase the software to keep using Image Trace. It will also take a while to get used to Illustrator's complex user interface and navigation. It takes patience and practice to master Adobe CC software.
You can use its Auto Trace feature to achieve the same result as Illustrator's Image Trace in fewer steps. With its CoreML Machine Learning model, Linearity Curve's Auto Trace feature analyzes your images and automatically selects the appropriate mode for you.
But you also have control over your tracing result. It enables you to change the image-handling mode (Sketch, Photography, or Illustration) and offers unique options for each one.
To learn more about Linearity Curve and keep expanding your design skills, check out our Academy tutorials and courses.
Jumpstart your ideas with Linearity Curve
Take your designs to the next level.
Frequently asked questions
Why would you need to convert an image into a vector?
Adobe Illustrator’s Image Trace feature is one of the tools you can use to turn images into vectors. For example, if you need to scale a logo to a large format, you can turn it into a vector using Image Trace.
Linearity Curve's (formerly Vectornator) Auto Trace feature is an AI-powered image tracing tool that you can try as an alternative to Illustrator.
As you may know, any bitmap image is composed of pixels. The more you zoom in on a bitmap image, the more you'll notice pixelation.
The same problem may appear when you try to scale it down. That is where vector images come into play. Once the image is converted into a vector, its shape will be scalable indefinitely.
No matter how much you want to zoom in or out, you won't see any pixels, and the quality of the image or logo will stay intact.
The reason for this is that vector images are not based on pixels, but on mathematical equations called Bézier curves.
Tracing an entire image in Illustrator may not come out as perfect as you'd like each time, especially if you're trying to trace complicated logos or photos. But you can tweak the image with the various vector editing features available.
What's image tracing?
In computer graphics, image tracing is the process of converting raster files into vector files. Image Trace in Adobe Illustrator and Auto Trace in Linearity Curve (formerly Vectornator) automatically convert raster images into editable vector paths and shapes.
Where to find Image Trace in Illustrator
Open an Adobe Illustrator file and place a raster image on your Artboard. Select the image and navigate to Object > Image Trace > Make to trace the image with preset settings.
To edit the paths immediately after performing the Image Trace, choose Object > Image Trace > Make and Expand.
If you'd prefer more control over the Image Trace result and want to tweak the settings, navigate to Window > Image Trace to open the Image Trace panel.
How to use the Image Trace Panel in Illustrator
- Accessing Image Trace Panel: To start tracing an image, you first need to open it in Adobe Illustrator. After that, you can access the Image Trace tool by selecting Window > Image Trace. This will bring up the Image Trace panel.
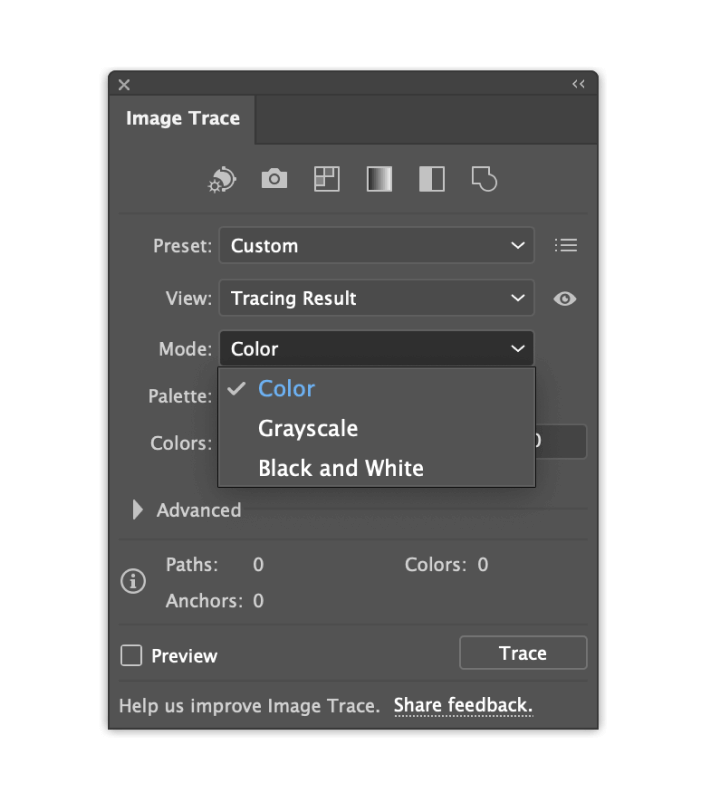
- Mode selection: Illustrator allows you to select the mode that best suits your design through a drop-down menu in the Image Trace panel. The three available Modes are: Color, Grayscale, and Black and White. Your choice will influence the following steps and how your final image will look.
- Colors, Grays, or Threshold sliders: Depending on the mode you've chosen, you'll adjust either the Colors, Grays, or black-and-white Threshold slider. The Colors slider controls the maximum number of colors used for tracing. The Grays slider adjusts the grayscale accuracy from 0 to 100. The Threshold slider sets a value where pixels darker than it are converted to black. Balancing these sliders will prevent your image from becoming too plain or too complex, depending on your specific needs.
- Advanced options: By toggling down the Advanced menu, you can access more options for fine-tuning your traced image.
- Paths slider: This slider sets the number of paths in your design. A design with fewer paths will be simpler, but too few can distort your image. Too many paths will produce jagged edges in your design. So, you want to strike a balance.
- Corners slider: This slider controls the number of corners in your design. Having fewer corners will produce more rounded curves in your design. If you want sharper curves, increase the corners.
- Noise slider: The Noise slider instructs Image Trace to ignore the parts of your image that fit within the pixel amount set. A higher amount will result in less noise, which can be helpful for eliminating unwanted elements of your design. However, it might also remove important, smaller details, so it's crucial to test how much noise your design needs.
- Method: You can choose Abutting or Overlapping paths. Abutting paths don't cross each other, they create cutout paths. Overlapping paths can cross each other, but may be more challenging to edit afterwards.
- Create: In Black and White Mode, you can choose whether Image Trace should create Fills, Strokes, or both. Fills will create a traced image with color-filled shapes. Strokes will create outlines of the traced shapes.
- Stroke: Set the Stroke weight if you've checked Create Strokes.
- Option: Two checkboxes with extra options. Check Snap Curves To Lines if you'd like more straight lines in your traced image. Check Ignore White if you want white-colored Fills to be set to None (clear).
- Preview option: Tick the Preview box with your image selected. This will give you a real-time view of your image as it's being transformed into a vector format. If it doesn't look perfect right away, don't worry. You can make as many adjustments as you need to get the look you're aiming for.
- Trace: Click the Trace button when you're ready to turn your raster image into a vector using the above settings.
After you've made all the necessary adjustments and clicked Trace, click the Expand button at the top of the screen and Save your image as an .ai, .pdf, .svg, .eps, or any other available vector file type.
Is there another method for tracing an image in Illustrator with more control?
Yes. You can always use the drawing tools in Illustrator to trace an image.
Manual tracing using the Pen tool gives you more control over the image trace result because you'll draw all the shapes yourself. It'll also give you more creative freedom.
But keep in mind that this process is much more time-consuming. It requires advanced use of the Pen tool, which might be challenging if you're not familiar with this feature.
For an alternative to Adobe Illustrator, see how Linearity Curve (formerly Vectornator) compares. Our vector design software offers Auto Trace and Pen Tool features that rival Illustrator.
Why is Image Trace grayed out in Illustrator?
There may be one of three reasons why you're unable to use Image Trace in Illustrator:
- You haven't selected the image using the Selection tool (V). Go back to your Artboard, select the image to be traced, and try again.
- Your image is already a vector. Image Trace only works with raster images.
- You've already traced the image. If you've already performed an Image Trace on the image, it's now in vector format and can't be traced. To turn the traced vector into editable paths, click Expand.
How to change the color of Image Trace in Illustrator
To change the coloring of an Image Trace, you must first edit the colors of the image itself. Select the image and navigate to Edit > Edit Colors in the main menu, then choose one of the available recoloring options.
Once done, you can open the Image Trace panel and choose Mode > Color. This will ensure your traced image contains the new colors.
Another way to recolor a traced image is to Expand the Image Trace and use the Direct Selection Tool (A) to select the areas you want to recolor. You can then recolor your selection by choosing a Fill color from the palette.

Share this!
Ben Barnhart
Ben is a Content Lead for Linearity living in Berlin. His hobbies include board games, cooking, reading, and writing.