:quality(75))
:quality(75))


:quality(75))
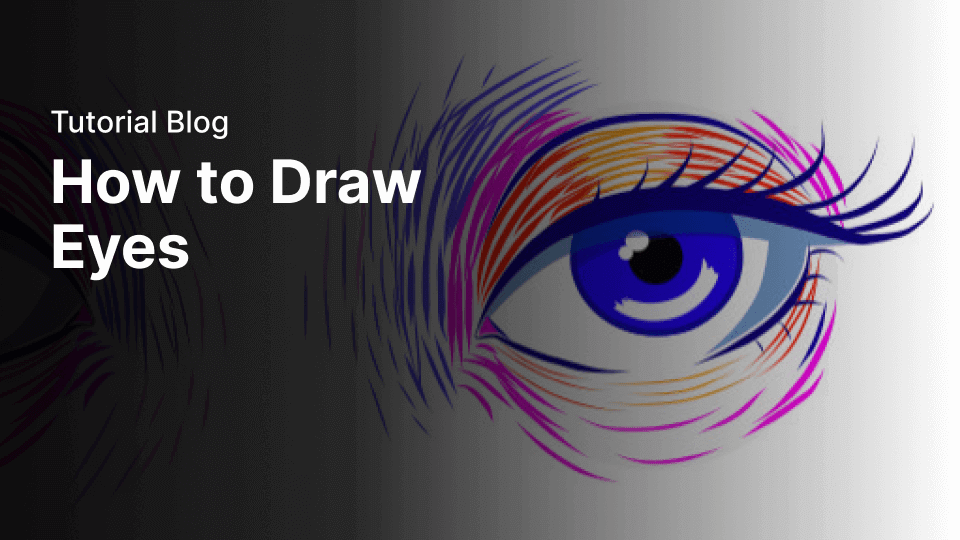
Sketching eyes well plays a crucial part in creating portrait art—it can even be the difference between a good drawing and a bad drawing—but many artists would agree that drawing them is difficult.
Learning how to draw eyes might seem like a challenge, but we promise to help you master the skill.
Jumpstart your ideas with Linearity Curve
Take your designs to the next level.
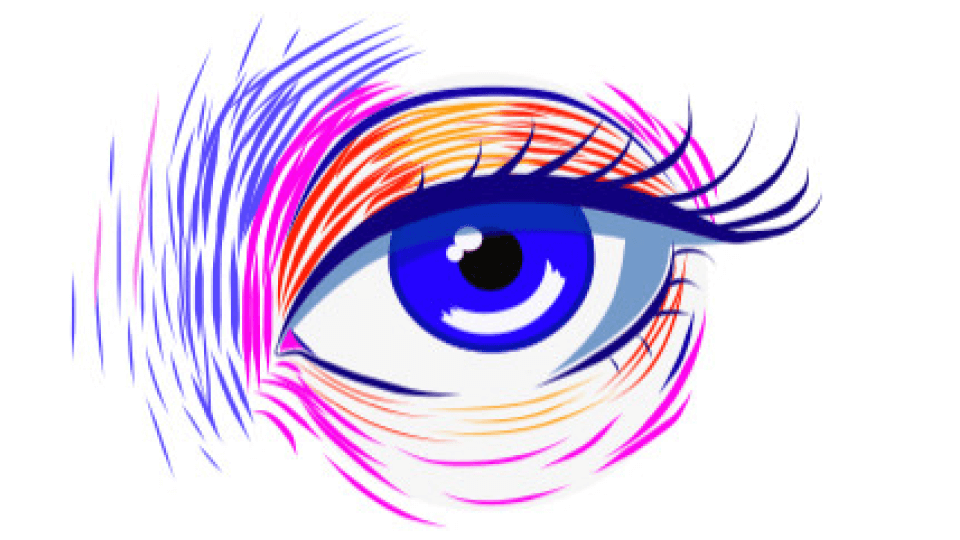
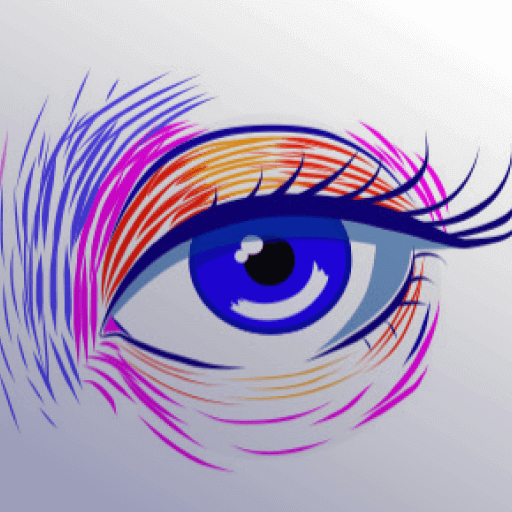
Aysel from the Vectornator design team created these beautiful vector eyes that convey a serene state of mind. We hope that by drawing eyes with us, you’ll feel pretty relaxed, too!
If you’ve set your sights on learning how to draw eyes, you’ve come to the right place. So, grab your iPad, Apple Pencil, and open up Vectornator.
Here’s how to draw eyes in a few easy steps.
• iPad
• Apple Pencil
• Latest version of Vectornator
• How to use the Shape Tool
• How to adjust shapes
• How to choose a color palette
• How to draw using the Brush Tool
• How to add shadow and reflections
• How to add shading
Ready to shape up your drawing skills? Follow our step-by-step guide for drawing eyes below.
Open a New Canvas
First, open the Vectornator app, where you’ll find the Gallery.
Next, tap or click on the plus sign to open a new canvas.
You can choose from our large selection of templates, or create your own custom canvas by entering your desired document dimensions.
Draw guidelines using the Shape Tool

Select the Shape Tool and draw three identical circles, fill them with a light gray color, and align them horizontally.
These basic shapes will act as guides for your eyes.
Delete the middle circle and adjust the rest

As a rule of thumb, the space in between your eyes should be equal to the size of one eye.

Therefore, simply delete the middle circle to create the space where the nose bridge will be. Next, lower the opacity of the remaining two circles so that you can barely see them.
Set up your color palette
We already know that eyes can communicate emotion, but colors can, too!
Think about the mood you want to convey with your illustration. Is your character sad or tired? If so, use cold hues such as blue and gray. Are they happy or friendly? Try warmer colors like in this tutorial.
Ready to create brand assets that pack a punch?
Visit our Academy to learn how to use color palettes.
If you’re going for a skin tone, don’t forget that there’s actually a whole range of colors in our complexions. If you look in the mirror or use a photo reference, you'll probably see dark blues, purple, or even green in the shadowed areas of the eye socket.
If you like the colors Aysel uses in this tutorial, they are:
- Blue (10007C)
- Red (FF1D05)
- Pink (FF05ED)
- Orange (FF9D08)
Or, learn how to create your own unique color palette in this guide.
Choose the light source
Next, decide on the direction of your light source.
This is vital when it comes to adding shading and highlights later. In this tutorial, Aysel’s invisible light source is coming from the top left of the canvas.
Draw the basic eye shape using the Brush Tool

Then, select the Brush Tool and draw the almond shapes for the outline of the eye using the darkest color in your palette.
Try to make the inner corners (next to the nose) lower than the outer corners, since the lateral orientation of the eye is rarely horizontal. Don’t forget to include the tear ducts and upper lash.
Learn more about creating freeform paths with our Brush Tool here.
Draw the irises and pupils with the Shape Tool

Now it’s time to draw the irises and pupils.
Select the Shape Tool and create a colored circle for the iris. Add a stroke using a darker color to depict the limbal ring, the dark band around the outside of the iris.
Draw a second, smaller circle for the black pupil and place it in the middle of your larger circle.
Duplicate both circles, and position them so that each iris is slightly under the eyelid of each eye. This helps to achieve a relaxed look. If the entire iris is on show, your character would look pretty shocked and less life-like.
Read our in-depth guide on how to use the Shape Tool here.
Draw the eyelashes using the Brush Tool

To draw eyelashes, select the Brush Tool and freehand a few thin, curved, and evenly-spaced lines next to the upper lash.
Make sure that the outer tip of each eyelash is thinner than its base. This helps to create the feather-like appearance of real lashes. To do this, we suggest using a brush style with a tapered end. You can also adjust the appearance of your brush strokes after you’ve drawn them in the Inspector Bar.
Repeat the same technique for the bottom lashes, but remember to draw them smaller and only place them on the outer corner of the eye.
Add shadow and reflections

The trick to drawing expressive eyes is to include shadows and highlights. In this step, your eyes will start to come to life!
First, select the Brush Tool and draw a white, swoop-like shape that follows the curve of the iris. Next, draw a couple of dots over the upper-left part of the pupil.
Ready to create brand assets that pack a punch?
Visit our Academy for free drawing design courses.
To add shadows, change the color of your brush to a blue/gray hue and lower the opacity.
Draw a line that neatly sits under the upper lash line, and follow the curve of the eye to also create a shadow in one of the corners.
Add shading around the eyes

Next, use the Brush Tool to add shading around the eyes.
To do this, think about the painting style of Vincent van Gogh. The Dutch Post-Impressionist became known for his expressive, short brushstrokes in thick paint. Try using your Apple Pencil to apply short, curved vectors in the same way. Your brush strokes should frame the eyes and enhance their natural contours.
In this case, Aysel cleverly uses color to create depth and highlights. She applied pink to accentuate the recessed eye sockets. And to make the eyelids look more curved and 3D, she used red in the corners and a light orange in the center.
Expand shading around the nose

Last but not least, continue using the Brush Tool to draw short brush strokes that expand from the inner corners of the eyes. These little marks create the illusion of 3D space, and we can start to imagine where the nose would be.
Check out this view of the full process:

You did it! You’re now a master at drawing eyes using Vectornator. Congrats!
Don’t forget to share your creations on social media with us, and keep tabs on our blog for more drawing tutorials.
Jumpstart your ideas with Linearity Curve
Take your designs to the next level.
Share this!
Emma Taggart
Emma is a Content Writer for Linearity in Berlin. Her hobbies include making ceramics, roller skating, drawing, and 2D animation.