:quality(75))
:quality(75))


:quality(75))

When you look at a magnificent tree, it's easy to appreciate its beauty.
But this beauty stems from the thousands upon thousands of individual leaves which form the whole.
Different types of leaves come in every shape, form, and color imaginable, and this versatility makes them perfect for nature studies or practicing your vector line work. They are also great for fully-fledged printable projects like patterns and logos.
Jumpstart your ideas with Linearity Curve
Take your designs to the next level.
How to draw a leaf with vectors
Some leaves have simple shapes that are easy to draw, while others demonstrate a beautiful complexity. And this is how we approached this drawing tutorial. We’re going to start with a simple leaf, inspired by a Pilea plant, and move on to the infamous Monstera.
This guide was developed in collaboration with the talented Soodabeh Daramvani; an Iranian illustrator and icon designer and a frequent tutor on our YouTube channel. She breaks down the whole process below in a step-by-step tutorial.
Let’s follow along! You can watch the video above or use the tutorial steps in the rest of this article.
• iPad
• Apple Pencil
• Latest Version of Vectornator
• A few references from Pinterest
• Pen Tool
• Shape Tool
• Node Tool
• Selection Tool (Duplicate and Multi-Select)
• Color Picker
• Boolean Operations (Unite and Subtract)
• Other Style Tab functions (Flip)
Do research and get inspired

It’s wise to study your topic before you start drawing.
That's why it's usually the first step in the creative process! Soodabeh recommends using Pinterest to gather inspiration, but Google image search will also serve you well. It also might be worth it to read up a little on the anatomy of leaves, just so you understand how they work structurally. It's a lot easier to draw something if you understand how it works under the surface.
Look for some photos of your favorite leaves to use as a reference later in this tutorial.
But, of course, also look around you! You can take inspiration from your house plants, from your garden, or the trees in your local park. It's a lot more fun than just surfing the internet, and it’s bound to get your creative juices flowing.
Identify the basic shapes

Here's a drawing secret: You can deconstruct anything you want to illustrate (in the whole world!) into basic shapes. This trick will make your life so much easier. So try to be analytical here and find the basic shapes that form your main object.
For example, the first leaf has a simple, circular shape; while the maple leaf has a lot of angles; and the third leaf blade is made up of 2 triangles joined together.
Start sketching

Take these main shapes as the starting point of your sketch.
Use your notebook, or any sketching software that you prefer and simply build on the basic shapes that you identified in the previous step.
The easiest angle to draw a leaf in is by viewing it straight-on. And if you are a beginner, we suggest you start drawing in this view and then move on to other angles.
Vectornator is now Linearity Curve.
Learn more about our recent rebrand and how we chose our new colors.
Leaves are relatively easy to draw, since you don't need to think too much about proportions while sketching. But one important factor to keep in mind is the leaf’s symmetry. So it might help if you first draw a line in the center and use that as a guide to draw the rest of the leaf.
Create a new canvas

As you open up the Vectornator app, you'll be greeted by the Gallery and all the functions you need to get started.
Just tap or click on the plus sign to create a new canvas.
Soodabeh prefers to work with a canvas that is the exact size of her iPad, since it easily fits her entire screen. We've got a lot of templates to choose from, so pick whichever size canvas works best for your project.
Import your sketch

Next, we'll need to import your leaf sketch into Vectornator.
You can do this in a few ways: If you have an image of your sketch from a different sketching software already saved to your device, you can import it straight into Vectornator through the Gallery, or by dragging and dropping it from your camera roll into Vectornator in Split Screen mode.
Now that you've got your leaf sketch in your document, add it to your background layer.
Adjust your layer settings

Next, lower the opacity of your background layer so that you can barely see your sketch.
Then, go to the Style Tab and change the Blend Mode from Normal to Multiply. This will help you to better understand what you’re drawing during the vectorizing process.
Create one more layer

To add a new layer, just tap the plus button in the Layers Tab, and place the newly created layer under the sketch layer.
This way, everything you draw is going to be underneath your transparent layer.
Try incorporating multiple layers into your workflow when adding any dimension to your leaves, like shadows, details, and so on. It will help keep everything neat and organized, and it's a great habit to learn early in your illustration journey!
Set up your color palette

The next thing you should consider is your color palette.
It’s important to think about your project's colors before starting your vector illustration. Of course, you can change it whenever you want, but it's much easier to have them in mind in advance.
The easiest way to select your colors is by using the Eyedropper Tool which allows you to pick colors directly from your reference images. But you can also play around with different shades of green for fresh leaves, or various hues of brown, yellow, or red if you are drawing autumn leaves.
• 107C7C for the leaf body
• 0F4848 for the stalk and veins
• 0A4343 for the shadow
If you want to learn how to create a color palette from scratch, we recommend you read this guide.
Draw the leaf outline

Next, pick up the Shape Tool and simply tap and drag an oval until it matches your sketch. You can hold one finger on the tablet to create a perfect circle, but Soodabeh chose to draw it freehand. It doesn't have to be too perfect, after all.
Check in the Style Tab that the Fill toggle is on (with the color 107C7C) and that the Stroke is turned off.
Draw the leaf stalk

Did you brush up on all the new improvements to our Brush Tool? Read our blog about it to get filled in on all the latest 4.4 updates.
Working with Brushes in Vectornator is as easy as using any other freehand tool. Simply select it from the Toolbar and create the brushstrokes you need.
:quality(75))
:quality(75))
In this case, Soodabeh drew a slightly curved line that goes from the middle of the leaf, downwards. She adjusts the stroke with the slider to 22 pts and darkens up the color to 0F4848.
Place stalk behind the leaf

The easiest way to correct the stalk being on top of the leaf is to place it underneath. Go to the Quick Actions menu, tap the first button, and change the order of your layers.
Draw the leaf veins

Back to the Brush Tool. For the smaller veins in the leaves, make sure you reduce the thickness to about 8 pts (using the slider on the left side) and freehand a few straight lines on the leaf itself.
A similar effect can be achieved by drawing pencil lines with the Pencil Tool, but for this, we prefer the Brush Tool.
Duplicate the main shape

Let's give our leaf some more dimension. Use the Duplicate function in the Selection Tool to make a copy of your leaf shape. And then move it slightly upwards and at an angle to create the shadow shape.
Subtract

Time to use boolean operations!
Select both shapes and use the Subtract operation from the Quick Actions menu. The mechanism behind this operation is that the duplicated copy of your leaf object is now reduced to the small semi-crescent shape created by the overlapping original circle and its duplicate.
Boolean operations are fantastic tools for creating logos and unique vector shapes—you can read more about them here.
Darken

Next, darken the shadow shape in order to make it look more realistic. The color Soodabeh uses is 0A4343. There you have it. These are the 15 steps needed to create a simple vector leaf with a shadow.
Ready to create brand assets that pack a punch?
Visit our Academy for free marketing design courses.
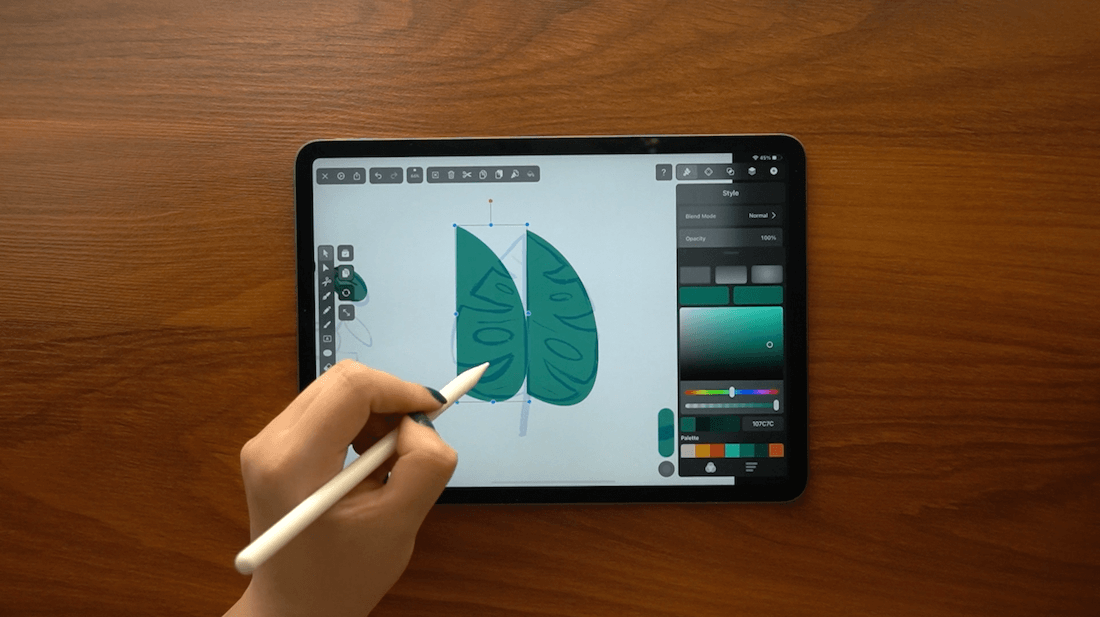
Now, it's time to level up the complexity and draw another example that's a little bit more complicated—a Monstera Albo leaf! To do this, the first part of our process will be the same. So let’s jump back to Step 8 and see how this process changed.
Draw a half of a heart shape
As opposed to the Pilea leaf, the Monstera leaf has a heart-shaped contour. But don't be scared, it's super easy to draw with vectors!
First, create one side of the leaf by drawing half of the heart shape with the Pen Tool. Watching the video is the quickest way to learn, but basically, you need to tap at the very top of the leaf to start your shape, then tap and drag two quarters in, and then again at the halfway point.
Make sure your Pen Tool has the Fill set to on in order to achieve this shape faster.
Make adjustments

The Node Tool is your best friend when adjusting paths. Move around any nodes or drag on the handles to bring your vector illustration closer to your sketch.
Duplicate
Next, use the Duplicate function of the Selection Tool. Tap and drag to create the second half of your heart shape.
Flip it

Then flip it so it matches sides, by tapping on the Flip Horizontally button in then Arrange Tab (second tab in the Inspector).
Combine

Let’s make the heart complete! Select both shapes and Unite them using the Quick Actions menu. The two parts of the leaf have now become one!
Now let’s create Monstera’s unique splits.
Create the splits shapes

This is where the Pen Tool comes in handy again. Pick it up and tap and drag on your canvas to create your desired shape.

Then tap on the last node you just created to change it from round to angular. If you do this, you can manipulate the vector path to take a sharp turn. Repeat and close the shape.
Next, make the ovals with the Shape Tool.
Duplicate them

To make the splits symmetrical, simply select your shapes with the Multi-Select Tool and Duplicate them.
Flip them

Now flip your splits using the buttons in the Arrange Tab. Then position them however you want on your leaf.
Subtract

Now, select all your splits and Subtract them by using the Quick Actions menu shortcut.
And now we’re left with the beautiful Monstera leaf shape! The rest of the steps you can just repeat from before.
We hope you had fun following along with this step-by-step tutorial of how to draw a leaf!
Don't forget to download Vectornator so you can recreate Soodabeh's leaf drawing and follow along for our upcoming tutorials!
Share your vector leaf drawings on social media with us, we love seeing what you're creating!
If you have any questions about this tutorial, or any requests for drawing tutorials you'd like to see in the future, please comment them below!


Jumpstart your ideas with Linearity Curve
Take your designs to the next level.
Share this!
Lavinia Aparaschivei
Lavinia is a contributing writer to the Linearity Blog.


