:quality(75))
:quality(75))


:quality(75))
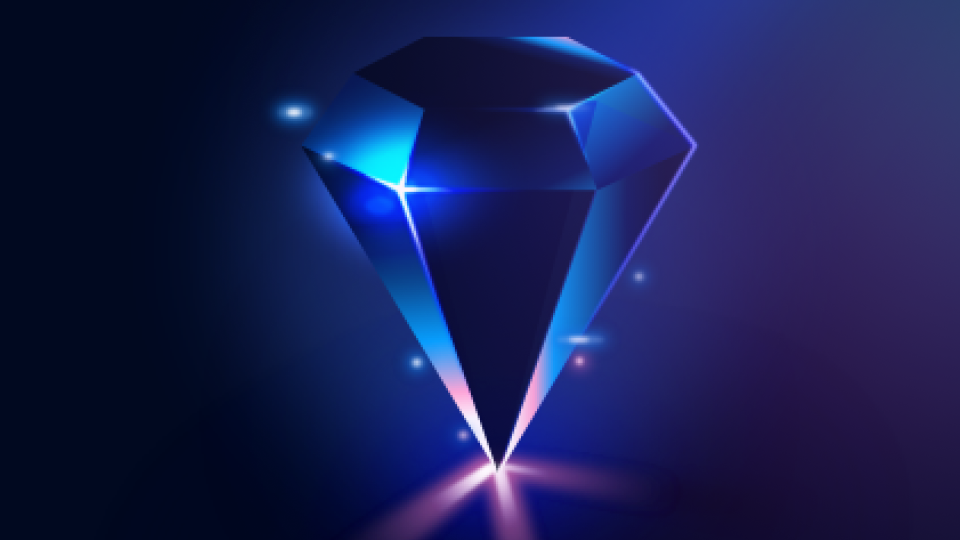
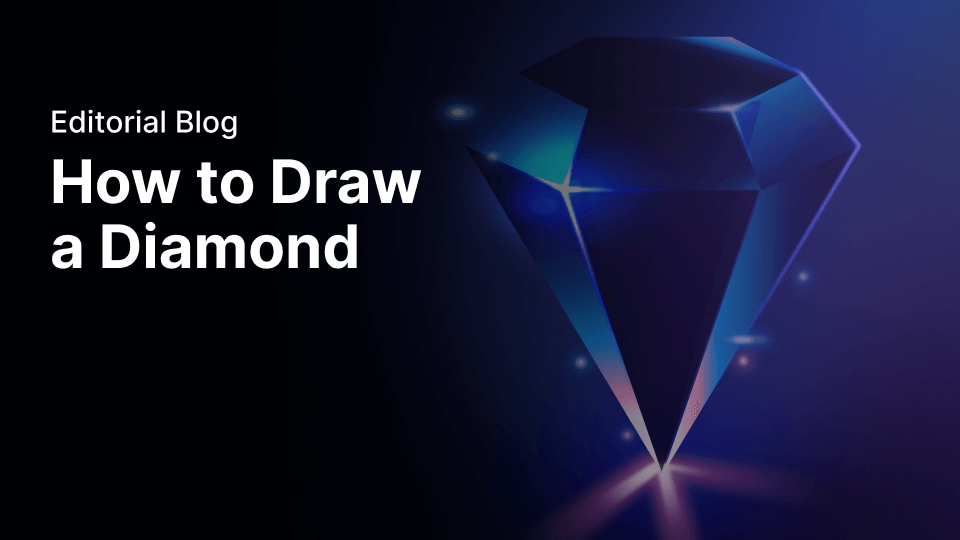
In our new beginner exercise, we'll show you a simple step-by-step guide on how to draw a refined diamond.
In today's tutorial, the talented illustrator and designer Nastya Kuliábina will show you how to draw the sparkling diamond.
To draw a faceted sparkling diamond with its magnificent light reflexes might seem a bit daunting and unachievable as a beginner. But don't despair—we at Vectornator will provide simple and easy-to-follow instructions that will allow you to create your sparkling diamond.
First, we'll show you how to draw the basic shapes with a few simple lines, and then we'll show you how to add the light reflexes. You'll be surprised what magic you'll be able to create! Let's begin drawing our beautiful diamond!
Jumpstart your ideas with Linearity Curve
Take your designs to the next level.
Learn how to draw a Diamond.
If you're ready to be bold and creative then let's get started!
• iPad
• Apple Pencil
• The latest version of Vectornator
• How to set up your canvas
• How to create and organize your layer hierarchy
• How to use the Pen Tool
• How to use the Shape Tool
• How to use the blend mode
• How to create and adjust a gradient
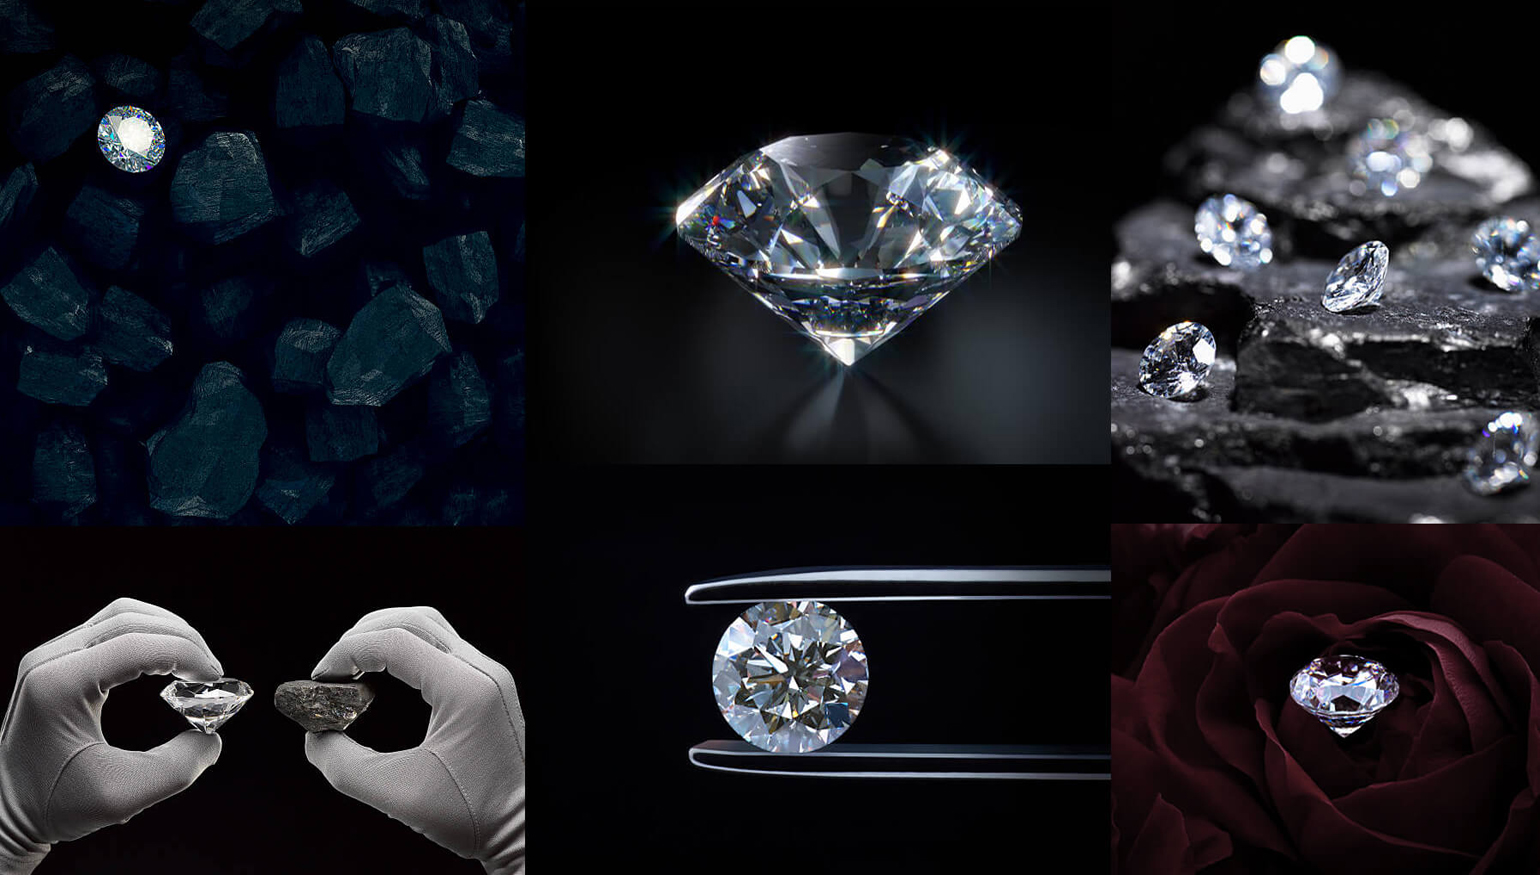
Find inspiration for your diamond drawing:
To get an idea of how magnificent the light reflects and refracts in a diamond, just look up a faceted diamond that has not been set into a piece of jewelry yet. This will give you an idea of how brilliantly and magically light interacts with faceted diamonds.
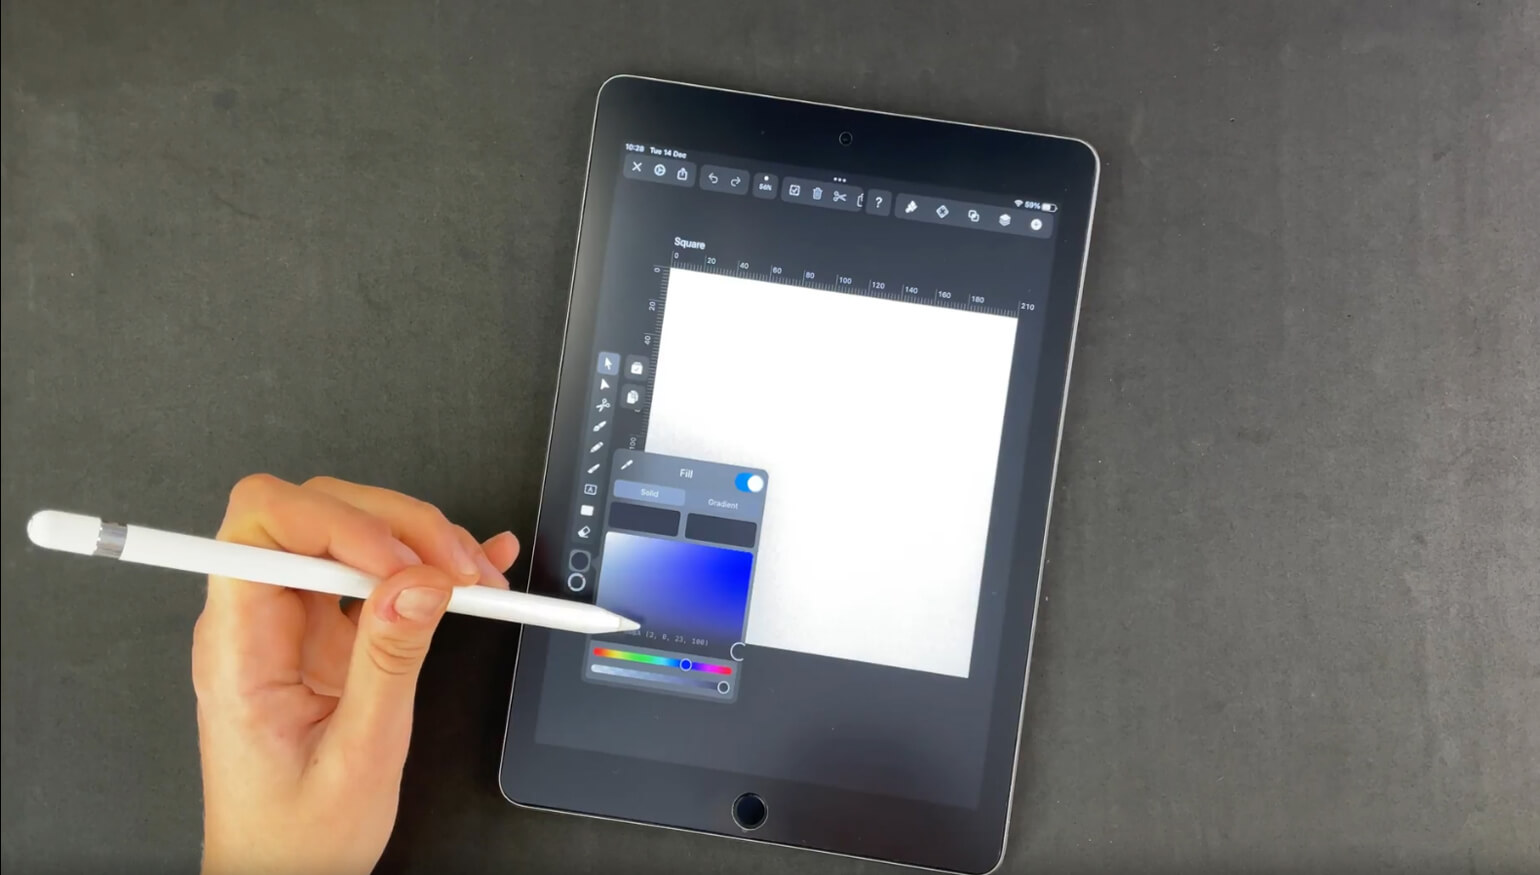
Set up your background
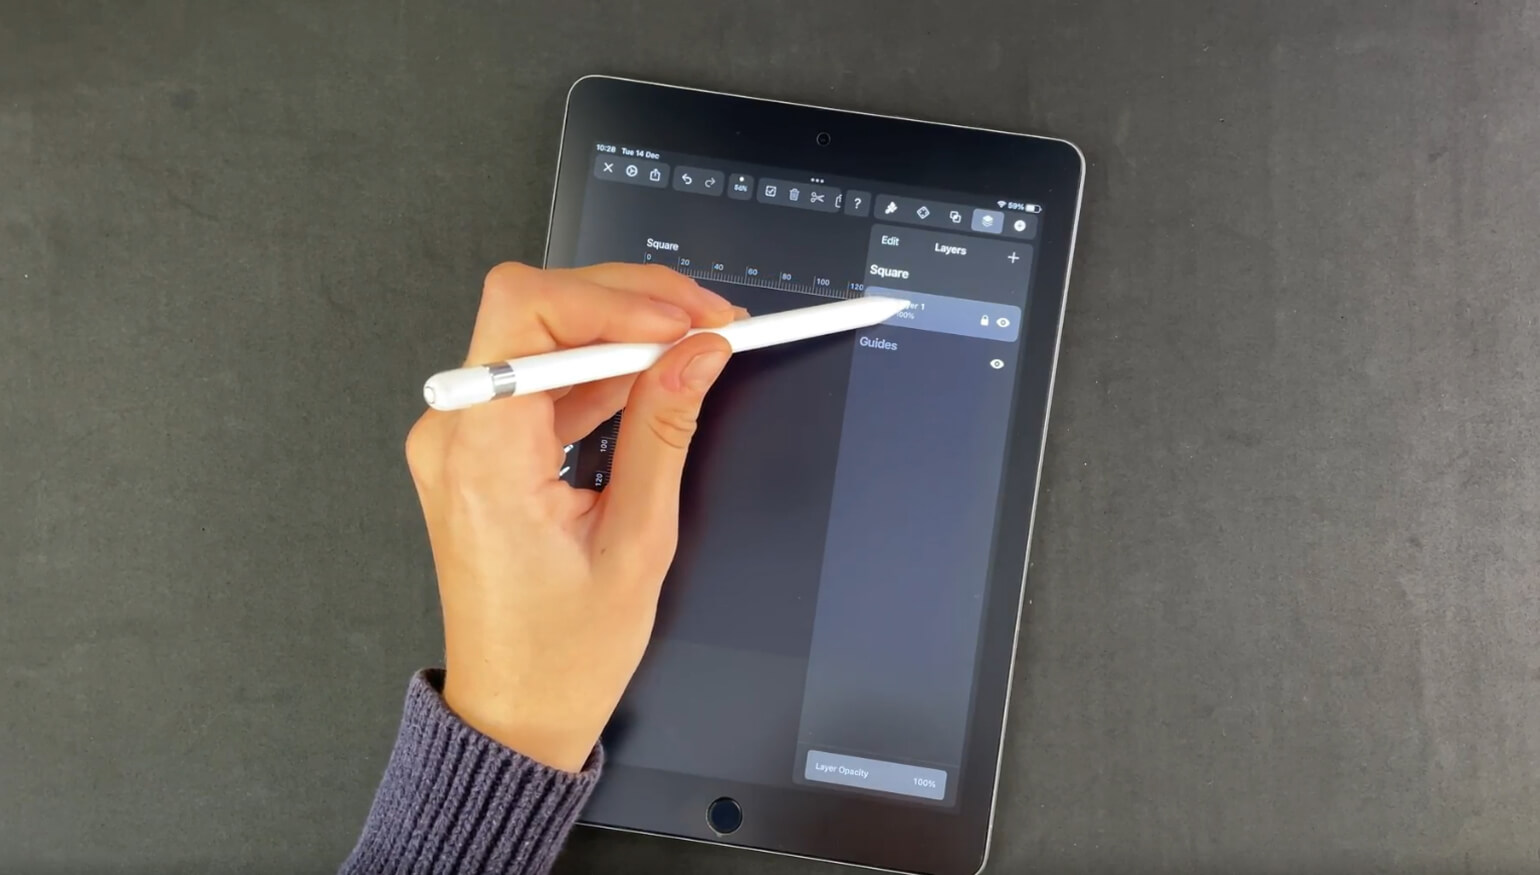
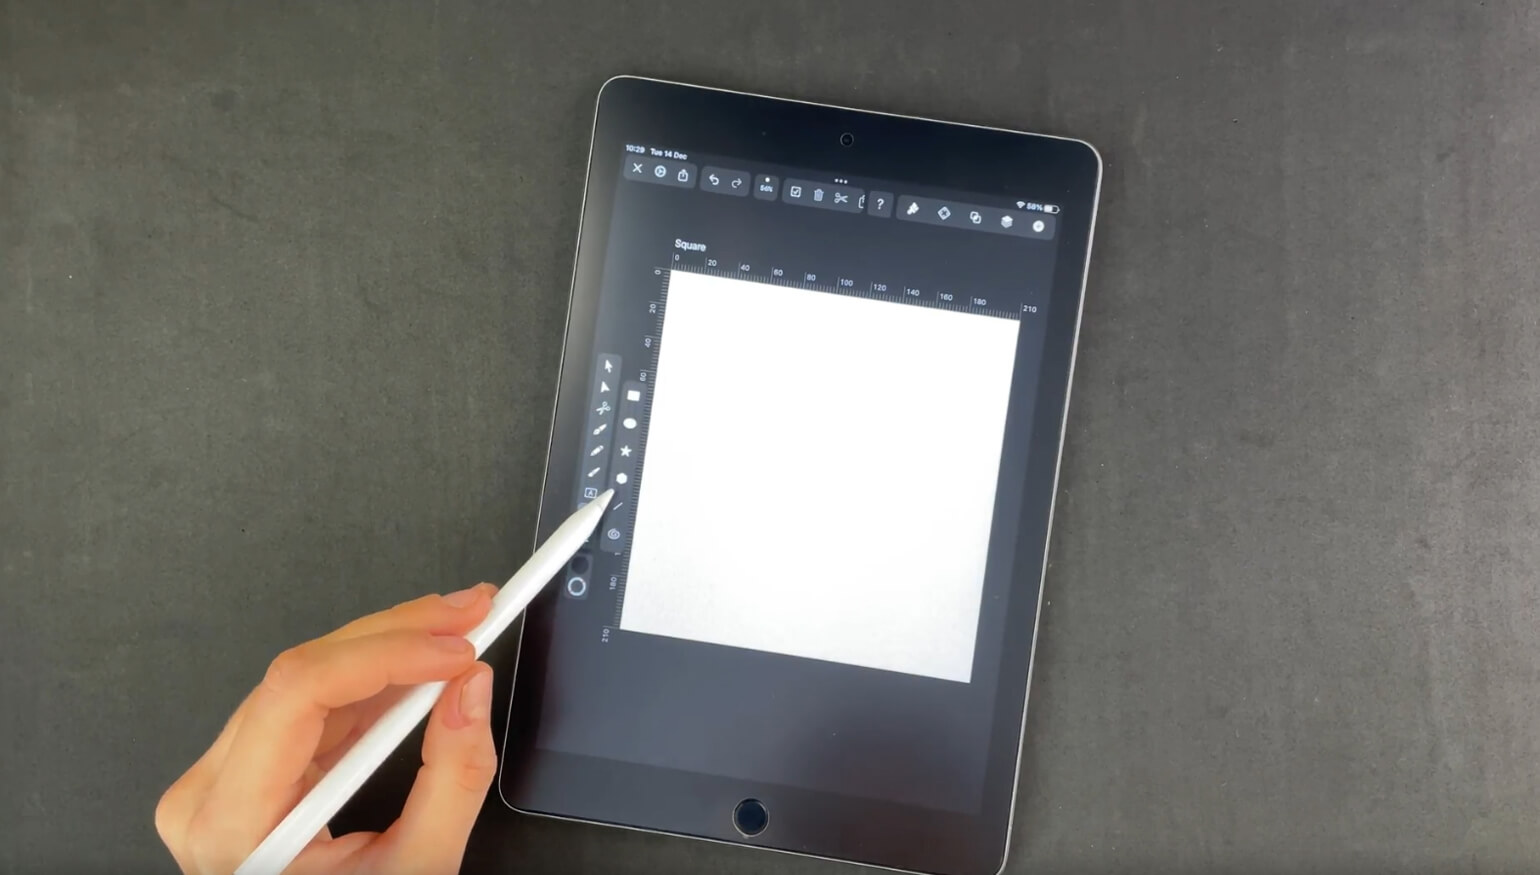
In this tutorial, it isn't necessary to import an outline drawing—we'll give you the exact measurements for your basic diamond shape. You'll create a new layer for each element you draw and name it accordingly. This will help you to navigate with ease through your workflow. Open a new document in Vectornator by clicking the + button and then set the canvas width and height manually to 210x210 cm.
Create a new layer in the Layers Tab to the right side of your screen. Now tap the Color Widget at the bottom of your Toolbar to the left side of your screen. Tap the fill mode and then pick a dark blue color with the RGBA values: 2, 0, 18, 100.
Activate the Shape Tool and select the rectangle option. Then drag a rectangle shape that completely covers the canvas.
Rename layer 1 to "Background" to keep your project tidy and organized.
Start creating the classic diamond shape
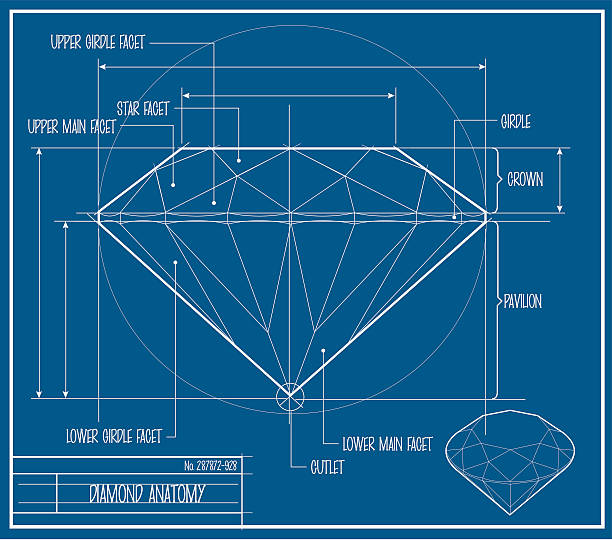
You can use the image below of classical diamond anatomy as your orientation for your drawing.
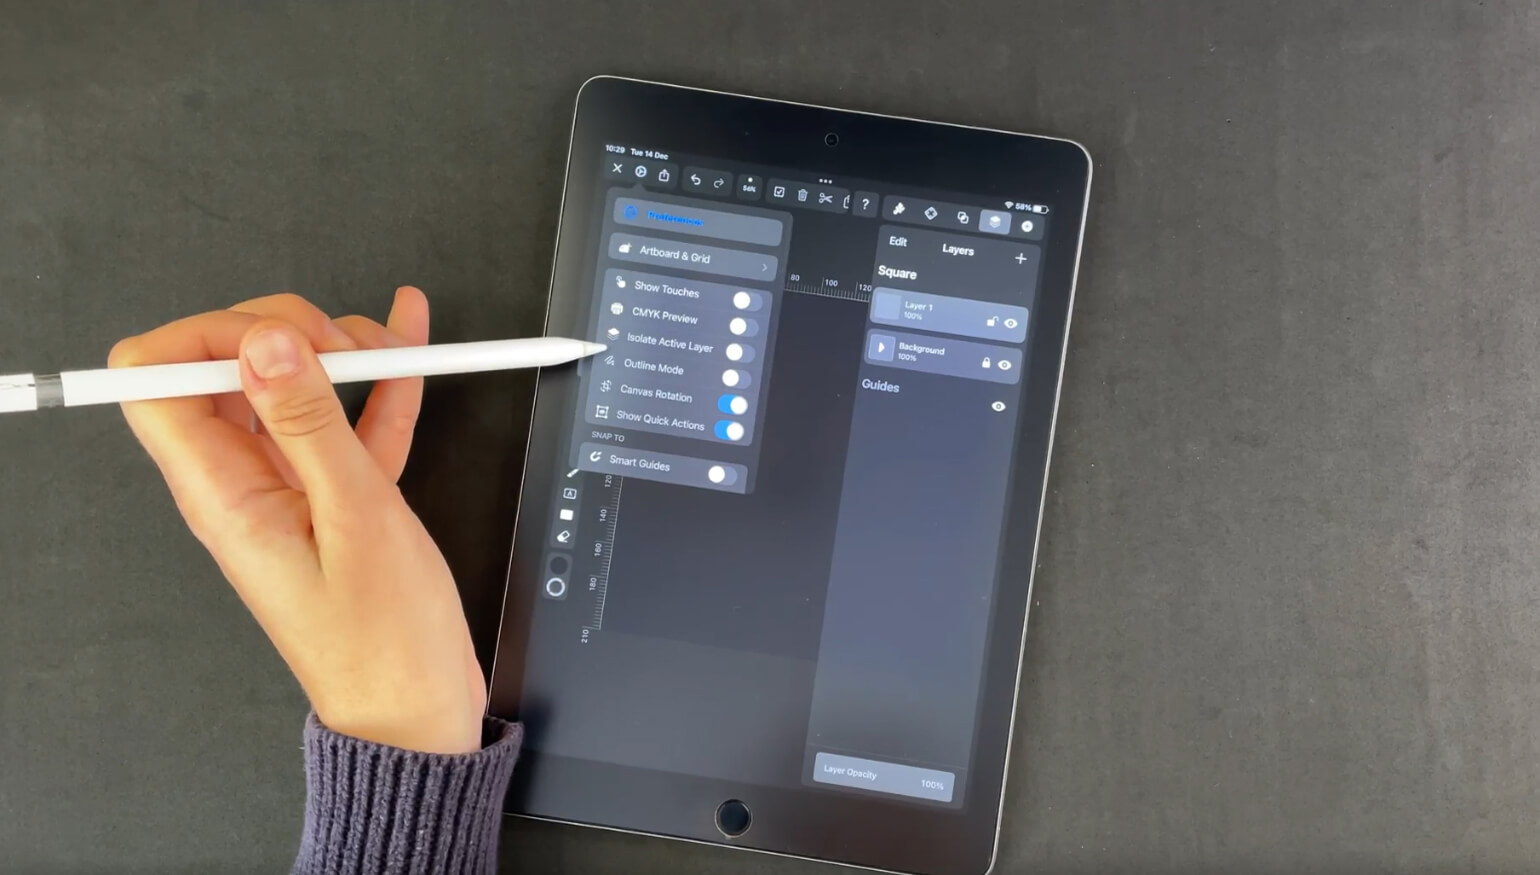
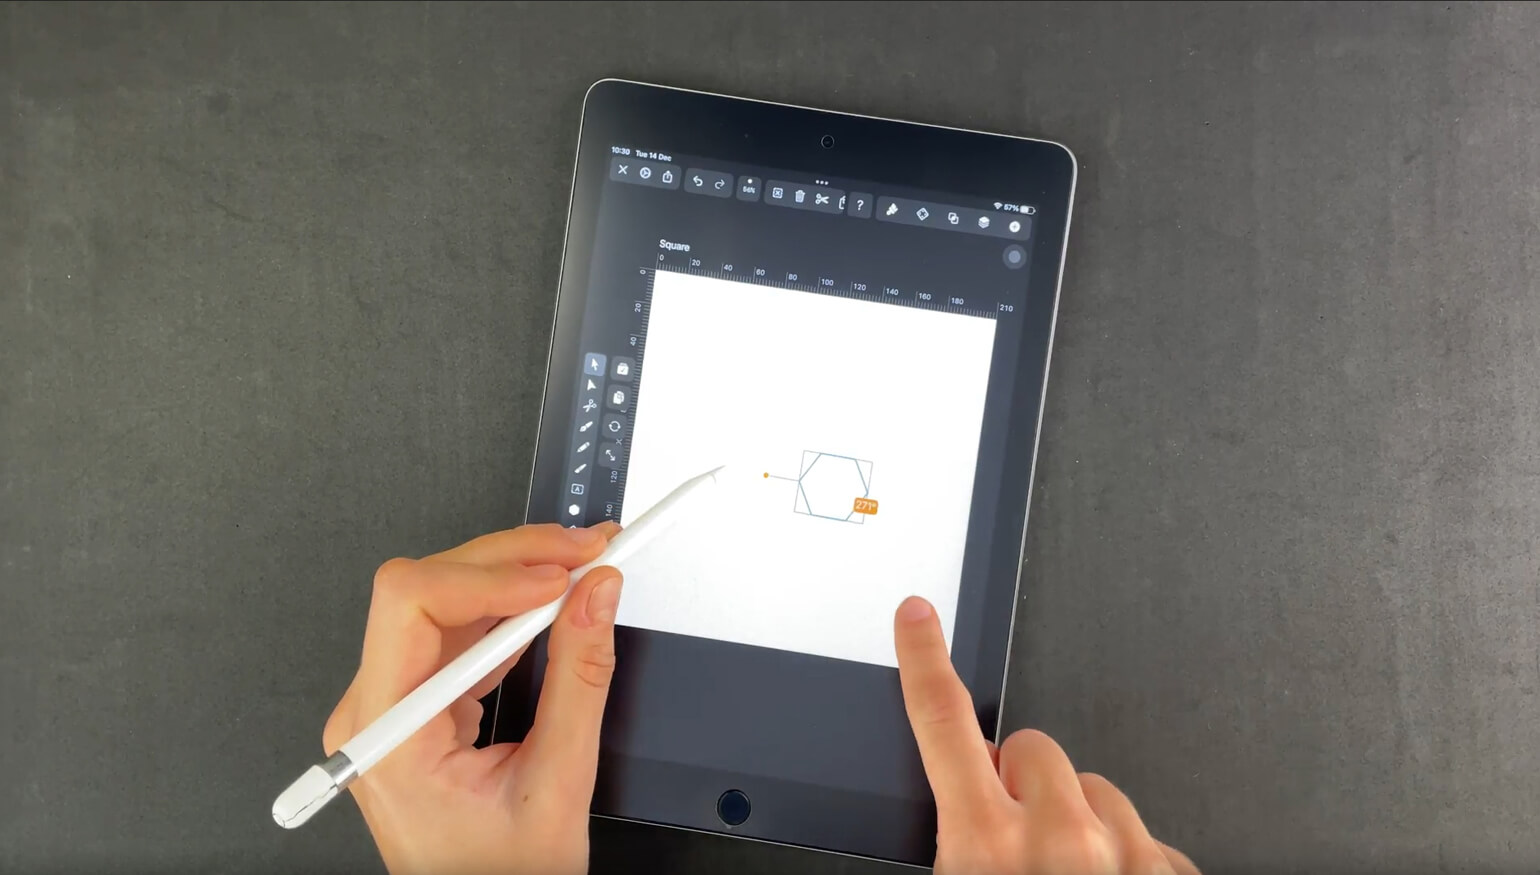
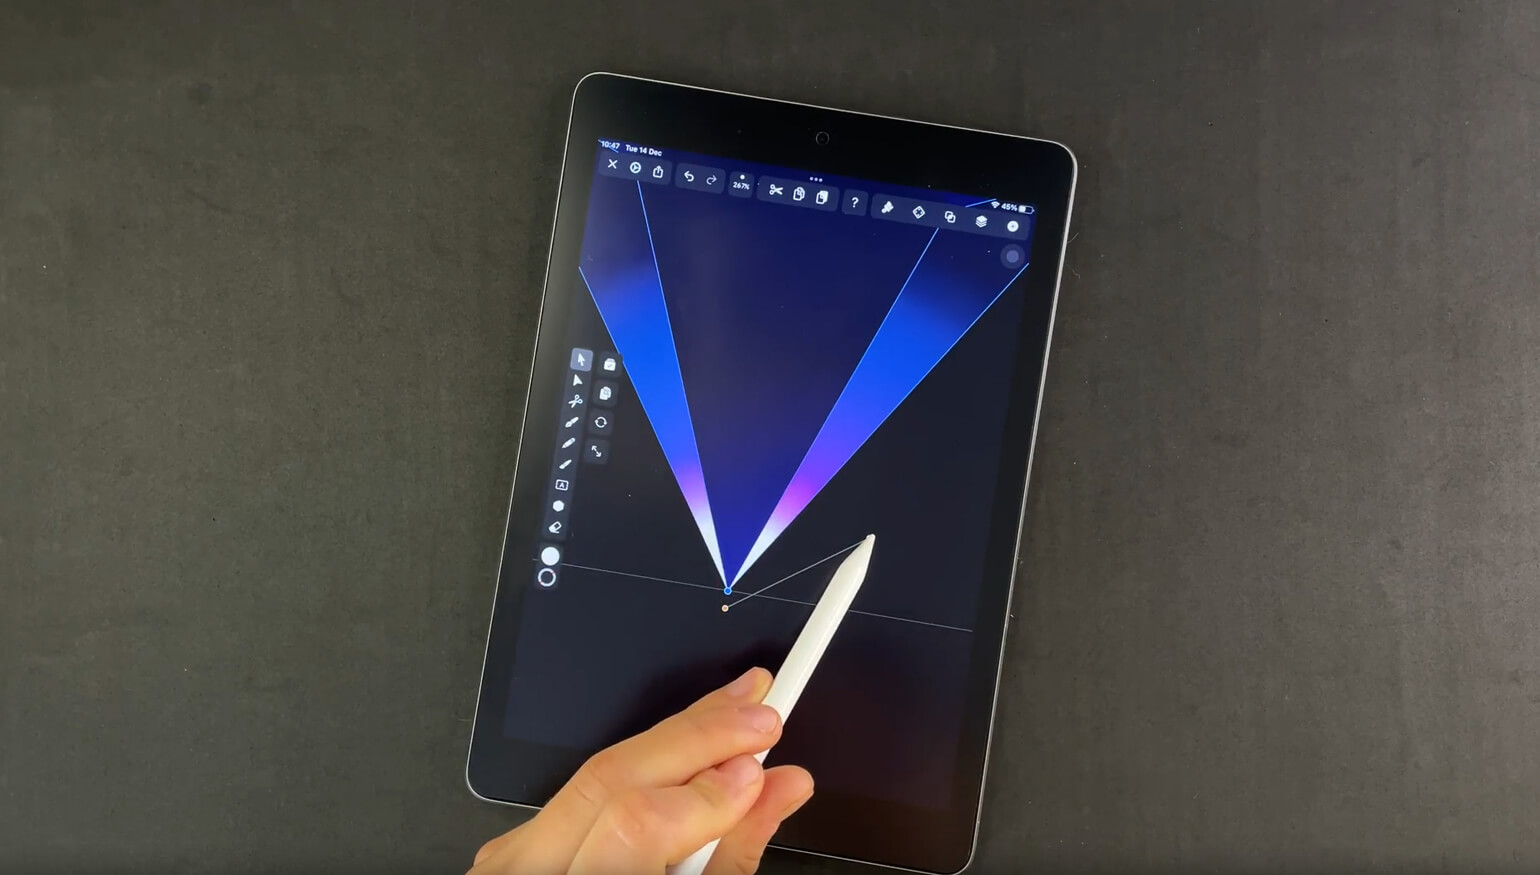
First, we will create the crown facets (the upper segment) of our diamond. Create a new layer in the Layers Tab. Then, select in your Quick Settings the Outline Mode.
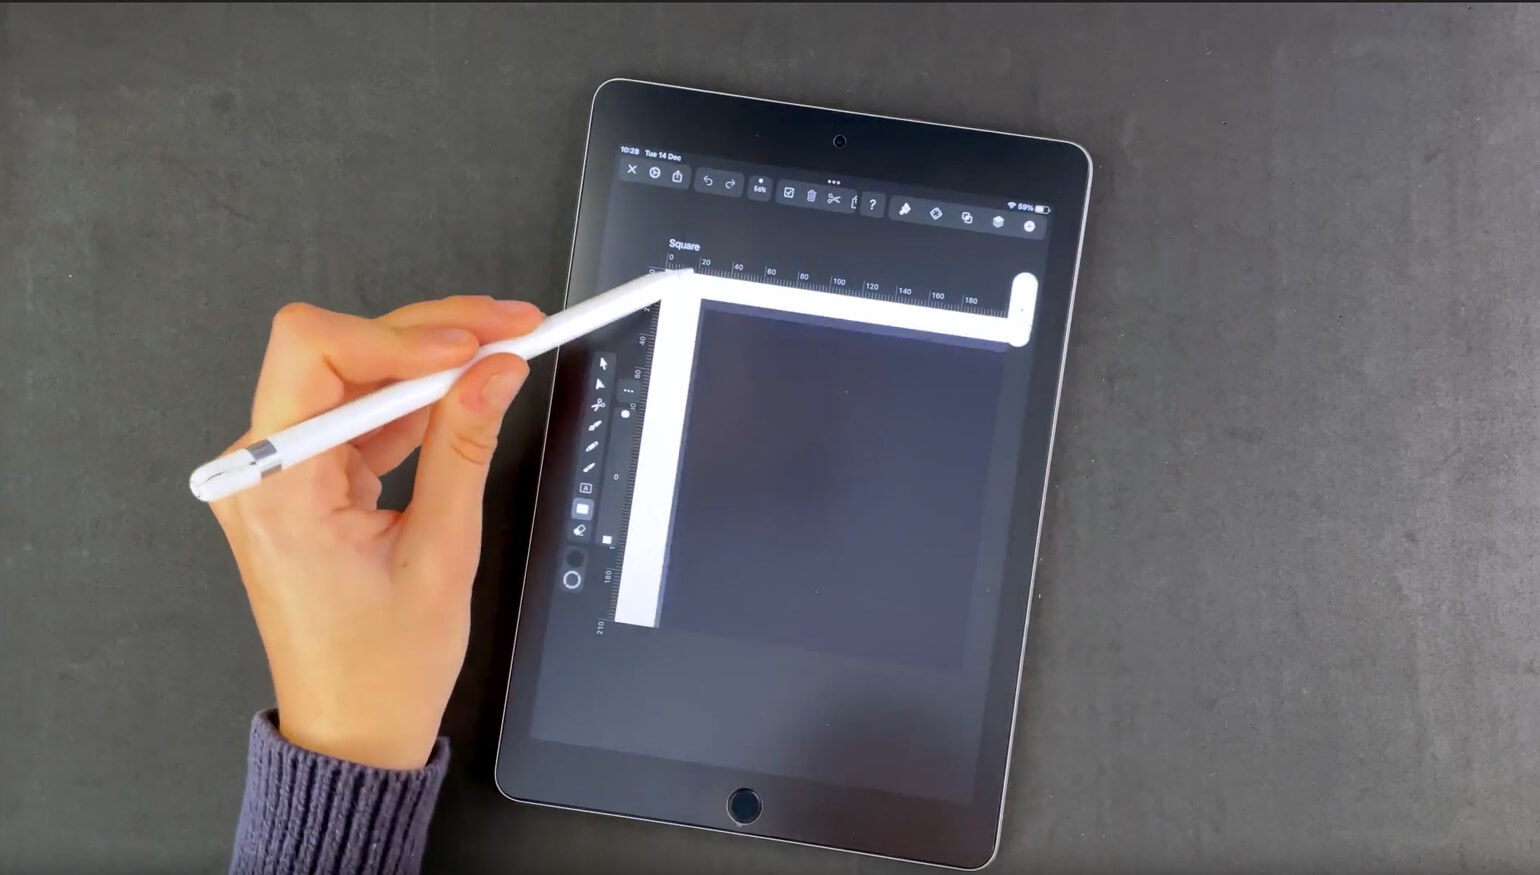
Now select the polygon shape from the Shape Tool by setting the number in the slider to 6.
Draw a hexagon shape on the canvas. Activate the Selection Tool and rotate the hexagon shape 90 degrees by dragging on the orange handle.
Transform the shape by using the bounding box handles to the measurements of 60x12 cm. Then turn on the Smart Guides and Edges in the Quick Settings.
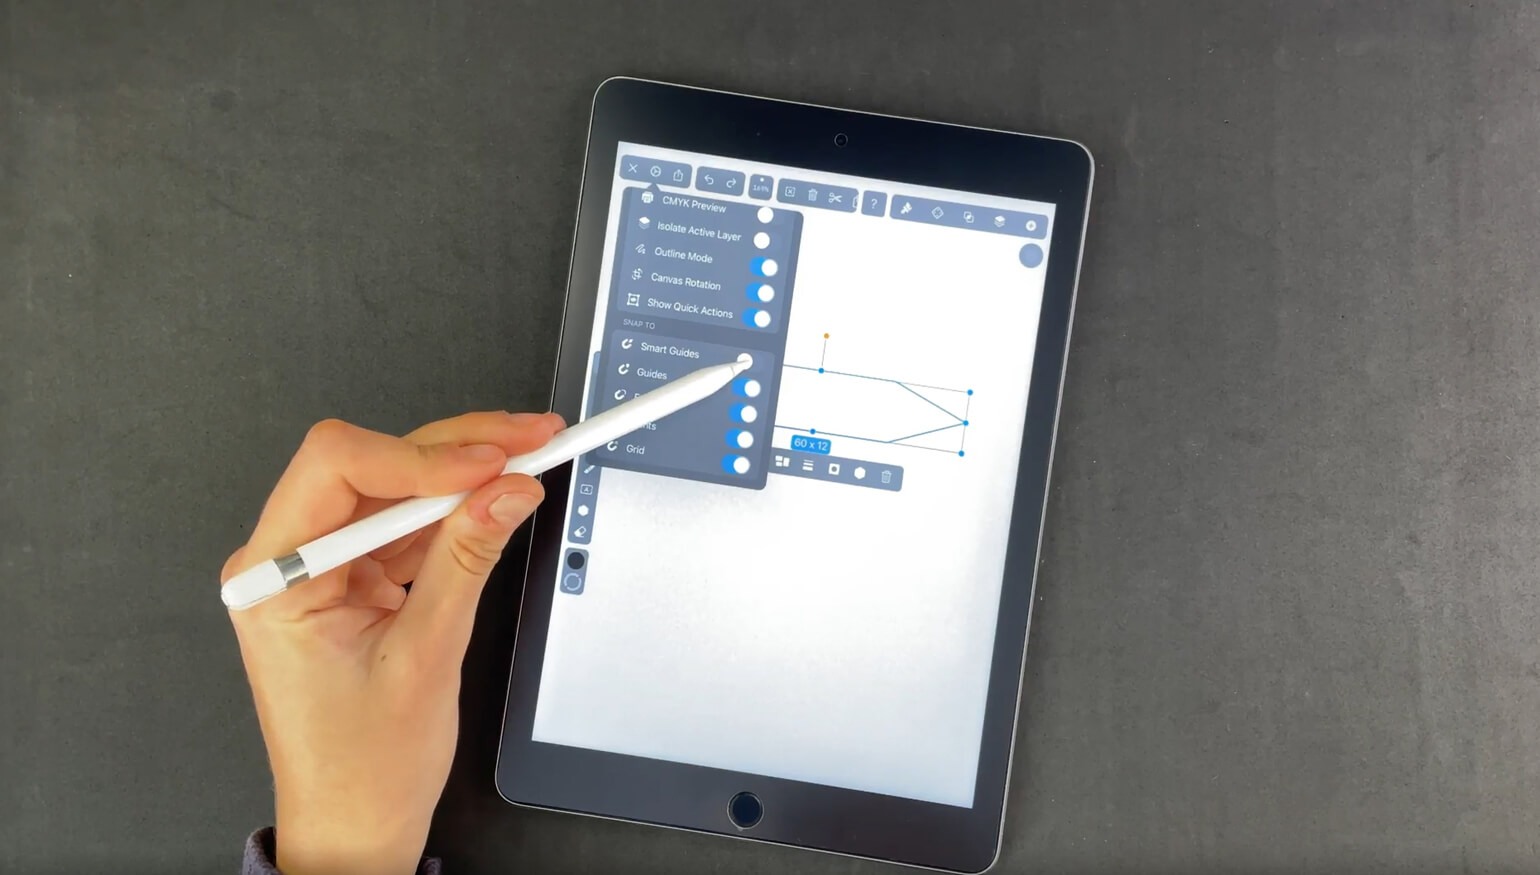
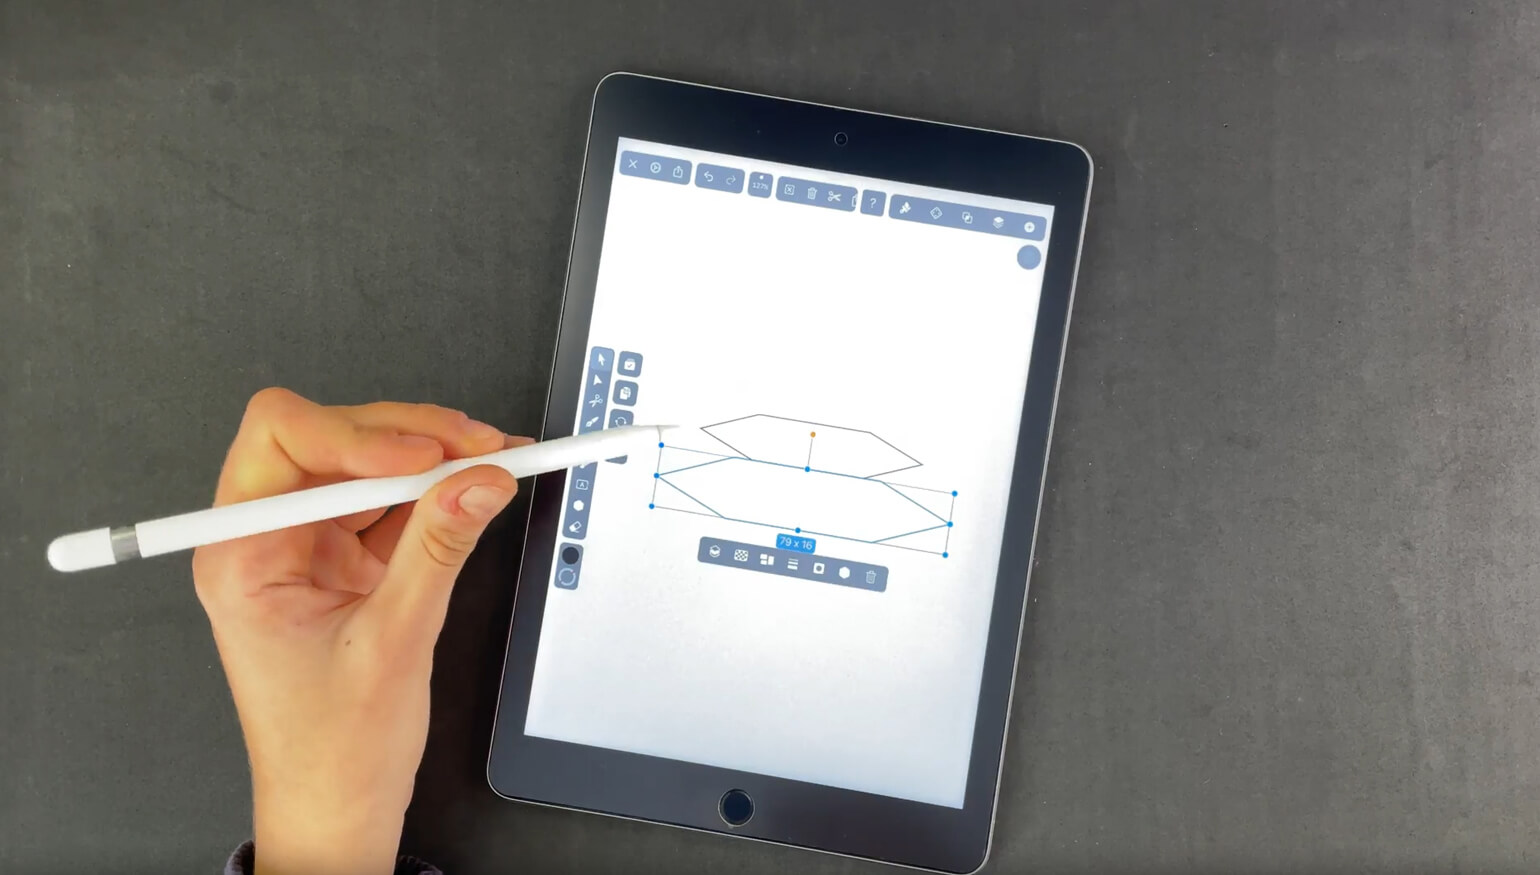
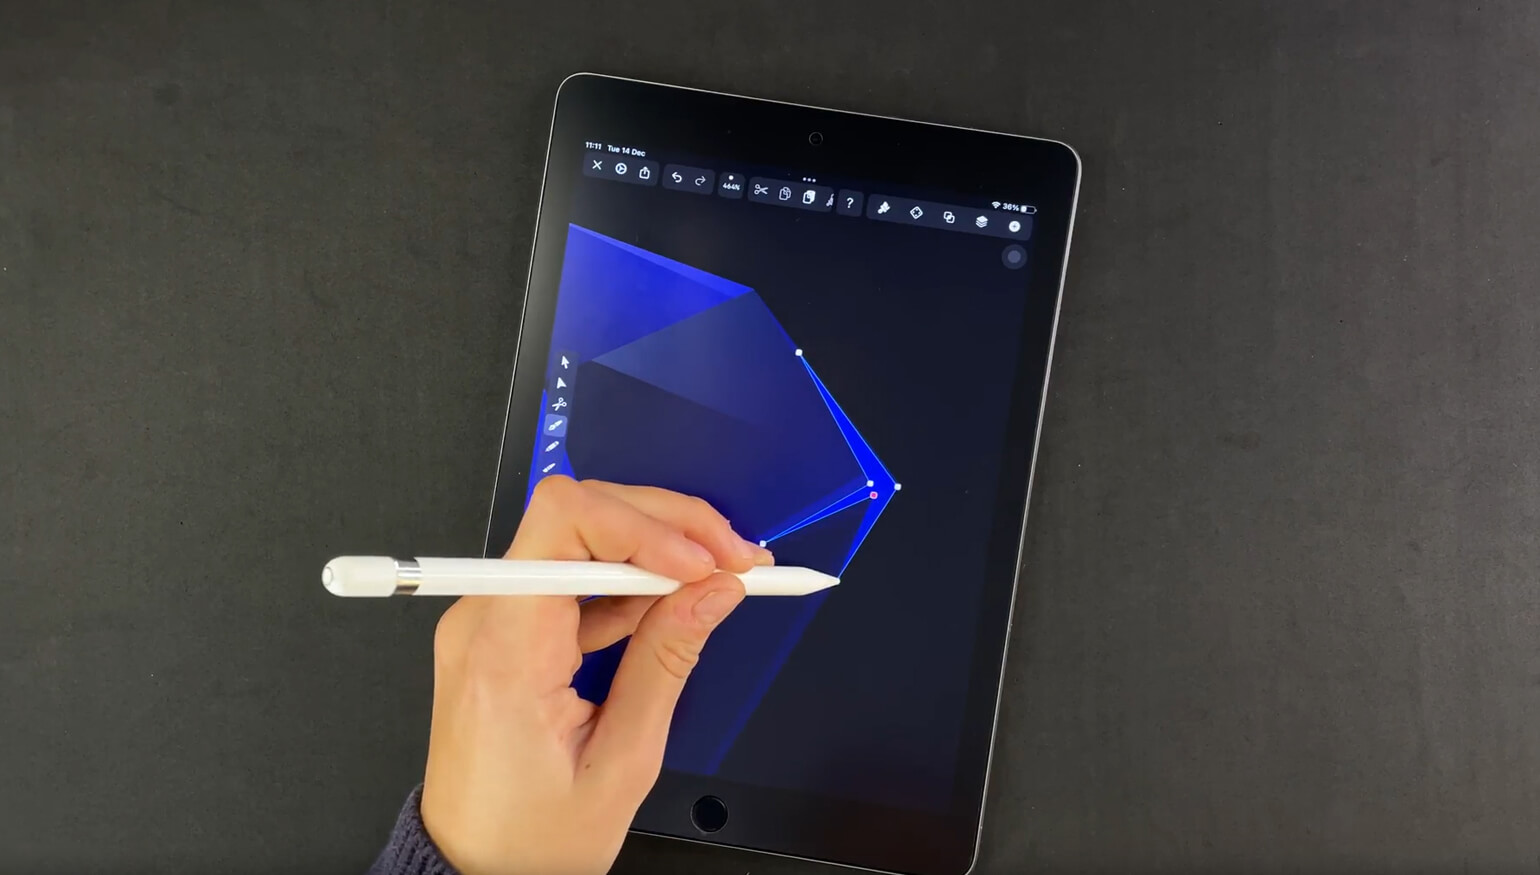
Tap the Duplicate Mode and drag the duplicated hexagon directly below the original shape. The duplicated shape will snap precisely under the original shape. When you are done, turn off the Duplicate Mode. Scale the lower hexagonal shape to 79x16 and let it snap to the center of the upper hexagonal shape.
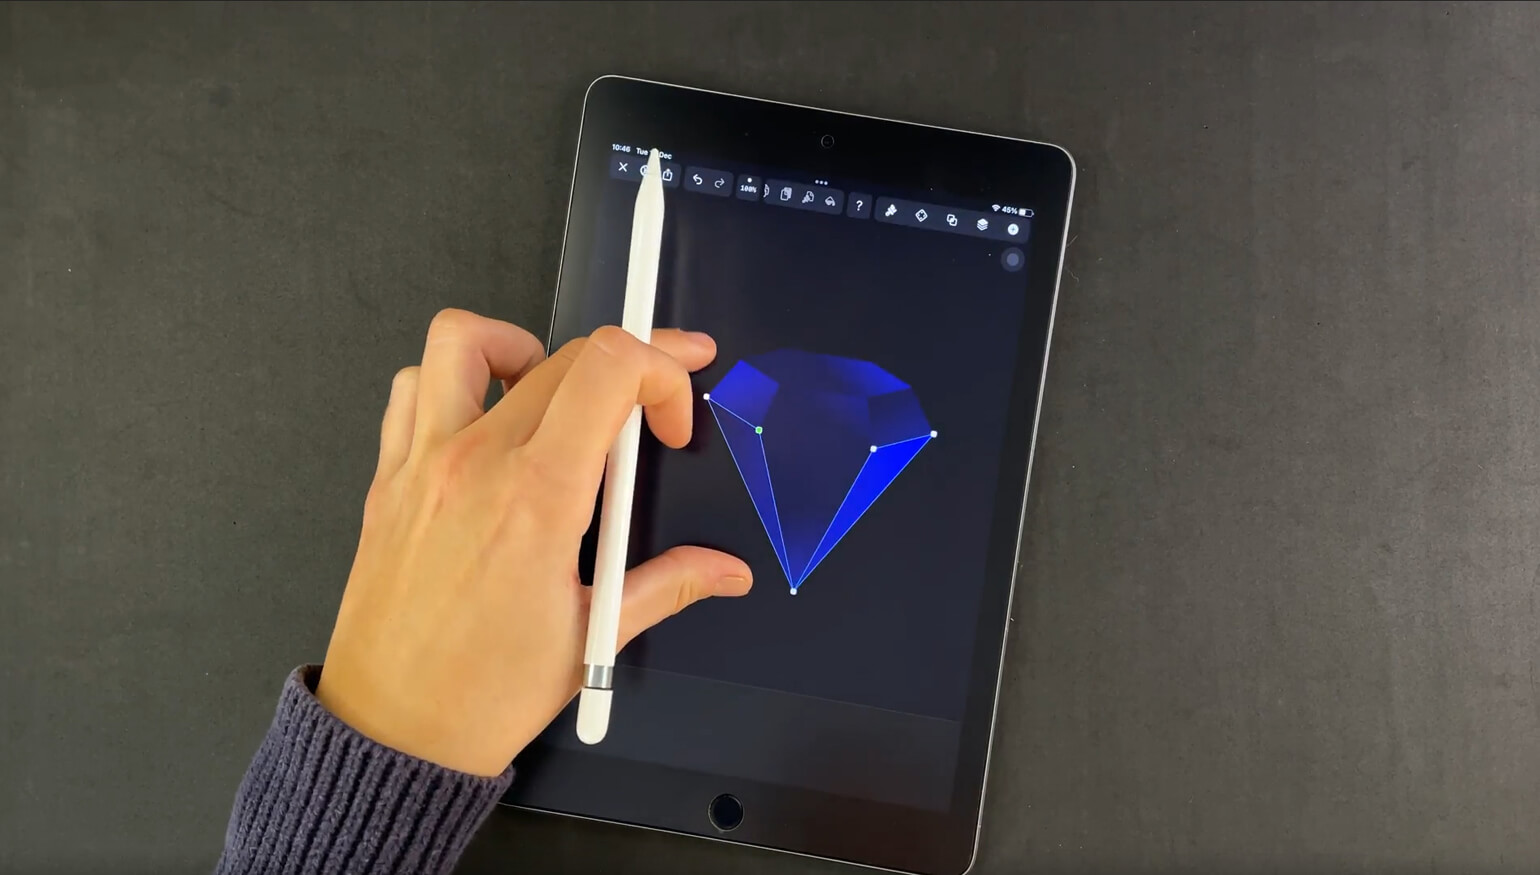
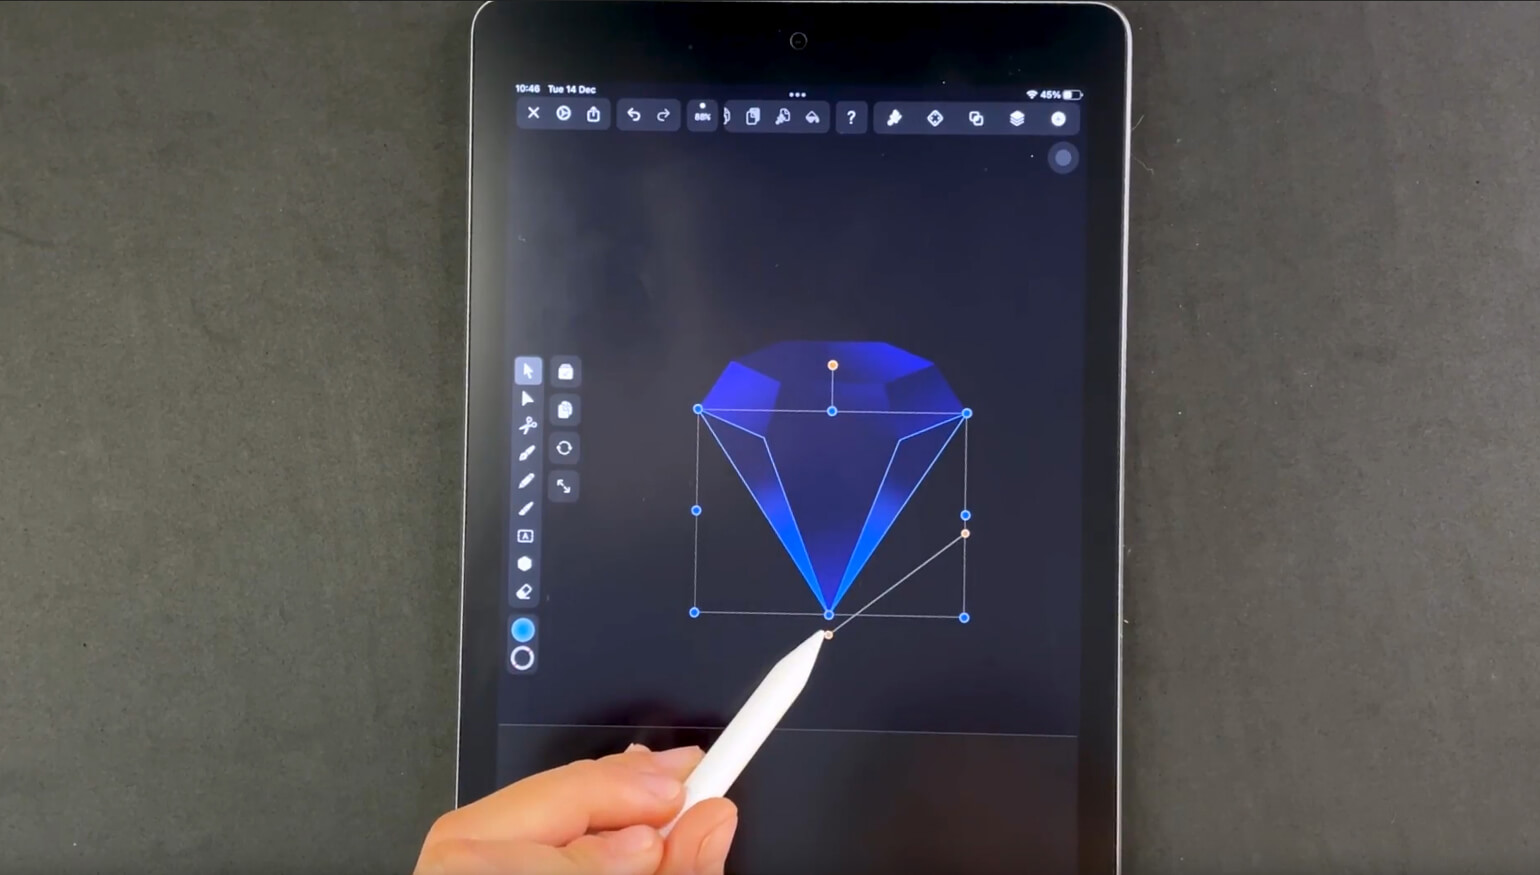
Refine the diamond shape
After creating the crown facets of the diamond in our previous step, we will now create the pavilion facet (lower segment) of our diamond. Select the Polygon Tool again and set the corner points this time to 3 points to create an inverted triangle. Scale the triangle to 40x50. Let the equilateral triangle shape snap directly under the center of the two hexagon shapes you have created previously.
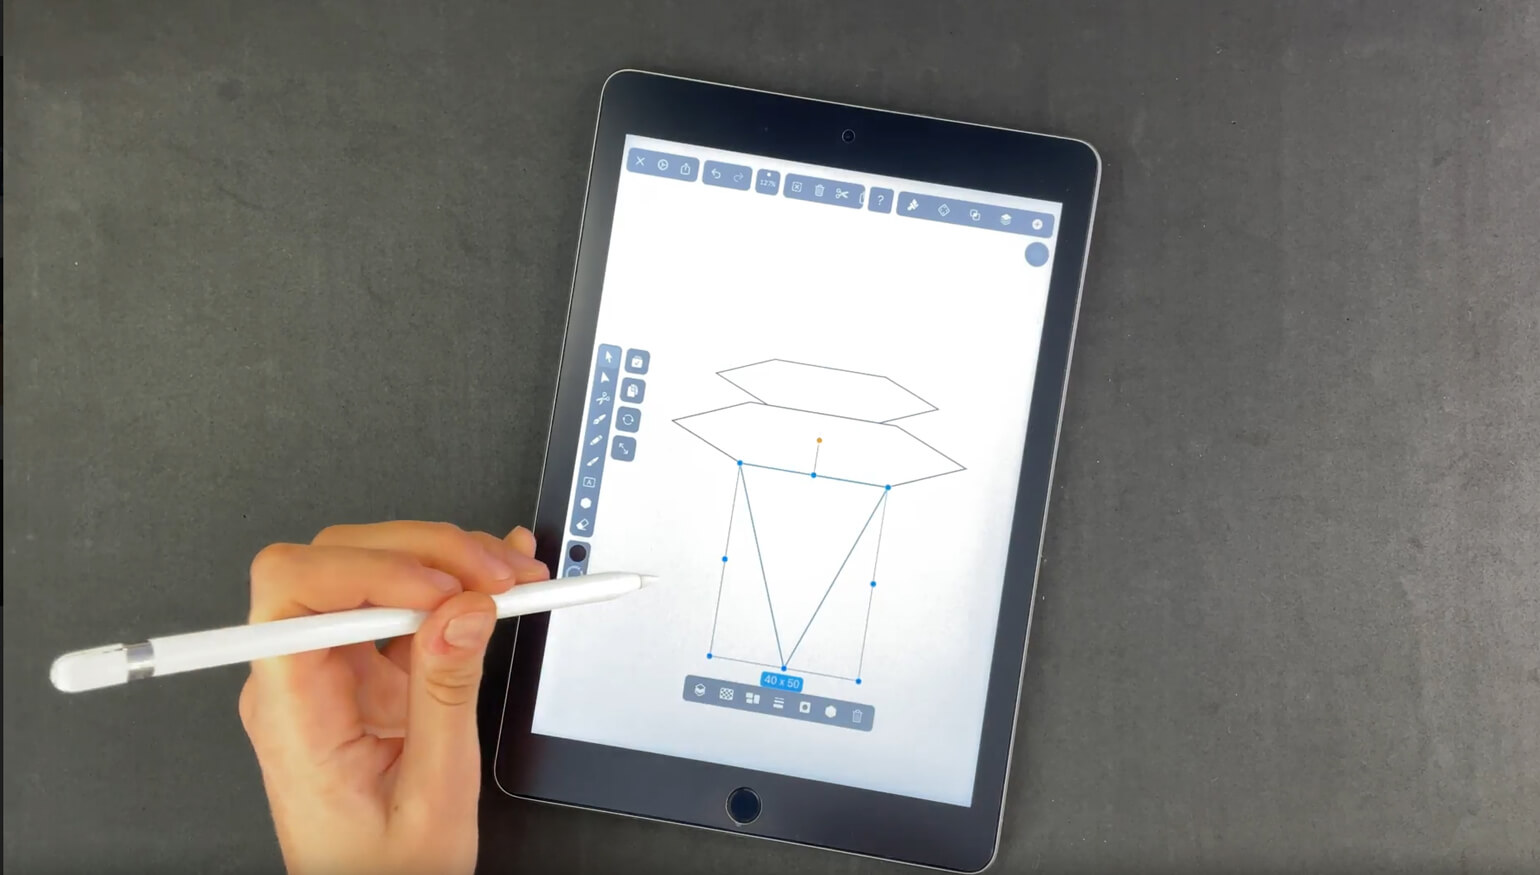
Now, fill in the gaps of the diamond shape with the Pen Tool. Be sure to close all the shapes by tapping on the first node again.
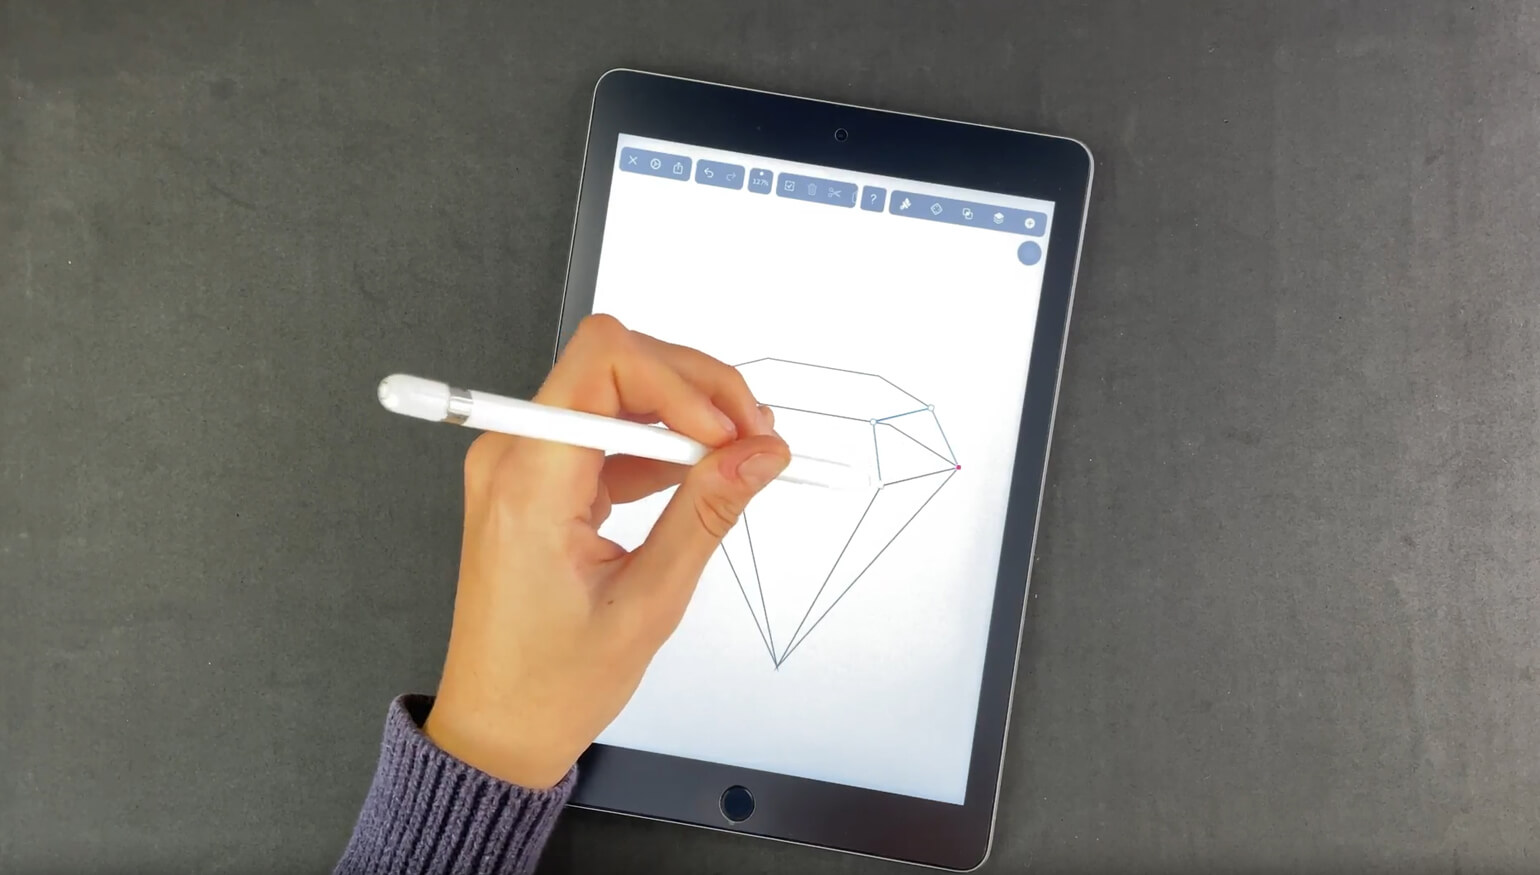
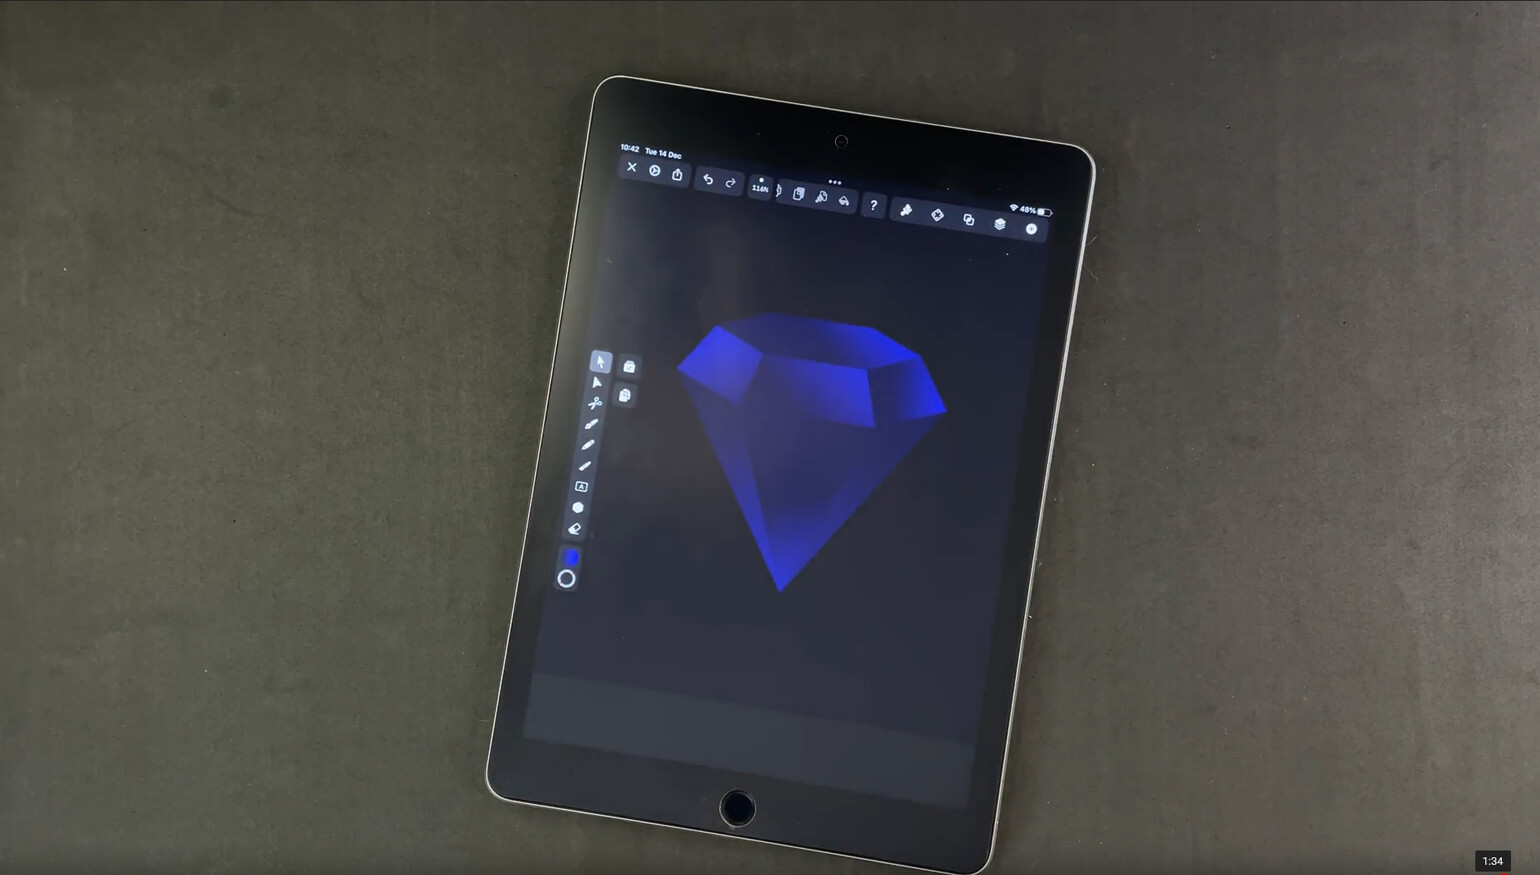
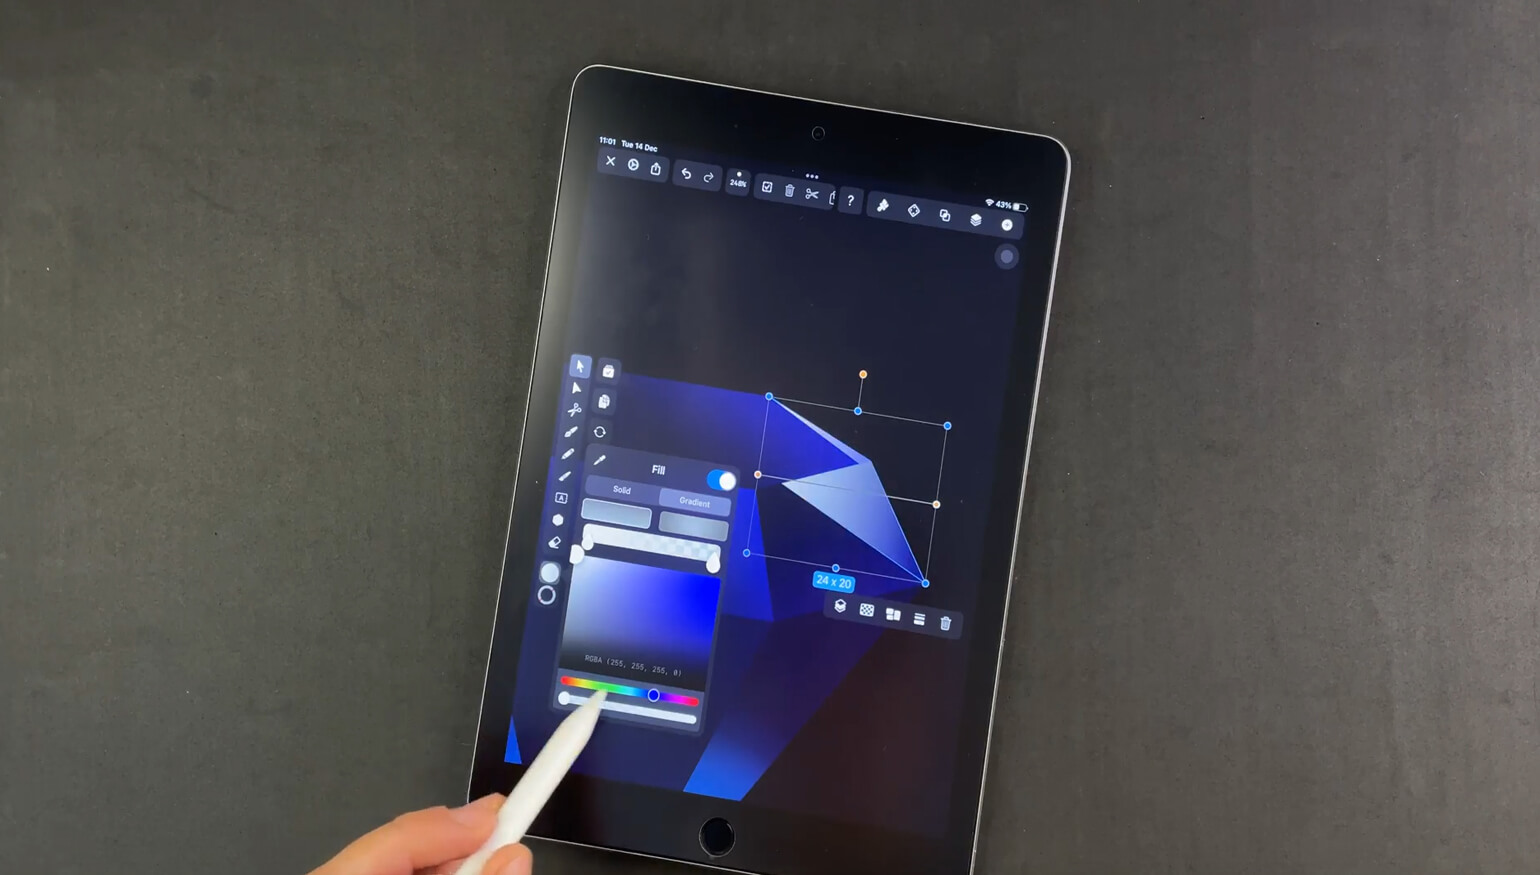
Deactivate the Outline Mode in the Quick Settings. The canvas now returns to dark blue again. Select all the Diamond shapes and set the Fill Option in the Color Widget to a royal blue color. (RGBA values: 12, 2, 97, 100), so that you can distinguish the Diamond visually from the background color.
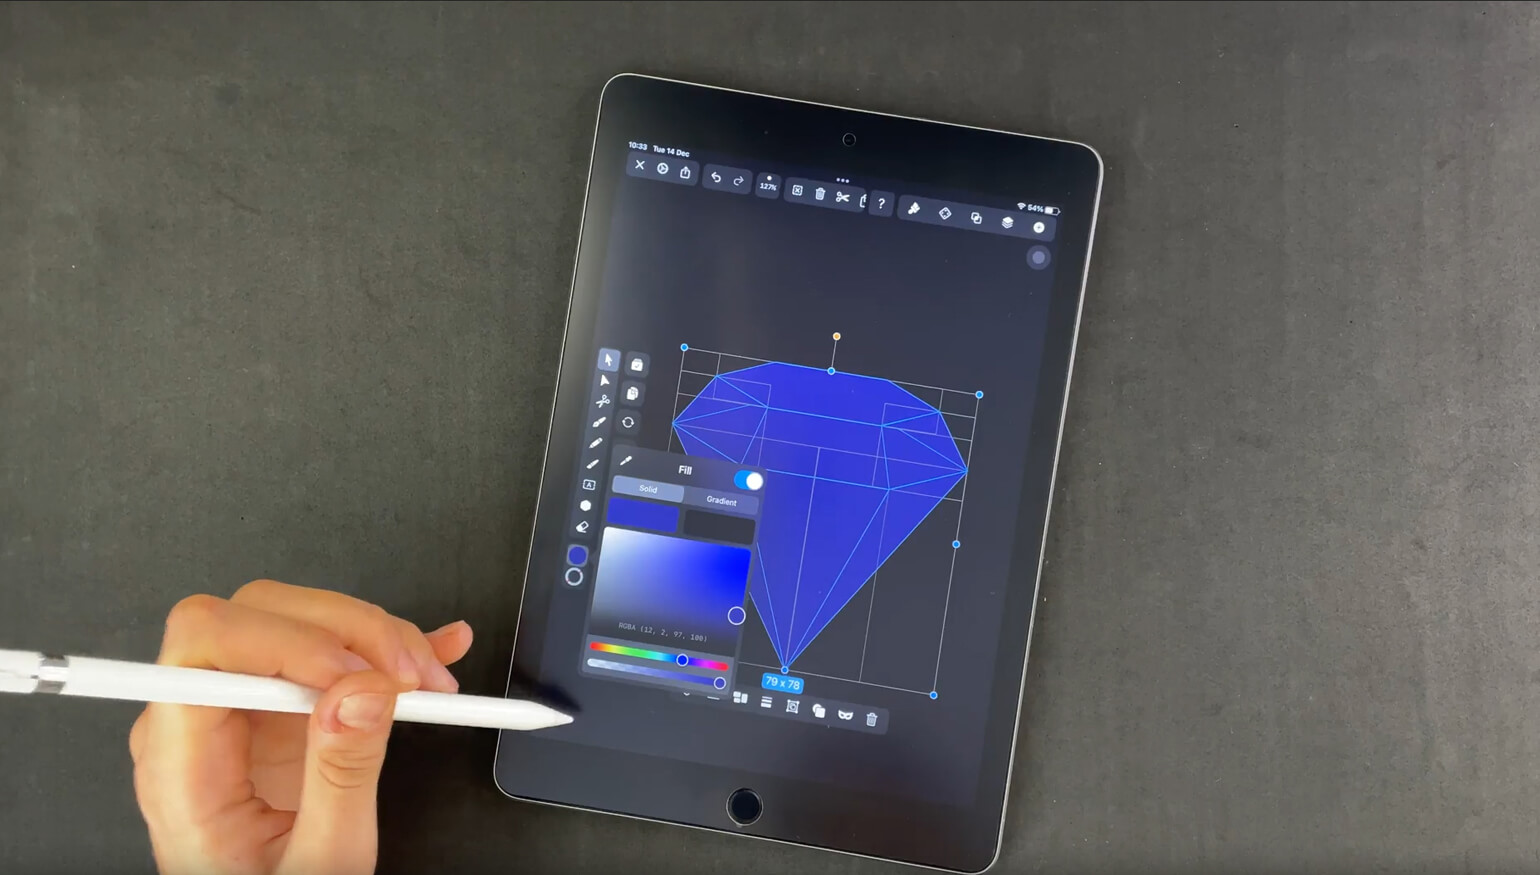
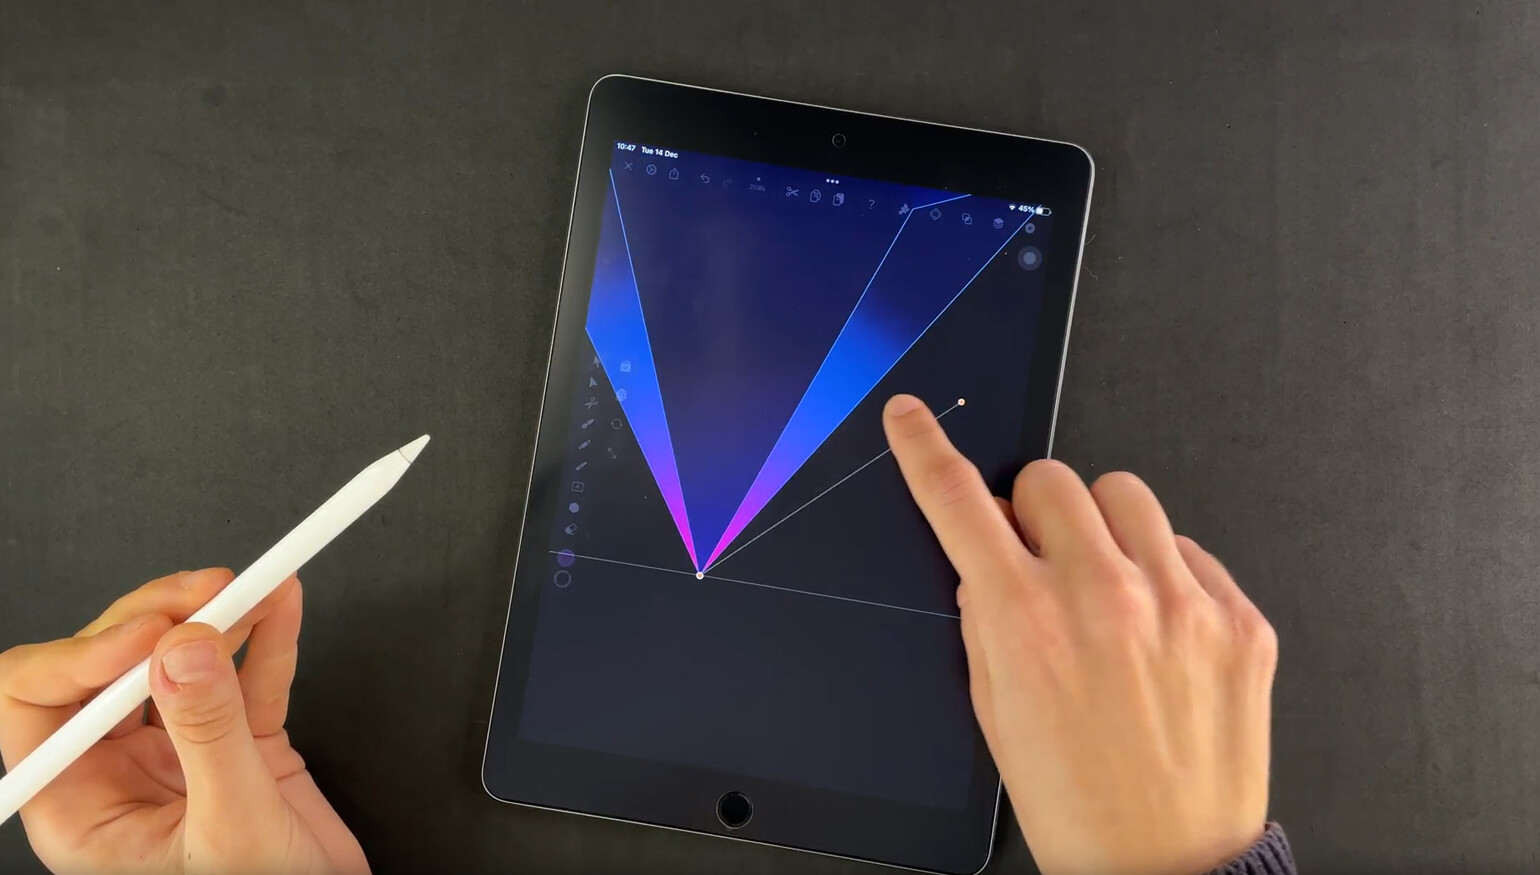
Create the gradients
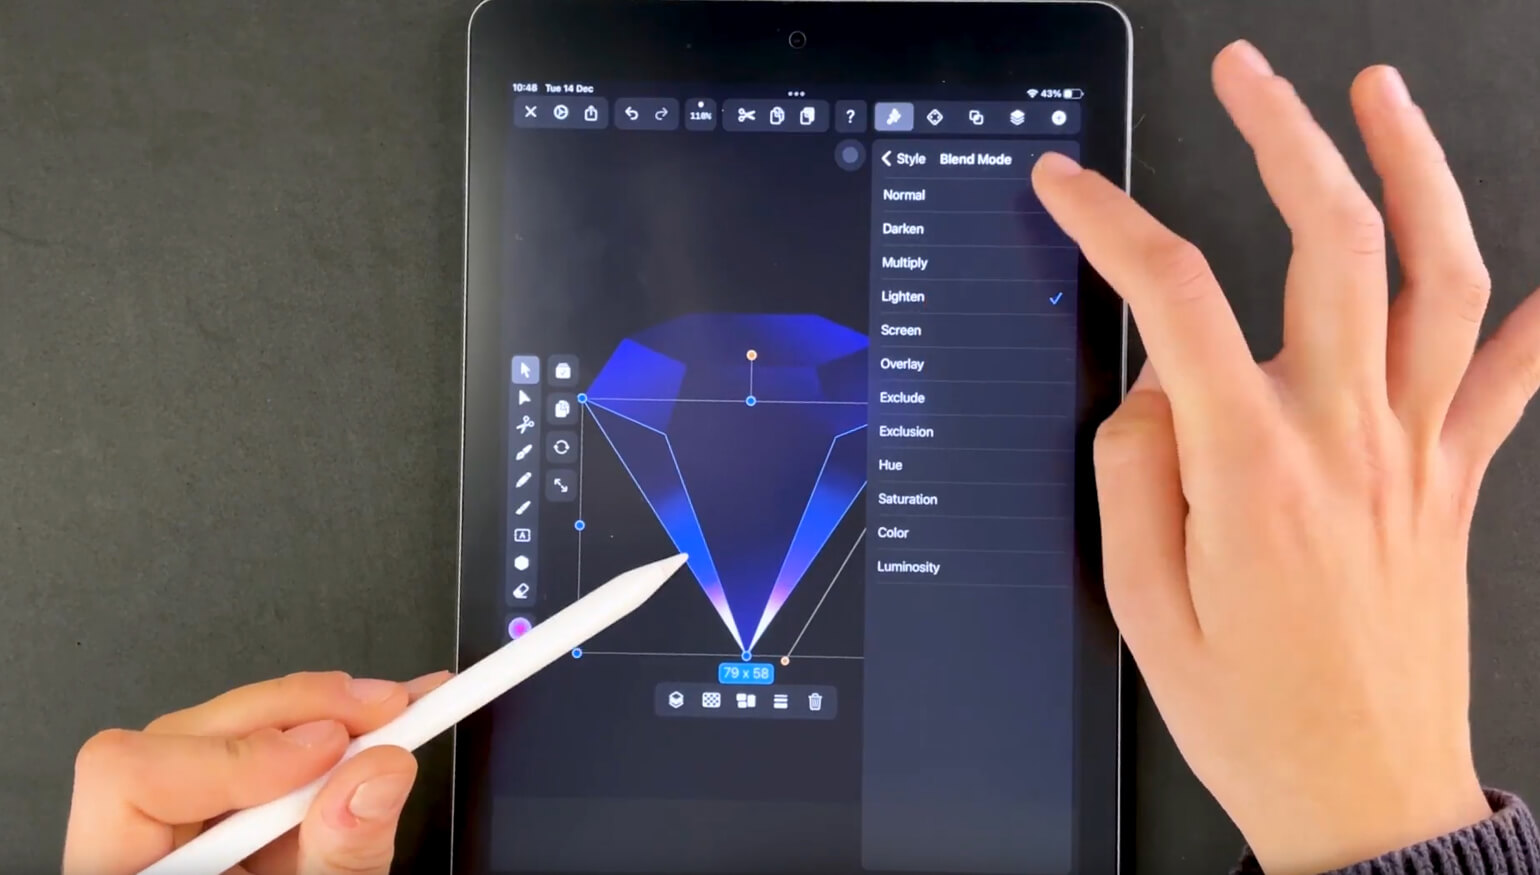
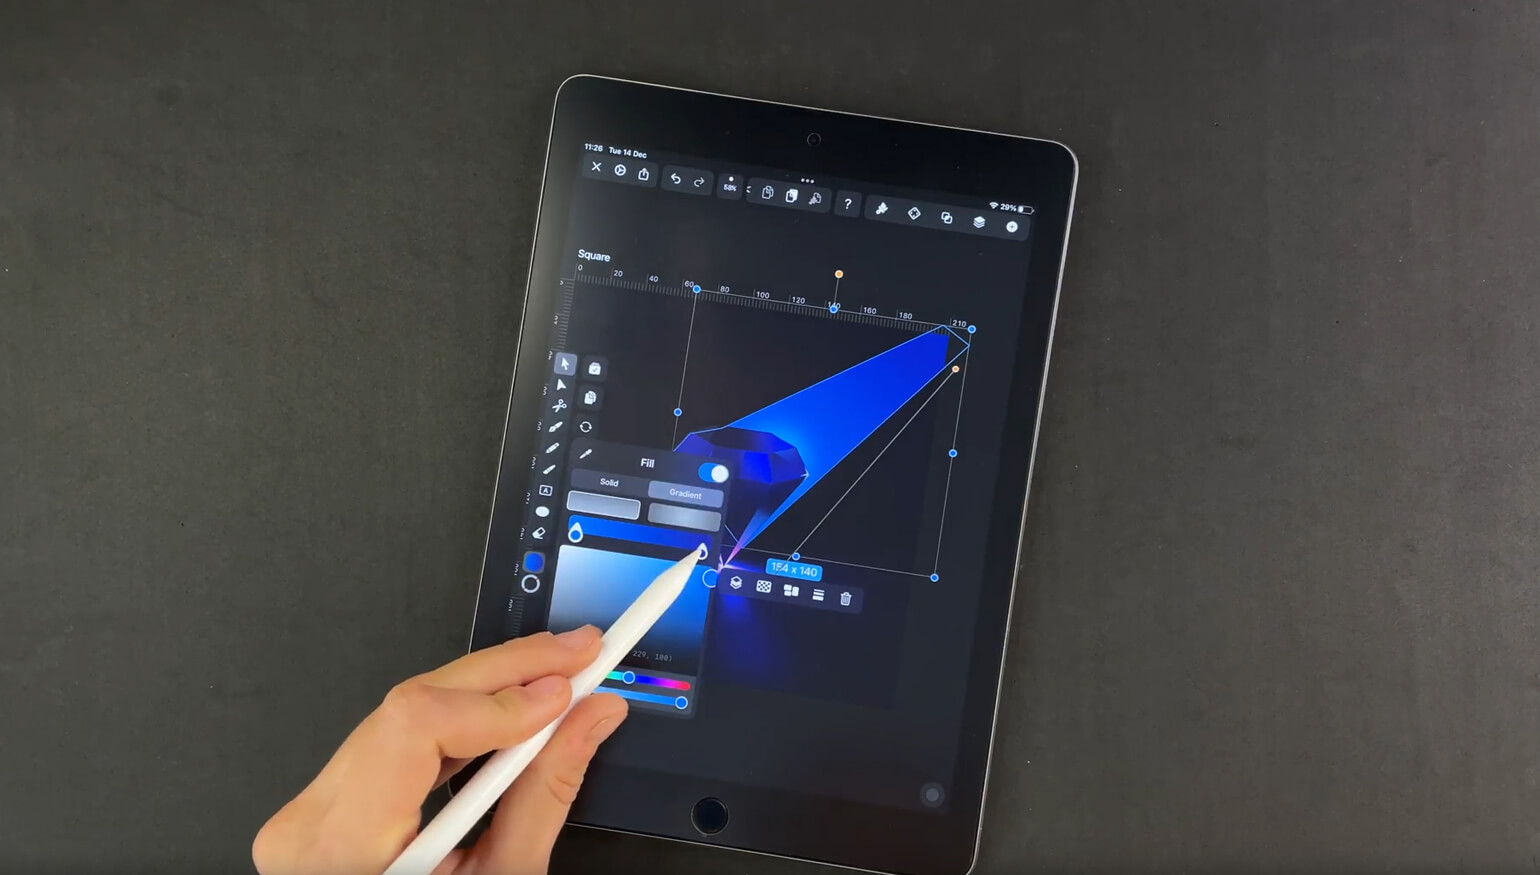
Select the front triangle with the Node Tool and then select the Fill option in the Color Widget. Inside the Color Widget window, switch to Gradient Mode. We will now create a gradient of color. Now you can adjust the gradient colors with the Color Picker and the Slider Handles.
Master the Art of Gradient Colors
Delve into the world of gradients with our Linearity Curve guide for Mac. Learn to seamlessly blend colors and add depth to your designs with stunning gradient techniques.
Create a gradient with the colors from left to right:
RGBA 0,5,46, 100 - RGBA 21,0,165, 100.
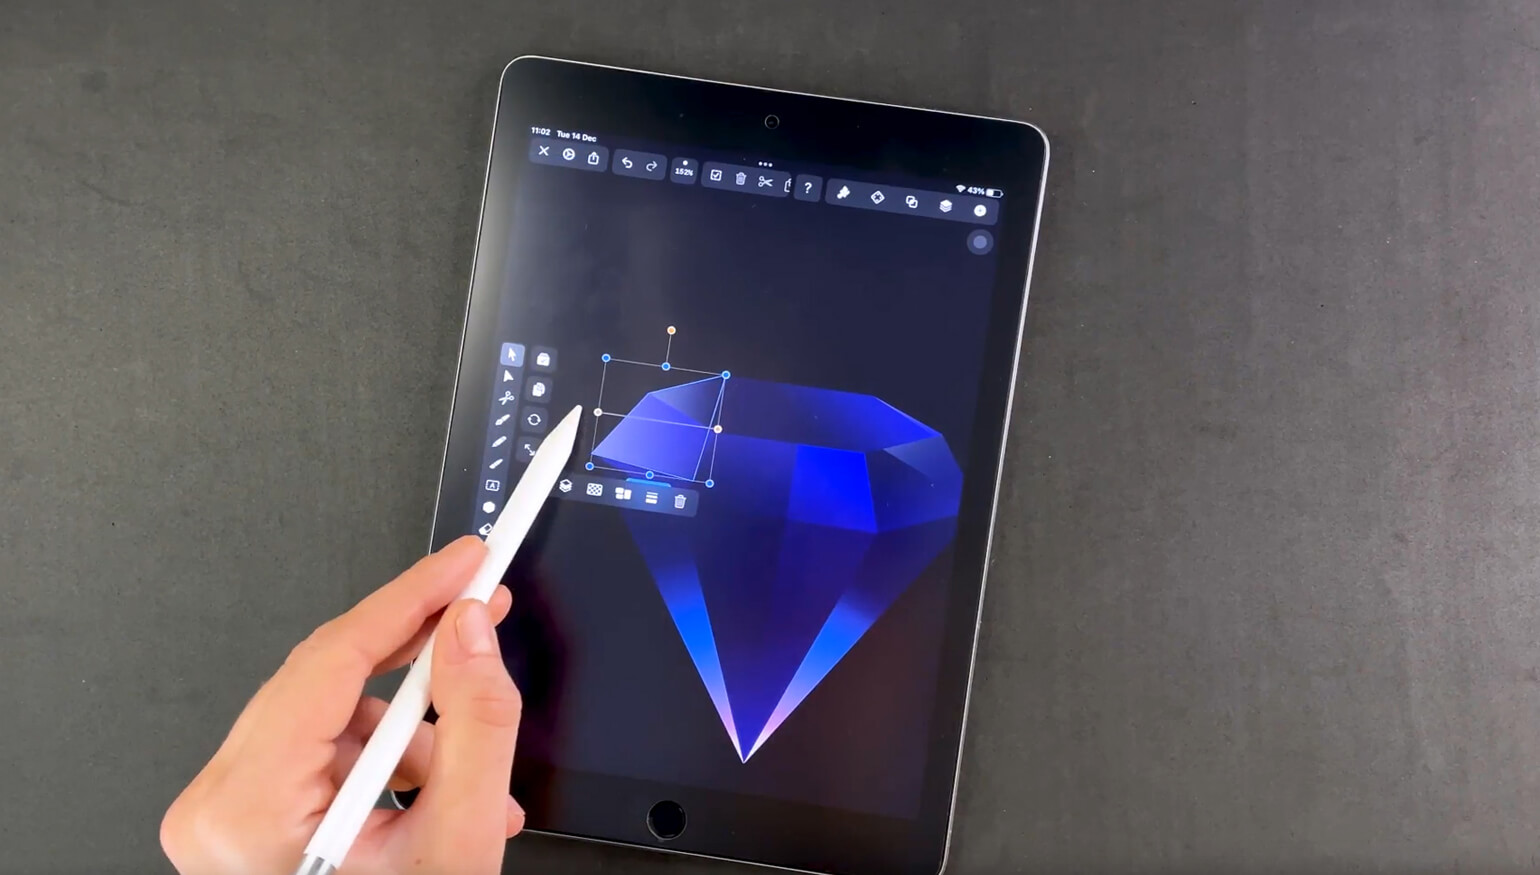
You can change the direction of your gradient with the Direction Handle that appears inside your Bounding Box. You can use the Pencil or your finger to move the direction handle of your gradient. Adjust the gradient direction just like the artist did in our screenshot.
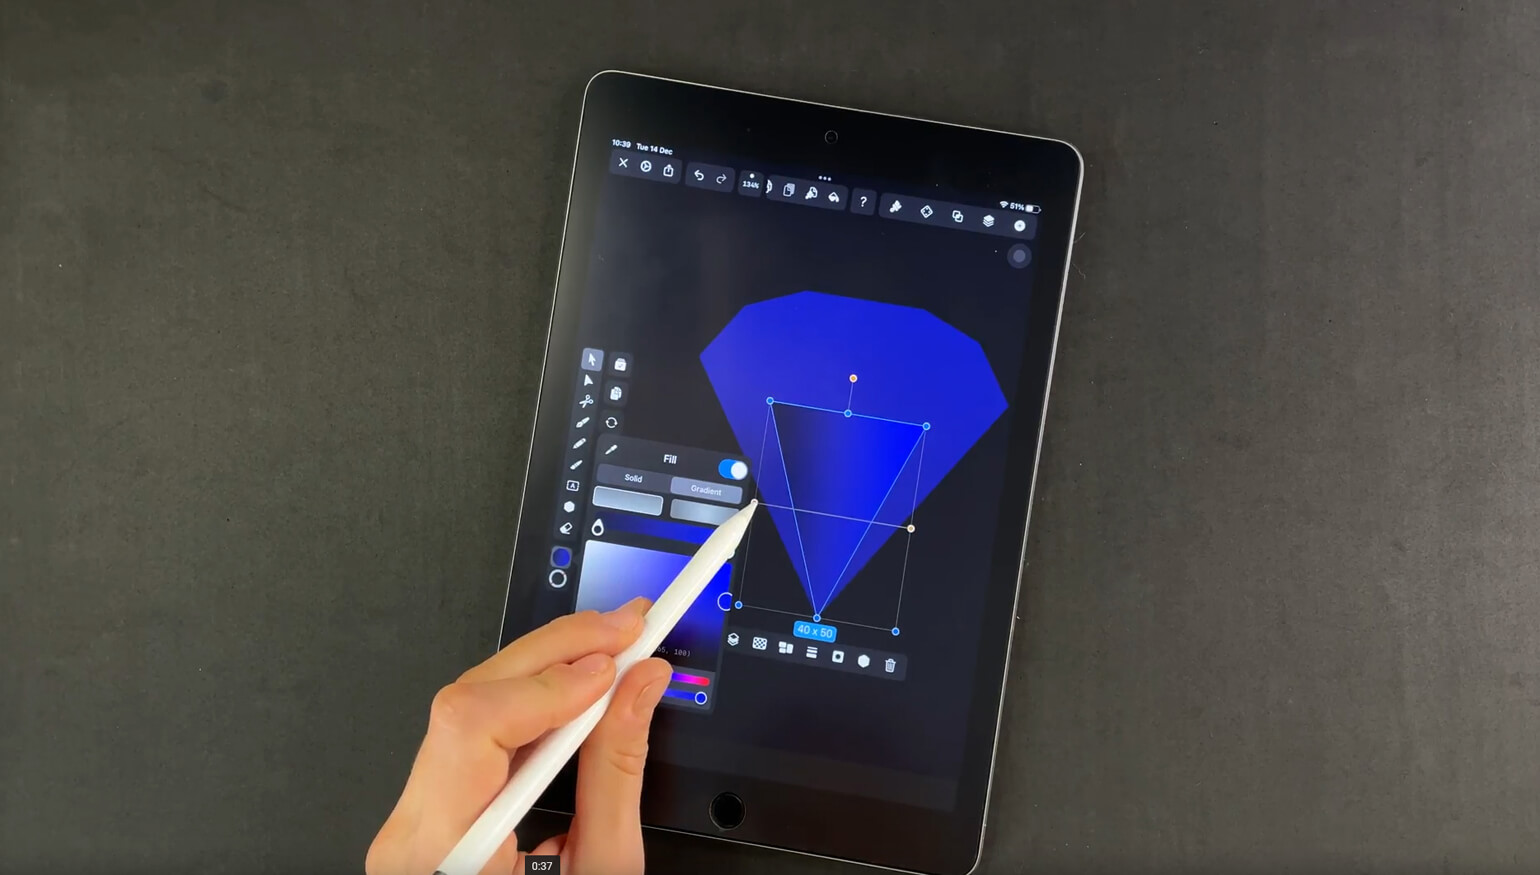
Repeat the steps with every triangle of the diamond. If you want to speed up your workflow, you can tap the Copy Style button in the Action Bar at the top of your screen. You can then apply the saved style parameters to every selected shape by using the Paste Style button.
Create the interior light reflections
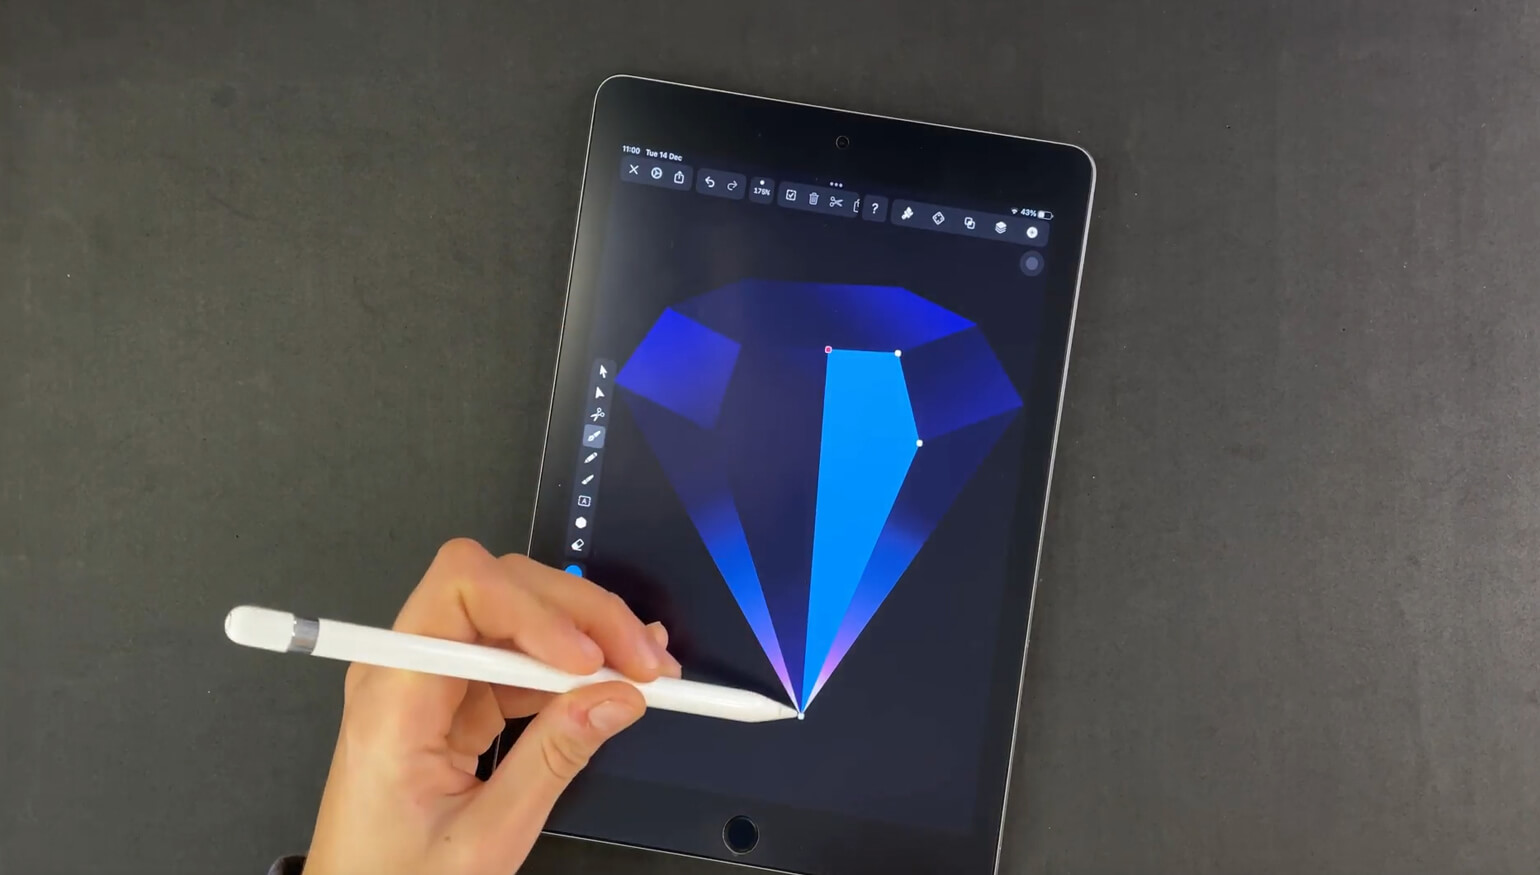
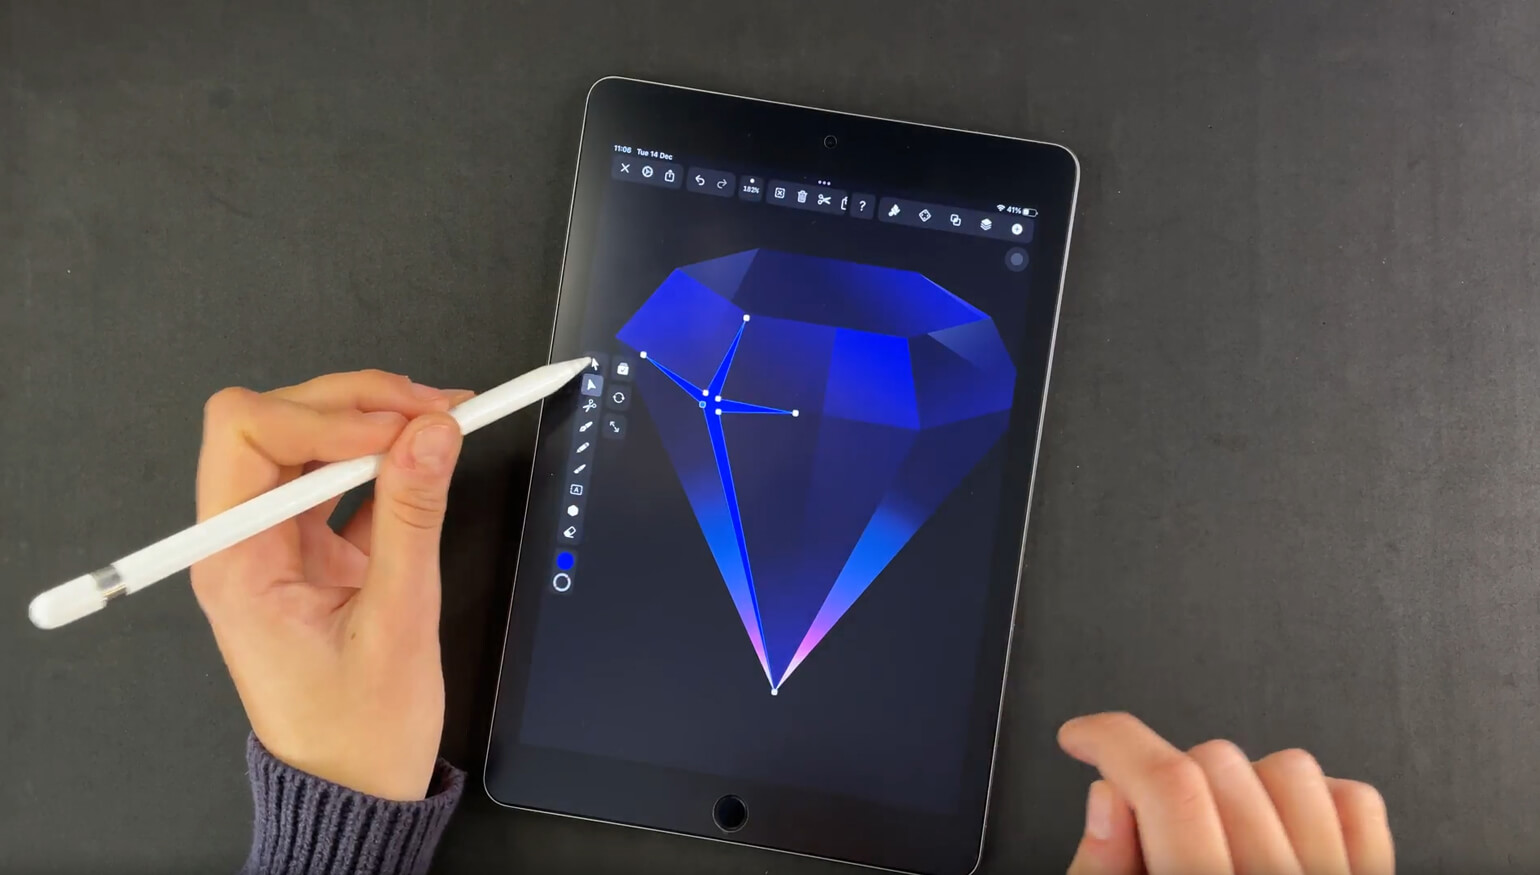
In our next step, we'll show you how to create the interior light reflections of your diamond. Create a new layer and name it "Diamond (colors)". Draw a V-shape with the Pen Tool that contains two side triangles.
Apply a radial gradient to the V-shape. Define the center gradient color as RGBA 44,152, 255, 100, and define the external slider as RGBA 44,152, 255, 0. (You can define the transparency by sliding the transparency slider completely to the left).
When you have set the RGBA values of your radial gradient, adjust the direction of your gradient so that you get the same visual results as in the screenshot.
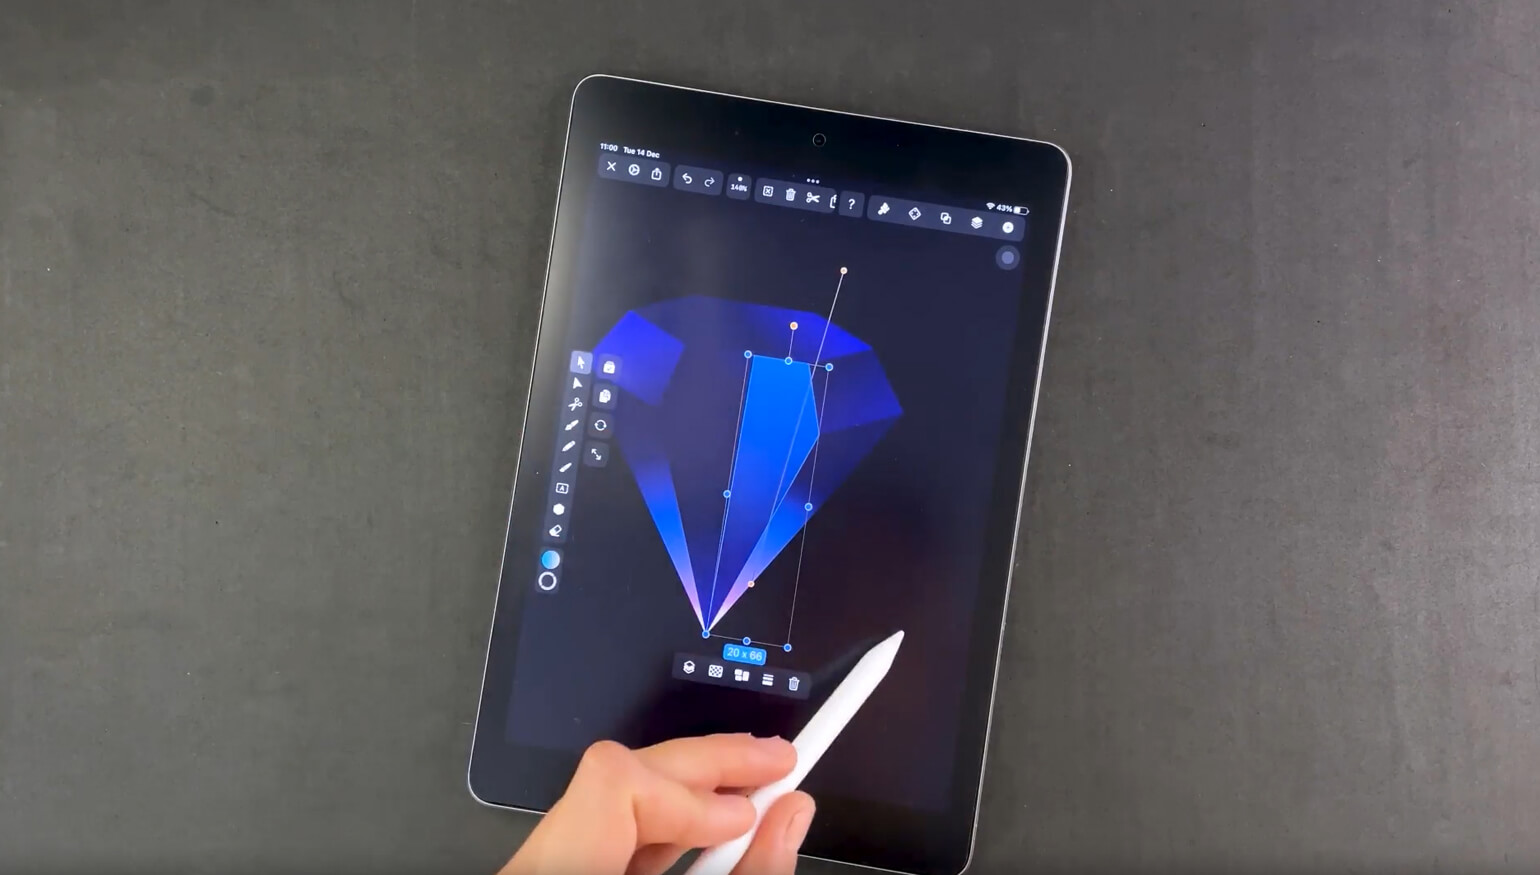
Now copy and paste your V-shape with the copy and paste buttons in the Action Bar. Change the color of the center gradient to pink, RGBA 255, 78, 188, 100 and the outer gradient color to transparent.
Copy and paste your V-shape again and set the radial center color to white: 255,255,255, 100. Set the radial exterior color to the pink hue that we have previously used: 255, 78, 188, 0.
For the next step, apply the Lighten blend mode to each V- shape you have created. Keep the opacity of the two first shapes at 100%. Then lower the opacity of the last V-shape that you have created to 60%.
Create the light reflections
Open the Layer Menu and select the "Diamond (base)" layer. Create the shape that you see in the screenshot below with the Pen Tool and apply a linear gradient to it.
Apply the color values of 0, 168, 255, 100 to 0,130, 255, 0 to your gradient and then adjust the gradient direction. Set the blending mode of your selected shape to Overlay. Take some time to readjust the direction of some gradients of your shapes so that they match the screenshot below visually.
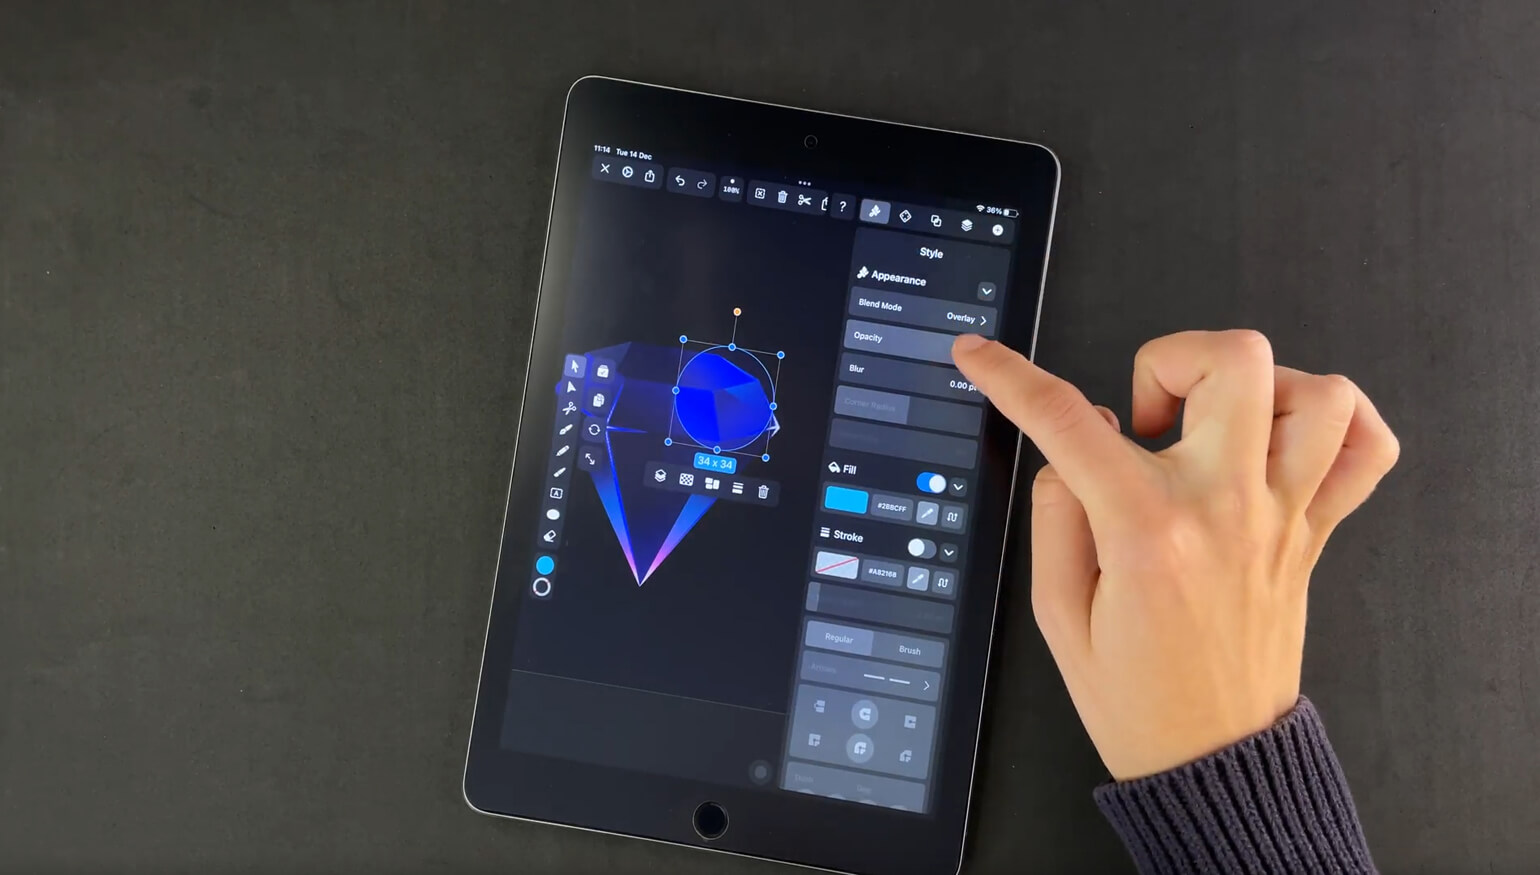
In our next step, we will show you how to create light reflections on the edges of your diamond. First, set the color in the fill option of your Color Widget to pure white (255, 255, 255, 100). Then draw the shape for the light reflections on the right side of the diamond with the Pen Tool.
Set a linear gradient from pure white (255, 255, 255, 100) to transparent. Adjust the direction of your gradient by using the Gradient Direction Handle. Then, set the blending mode to Overlay and set the opacity at 50%. Repeat the steps on the left side of the diamond.
Create the сolor overlay
In step number 7, we will show you how to create the color overlay on the edges of the diamond. Minimize the “Diamond (base)” layer and lock the layer. Create a new layer on top of the “Diamond (colors)” layer. Rename the layer to “Edges”.
Turn off the Snapping in your settings to gain more freedom when you move your nodes. Select the Pen Tool and set the color value in the Fill Option to 0,22,209, 100. Then draw a four-pointed star shape. Then set the blend mode of your layer to Overlay.
Copy and paste the star shape with the copy and paste buttons in the Action Bar. Change the color value of the second shape to a lighter blue with the color value: 0,158, 255, 100. Adjust the nodes so that the outer edges of the first dark blue star shape are visible. Repeat the steps and set the fill color to an even lighter blue: 113, 201, 255, 100.

Copy the last shape, repeat the steps and set the color in the color widget to pure white: 255, 255, 255, 100. Set the blend mode on this layer to Normal. Select all the star shapes and then set the blur in the Style Tab to 0.2 pt. Select the shapes again and group them by tapping the Group button.
Repeat all the steps on the right side of the Diamond. When you are finished, lock the layer named "Edges."
Create the inner lights
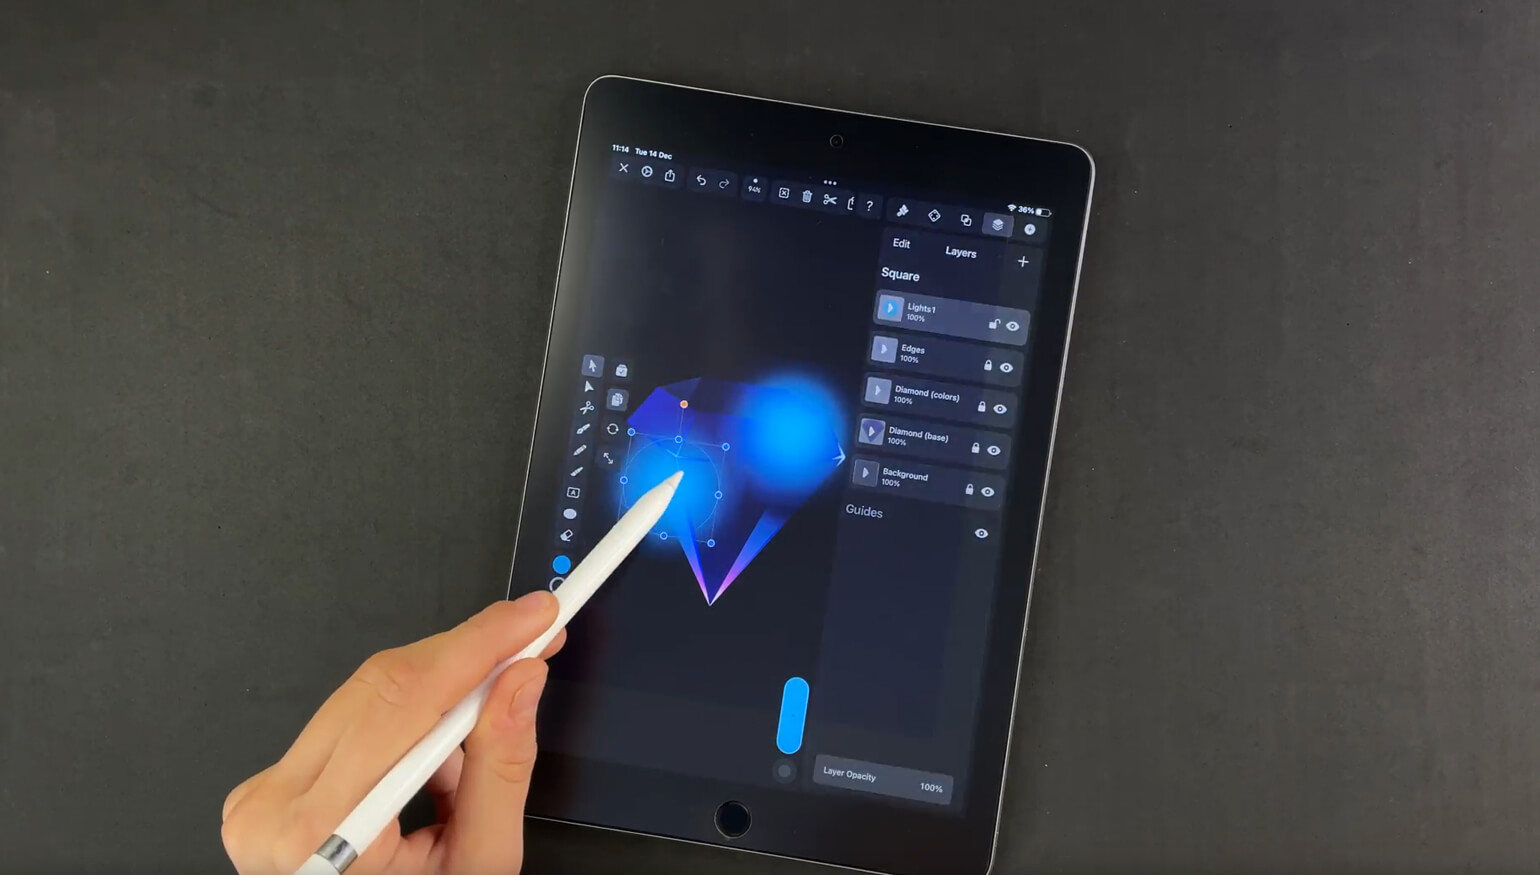
In our next step, we will create the inner light reflections of our sparkling diamond. Create a new layer in the Layers Tab and name it "Lights 1."
Ready to create brand assets that pack a punch?
Visit our Academy for free drawing design courses.
Open the Color Widget and set the fill color to 43, 188, 255, 100. Select the Shape Tool and press the 3 dots on top of the left slider and choose the ellipse shape. Draw a circle while putting your finger on the screen. Choose the blend mode Overlay and keep the Opacity at 100%. Blur the shape to 0.20 pt.
Duplicate the circle shape and position it to the left side of your diamond. Now lock the layer "Lights 1."
Create the ground lights
In this step of our tutorial, we will show you how to create the ground lights.
Create a new layer on top of your "Background" layer. Name the layer "Ground Lights." Open the Color Widget and set the fill color to 5, 1, 146, 100. Pick the Pen Tool and create a polygon shape like the one shown in the screenshot below.
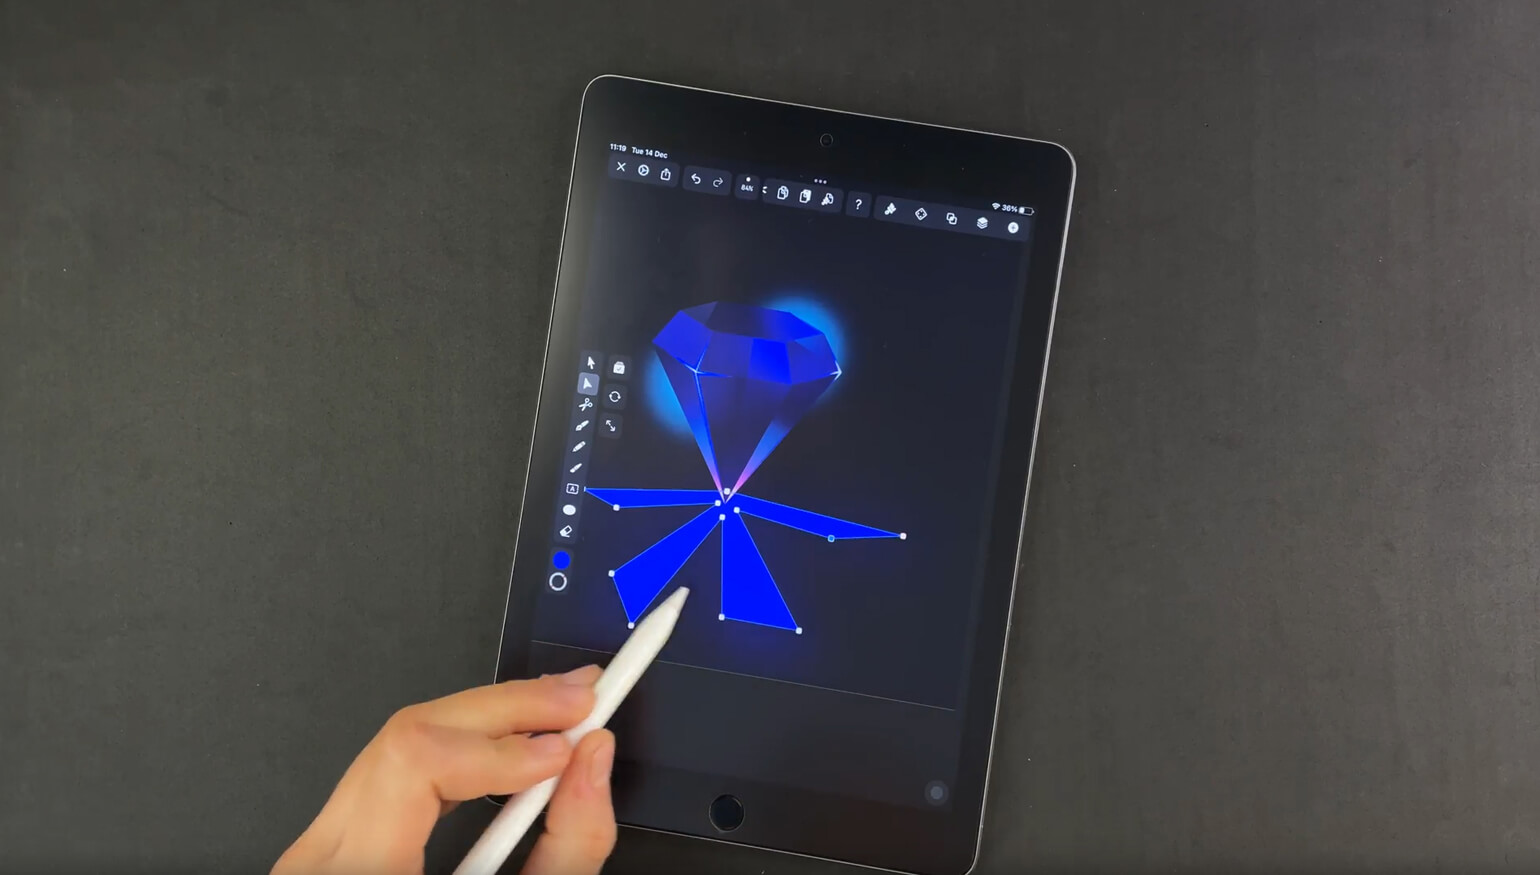
Set the blend mode to Normal and the opacity to 62%. Set the blur of your shape to 0.35pt. After you have applied these settings to your shape, copy and paste the shape. In your second shape, set the blur to 0 pt and the opacity to 100%, so that it will be easier for you to work with your color and shape. Change the fill color of your shape in the Color Picker to a lighter blue and use the Node Tool to contract the size of your shape as you can see in the video.
Set the fill to a Radial Gradient. For the center color use the RGBA values: 0, 3, 214, 100, and for the external color of your gradient use the following color values: 0, 24, 180, 0. Then move the center color of your gradient to the tip at the bottom of your diamond. Adjust the gradient with the Gradient Direction Handle to create the effect of light coming out of the diamond. Set the blend mode to Normal, the opacity to 100%, and the blur to 7.56pt.
Copy and paste your ground lights shape. Make the new shape a little bit smaller as you can see in the video. Set the center color of your gradient to 0, 145, 255, 100 and adjust the direction of your gradient accordingly. Set the blur of your shape to 3.49 pt.
Copy and paste your last ground lights shape. Make the shape a little smaller as you can see in the video. Set the center color of your gradient to 251, 128, 247, 100, the blur value to 1.26 pt. Adjust the gradient with the direction handle.

Copy and paste your last ground lights shape again. Set the center color of your gradient to pure white (255, 255, 255, 100) and the external color of the gradient to 251, 128, 247, 0. Adjust the gradient with the direction handle and set the blur to 0.50 pt.
Create the background light
Create a new layer directly on top of your “Background” layer. Rename the new layer to “Background light”.
Select the Pen Tool and draw the background ray of light as you can see in the video. Select in the fill option of the color picker to a linear gradient. Set the gradient color values from RGBA 0, 53, 229, 100 to 0, 8, 47, 100 and set the blur to 23,24 pt.
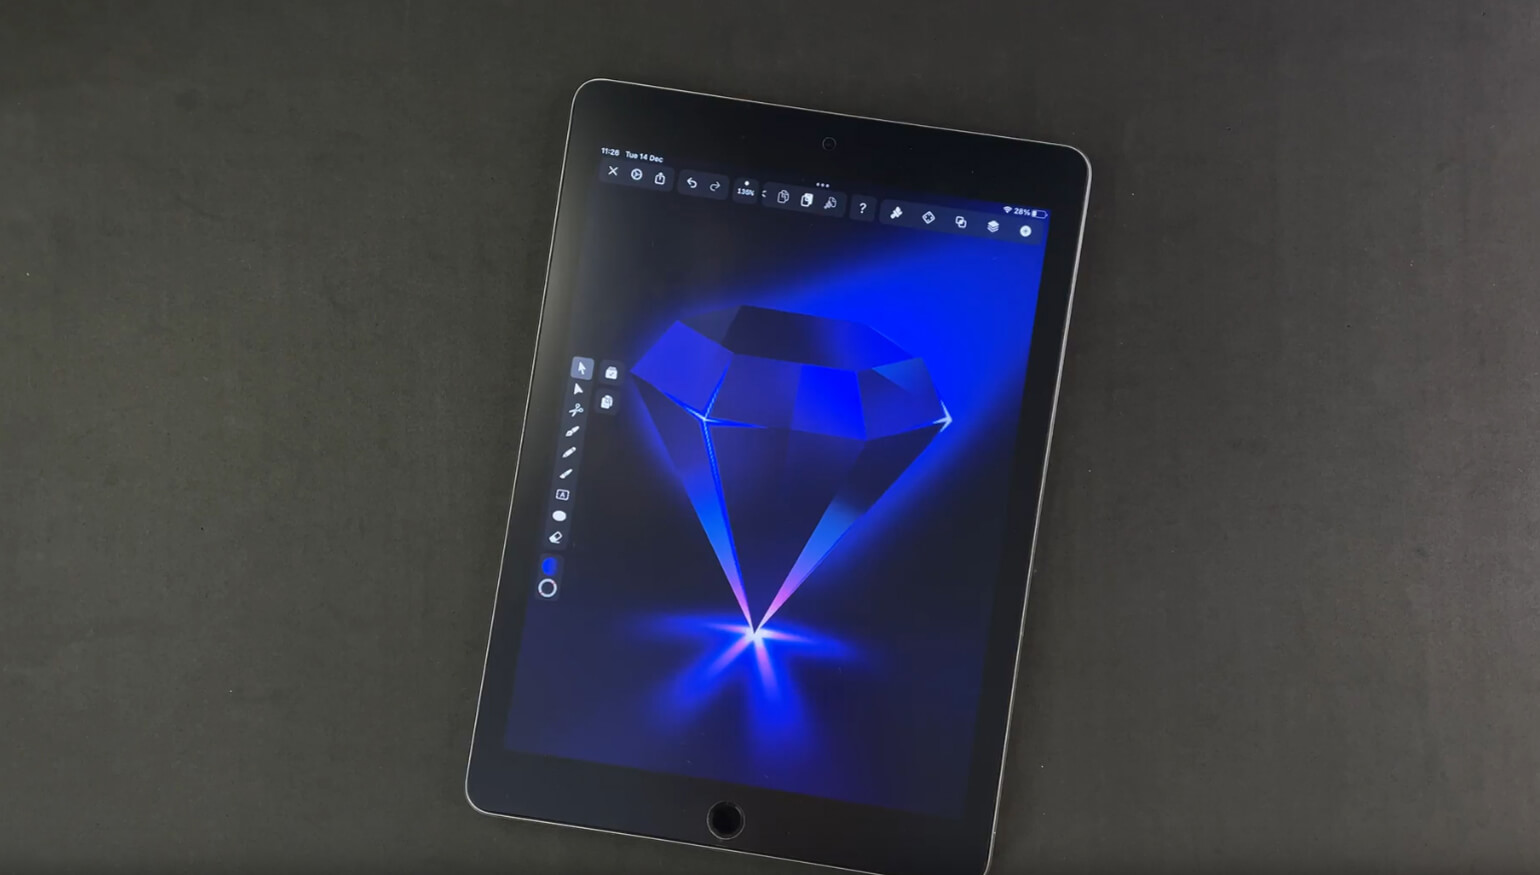
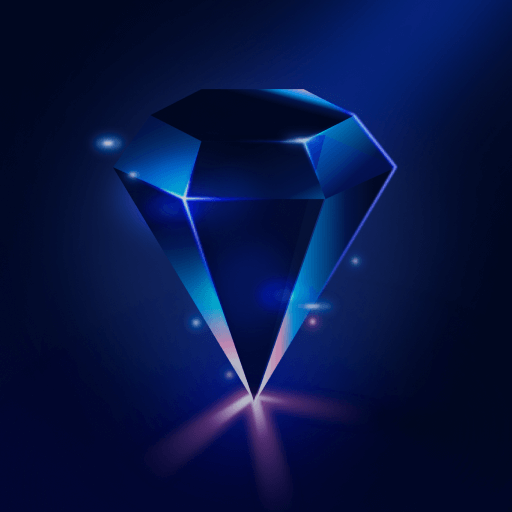
Tada! After countless layers and gradients, you're finally done! You have finished your beautiful diamond drawing! You have brilliantly waved the magic wand of gradient power in Vectornator!
If you want to try more tutorials, we also have guides for How to Draw a Fish, How to Draw a Polar Bear, and How to Draw a Flower. Don't forget to follow us on social media and share your artwork with us. We're super excited to see the masterpieces that you have created with our tutorials!
Get creative with our ready-to-use templates.
Linearity Curve offers templates for every social media platform and various use case templates for posters, business cards, slides, app store screenshots, and more.
Share this!
Marion Gerlinger
Marion is a contributing writer to the Linearity Blog.