:quality(75))
:quality(75))


:quality(75))
Photoshop’s Crop Tool is a straightforward member of the Toolbar that allows you to remove unwanted portions of an image. But you might find that there is far more to it than meets the eye.
Adobe Photoshop is an incredibly capable and versatile tool that designers and photographers have been using for decades. One of its most fundamental processes is cropping, which removes a piece of a photo or design.
The Crop Tool isn't destructive, meaning that you can select the cropped portions that you would like to retain. You can then optimize these trimmed edges at a later stage
While the Crop Tool is incredibly effective at its primary function, you can also use it to straighten images during the cropping process itself.
This guide will take you through the basics of cropping and how it works in Adobe Photoshop. We’ll also learn how to straighten an image using the Crop Tool and how to crop images non-destructively.
Beyond the Crop Tool, the Lasso Tool is another fantastic way to remove figures from an image. We’ll have a tutorial near the end of this article explaining how to use the Lasso Tool effectively.
Jumpstart your ideas with Linearity Curve
Take your designs to the next level.
The Crop Tool basics
The Crop Tool is an incredibly dynamic tool that deserves a few tutorials. Even if you have been using this Photoshop feature for some time, you might learn a trick or two from this guide!
Let's start with the very basics of the original crop features from Photoshop.
Selecting the Crop Tool
We begin this process by opening up an original photo and selecting the Crop Tool from the Toolbar. You'll find it near the top of the Toolbar. You can also press the C key to select the Crop Tool.

Using the Crop Tool
Once you choose the Crop Tool, you'll notice that Photoshop creates a cropping border around your original image. The size of this border will be determined by your previous image's Crop Tool usage.
We should set the Crop Tool back to its original settings before continuing. To do so, head over to the Options Bar in the top-left corner of the display. Right-click or Ctrl + click the Crop Tool icon and then select Reset Tool.
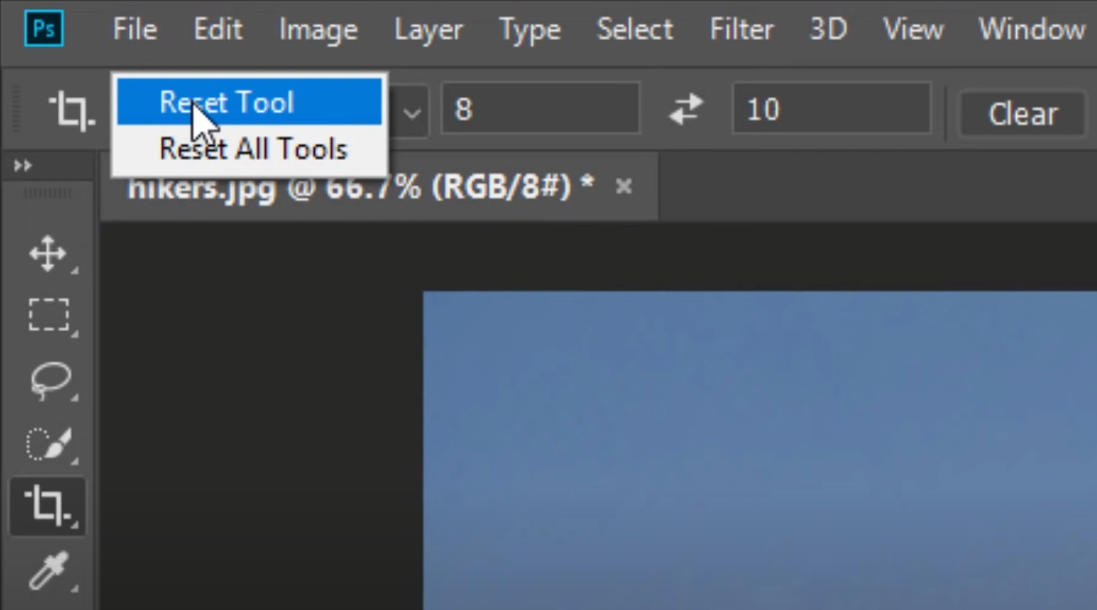
This will reset our Aspect Ratio to its default setting while emptying the Width and Height boxes. Finish by pressing the Esc key. If you still cannot see the border, select another Tool from the Toolbar and then hop back to the Crop Tool.
The cropping border should now surround your image properly. You'll notice that crop handles appear at the edges and four corners of your image.
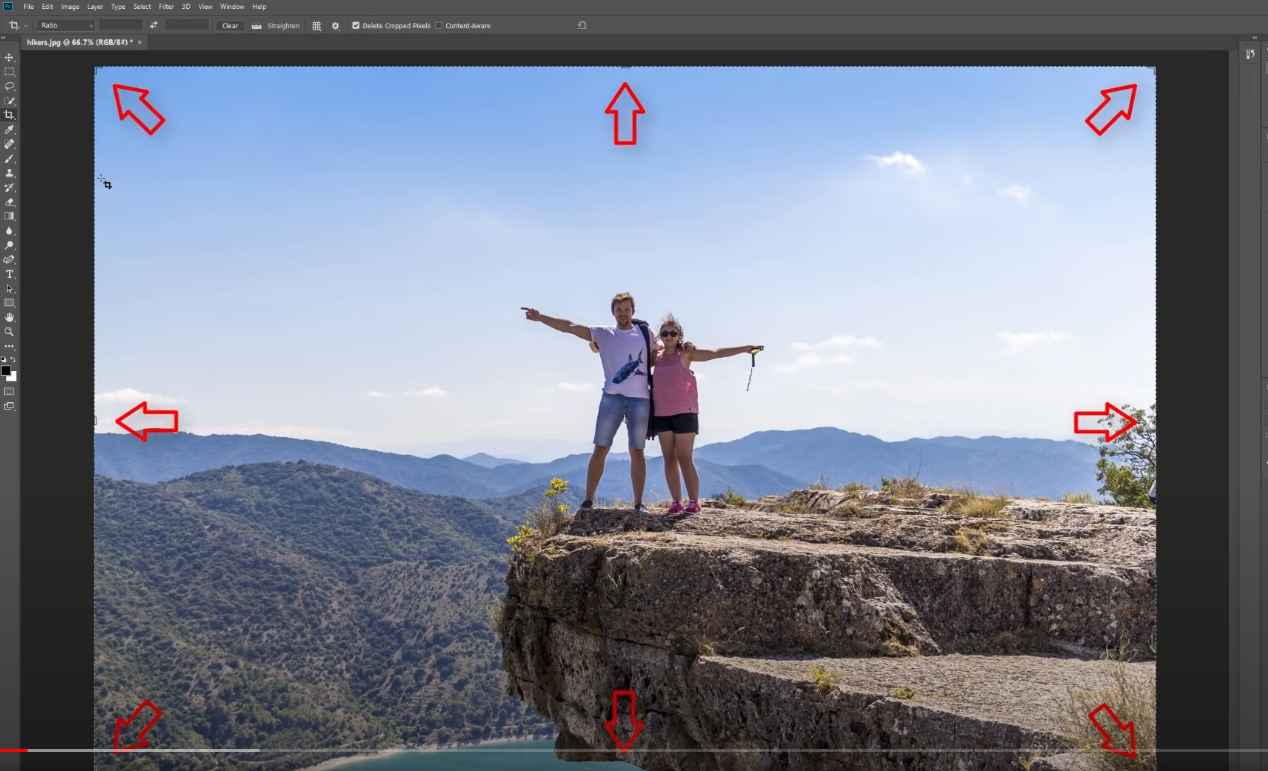
You can click and drag these crop handles to resize your image to your preferred point.

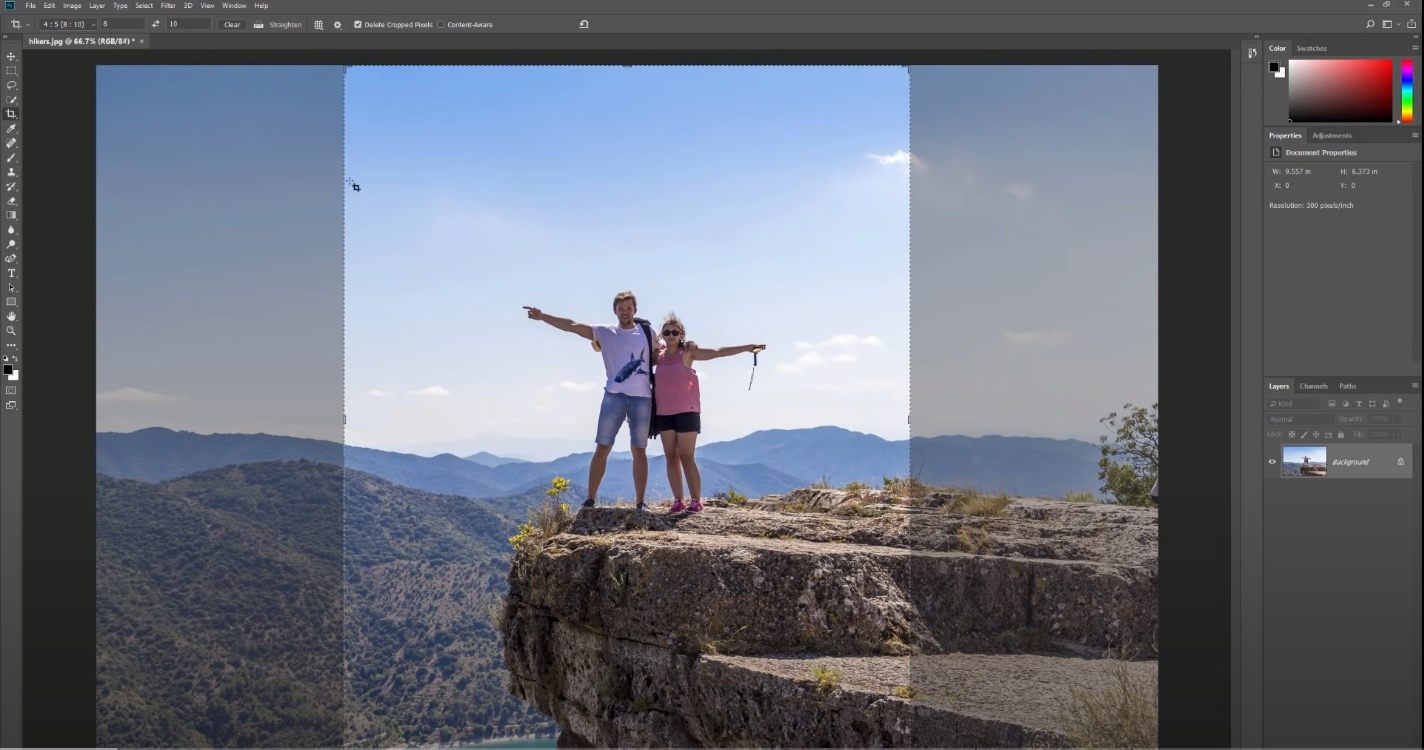
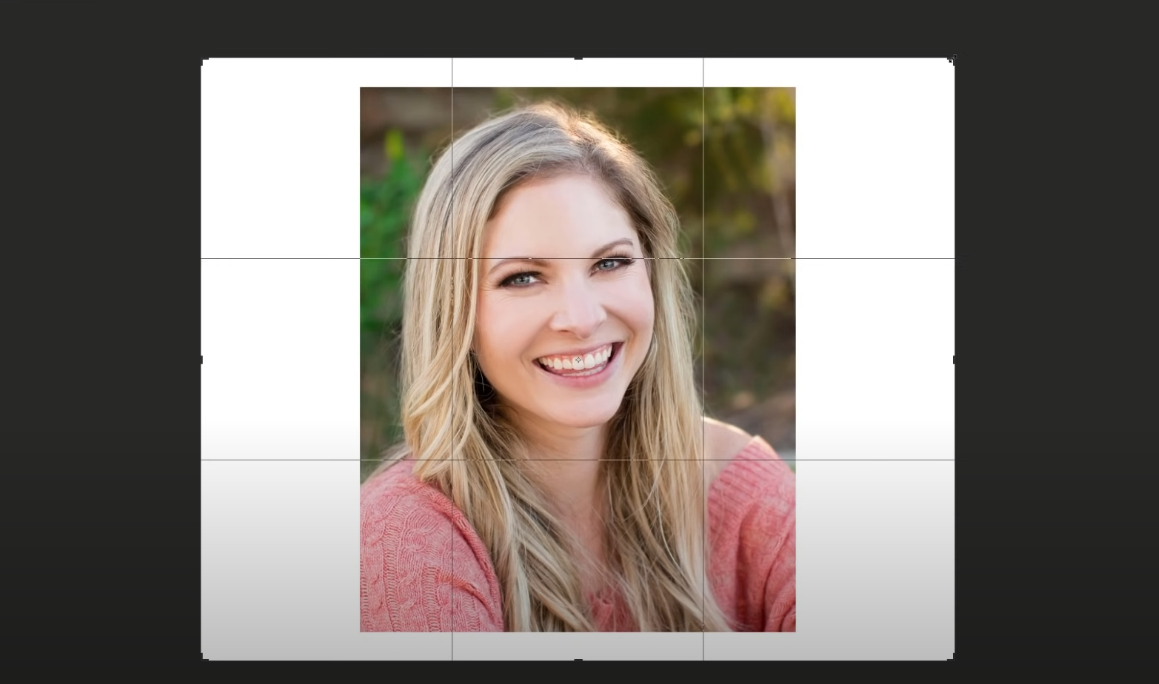
The highlighted area inside the Crop Box will be kept, while Photoshop will crop out the darkened area. You can click and drag the image within the Crop Box to best position your final image. Notice the Rule of Thirds grid within the Crop Box that will help you get the best-composed image possible.
An even more straightforward way to crop images is by simply selecting the Crop Tool and then clicking and dragging the Crop Box to your desired size. You can also use the handles to resize the Crop Box.
Resetting your crop
If you are unhappy with your crop, you can reset this process rather than canceling it altogether. Head over to the Reset button, which can be found at the top of the Options Bar. We can then reset the Crop Box without losing too much progress.

Control your aspect ratio
You'll create a custom Aspect Ratio when freely using the Crop Tool. If you would like to maintain your image's original Aspect Ratio, simply hold down the Shift key and click and drag one of the Crop Box's corner handles.
If you would like to resize your Crop Box from the center, press down the Option or Alt key while dragging the handles.
Specific aspect ratios
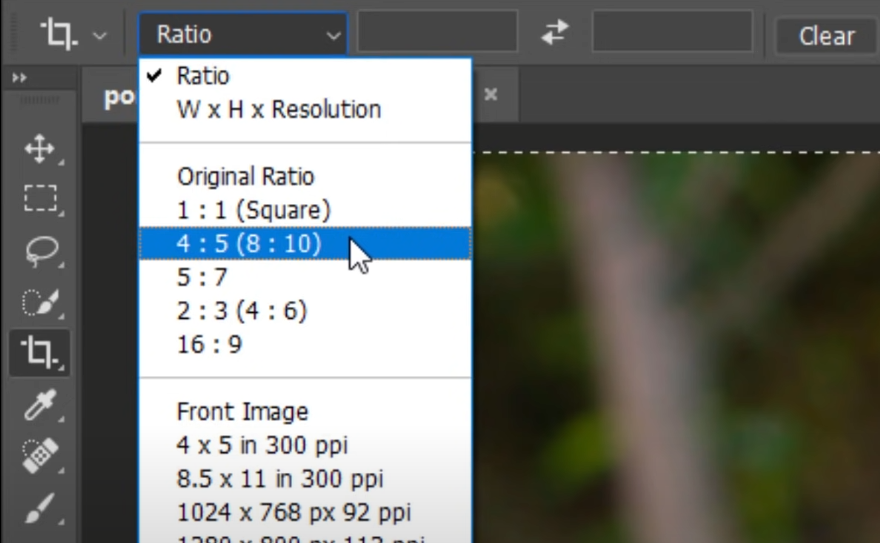
Photoshop allows you to work beyond preset Aspect Ratios. If you would like a specific Aspect Ratio to fit your image in, say, a photo frame, we can set the Aspect Ratio using the Options Bar.
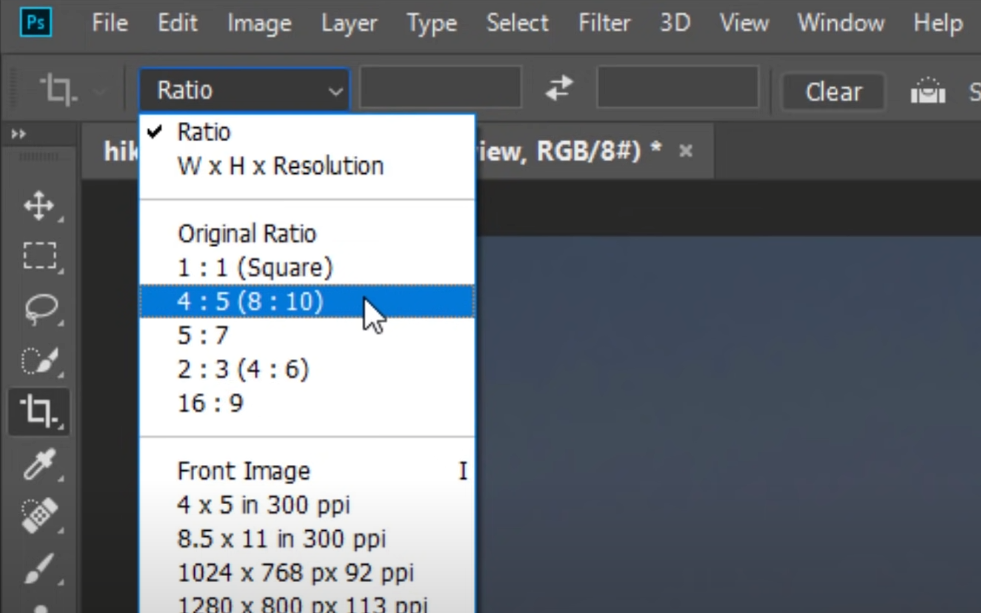
Click on the Aspect Ratio drop-down menu and select the specific Aspect Ratio you need for your frame, such as 1 : 1 (Square) or 4 : 5 (8 : 10). Let’s select the 4 : 5 (8 : 10) ratio for the sake of this tutorial.
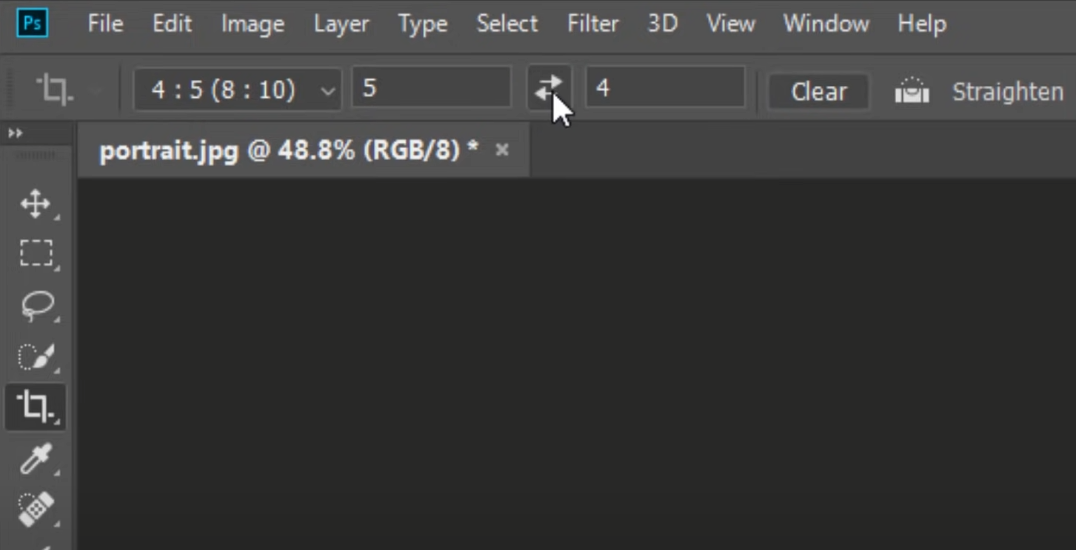
Your selected Aspect Ratio will automatically be entered into the Width and Height boxes.
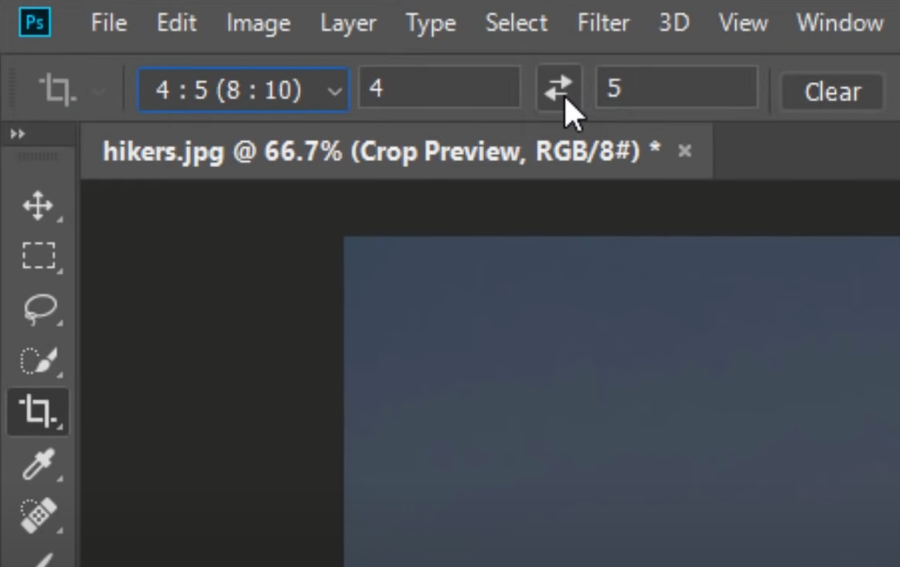
You can swap your Width and Height values using the Swap icon in the Options Bar. With the Swap icon, you can switch between portrait and landscape mode.
If you want to set your custom Aspect Ratio according to a photo frame, simply enter the specific values into the Width and Height boxes in the Options Bar.
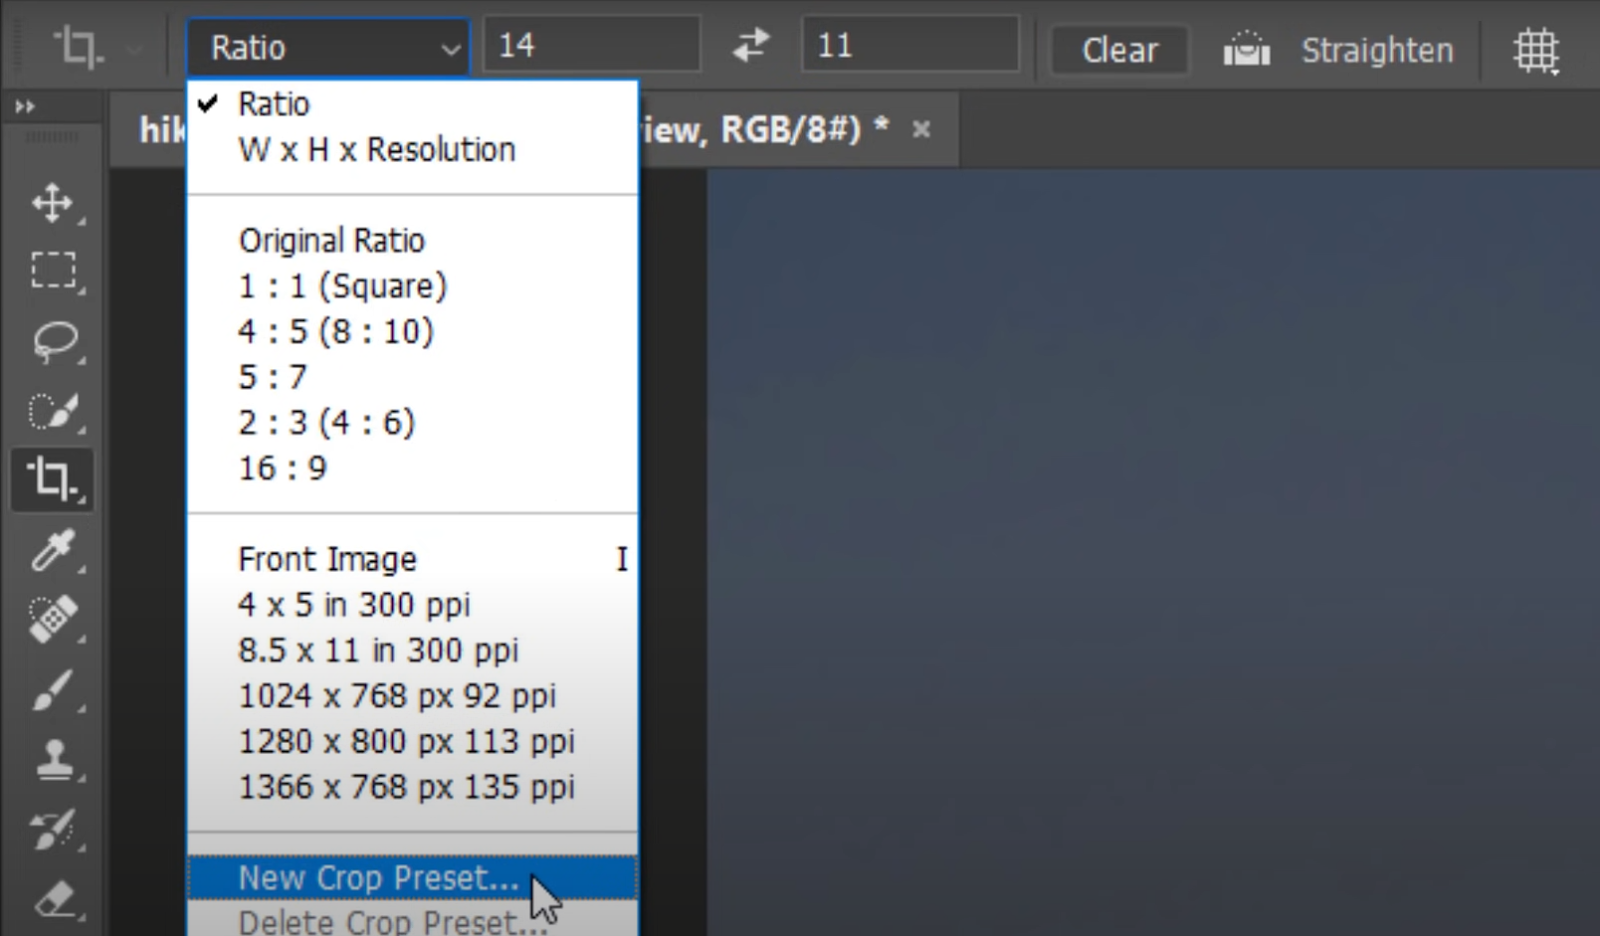
You can save this custom Aspect Ratio by heading back to the Aspect Ratio drop-down menu in the Options Bar and selecting New Crop Preset. Finish by naming your custom Aspect Ratio and then click OK.
Custom sizes and resolutions
The Crop Tool can also be used to set a specific image size and resolution. To do so, let's open the Aspect Ratio drop-down menu back in the Options Bar and then select W x H x Resolution.
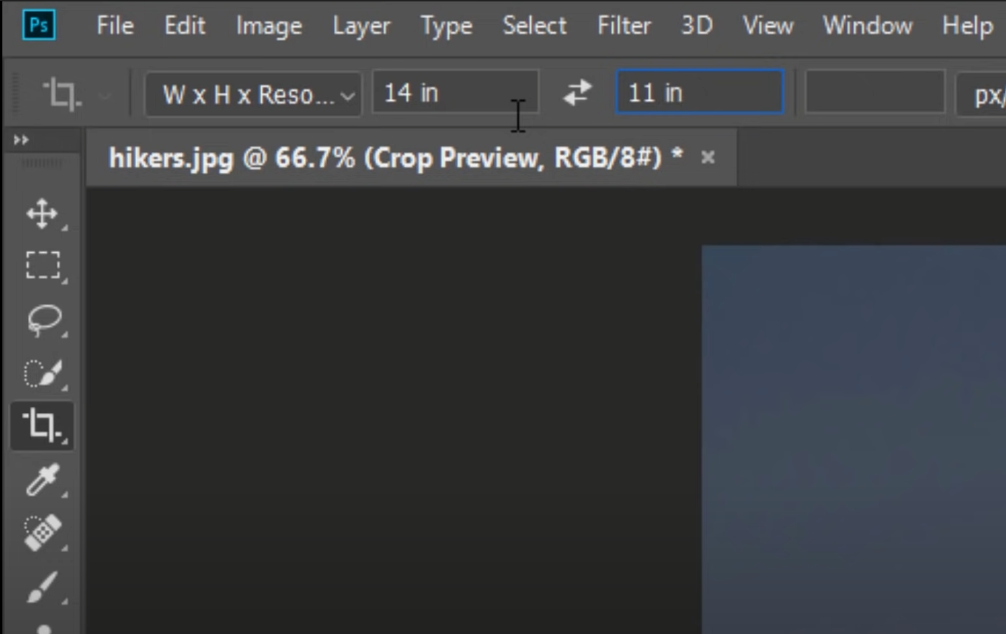
Enter your Aspect Ratio values as per usual in the Width and Height boxes with the addition of "in" after each number. So, for example, 14 in x 11 in.
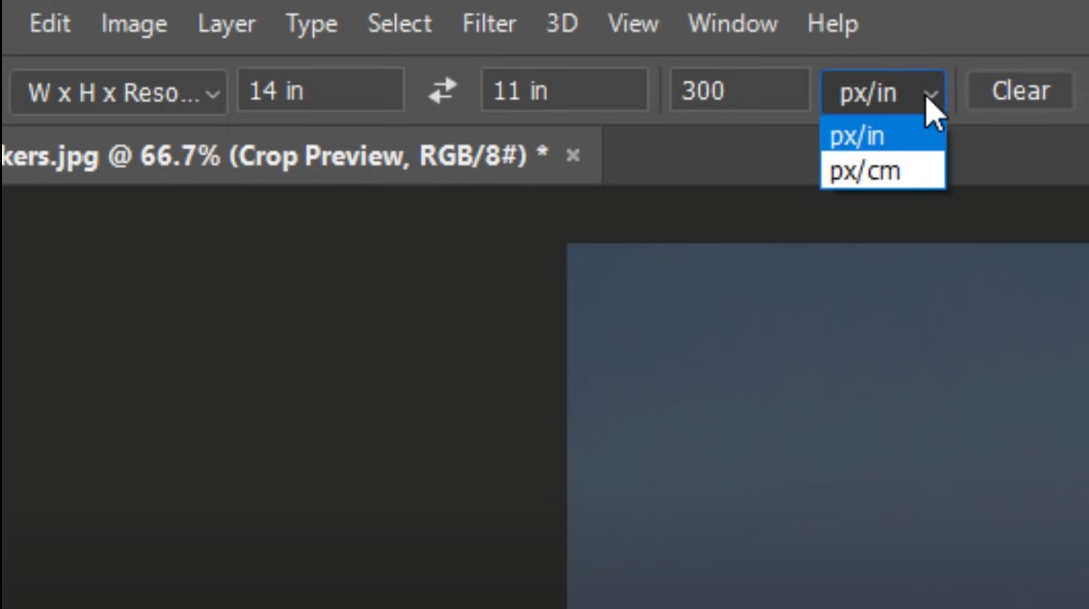
You'll notice that there is a third box to the right of the Width and Height boxes. This is one of the more specific cropping options that allows us to add a Resolution value.
In terms of image quality standards for printing, 300 pixels per inch is the standard. So, let's type 300 into this box. Finally, we'll see the measurement mode for this image in pixels per inch in the box to the right of the Resolution value box.
Now that we have our settings perfected let's resize the crop orientation. Once you're happy with your crop boundaries, click on the check mark at the end of the Options Bar. You can also use the crop command Enter or Return.
To ensure that we have the correct file format down, we can head over to the Image menu, select Image Size, and open the dialog box. There, you should confirm that your custom crop is preset and that your Width and Height are set to 14 x 11 inches and 300 pixels per inch.

If you want to undo your cropping efforts, simply head up to the Edit menu and select Undo Crop.
Crop overlay
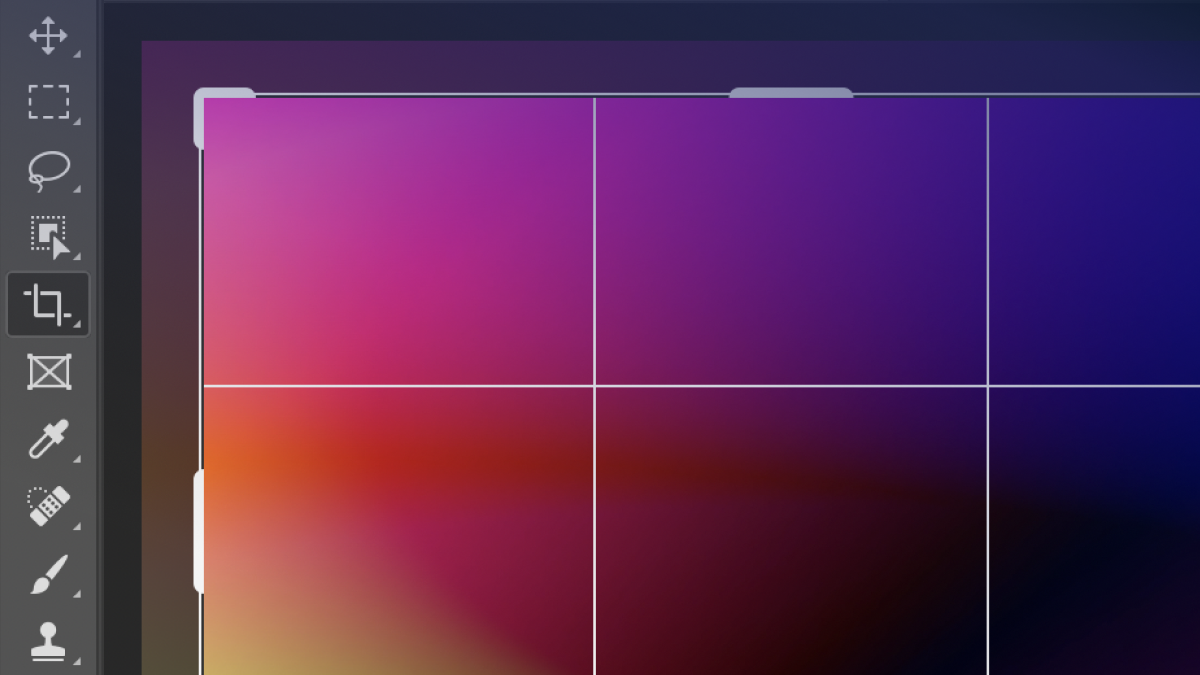
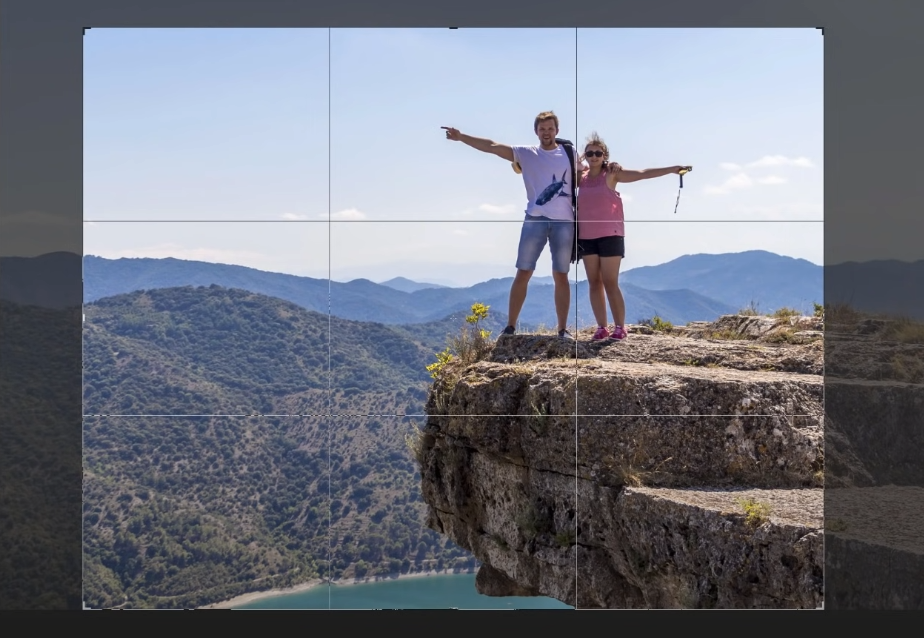
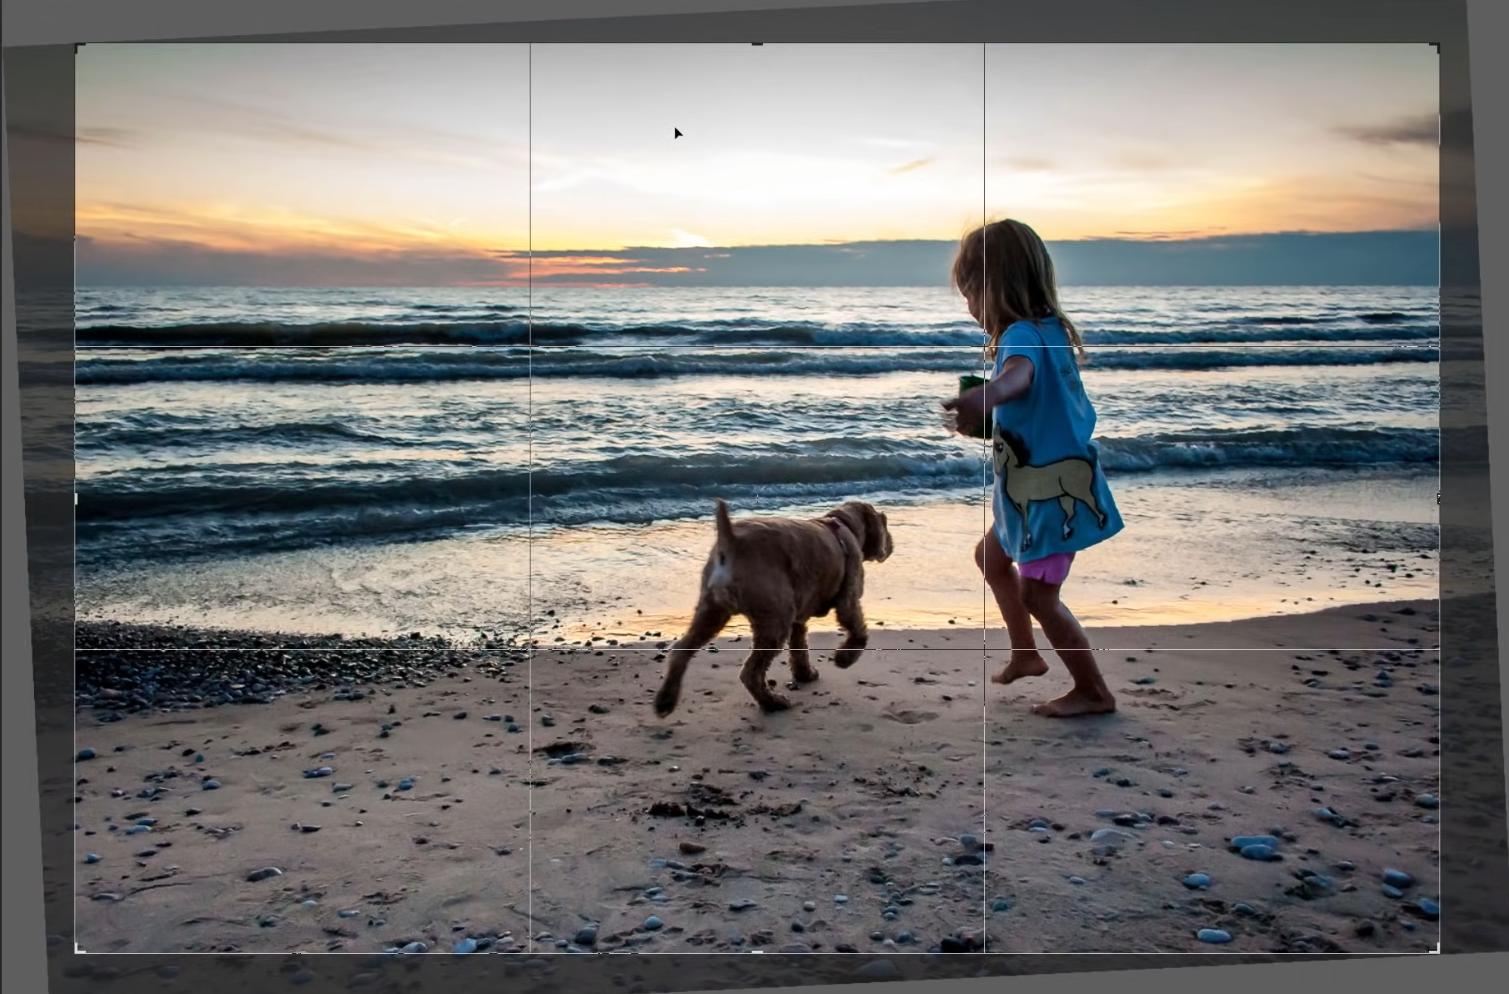
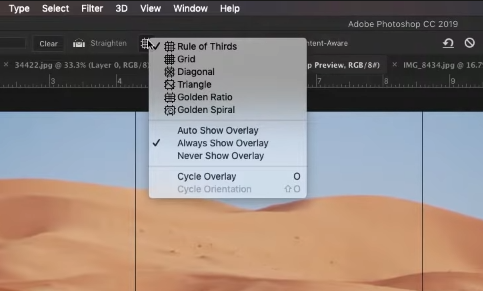
Now, let's find out how to use the Crop Overlay, which is another handy member of the Crop Tool options. Let's select the Crop Tool and then select our image with it. You'll see that a 3 x 3 grid fills the border.
As mentioned earlier, this grid represents the Rule of Thirds. This is an essential guide for graphic designers as it allows them to create more interesting compositions. If you align your image or photo's subject with the intersecting grid lines, your subject will stand out better.
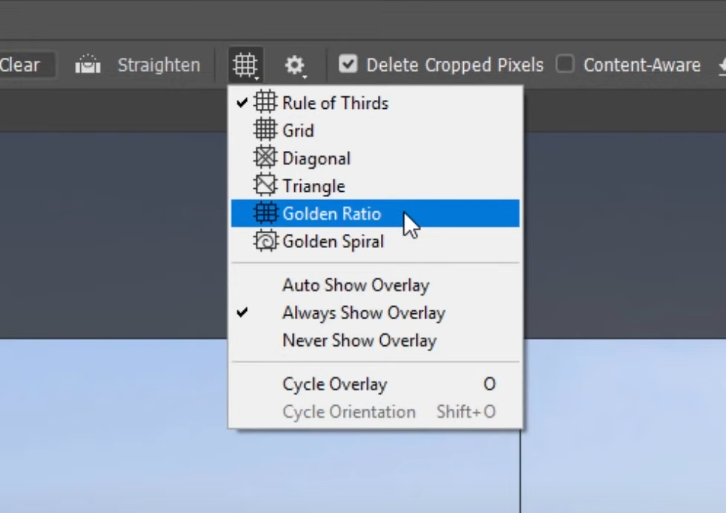
This is just one of the Crop Overlays available to us. Let's head over to the Options Bar and select the Overlay icon to see the various overlays available. Let's choose the Golden Ratio, which is similar to the Rule of Thirds; only its grid intersection points are tighter.
As useful as Photoshop is for cropping photos, you might find that this process is a bit time-consuming when cropping simple shapes and images. Graphic designers can save a lot of time in their day by using Linearity Curve for their graphic design tasks.
How to straighten images using the Crop Tool
There are plenty of additional crop options with Photoshop, like straightening images. For example, let's say that you took a beautiful photo of the ocean but found that the horizon was crooked on closer inspection.
Thankfully, we can fix this skewed image using the Crop Tool.
Get creative with Linearity Curve.
Learn more about our recent rebrand and how we chose our new colors.
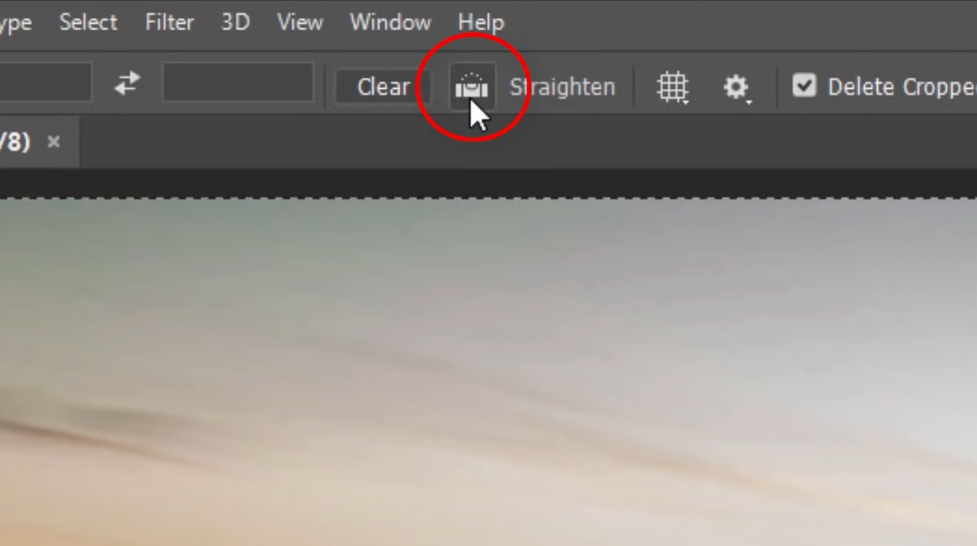
Select the Crop Tool and the Straighten Tool
Let's start this straightening process by selecting the Crop Tool from the Toolbar and then the Straighten Tool from the Options Bar.
Drawing the line
With the Straighten Tool selected, click on one end of the horizon, and then left-click or click and drag all the way to the other end of the horizon.

Once you let go of the left-click or click button, your image will instantly straighten.
Cropping out the borders
Once your image is straightened, the Crop Border will reappear. You'll notice that the edges of your image are now out of sync with the main area inside the Crop Border and that there are blank areas beyond that.
To crop the area inside of the Crop Border, resize it to your liking using the handles, and then simply press Enter or Return.
How to crop images non-destructively
Our following tutorial will take you through the process of cropping images non-destructively. Please select an image or photo that you would like to use for this process (preferably one with a central figure), and then we can begin!
If you would like to see what other graphic design authorities have to say on editing images, Linearity Curve offers simple and easy-to-follow tutorials on a range of image editing processes focused on vectorizing.
The right aspect ratio
Once you've loaded up your image, let's select the Crop Tool from the Toolbar and then the Ratio drop-down menu in the Options Bar and select the 4 : 5 (8 : 10) ratio.
Finish this step by left-clicking or clicking and dragging the Crop Border's handles until you have your preferred image type. Press Enter or Return, and we'll have a neat portrait crop.

How to change the orientation
If you would prefer your image to have a landscape orientation rather, then you can head back to the Options Bar and click on the Swap icon.
Now, the Crop Border will return to the image in landscape orientation. The Crop Border will probably be zoomed-in quite intensely at this stage, so we might want to left-click or click and drag the Crop Border out.
Managing the background
Once you release your left-click or click button, you’ll notice that a white background surrounds your image. This blank area was caused by Photoshop deleting the pixels following our initial crop.
Photoshop used the white color due to its default background fill setting. Photoshop removes these pixels with a setting that you can find in the Options Bar called Delete Cropped Pixels which is checked by default.

Selecting the correct settings
We’re now going to revert our image to its original form. Start by canceling the crop by heading back to the Options Bar and clicking on the Cancel button. Next, we’ll go to the File menu and select Revert.

Let’s swap the Aspect Ratio in the Options Menu, returning it to portrait. You can also click and drag on the Crop Border's handles to get a more satisfying crop. Don’t press Enter or Return just yet, however!
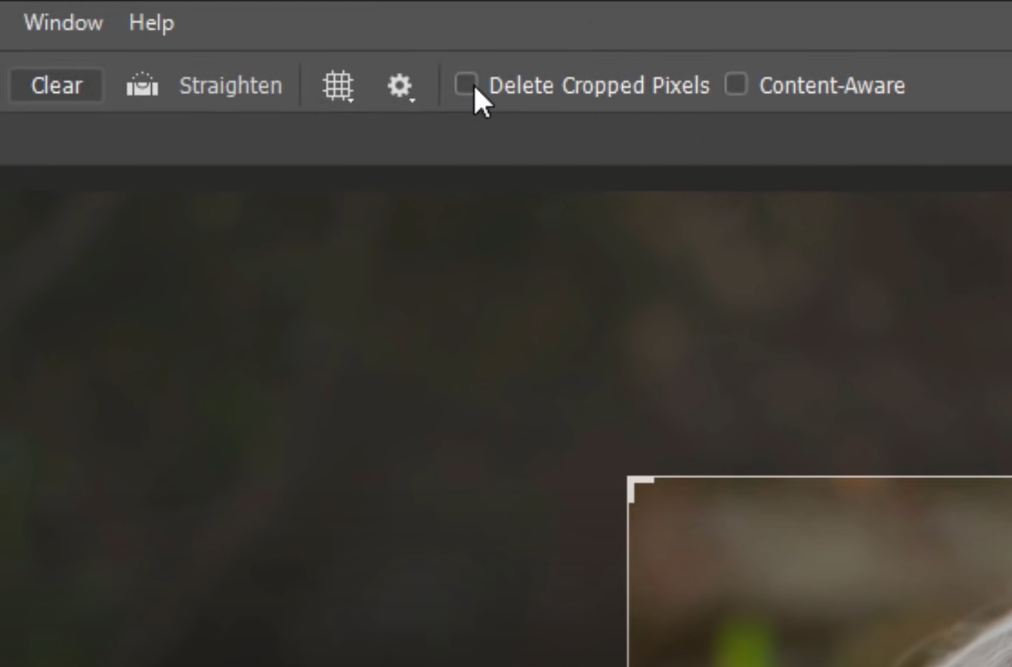
Before we crop our image, let’s make sure that we turn Delete Cropped Pixels off. Finish this step by pressing the Enter or Return button.
Cropping without destroying
Now, you can press Enter or Return to confirm your crop. It doesn’t look like anything has changed at this stage, but wait until we resize the crop.
Let’s return the Aspect Ration to landscape mode via the Options Menu. Once you do so, instead of a white background appearing outside of the Crop Border, you’ll see the rest of the image.
We saved the cropped pixels by turning off Delete Cropped Pixels, meaning that Photoshop hid the rest of the image rather than deleting it.
We can then resize the Crop Border to our liking and press Enter or Return.
Repositioning the image
There are other benefits to switching Delete Cropped Pixels off.
Seeing as Photoshop has kept the rest of the image outside of our cropped section, we can reposition it for a better composition.

Let's revisit the Toolbar and select the Move Tool. Now, we can left-click or click and drag the image until we have a satisfying final product.
Now that we know how to use the Crop Tool, let’s take a deeper look into its subtler functions.
Crop Tool tips + tricks
We know that using the Crop Tool for its more basic services is straightforward. Most people simply crop the part of the image they want to keep and discard the rest.
The Crop Tool is essential for landing a superb composition when used to its full potential. Now, let’s find out how to wield the Crop Tool like a Photoshop master with these advanced tips.
Perfecting the aspect ratio
Now that you know how the Aspect Ratio element to cropping works, let’s find out how to land a perfect composition. First, we’ll load up an image with a prominent figure in it.
The rule of thirds, revisited
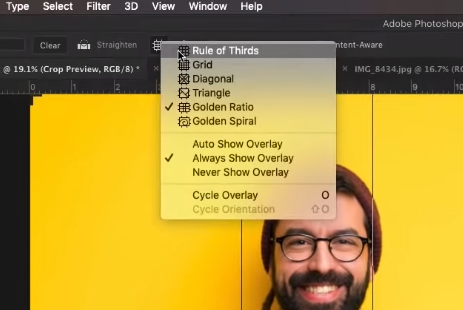
We begin this process by heading over to the Options Bar and selecting the Overlay icon, choosing the Rule of Thirds.
Reposition the crop overlay
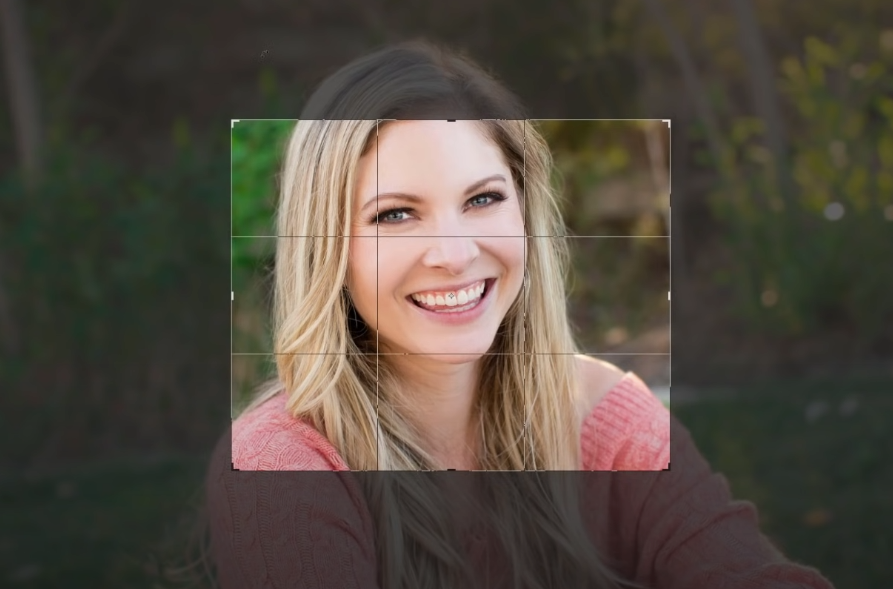
Once this overlay is applied, we can hold down the Alt or Option key and the Shift key to maintain the initial Aspect Ratio, moving the Crop Overlay to the figure’s face.
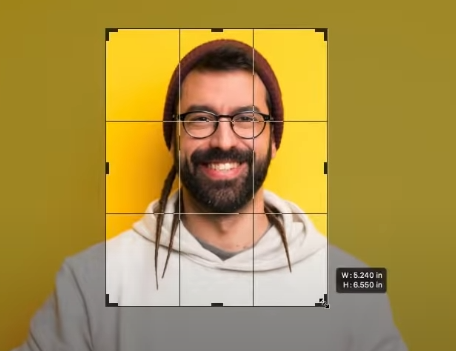
Apply the crop
You want to align the top-two grid intersections with the figure’s eyes. Once you press Enter and apply the crop, you’ll notice how striking the figure’s face (and eyes) become. This cropping method is excellent for drawing attention to a figure’s most appealing features, generally found in the face.

Avoid cropping these areas
Faces are a fantastic part of a figure to crop, but what about the rest of the body? When it comes to trimming an entire figure, there are some areas that you should avoid cutting out.
One design principle states that you shouldn't crop a figure’s joints. Ankles, knees, hips, and elbows should be kept in crops rather than cut out.
Play around with the Crop Overlay
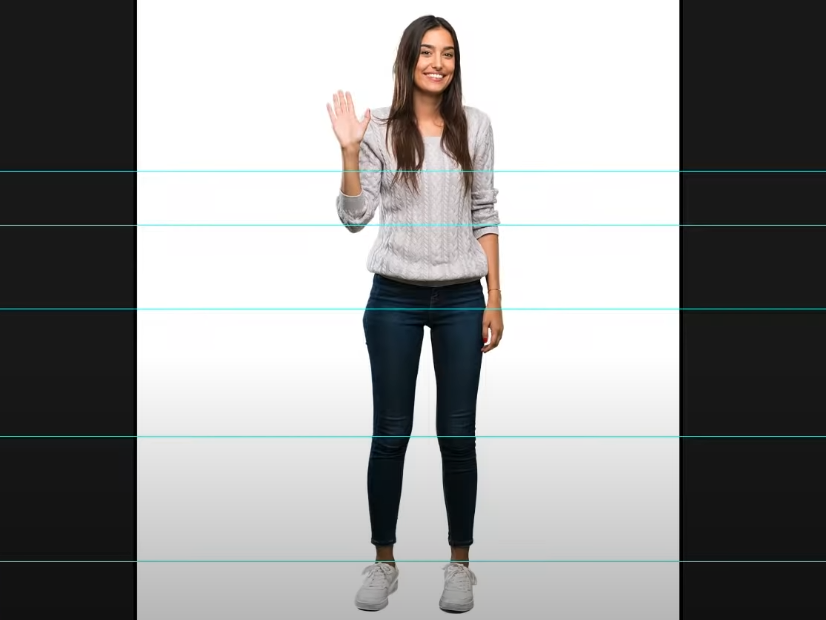
To better demonstrate this principle, let’s move the Crop Overlay around an image with a prominent figure in it. Hold down Alt or Options + Shift and drag your Crop Overlay around the figure.
Crop at a highlighted point
Try landing your Crop Overlay on one of the highlighted lines on the figure and then press Enter.
You’ll probably get a bit of an uncomfortable feeling from this crop. As a general rule, cropping a figure at any of the highlighted levels will lead to an awkward final image.
Deciding on the focus
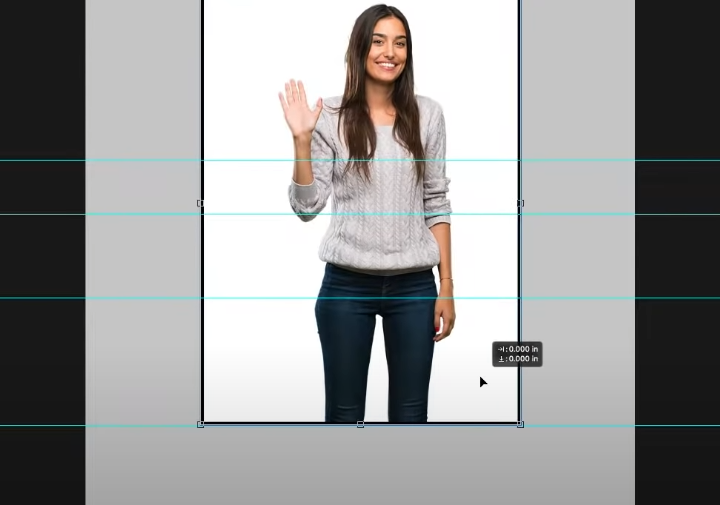
This point doesn’t really need much elaboration, but there are two things to keep in mind when cropping a figure, depending on what you would like to stand out.
If you leave a person’s body in the final image, their physical characteristics will be emphasized, such as their posture, clothes, and body language.
On the other hand, cropping close to a figure’s face highlights their personality and expression.
Keep these principles in mind when deciding what you would like the viewer to focus on in an advert or social media post.
Ready to create brand assets that pack a punch?
Visit our Academy for free design courses.
More on overlays
Let’s discuss Photoshop’s different overlays a bit more, as they are both essential for cropping an image in the most aesthetically pleasing way possible.
Why don’t we load up a picture with a landscape and a small but interesting figure floating somewhere in the middle ground to better understand these principles?
The Golden Spiral
Let’s start this overlay deep-dive by selecting the Crop Tool from the Toolbar. Head over to Overlays in the Options Bar. While the Rule of Thirds is this department’s default setting, we’re going to play around with a new one.
If we press the O key, we can toggle between the overlays. Let’s cycle through the different overlays until we reach the Golden Spiral overlay.
Adding tension
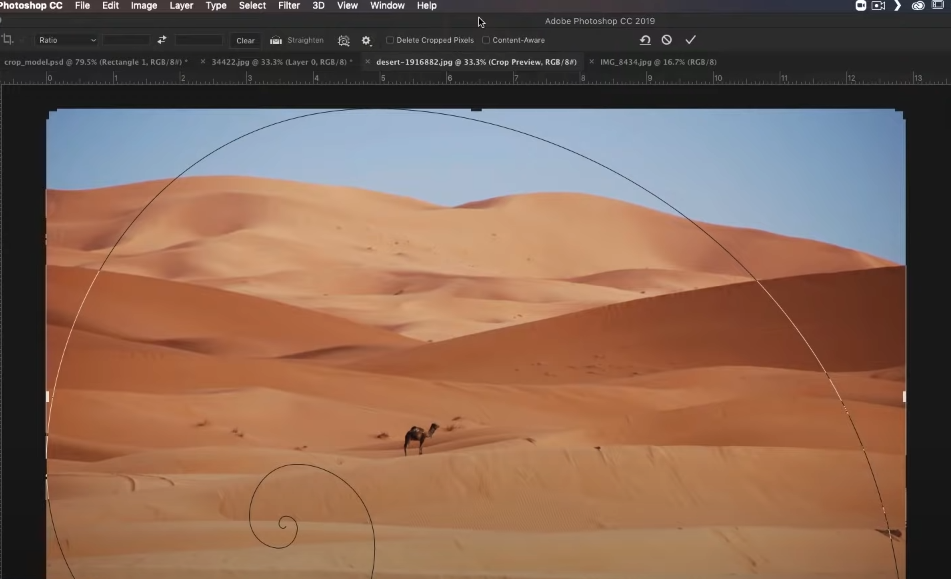
The Golden Spiral overlay should be in the above-pictured position, but if not, you can press Shift + O to reposition it until the spiral ends at the bottom-left corner of the screen. Now, let’s drag the Crop Overlay until the spiral ends where your figure is placed.
Press Enter to confirm your crop, and then look at your new image!

It should look a lot better than the original, with a far better-emphasized figure. The Golden Spiral adds tension to your image, ensuring that the figure is the focal point without taking away from the beauty of the landscape.
When you use the Golden Spiral, try to crop your image so that the figure is facing into the image, rather than out. This positioning will draw more attention to the overall scene and focus the tension in the landscape.
If you would like to learn more about when and how to correctly use the Rule of Thirds, read more on our blog.
How to cut images out of a background
Cutting images out of a background takes only one click in Linearity Curve, but to do it in Photoshop takes a bit more preparation, time, and an understanding of Photoshop's Lasso Tool.
If you'd like to learn how to cut images out of a background in just one click, read more about our Background Removal tool.
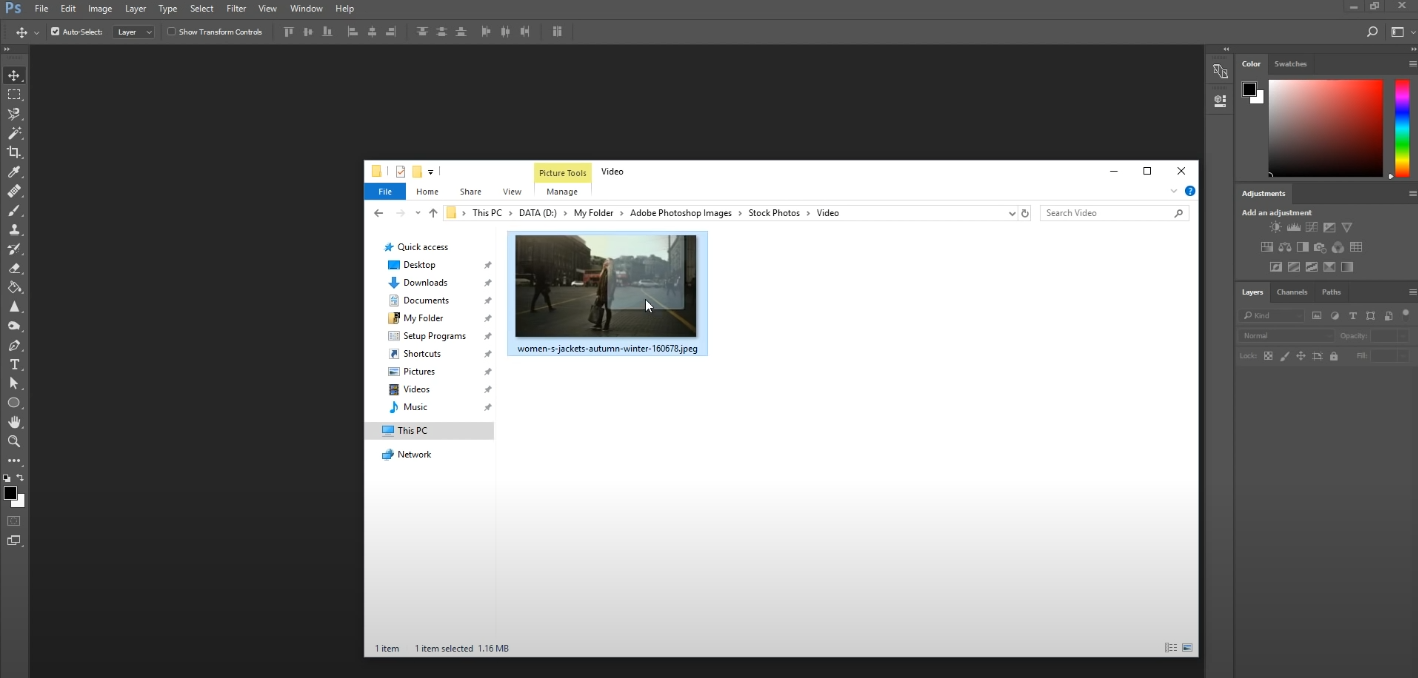
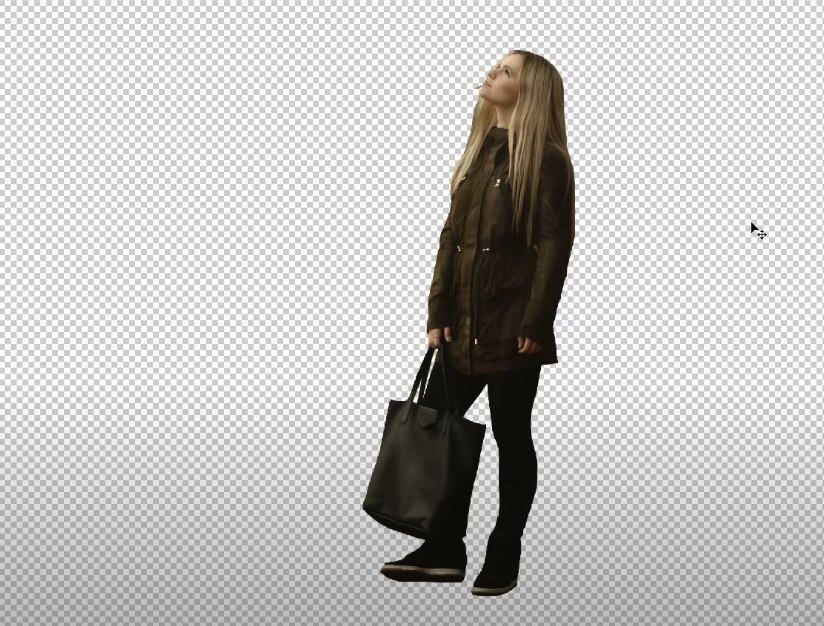
If you'd rather use Photoshop, we'll teach you that as well. Let's jump right in by finding a suitable image for this tutorial, preferably something with a person in the foreground.
Setting up your image
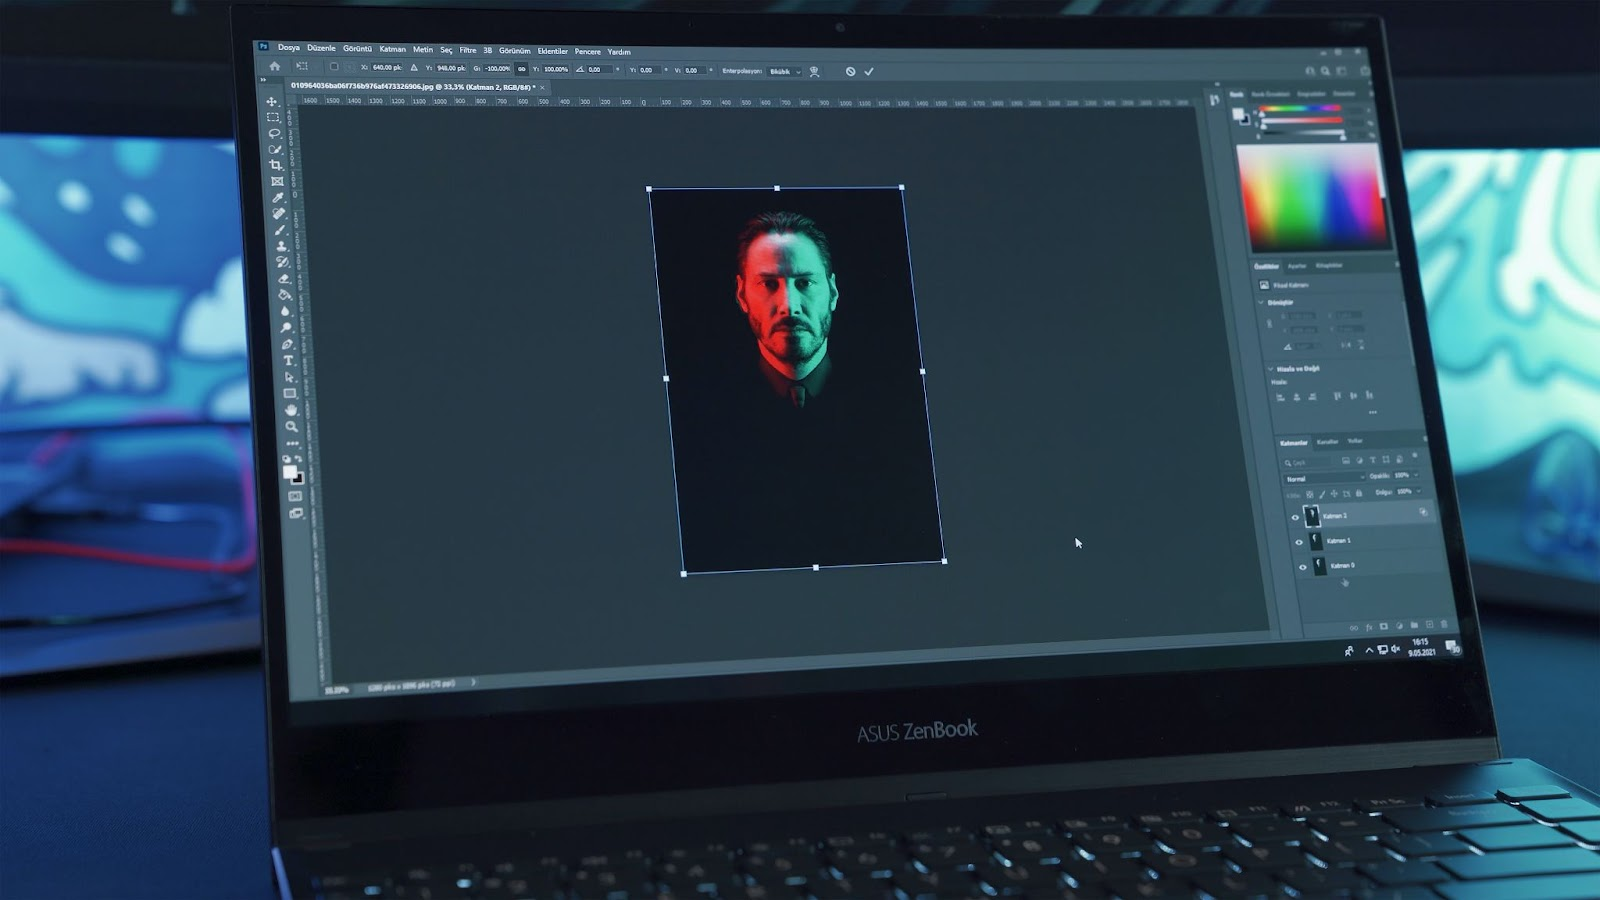
Once you've got the ideal image or photo, we can start this tutorial by loading it into your work area.
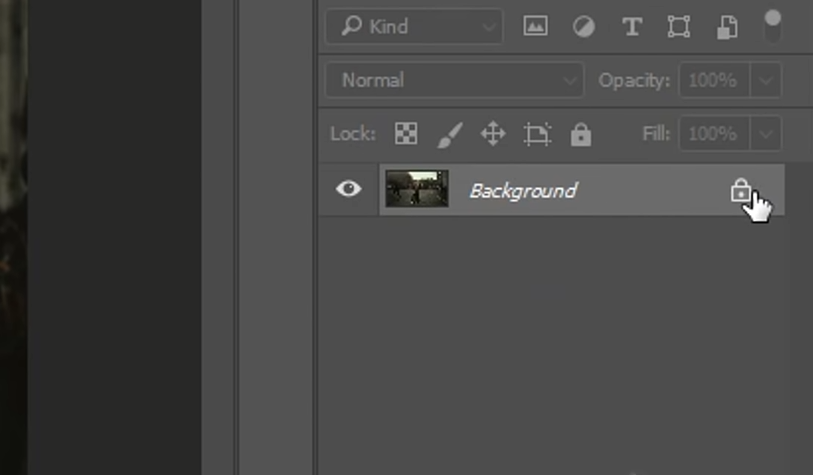
Once your original image is in place, head over to the Layer section in the bottom-right of your display and unlock this image to turn it into a layer. You can do this by clicking the little lock icon with the left mouse button.
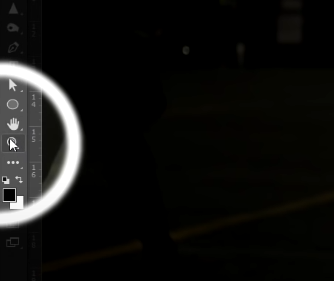
Let’s zoom in on the figure. If you'd prefer to use a tool, select the Zoom Tool that can be found to the left of your screen near the bottom of the Toolbar.
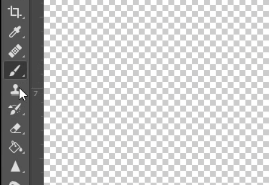
The right tool for the job: the Lasso Tool
We will use the Magnetic Lasso Tool for this tutorial. You can select it from the Toolbar, or by simply pressing the L key.
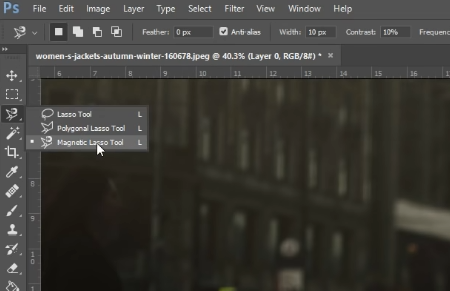
The Magnetic Lasso Tool works much like the Pen Tool, where you can trace an accurate line around an object. The benefit of the Magnetic Lasso Tool is that Photoshop will automatically detect the outline of an object as you draw around it.
Your job is to guide the Magnetic Lasso Tool around the object you would like to cut out.
Guiding the Magnetic Lasso Tool
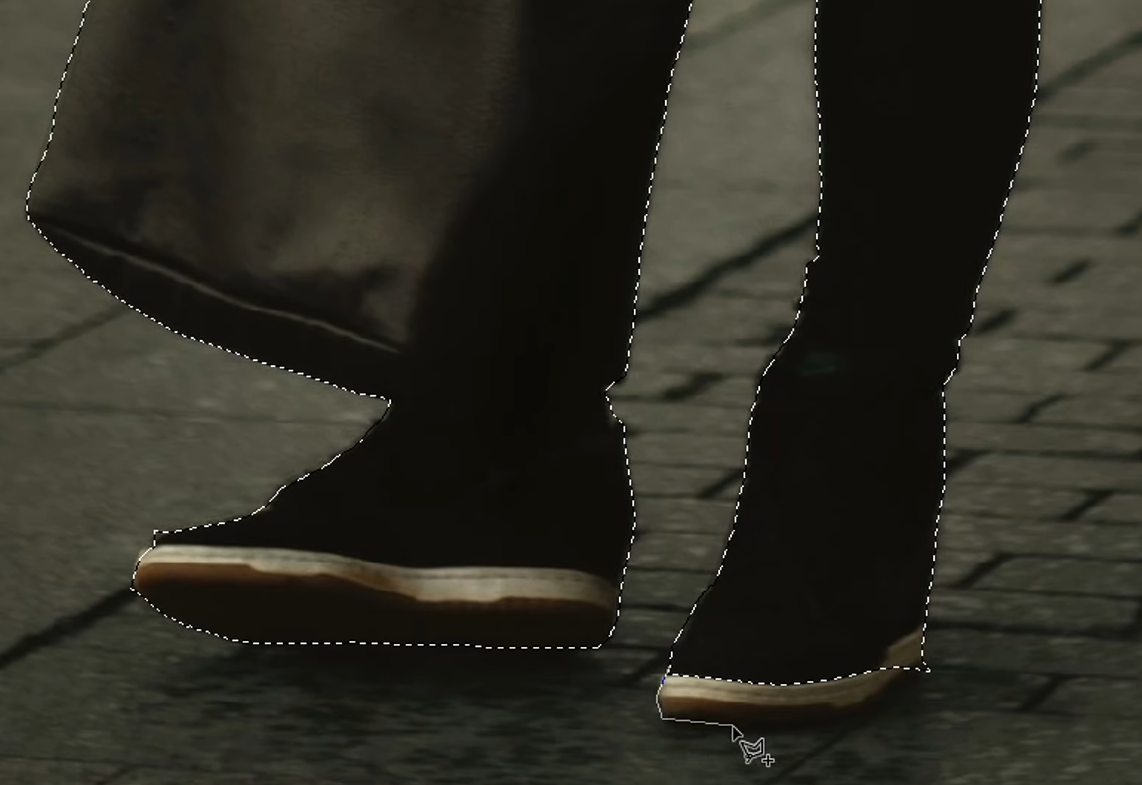
Let’s get lassoing! The most accessible place to start with the Magnetic Lasso Tool is generally at the bottom of a figure. So, if you want to lasso a person, start with their feet.
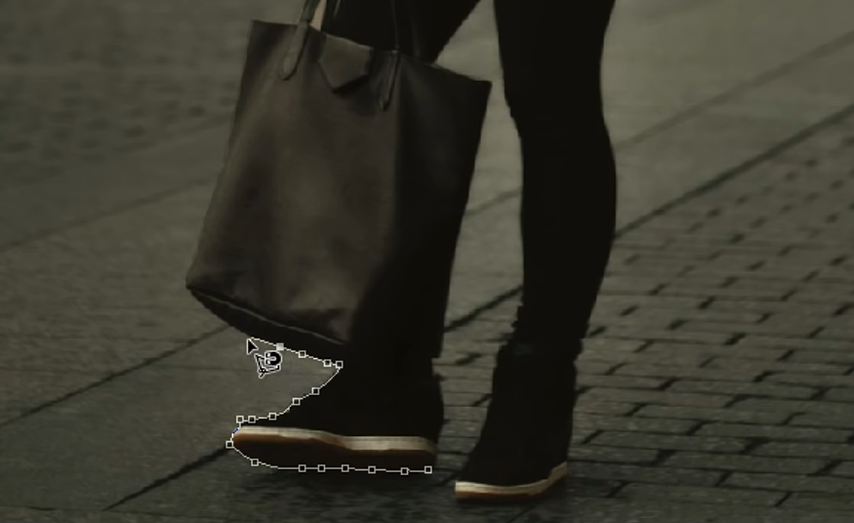
We’re going to click at a point near the heel of your figure, and then drag the mouse along the foot, up the ankle, and across the rest of the figure’s outline.
While the Magnetic Lasso Tool will do most of the work for you, you can click at specific points along your outline for maximum accuracy.
You might start this process off slowly as you get used to it, but soon you’ll soon pick up speed as the Magnetic Lasso Tool is relatively accurate.
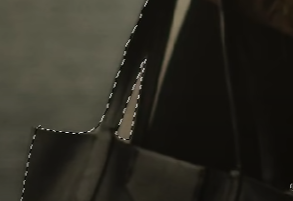
The Magnetic Lasso Tool might struggle a bit with sharp corners, so you could help it along its way by left-clicking or clicking your way through these precise edges.
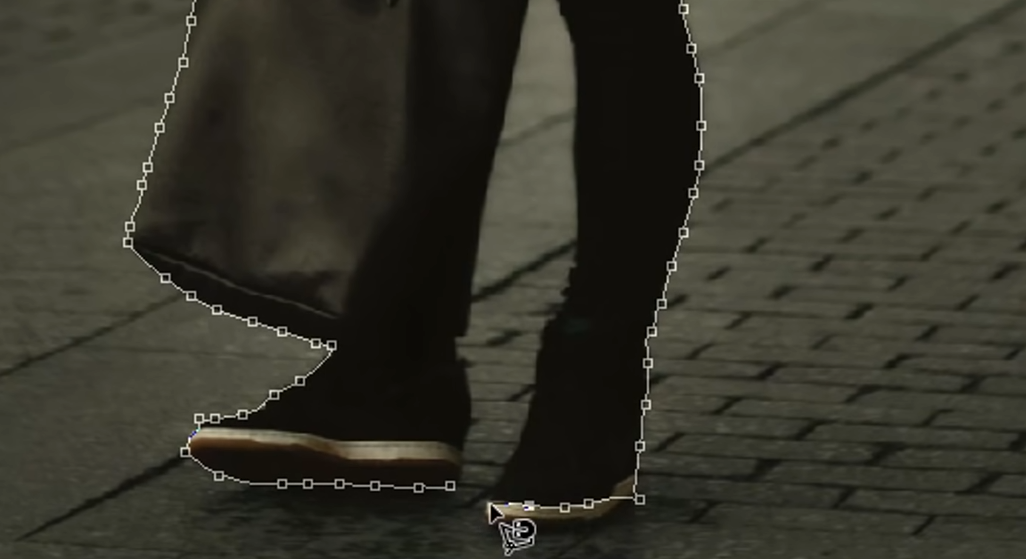
You might find that the Magnetic Lasso Tool fails to pick up certain colors. Don’t worry about an imperfect outline, as we’ll fix it later.
Trace a complete outline along the figure and then finish the job by ending where you started with the Magnetic Lasso Tool. Finish by left-clicking or clicking on the first point you made.
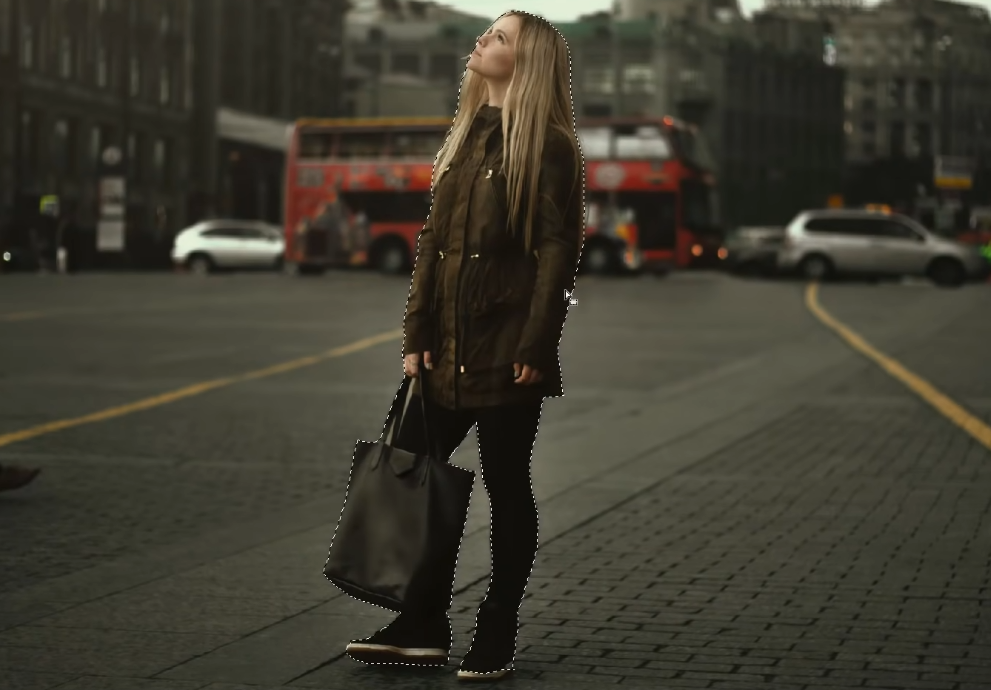
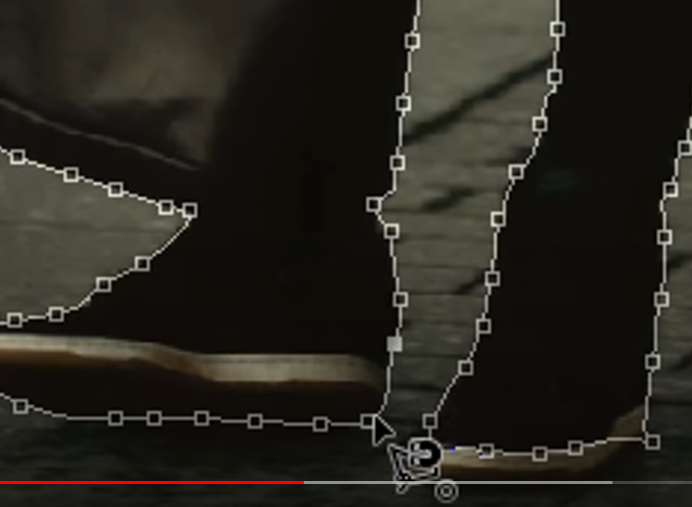
Once you finish tracing your outline, a thin, black-and-white line will appear. Now, we can fix the areas that the Magnetic Lasso Tool didn’t pick up correctly.
Perfecting the outline
To smooth out the kinks in our outline, we will use the Polygonal Lasso Tool. You can select it from the Toolbar or press the L key and then left-click or click on it.
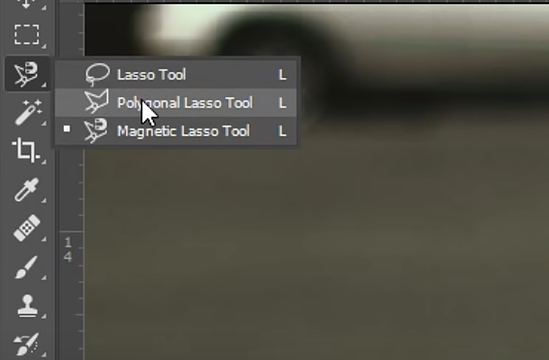
We’ll also select Add to selection from the Options Bar. This will allow us to include our new changes to the original outline.
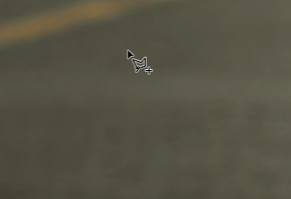
You should now see a + symbol added to the Polygonal Lasso Tool. If we hold down the Alt or Option key, the + symbol will turn into a - symbol. With these settings, we can begin outlining the areas of our figure that we didn’t catch in the initial tracing process.
Hold down the Alt or Options key and then left-click or click to make your first point. You can now let go of the Alt or Options key and trace the gap you want removed.
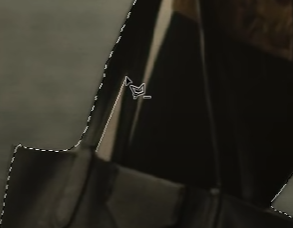
Once you join your lines, you’ll notice that the shape takes on the same black and white, snaking outline.
We can also adjust our original outline this way by left-clicking or clicking at the point where the Magnetic Lasso Tool began to miss the figure’s edges. Left-click or click your way around the figure’s actual edge and then finish this addition by holding down the Ctrl key.
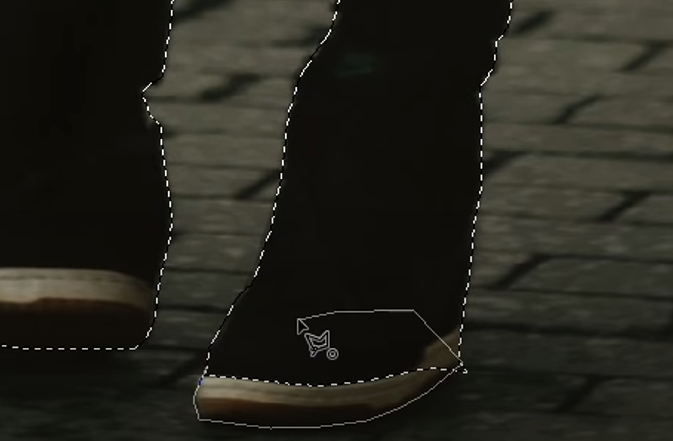
While holding down the Ctrl key, you’ll notice that the + symbol under the Polygonal Lasso Tool now turns into a circular one. Don’t take your finger off the Ctrl key and finish this job by left-clicking or clicking.
Once you’re happy with the outline, we can move on to the next step!
Adding a layer mask
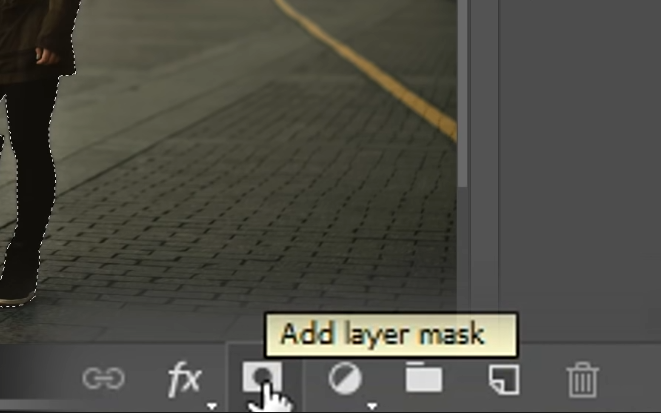
We’re now going to add a layer mask. Let’s head down to the bottom-right corner of the display and click on the Add layer mask icon. Your background will disappear, but you can always switch back to it by unselecting the mask.
Smoothing out the cut image
Now that we have our cut-out figure on its own, we can do some touch-ups to get it in complete working order. Let’s start this process by selecting the Brush Tool from the Toolbar.
We also want to choose Feathering from the Brush Tool Options Bar’s Brush Preset Picker list. Now you can feather out the edges of the figure.
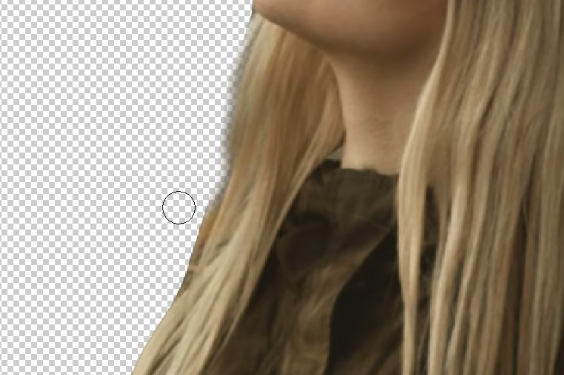
This might be a bit of a labor-intensive task, but it’s certainly worth it when you have a realistic-looking standalone figure.
Getting rid of the background
If you would like to delete your background completely, you can right-click or ctrl + click on the Layer and select Convert to Smart Object.
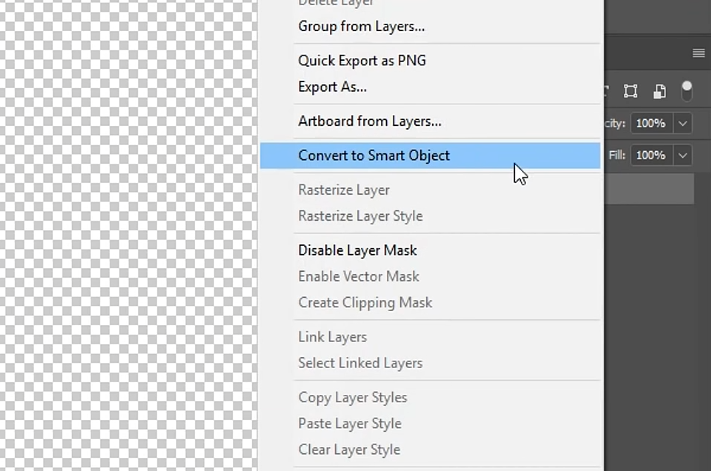
Now, you are left with a neat, standalone figure that you can use in any of your projects.
This tutorial was a long-winded process, and you should know that you can cut images far more quickly (and cheaper) with software like Linearity Curve.
How to cut in Linearity Curve
While Photoshop’s Crop Tool works well for photographs, graphic designers can save much time using Linearity Curve's speedier Cut Tool for their illustrations. Linearity Curve is also free to use, unlike Photoshop’s expensive subscription fees.
Draw a rectangle
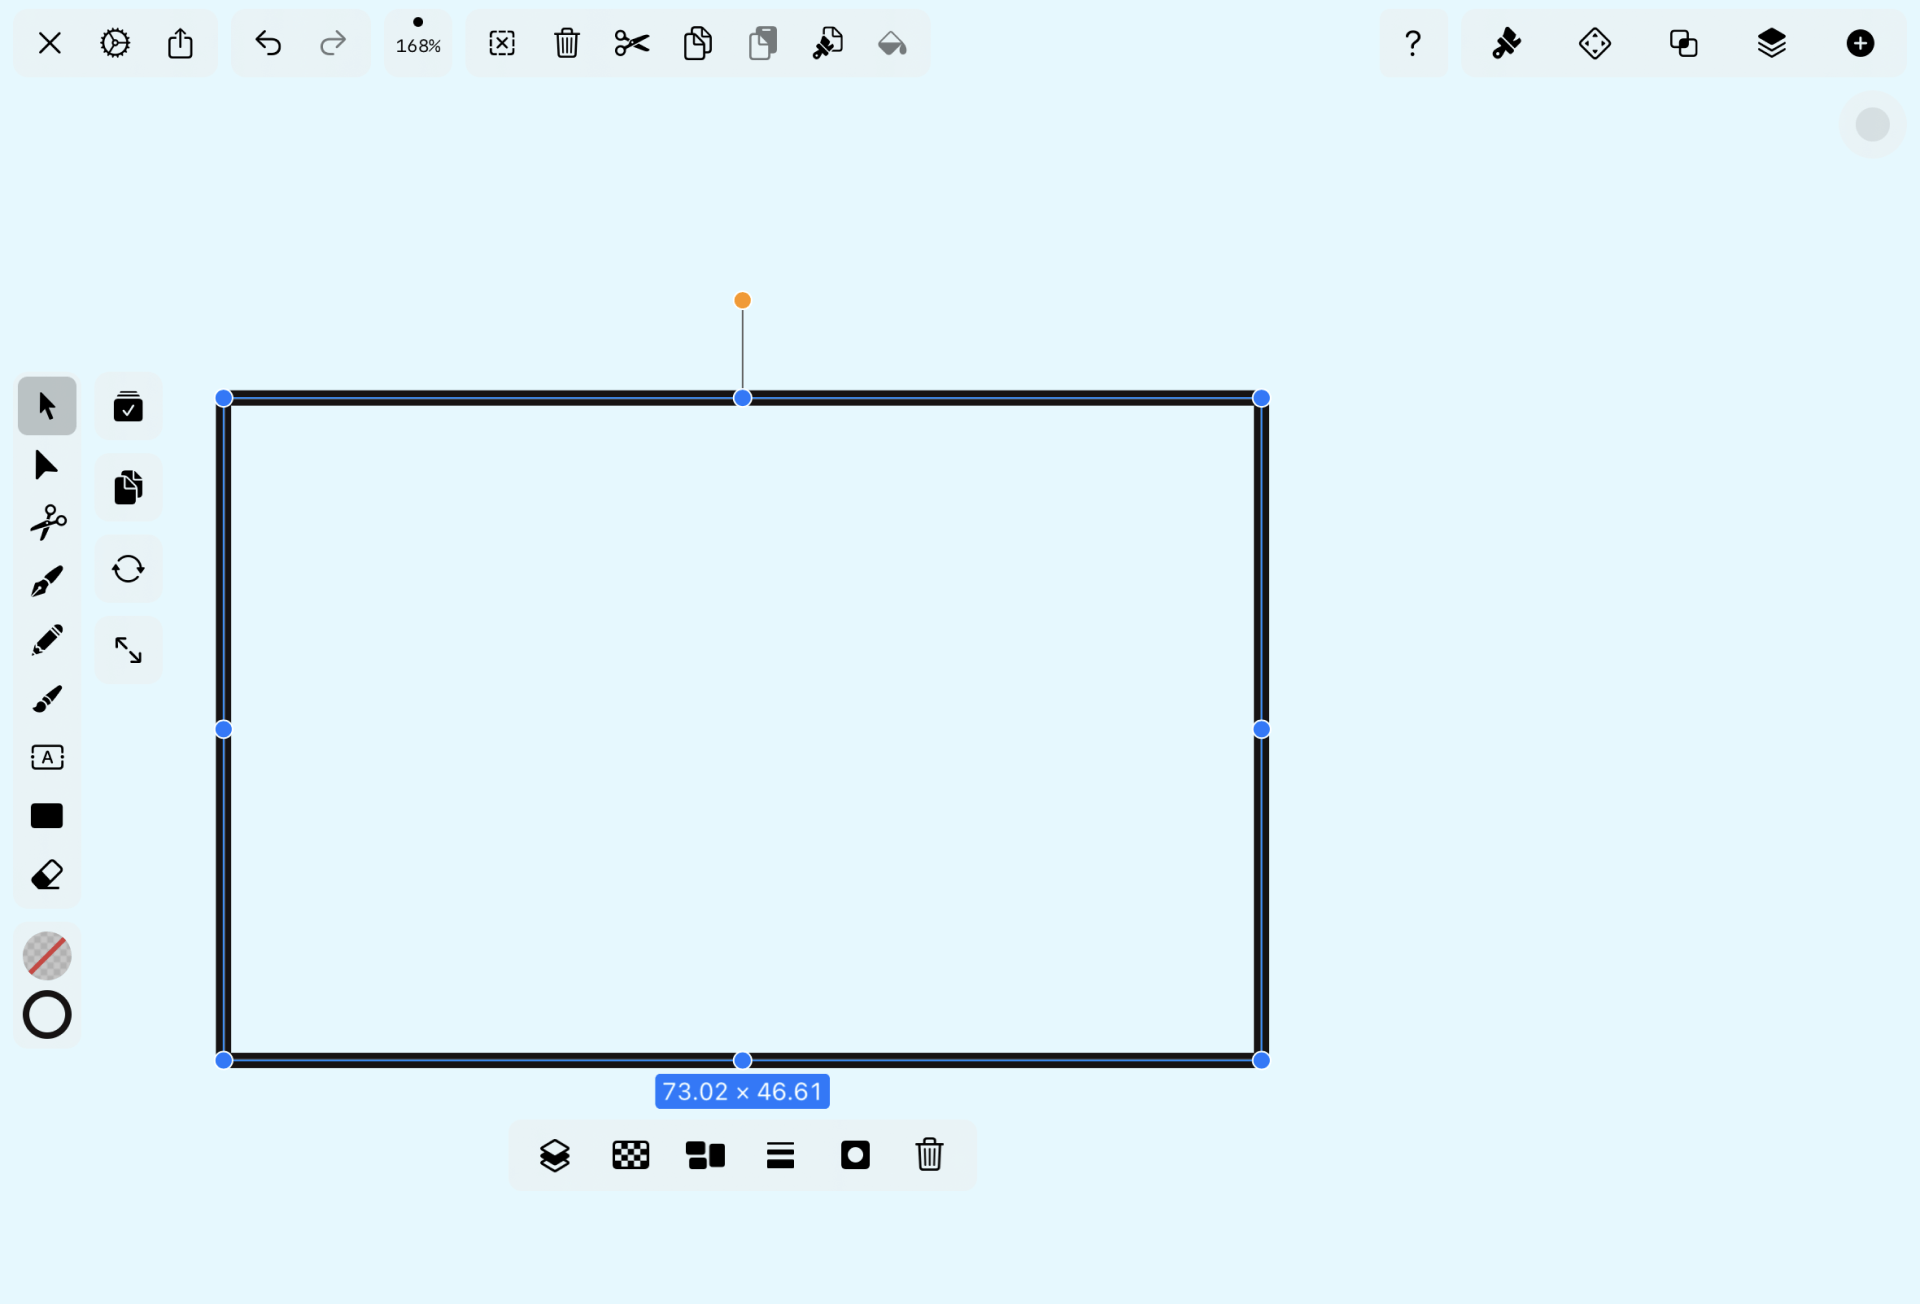
Let’s start this tutorial by drawing a rectangle using the Rectangle Tool. Select the Rectangle Tool from the Toolbar and then press or click and drag a rectangle out into your canvas.
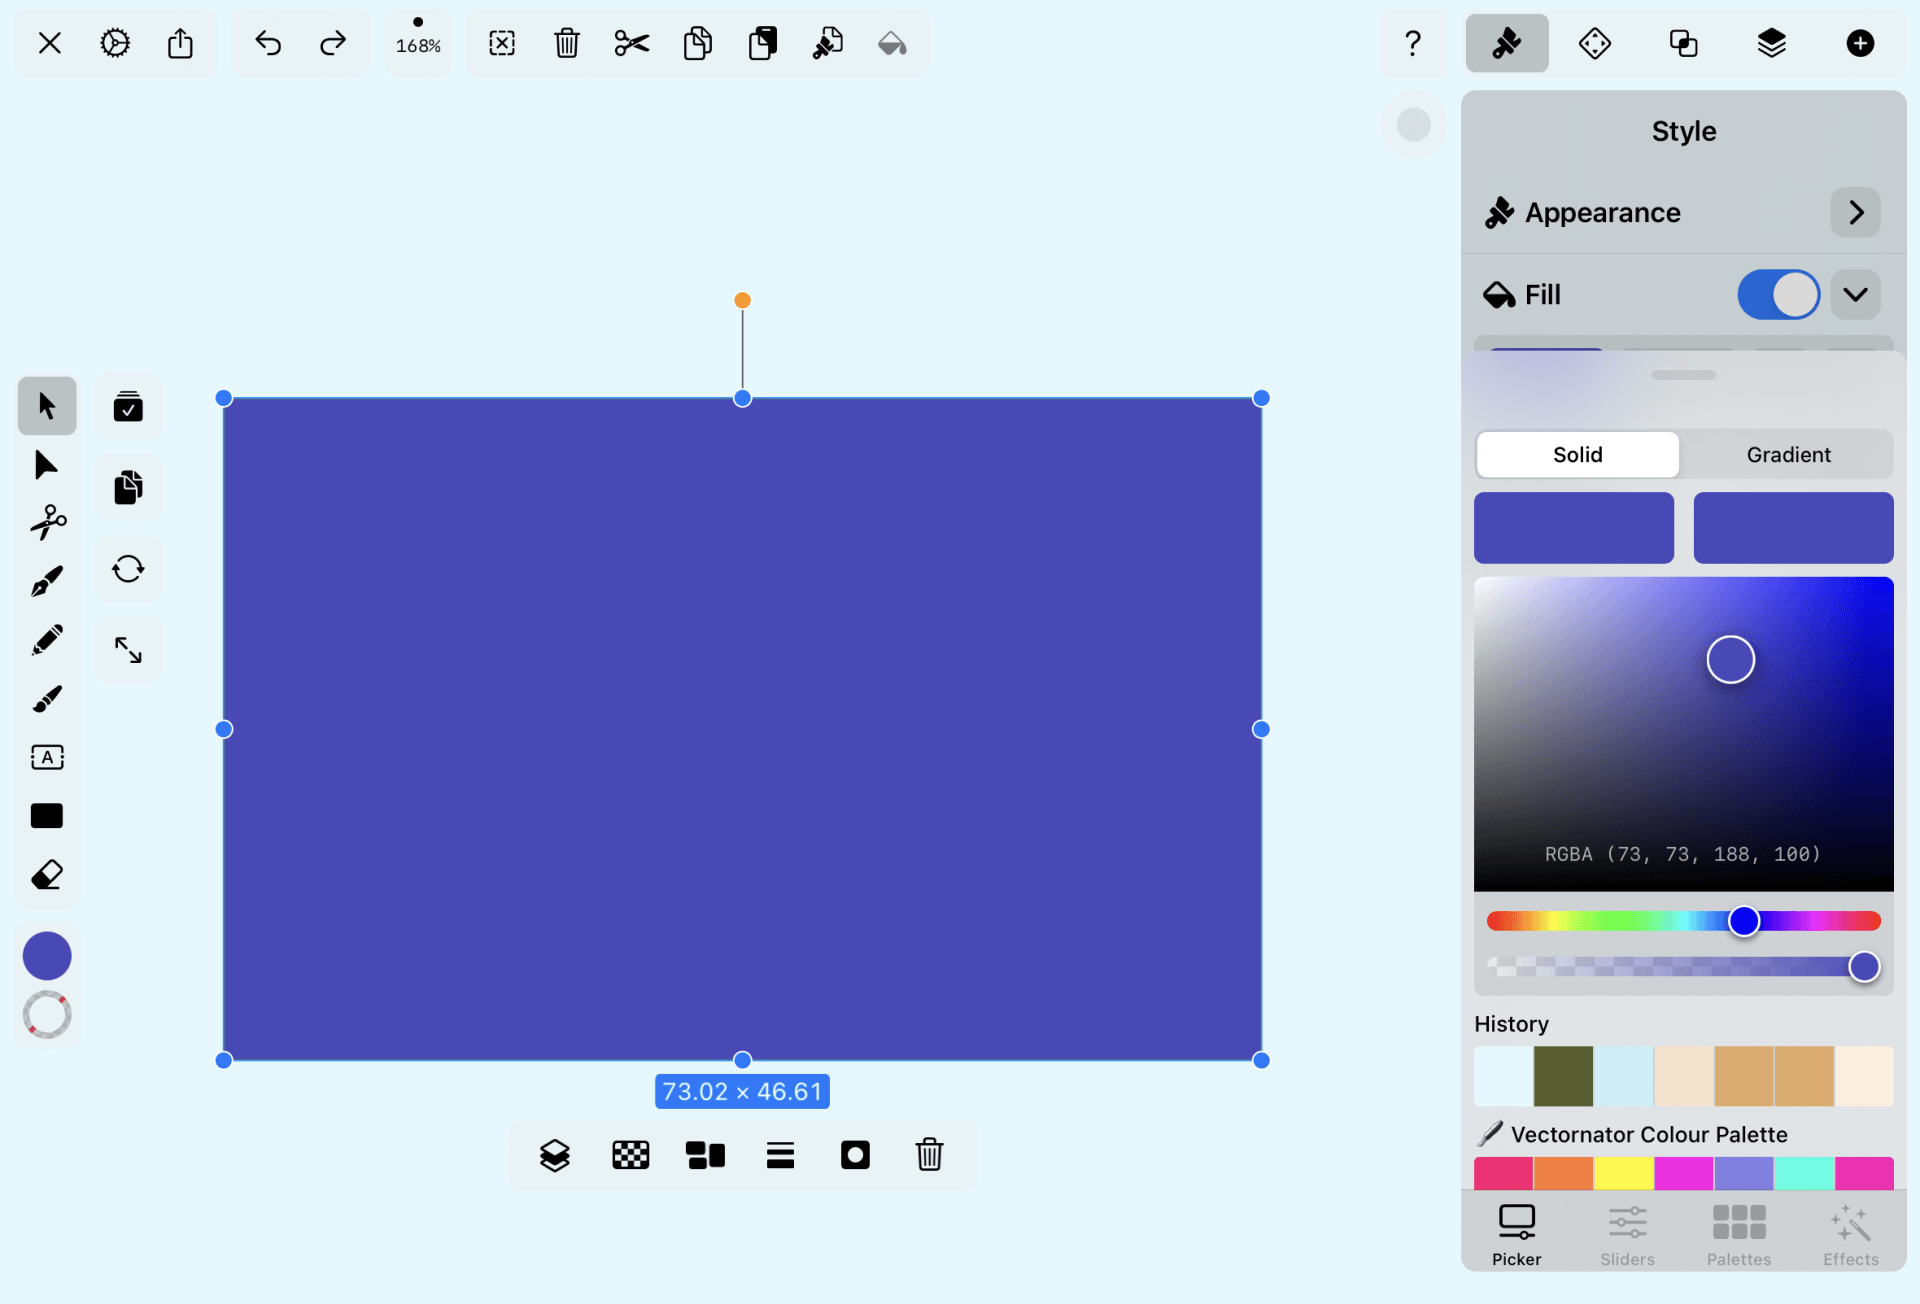
Let’s select our rectangle using the Selection Tool and then hop over to the Style Tab. From there, we can press or click on the Fill & Stroke switch to fill our rectangle.
On anchor points
Now that we have our rectangle, we can add anchor points to it. These anchor points will serve as starting points for our cutting task.
First, we need to add the anchor points. We can begin this process by using the Direct Selection tool from the Toolbar.
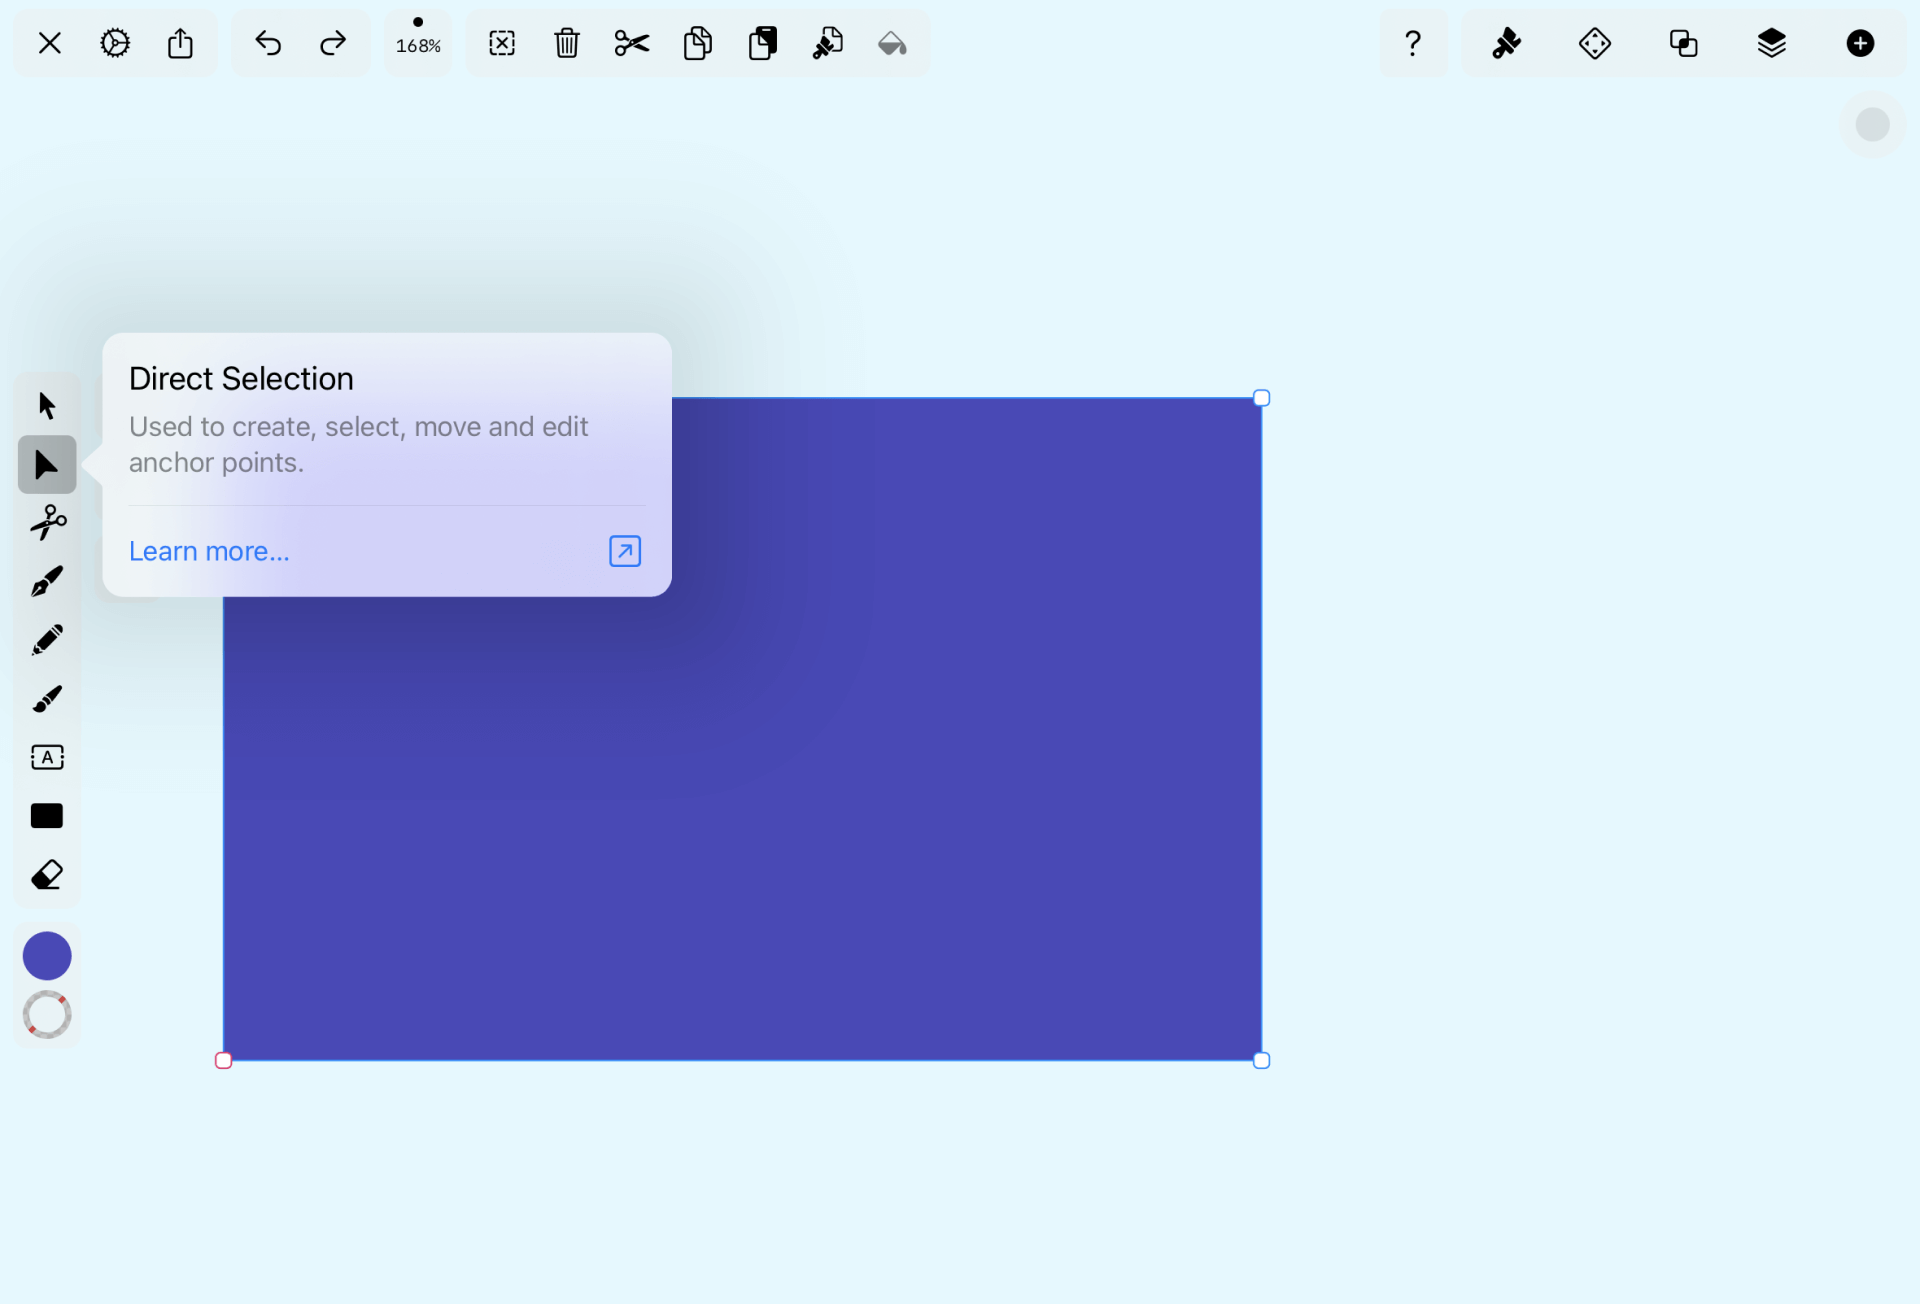
Now, select your rectangle with the Direct Select tool. You’ll notice that the anchor points appear in the four corners of your rectangle.
If we want to cut our rectangle at its center, we need to add anchor points to the center of the rectangle. There are two ways to add anchor points, the first being by clicking or pressing on the rectangle line.
As you can see, this process is not very accurate, and you might struggle to place an anchor point at the direct center of your rectangle. Why don’t we try the second and more precise way of adding anchor points instead?
Add anchor points automatically
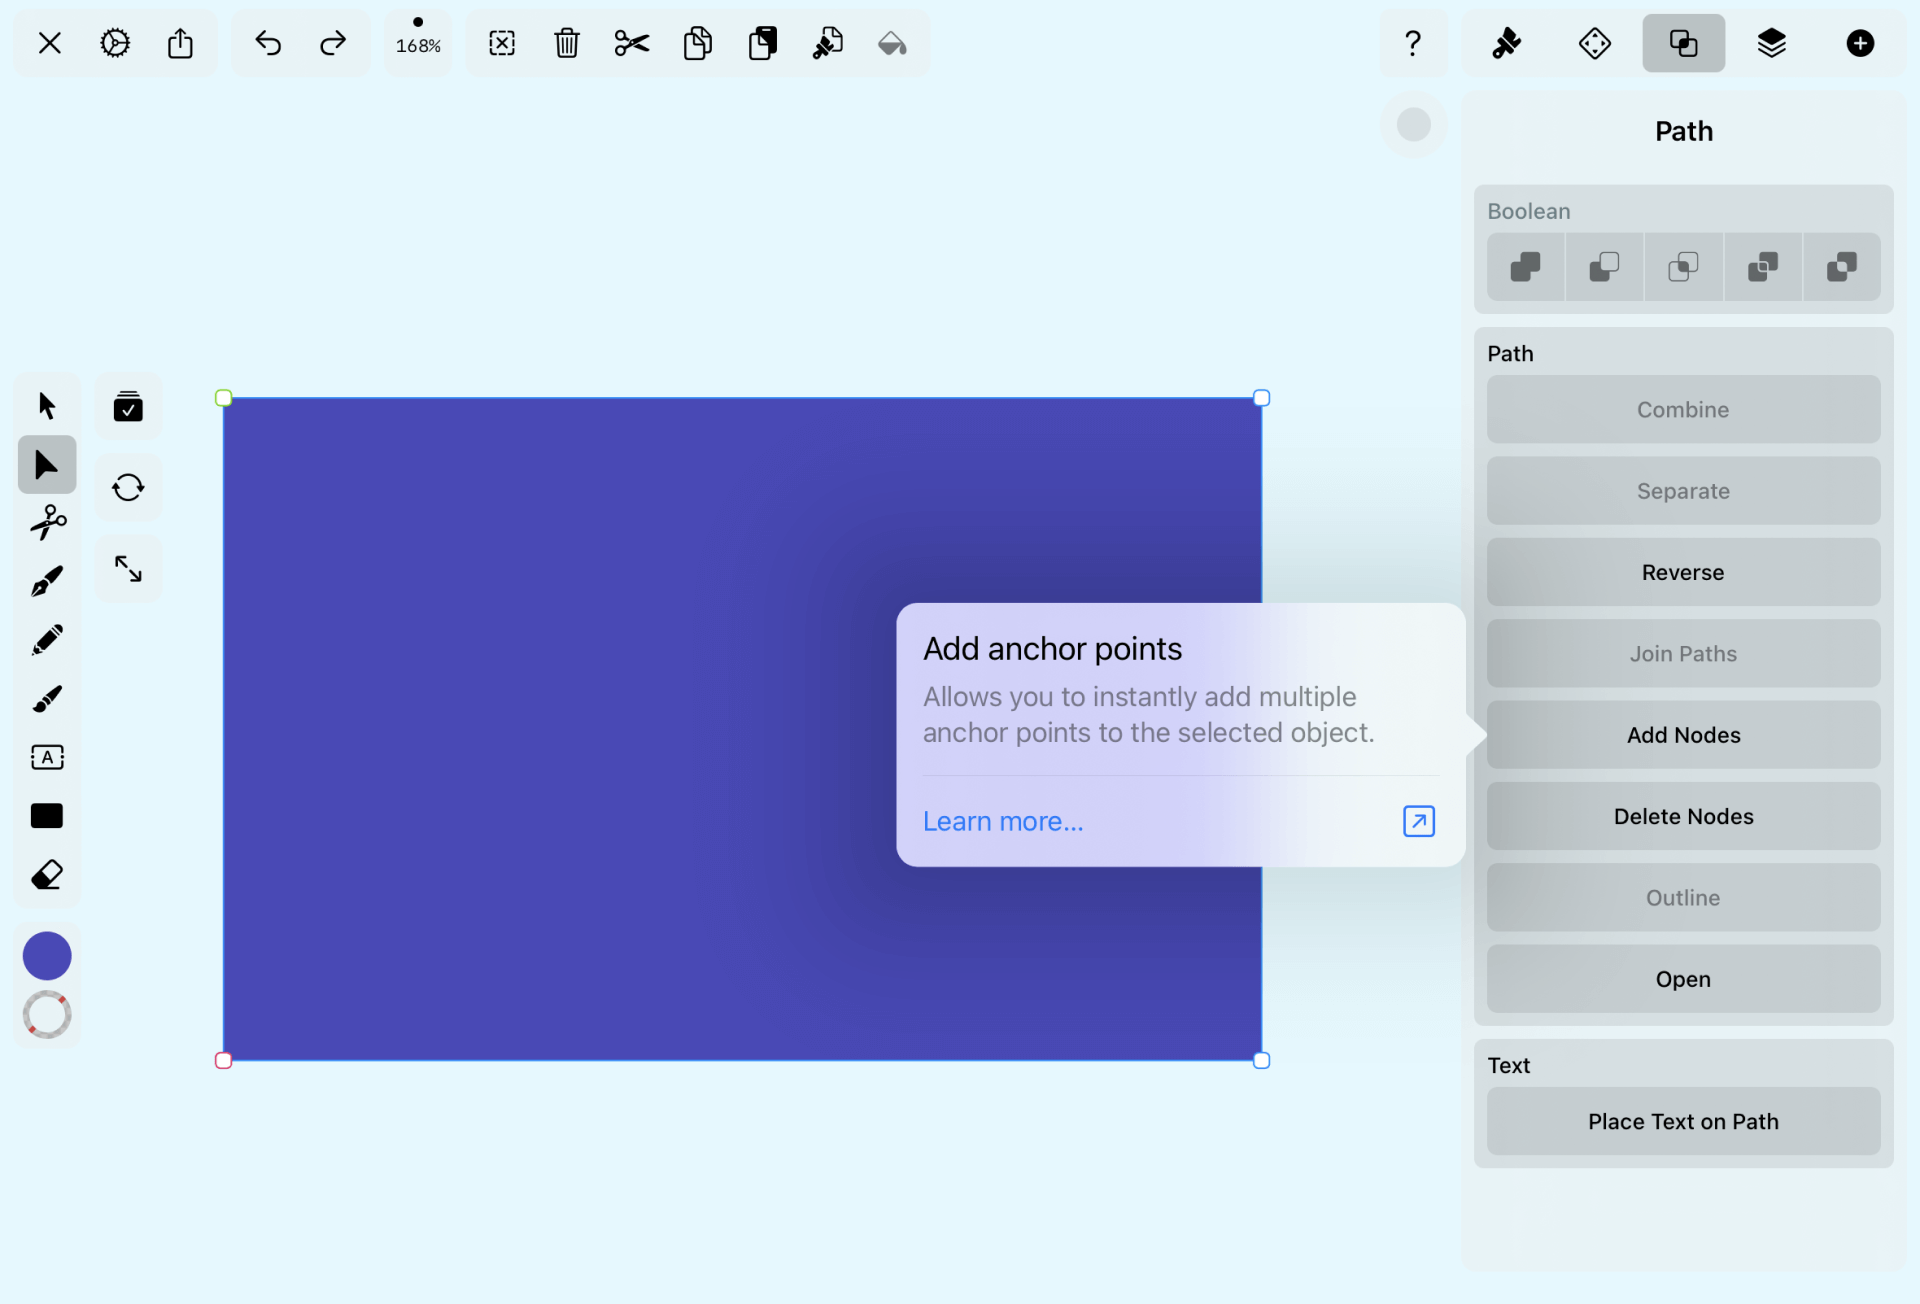
To add anchor points automatically and accurately to your rectangle, head over to the Path Tab in the top-right corner of your display. From there, you can click or press on the Add Nodes button.
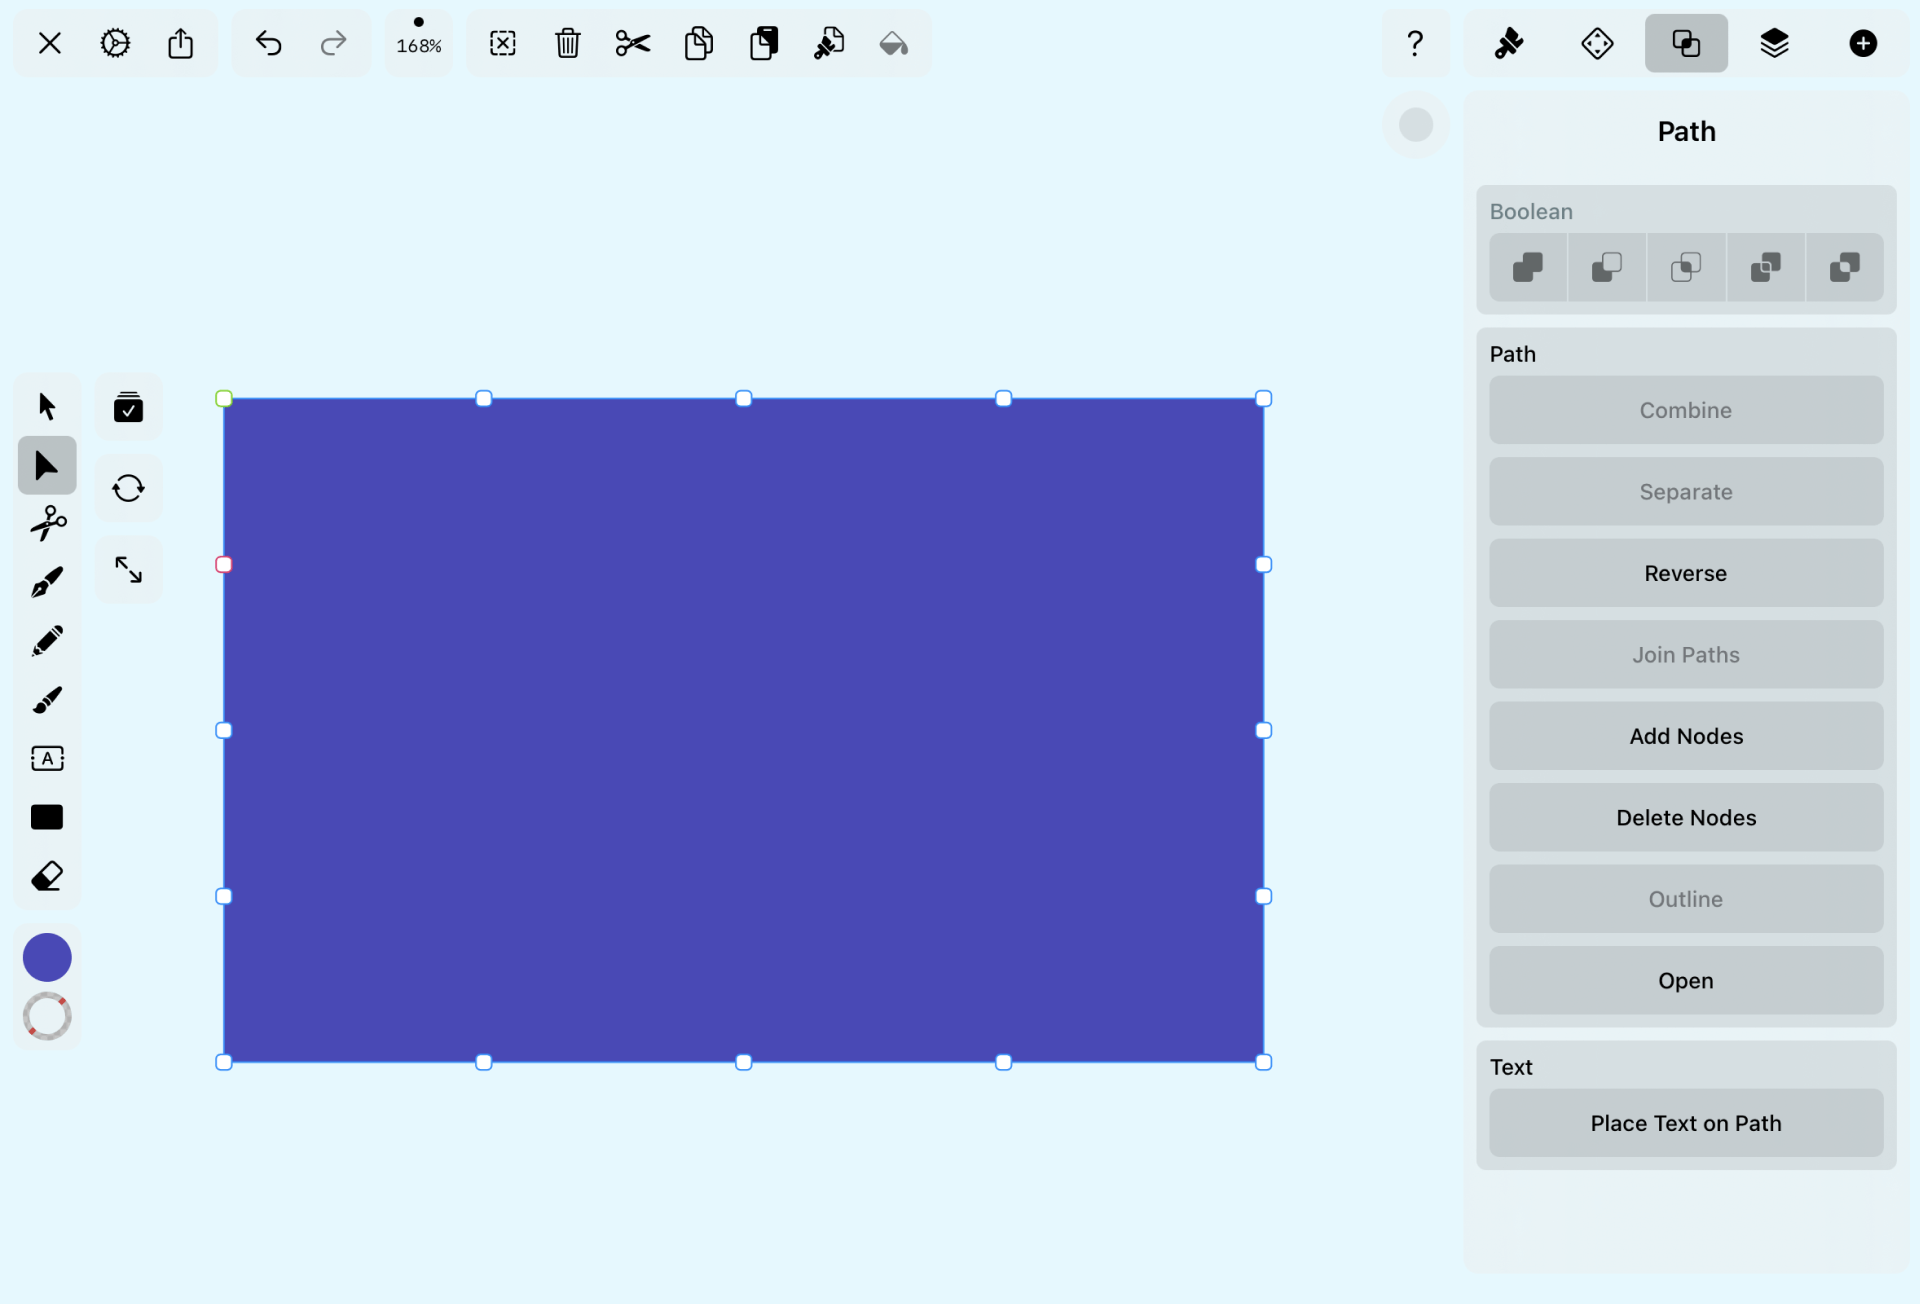
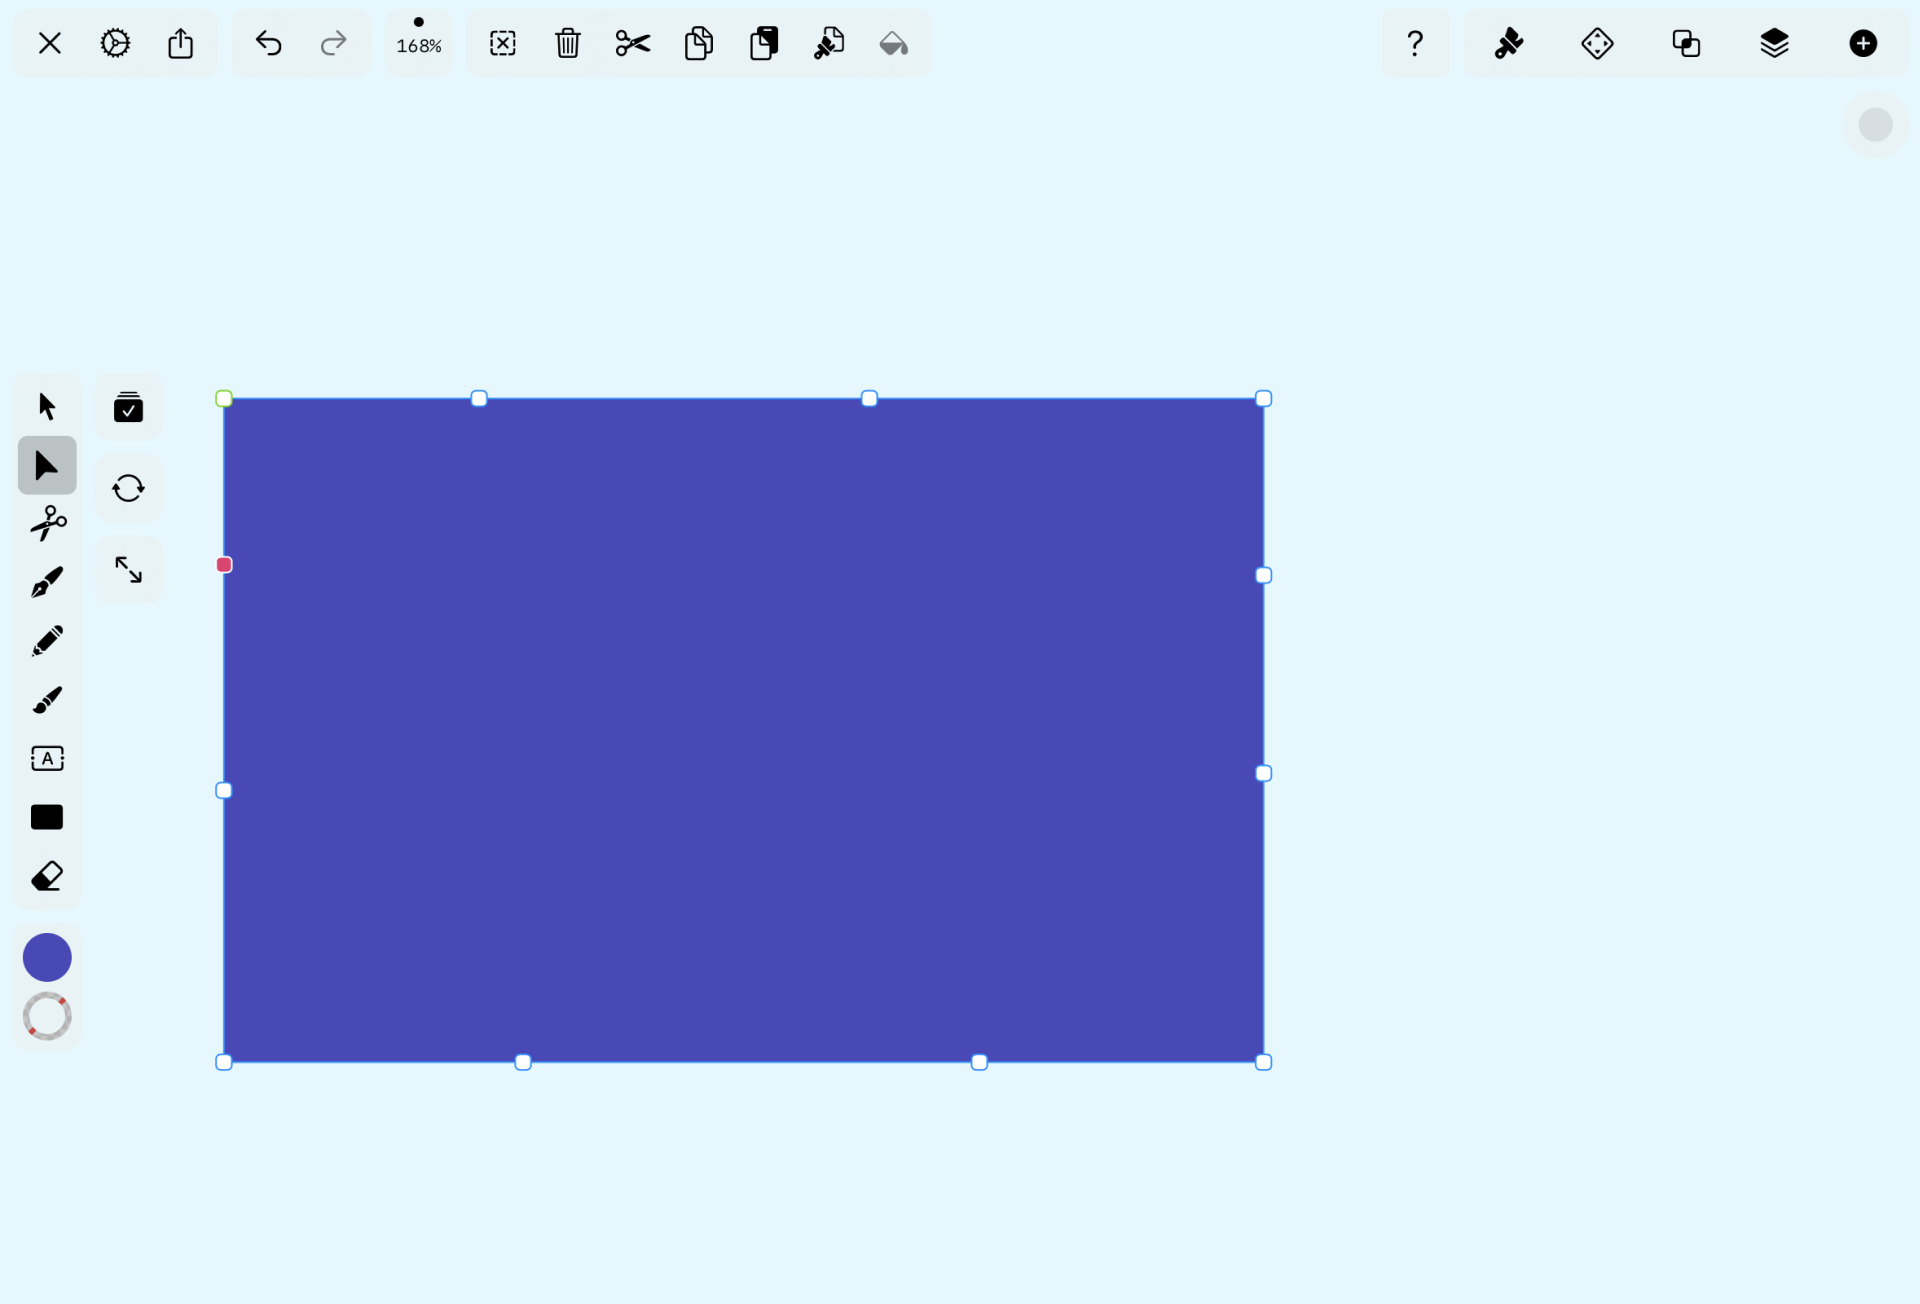
Press or click on the Add Nodes button until you have precisely three new anchor points on each side of your rectangle.
Using the Scissors Tool

With our anchor points successfully added to our rectangle, we can now use the Scissors Tool. Let’s select it from the Toolbar.
Let’s now return to our anchor points, specifically the one in the middle of the top line. Press or click on it with the Scissors Tool. You’ll notice that this anchor point turns from white to red to show your selection.
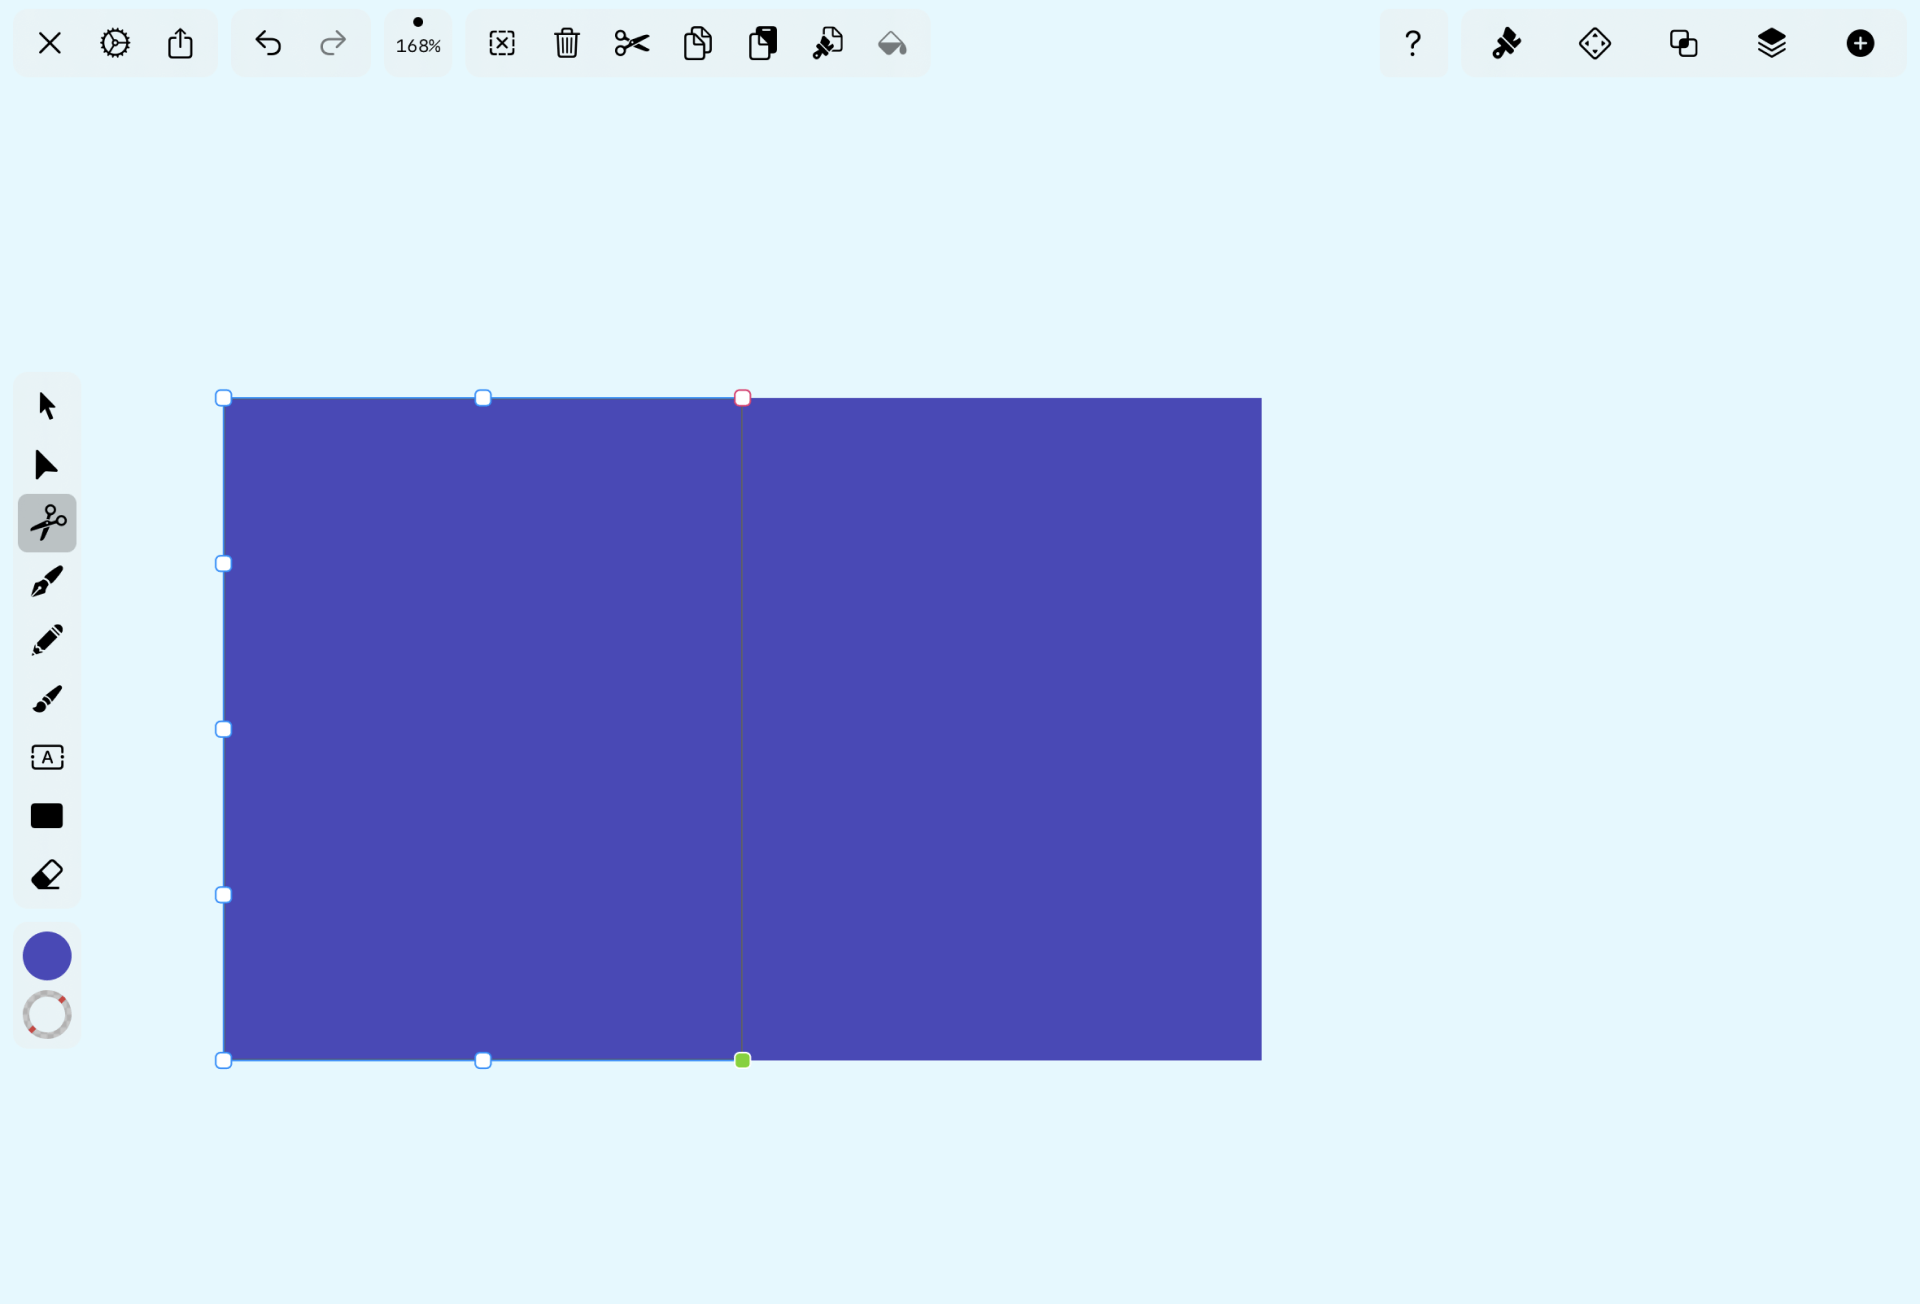
After selecting the top-middle anchor point with the Scissors Tool, we’ll then press or click on the directly opposite anchor point in the bottom-middle of your rectangle.
Making the cut
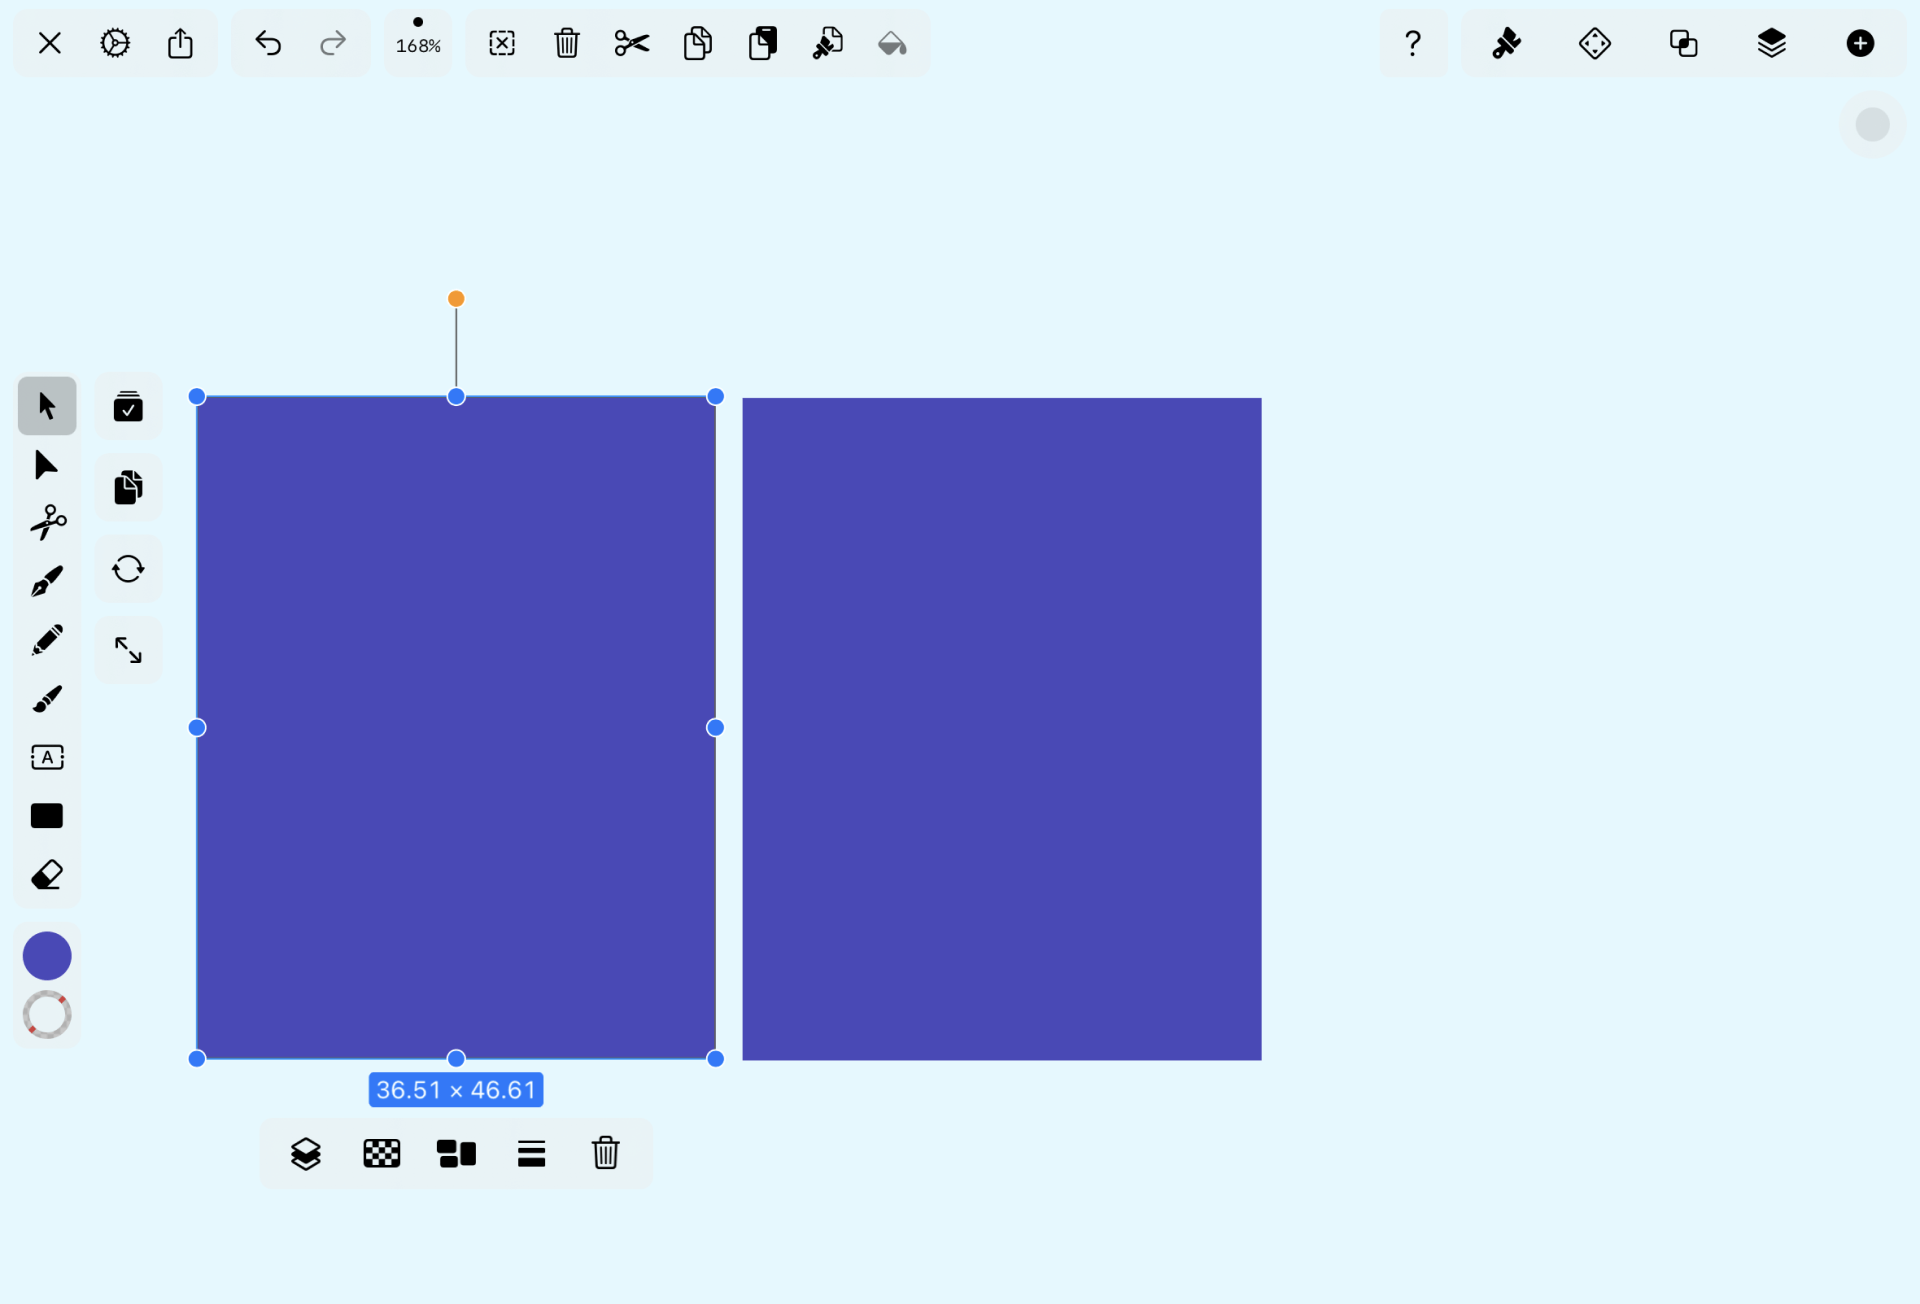
Boom! There you have it, a symmetrically cut rectangle, that has now been split into two. We finish this tutorial by playing around with our two rectangles with the Selection Tool to ensure that we cut our original rectangle correctly.
Cropping it all up
That’s it for cropping, at least for now. Well done for working through all our tutorials!
As you know well by now, cropping is an incredibly versatile function that has far more to it than simply cutting images out.
It’s also great to see that you can use other tools like the Lasso Tool to cut things out of your image. Photoshop’s tools have many uses and can be applied to all manner of creative tasks.
While Photoshop is a potent tool, there are plenty of other design apps out there that will allow you to chop and change your images, like Linearity Curve. We recommend that you experiment with different design tools, too, as you might find that some are far simpler than others.
After all, your basic cropping needs don’t need expensive software. We hope that you enjoyed this comprehensive cropping guide and that your Photoshop proficiency has improved. Have fun with your new skills!
Jumpstart your ideas with Linearity Curve
Take your designs to the next level.
Share this!
Theodore Cipolla
Theodore is a contributing writer to the Linearity Blog.