:quality(75))
:quality(75))


:quality(75))
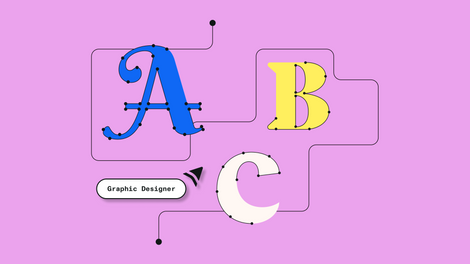
Hand lettering or hand-drawn lettering has been around since the Middle Ages and is still popular today as a graphic design skill. In the Middle Ages, all books were drawn by hand and often included elaborate drop caps and accompanying illustrations to help tell a story.

If you’re interested in learning more about the lettering process, look no further. We can take you from a complete design novice to a hand-lettering pro.
This article will cover how to build your lettering skills, the essential lettering tools and supplies you’ll need, give you some resources, including lettering drills, and cover the basic lettering styles.
Let’s start with the basic knowledge you’ll need to move forward: What is hand lettering?
Jumpstart your ideas with Linearity Curve
Take your designs to the next level.
What is hand lettering?
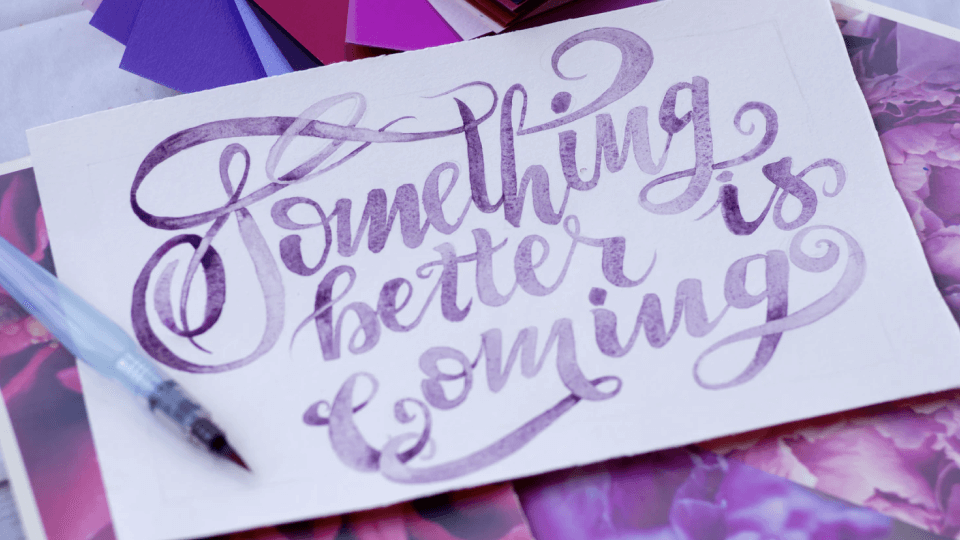
Hand-drawn lettering has reemerged with a vengeance with the recent popularity of the DIY movement. Despite the digital age making it incredibly easy to type things up on a keyboard, people are still utilizing this art form that is thousands of years old.
Hand lettering videos are a popular trend on social media. Many find watching lettering techniques and lettering tutorials to be quite soothing. Hand lettering is an art form that involves drawing letters by hand. Hand lettering allows artists to interpret letters in creative ways.
The art of lettering varies depending on the style and the artist doing the lettering. No two lettering projects are the same. You’ve likely seen hand lettering designs on wedding invites, home decor, and social media posts.
Hand lettering has various creative lettering styles, shapes, and forms. We'll discuss this later and cover the basic styles you need to know. So, you might be thinking, isn’t that just calligraphy? Well, yes and no.
Let’s break these terms down and talk about how they differ and how they are similar.
Hand lettering versus calligraphy
Hand lettering and calligraphy are often confused with one another, but they are, in fact, different.

In calligraphy, artists write out letters. With hand lettering, lettering artists draw each individual letterform. Or, to put it simply, hand lettering is the art of hand drawing letters, and calligraphy is the art of writing.
Lettering artists don’t need a special tool to create their work, while calligraphers use a special calligraphy pen.
There is also a form of calligraphy called brush calligraphy that uses a brush pen. This is popular in Chinese culture and is similar to brush painting. Chinese Brush Painting is an ancient art that uses brush strokes to depict an object or scene. Brush letterings are similar to calligraphy. In brush lettering, heavy pressure is applied for downward strokes, and light pressure is used for upward strokes.
If you want to learn more about calligraphy and brush lettering, here are some great YouTube channels with calligraphy classes and brush lettering classes.
Now, let’s chat about the most popular lettering styles seen in the design industry.
Popular hand-lettering styles
If you’re trying to get into hand lettering, you’ll likely want to learn multiple styles. We’re here to help you on that journey.
We gathered up a list of basic lettering styles, and we’ll go into a bit of detail about what each style is known for. And don’t forget that you can combine these styles in your lettering projects to make certain words stand out. Learning multiple styles can take your designs to the next level.
Looking for more cool drawing ideas?
Check out our list of 25 easy tutorials.
You can also play around with letter sizes and capital letters to create diversity in your letter art. Try out all these styles and see which works best for you.
Serif lettering style
A serif is the ‘bar’ attached to certain letters' ends. This style makes designs appear dignified and traditional. It is a classic of the basic hand lettering styles. If you’re going to become a lettering artist, you’ll undoubtedly need to learn this style.
With this style, you must pay attention to the spacing of the letters. You don’t want your letters to be too close, as you’ll have no space to insert the Serifs you wish to.
Sans-serif lettering style
Now that you know what a serif lettering style is, let’s get into sans-serif style. Sans-serif means “without” the serif. So, essentially it’s the same style as above, but without the serif on letters. Sans-serif is also known as block letters. This style is modern and clean in appearance.
We recommend starting with this style because it is perfect for beginners and is easy to learn.
Script lettering style
Script lettering Style, also known as cursive writing, is common in hand lettering. Script lettering is a style where each letter flows together. You can use this style to make a letter project appear fluid or feminine or to add diversity to a piece with block letters.
Just be mindful of the thick downstrokes and the thin upstrokes required for this style. Push the pencil down hard when doing the downstrokes and then change the direction to lighter when going upwards or drawing horizontal lines. You also don’t want to add too many swirls to your letters, which may make this style look sloppy.
With any style, it’s essential to stick to these guidelines to ensure you are thickening the right parts of your letters.
Bounce lettering style
Bounce lettering style goes against many of the basics you’ll learn when you start lettering. In this style, your letters don’t align like they usually do. Instead, they ‘bounce’ around on the page.
Use the Bounce Style to give your designs a fun, whimsical look.
Celestial lettering style
The celestial lettering style is a condensed lettering style with serifs that features stylistic brush strokes. Celestial letters appear sophisticated and creative. Use this style to add flair to your lettering design.
Vintage lettering style
Vintage lettering is a style that mimics classic lettering styles from the past. Vintage designs are incredibly trendy. This style is inspired by classic lettering fonts and can be used to create a vintage appearance or add a nostalgic feel to your design.
Gothic lettering style
Gothic lettering is a style that is similar to the vintage lettering style. This style, also known as Blackletter or Old English, features bold strokes and serifs. Gothic lettering mimics Gothic architecture and can be used to make a lettering piece appear vintage or austere.
Essential lettering tools
You don’t need fancy or expensive tools for hand lettering. In fact, you probably have most of the things you’ll need to get started lying around your house.
However, if you want to get the best tools, we also have some suggestions for that. We’ve included our suggestions with links below to simplify the process.
Pencil or pen
To start lettering, you need a writing utensil. This might seem obvious, but the kind of writing utensil you use is pretty important. A pencil is excellent for practice and first drafts (an HB No. 2 pencil and a Blackwing Pencil are recommended). Light pencil marks are much easier to erase than dark pens.
You can use a mechanical or a nice art pencil when practicing. We recommend you start with a pencil like the No. 2 first—just don’t forget a pencil sharpener.
Eventually, you will likely find that a pen or marker gives you cleaner lines (consider trying the Uni-ball Pen, a calligraphy pen, a brush pen, or a fine-tip marker pen to achieve more delicate detailing).
Play around with different pens, pencils, and markers and see what works best for you. Everyone has a different preference.
Eraser
We all make mistakes, right? If you start practicing lettering, you’re going to make a lot of them. The good news – you can just erase them!
You probably have an eraser on the end of your pencil if that is your writing tool of choice. Still, if not, you should consider grabbing a high-quality eraser that enables you to make mistakes. We’ve been making erasable mistakes since 1858, as that is when the first patent for the eraser was invented!
Making mistakes is how we learn and grow when trying new things. Keep an eraser handy when you’re starting out, and don’t be afraid to try new things and erase them if they don’t work out.
• Mr. Pen Pencil Erasers
• Mr. Pen Eraser Set With Kneaded Erasers
• Tombow MONO Sand Eraser (this one can erase pen markings)
Paper
The next item on our supply list is another obvious one. If you want to draw letters, you’ll need some paper to work with. This can be fancy art paper, such as Bristol, or it can just be a piece of printer paper. We recommend using simple printer paper when you are still practicing your lettering. This is because using the right paper can save you money over time.
Furthermore, certain types of paper will wear on your lettering pen and require frequent replacements. If you want some extra help making straight lines, see if you can find some graphing paper or paper with lines that you can use to base your letters on. It’s certainly better than practicing on Mulberry Bark, which was what the first pieces of paper were made from!
Ruler
A ruler can help with straight lines and consistency (a six-inch ruler is usually the recommended size). But you don’t need to go out and buy a ruler if you don’t have one (although humans have been using rulers since 2650 BC).
The edge of a book or a thick piece of paper will work just fine to help you draw straight lines. However, a ruler is especially helpful because you can measure the size of your lines and letters and draw lines to stay within them.
Straight lines are the key to any good hand lettering project, but you don’t have to keep a completely steady hand with the help of a trusty ruler or straight edge.
A bonus tool would be a compass, which allows you to create more precise circles and curves.
How to hand letter
Now that we know some basic and simple lettering styles to practice, let’s take you through a step-by-step guide on hand lettering for beginners. It’s easier than you might think. Your skill level is less important than your willingness to learn and your level of consistency. We’ll give you some basic techniques, but you’ll need to keep practicing to build muscle memory and nail the aspects of lettering.
Here are the basic steps to hand lettering:
Determine your phrase
Think about a fun or inspiring quote that’s meaningful to you (like a quote from your favorite philosopher or writer) to help you choose your phrase. It should be no more than ten words. Having a phrase in mind will allow you to start thinking about what the lettering and design should look like.
You’ll then want to write some words that link to the phrase. For example, if you want the phrase to be fun, quirky, and loud, the words you will write will be electric, eccentric, and colorful. Creating a list of these words (in conjunction with the phrase) creates the direction for the lettering in terms of the tone of your lettering illustrations.
Websites like Pinterest will give you visual examples you can use as references for your letterings, such as colors, textures, accents, patterns, and more.
Ready to kit out your drawing toolbox?
Visit our Academy for free drawing and design courses.
Create small thumbnails
Make small-scale thumbnails of the layout and overall design of your lettering concept. This will help you visualize how your hand lettering project will appear on a larger scale without having to create full-size sketches.
These don’t need to be detailed – you just want to get practical ideas on how the overall layout will work. The point is to get your ideas on paper. Play around with sizes, styles, and looks (based on the tone you are going for).
Try practicing the phrase you determined in the step above in five different lettering styles you like.
This is also a great time to practice basic strokes.
Create a full-size draft
Once you’ve perfected your small thumbnails, use a pencil to scale your design to the size you want. You can use your ruler to draw a box to measure the length and width of your lettering. Ensure you draw perspective lines, as they act as a guideline for where each letter should go.
You will also want to add an ‘x’ line horizontally. It should be in the middle of the box. Doing so helps your words line up better.
Your beautiful lettering will then go inside the box, as this ensures it will be in a straight line (or that it lines up straight in a curved or slanted direction) and is the desired size and spacing you want.
Start out drawing your lettering lightly a few times until you are happy. Then, you can make your lines darker and more refined once you have achieved the style you want.
Now focus on the lettering itself
Start with the frame of the lettering. You will want to ensure that it is spaced evenly and in the proportions you want. You’ll then add weight to the letter. You can do this by thinking about your letter in terms of shapes. For example, the letter ‘A’ has a triangle-based shape.
You will then add the style details, which you can source from the reference material you researched. Lastly, you will add the finishing details, like the textures, patterns, and more.
Sketch your letters
Now that you have a full-sized draft and thumbnails, get some inexpensive paper. Use your pencil to start sketching out letters. Again, you will need to draw where you want the lettering to be on the page, which you can achieve with your box and perspective lines. Be sure to draw boxes for each line or section of lettering in your overall design.
You’ll then choose your favorite thumbnail (and you’ll use your refined draft) to expand on. Focus on the details you want to add, the curvature, the overall spacing, and where you want your phrase to go in relation to the rest of the design you drew in your chosen thumbnail.
Trace over with ink
Before you go over the design with ink, ensure you tighten up any elements of the lettering that may seem off to you. It could be adjusting the spacing of the words, enhancing any imagery or shapes, and making certain elements darker or bolder.
Once you are happy, get a piece of paper you want your finished product to be on, and place it on top of the sketch. You will essentially be tracing the design from one page to another—it’s helpful to place the paper up against bright light and tape the sides of your paper to one another so that it doesn't slide while you’re tracing.
Once you’ve completed your tracing (in pencil), it’s time to make things final. Get your pen or marker out and trace over your design with ink.
Finalize your design
Now that your letters are complete, you can add your finishing touches, like extra embellishments or designs to your letters if you wish, and be sure to clean up your lines.
Don’t be afraid to add fun colors to your design.
Digitize (optional)
You can use Linearity Curve (formerly Vectornator) to digitize your final design for printing or posting on socials or collateral.
Basic rules of hand lettering
Let’s go over two core lettering rules you should remember while starting your lettering journey: practice and consistency.
Practice
They say regular practice makes perfect. That is especially true for lettering. It is an art that gets better with practice and patience. Try and set aside some time each day to get consistent practice. You’ll be surprised how much your art improves. But don’t worry if you don’t have time to do lettering daily. You’ll still get better with practice over time.
Set some lettering goals, such as learning a new style or perfecting Serifs, and do lettering drills until you achieve them.
Get creative with our ready-to-use templates.
Linearity Curve offers templates for every social media platform and various use case templates for posters, business cards, slides, app store screenshots, and more.
Consistency
This is essential in how your hand lettering will turn out. Letters, spacing, and sizing must all be consistent, or the overall product will look unpolished. This takes tons of practice. To reach a level of consistency that looks flawless, you will need lots of patience and experience with hand lettering.
When done correctly, consistent letters and consistent lines will take your hand lettering a level up. Once you get the consistency of lettering figured out, you’ll be a pro and will be able to take on complicated projects.
A good ruler and a steady hand will help you achieve this goal. You’ll also need to be careful to have the correct letter spacing and clean up lines that look messy.
Additional resources
Now that you know the basics of hand lettering, it’s time to practice. But you’re not on your own. We have some awesome resources to help you learn more about lettering and hone your lettering skills.
Use these additional resources to continue your practice and look for hand lettering communities.
Practice worksheets
Practice lettering worksheets are the perfect way to improve your lettering skills. This list includes some practice sheets and lettering alphabet worksheets you can download and play around with.
Online classes with lettering experts
Taking an online class or watching a tutorial is another great way to practice lettering. These classes are entirely free and easy to follow (you can also enroll in general graphic design courses).
One features a basic drill, another is a simple introductory class, and the third class can help you find your own hand-lettering style.
Lettering books
Books about lettering are another great way to maintain your lettering practice. This list has some excellent books for beginners.
- Lettering and Modern Calligraphy: A Beginner's Guide: Learn Hand Lettering and Brush Lettering
- The Ultimate Guide to Modern Calligraphy & Hand Lettering for Beginners
- Hand Lettering for Beginners: Simple Techniques. Endless Possibilities
Wrap up
That concludes our guide to hand lettering. By now, you should have a solid foundation to build on your lettering skills and many resources to help you practice and find your own hand-lettering style. And if you feel ready to digitize your hand lettering projects, you'll find that using Linearity Curve (formerly Vectornator) is much easier than any other software.
If you’d like to try Linearity Curve (formerly Vectornator), we recommend you give the Pencil Tool a go. To activate the Pencil Tool, simply tap the ‘pencil’ icon in the toolbar or press ‘W’ on your keyboard.
As soon as you have activated the tool, a slider appears to the right of the toolbar with which you can control the smoothness of your path.
Then, use your cursor (Mac), stylus (iPad), or finger (iPad or iPhone) to draw on your artboard, just as you would with a pencil on paper.
When you start drawing with the Pencil Tool, you'll create a vector path that follows the path of your hand. It can follow it precisely or follow with a more consistent line, depending on the smoothness you set.
At the right of the Pencil Tool, you’ll find a slider to control the pencil's smoothness. If you want your path to be exactly as you draw it, you can simply set the value to 0%. Setting the value higher will increase the level of smoothing that the tool will apply to the line that you draw.
When you’ve finished drawing, Linearity Curve (formerly Vectornator) will smooth the curve and simplify the path you’ve just created. The smoothness of your path can also be adjusted after drawing. Select your path, and the smoothness slider will appear inside the ‘Style Tab.’
If you choose this option, the smoothing operation will be almost invisible, so we recommend you select your path with the Node Tool, so you can better see how the anchor points will be affected by smoothing the path.
So, what are you waiting for? Get started on your hand lettering journey, and don’t be afraid to try out different styles to find the ones that work best for you.
Don’t be a stranger. Follow us on social media and share your favorite lettering projects. We can't wait to see where your lettering journey takes you.
Jumpstart
your ideas with
Linearity Curve
Take your designs to the next level.
Share this!
Ben Barnhart
Ben is a Content Lead for Linearity living in Berlin. His hobbies include board games, cooking, reading, and writing.