:quality(75))
:quality(75))

:quality(75))
Welcome to the festive world of custom wrapping paper design. As Christmas approaches, it’s the perfect time to add a personal touch to your gifts.
In this tutorial, we'll guide you through the process of creating a wrapping paper design with Linearity Curve that will make your gifts stand out under the Christmas tree.
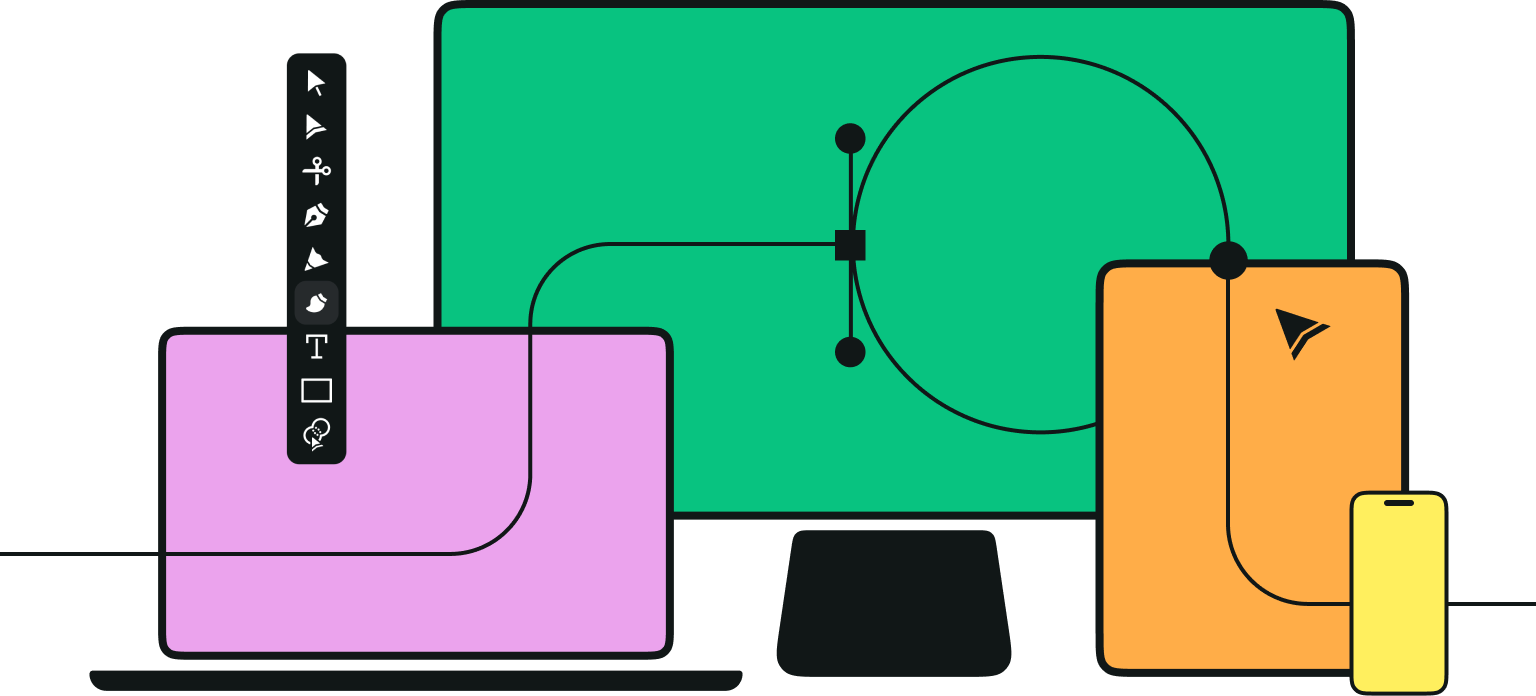
Jumpstart your ideas with Linearity Curve
Take your designs to the next level.
Design options for Christmas wrapping paper
Before we dive into our step-by-step Christmas wrapping paper design tutorial, consider a few elements that will shape your design.
Paying attention to these details will ensure a beautiful end result to suit the occasion.
Theme
The theme is the heartbeat of your wrapping paper design. Whether you go for an elaborate and colorful design or stick to minimalist shapes, it sets the mood and tone for your creation.
Do you lean towards the traditional elements like holly and mistletoe, or do you prefer a modern twist with abstract patterns and shapes? Maybe your style is more whimsical, filled with playful Santas and reindeer.
Or perhaps you're celebrating a summer Christmas in the Southern Hemisphere and want to convey this feeling with flowers and fruit.
Christmas wrapping can incorporate a wide range of themed ideas to bring across the "warm and fuzzies" of the holiday season.
:quality(75))
:quality(75))
Color scheme
Colors are powerful. They evoke emotions and create ambience. The color scheme you choose for your Christmas wrapping paper should complement your theme.
Classic reds and greens are a safe bet for a traditional look, evoking warmth and holiday cheer. But don't be afraid to experiment with unconventional palettes, like bright pink or warm yellow.
A monochromatic color scheme will bring across minimalist sophistication, while a colorful design can convey playfulness and whimsy. The key is consistency and harmony within your chosen palette.
:quality(75))
:quality(75))
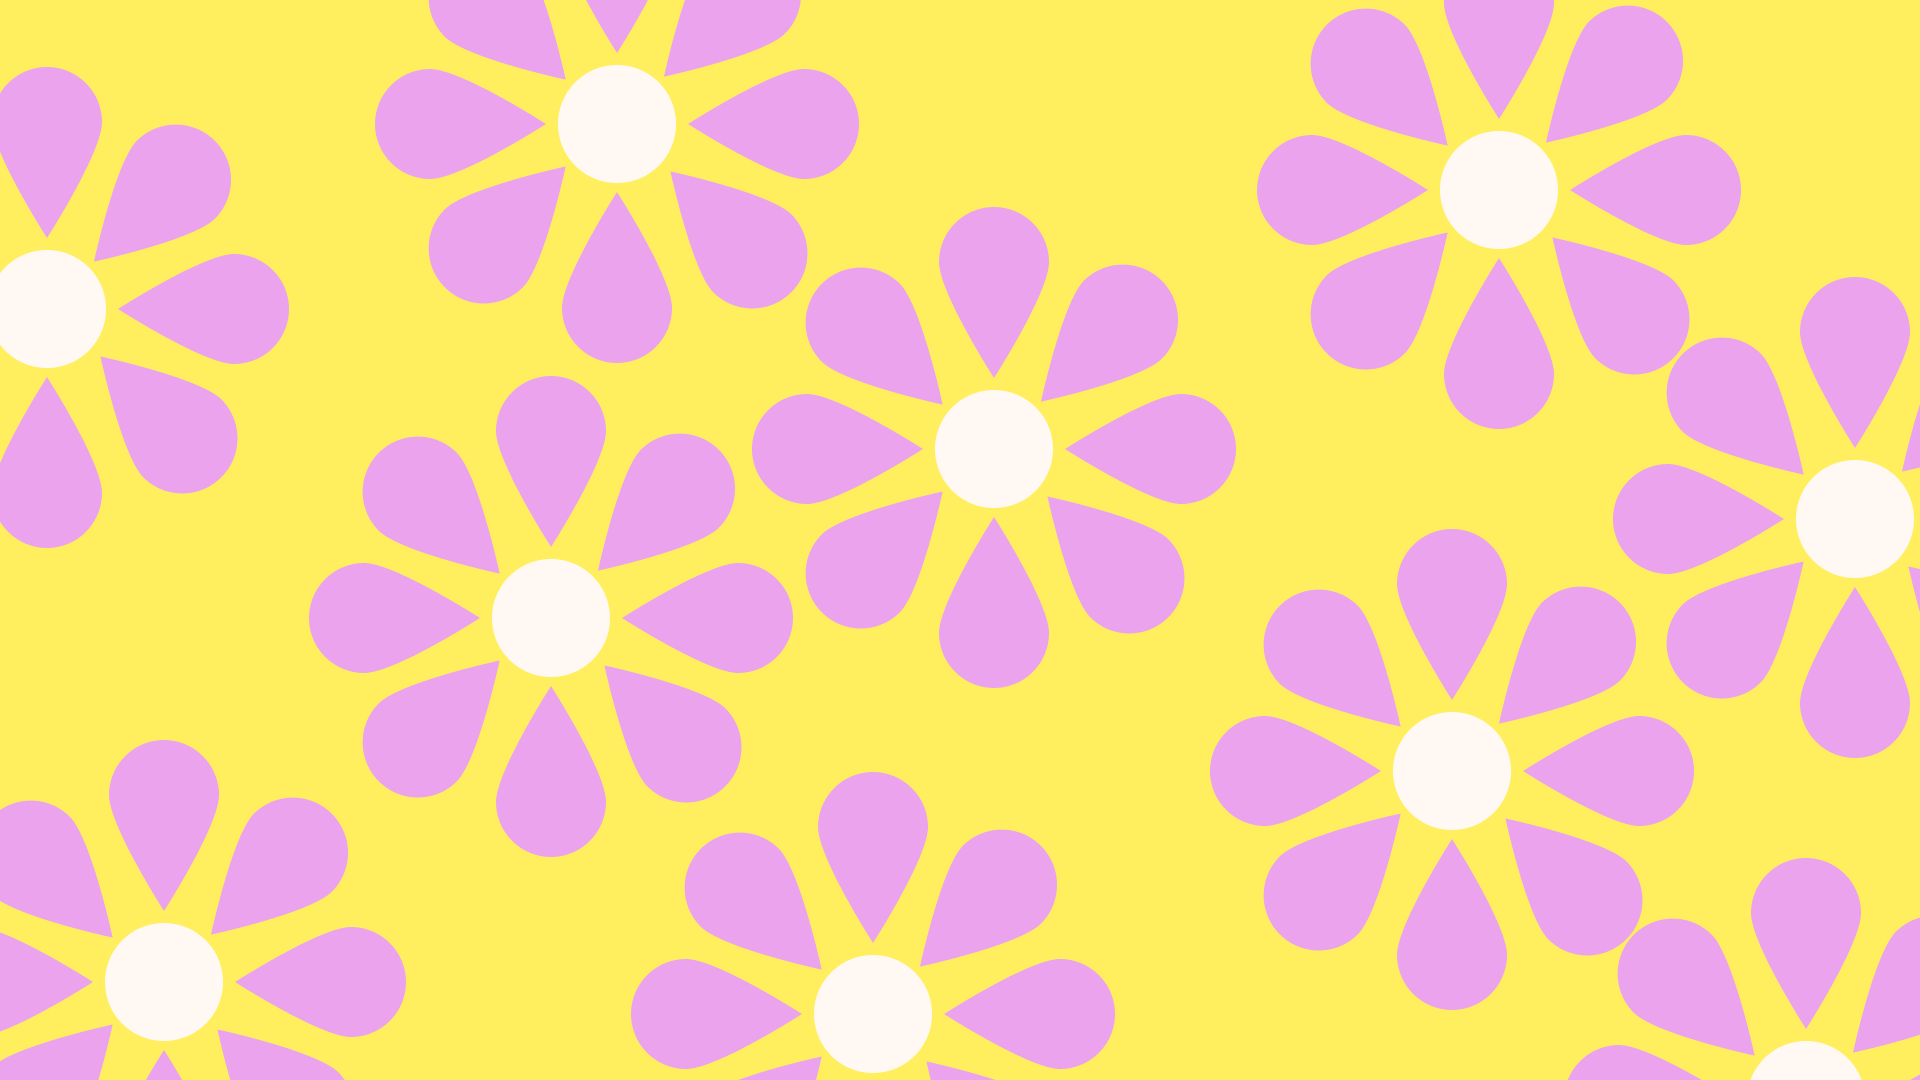
Pattern repetition
The magic of wrapping paper lies in its pattern. A well-designed pattern brings a sense of rhythm and infinite flow to your paper.
Think about how your elements—snowflakes, gloves, socks, stars, or Christmas trees—will repeat across the paper. A good pattern should be seamless and continuous without jarring breaks or awkward overlaps.
This enhances the aesthetic appeal and ensures that it always presents your design beautifully, no matter how you cut and fold your wrapping paper sheets.
:quality(75))
:quality(75))
Your audience
Finally, consider the end receiver of your gifts. The design should resonate with them. For children, opt for playful and colorful designs that spark joy and excitement. Think bright colors, fun characters, and lively patterns.
For adults, you might lean towards more elegant and sophisticated designs. Subtle patterns, refined colors, and a touch of luxury can elevate the gift-giving experience. Your wrapping paper is the prelude to the cherished gift inside.
Ready to create brand assets that pack a punch?
Visit our Academy for free marketing design courses.
Step-by-step Christmas wrapping paper design tutorial
Are you ready to get festive? For this tutorial, we're going to use Linearity Curve on iPad. But you can find all the steps for Mac in our Academy user guide.
Choose a Curve template for your holiday gift wrapping paper
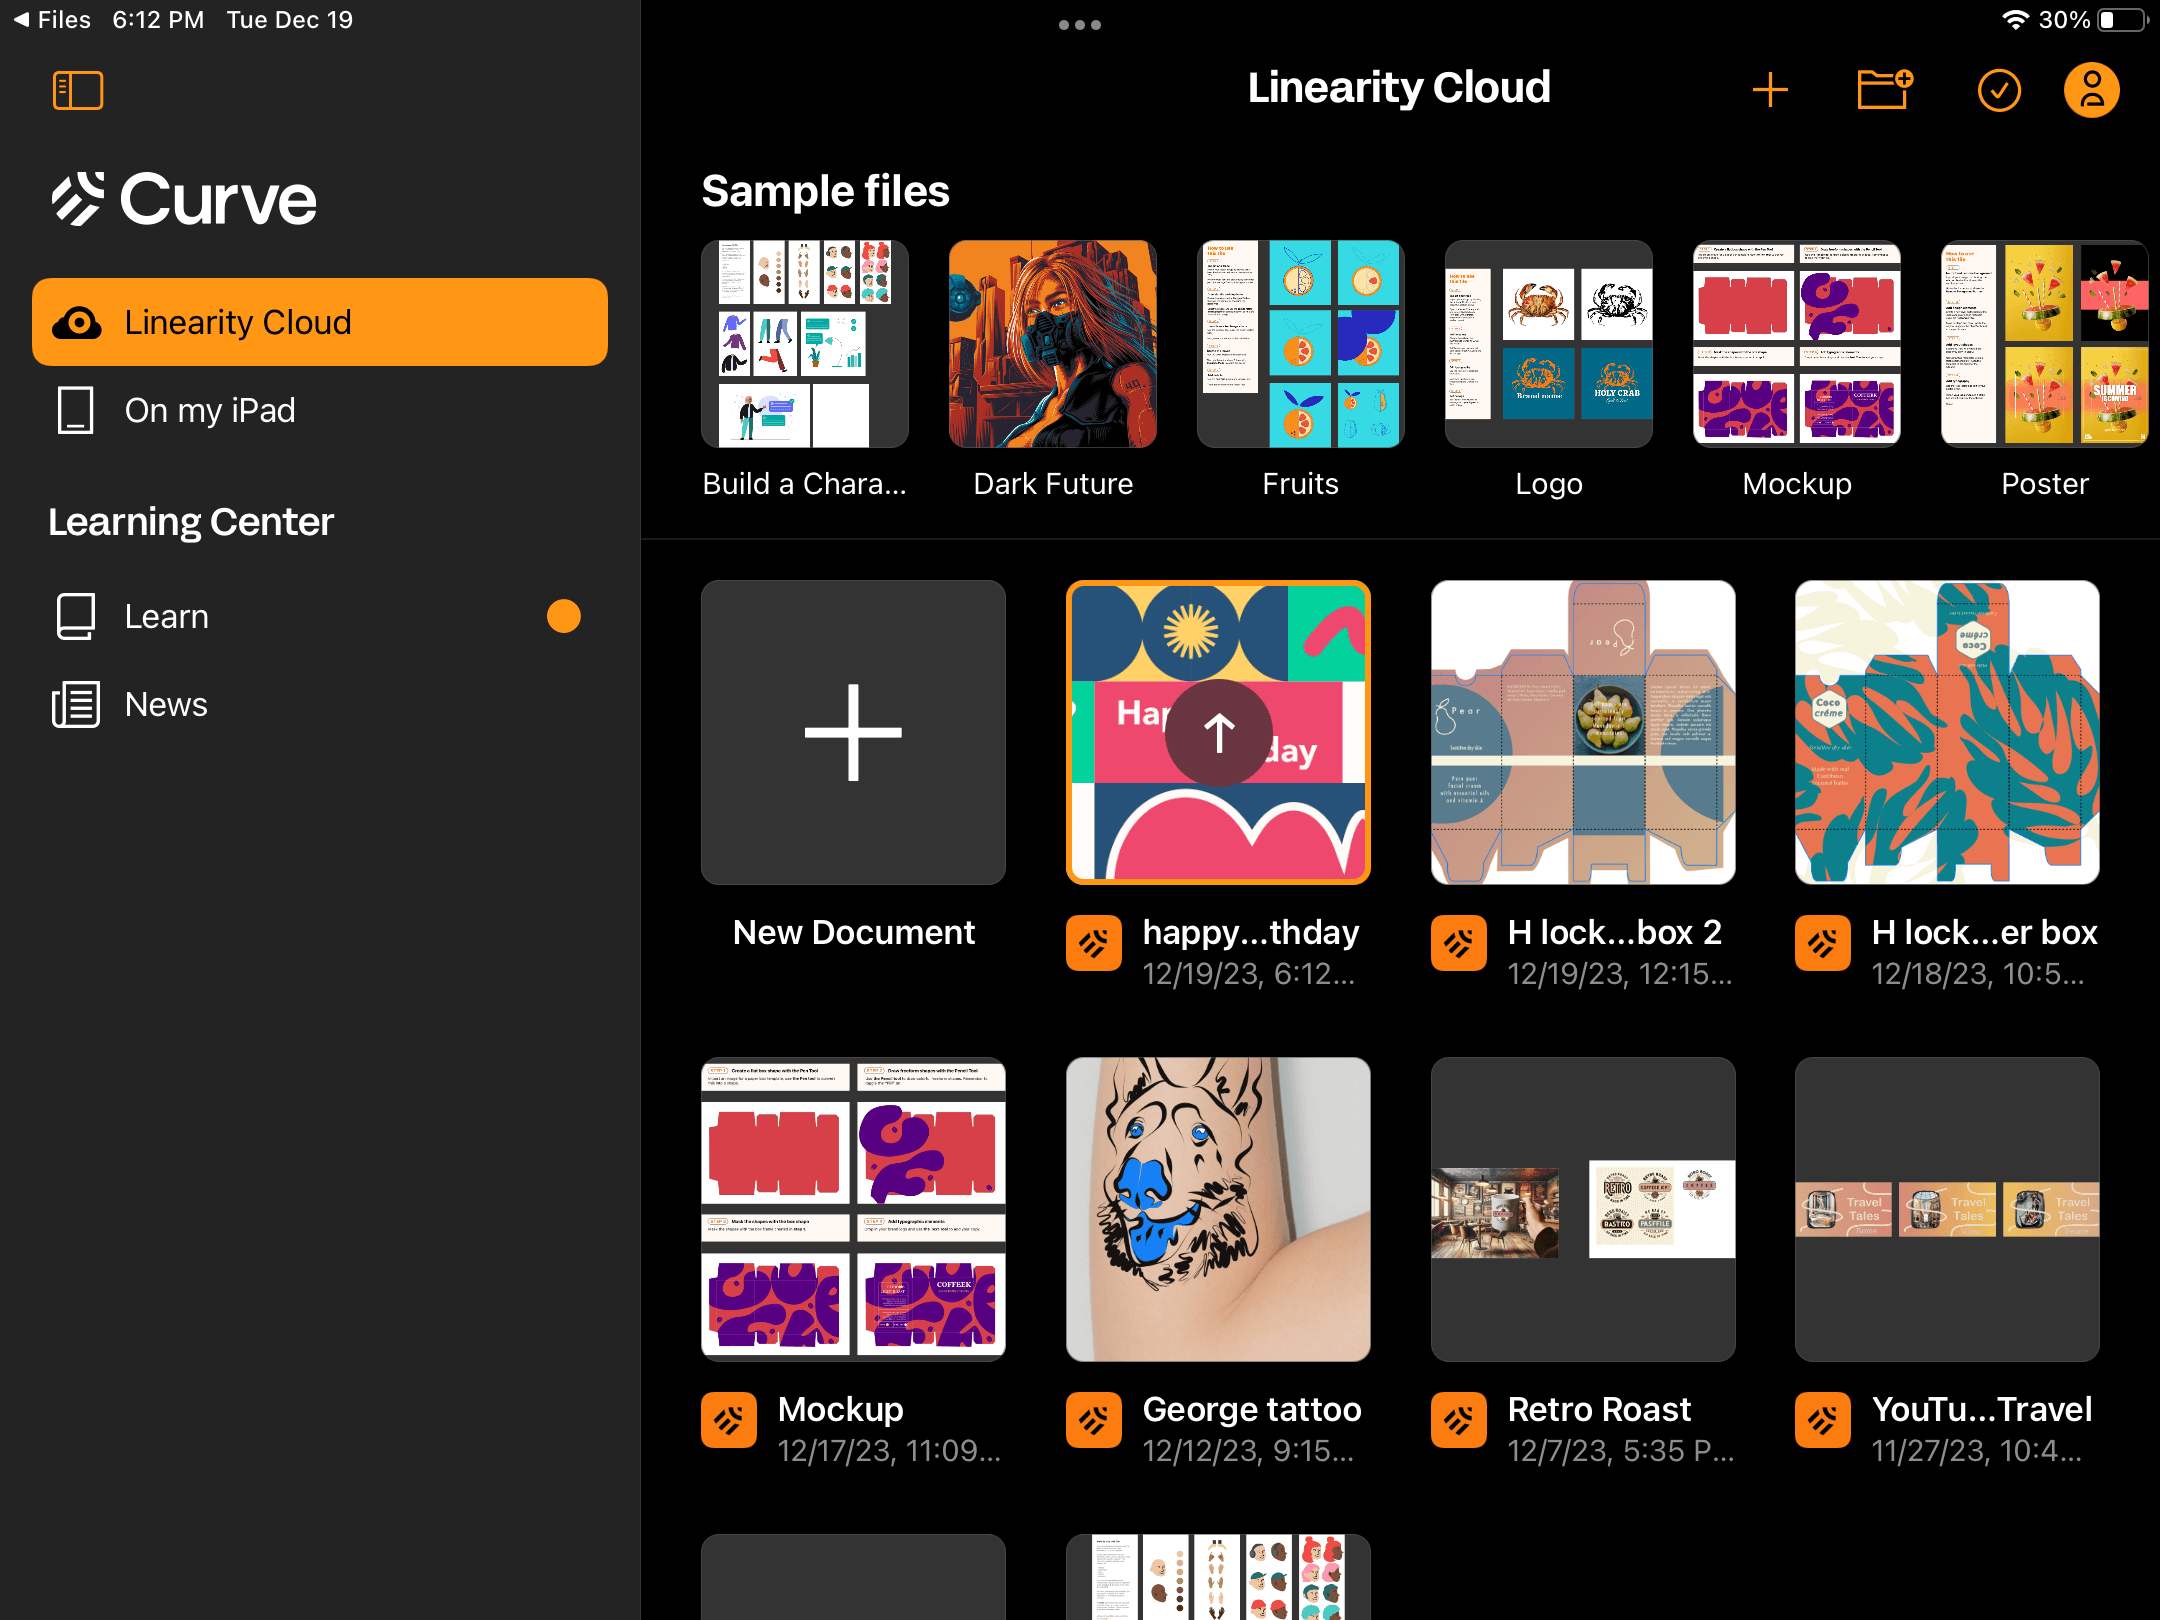
Open Linearity Curve and tap on the orange plus icon in the top right corner. Choose the Templates option to be redirected to our library of 2,000+ free design templates.

Browse the selection and tap on a festive design that catches your eye—it doesn't even have to be a Christmas wrapping paper template. We chose the Geometric Birthday Card (it has versatile elements we can use for our Christmas-themed custom wrapping paper).
You can get this design template below:
:quality(75))
To download the file, tap on the Open Template button and choose Download.
You'll see the .curve (or .vectornator) file in your Downloads folder. Tap on it to automatically add it to your Curve Homescreen Gallery.

Tap on the thumbnail in the Homescreen Gallery to open the file.
Customize your template
The wonderful thing about vector design is that it offers a wide selection of customization options.
You can add or delete elements, such as shapes and text. To edit the text in the template, double-tap on it with the Selection Tool in the Toolbar on the left and type the new text.
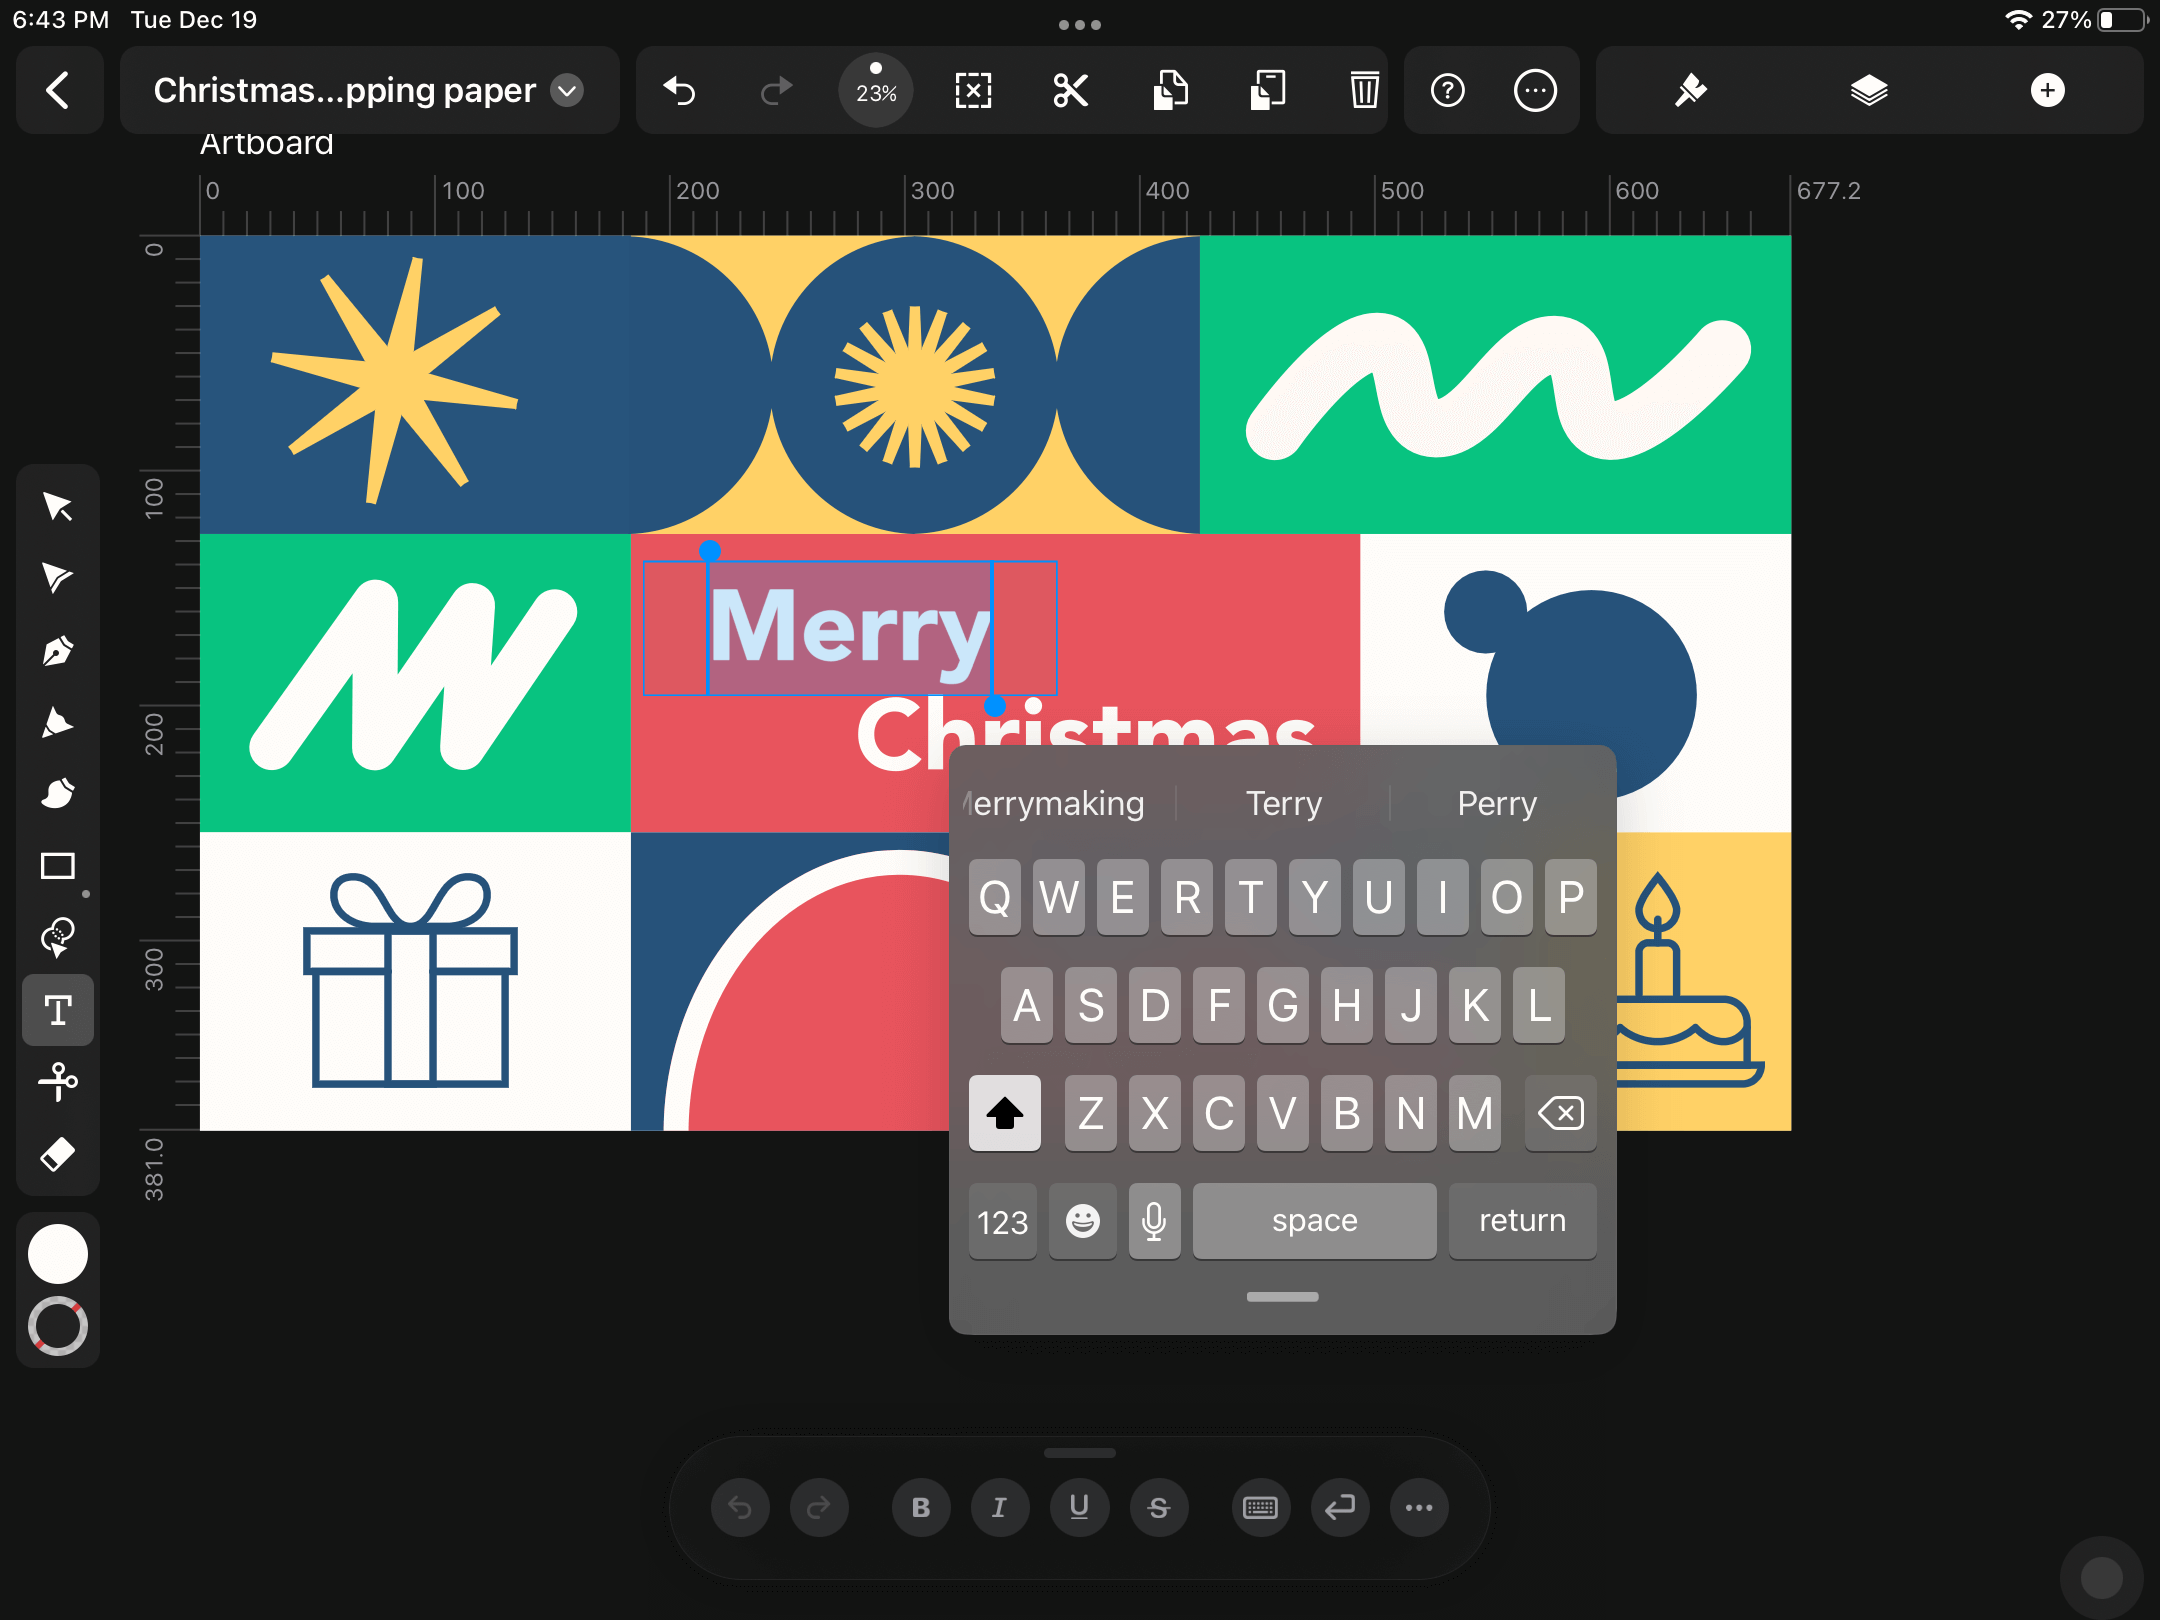
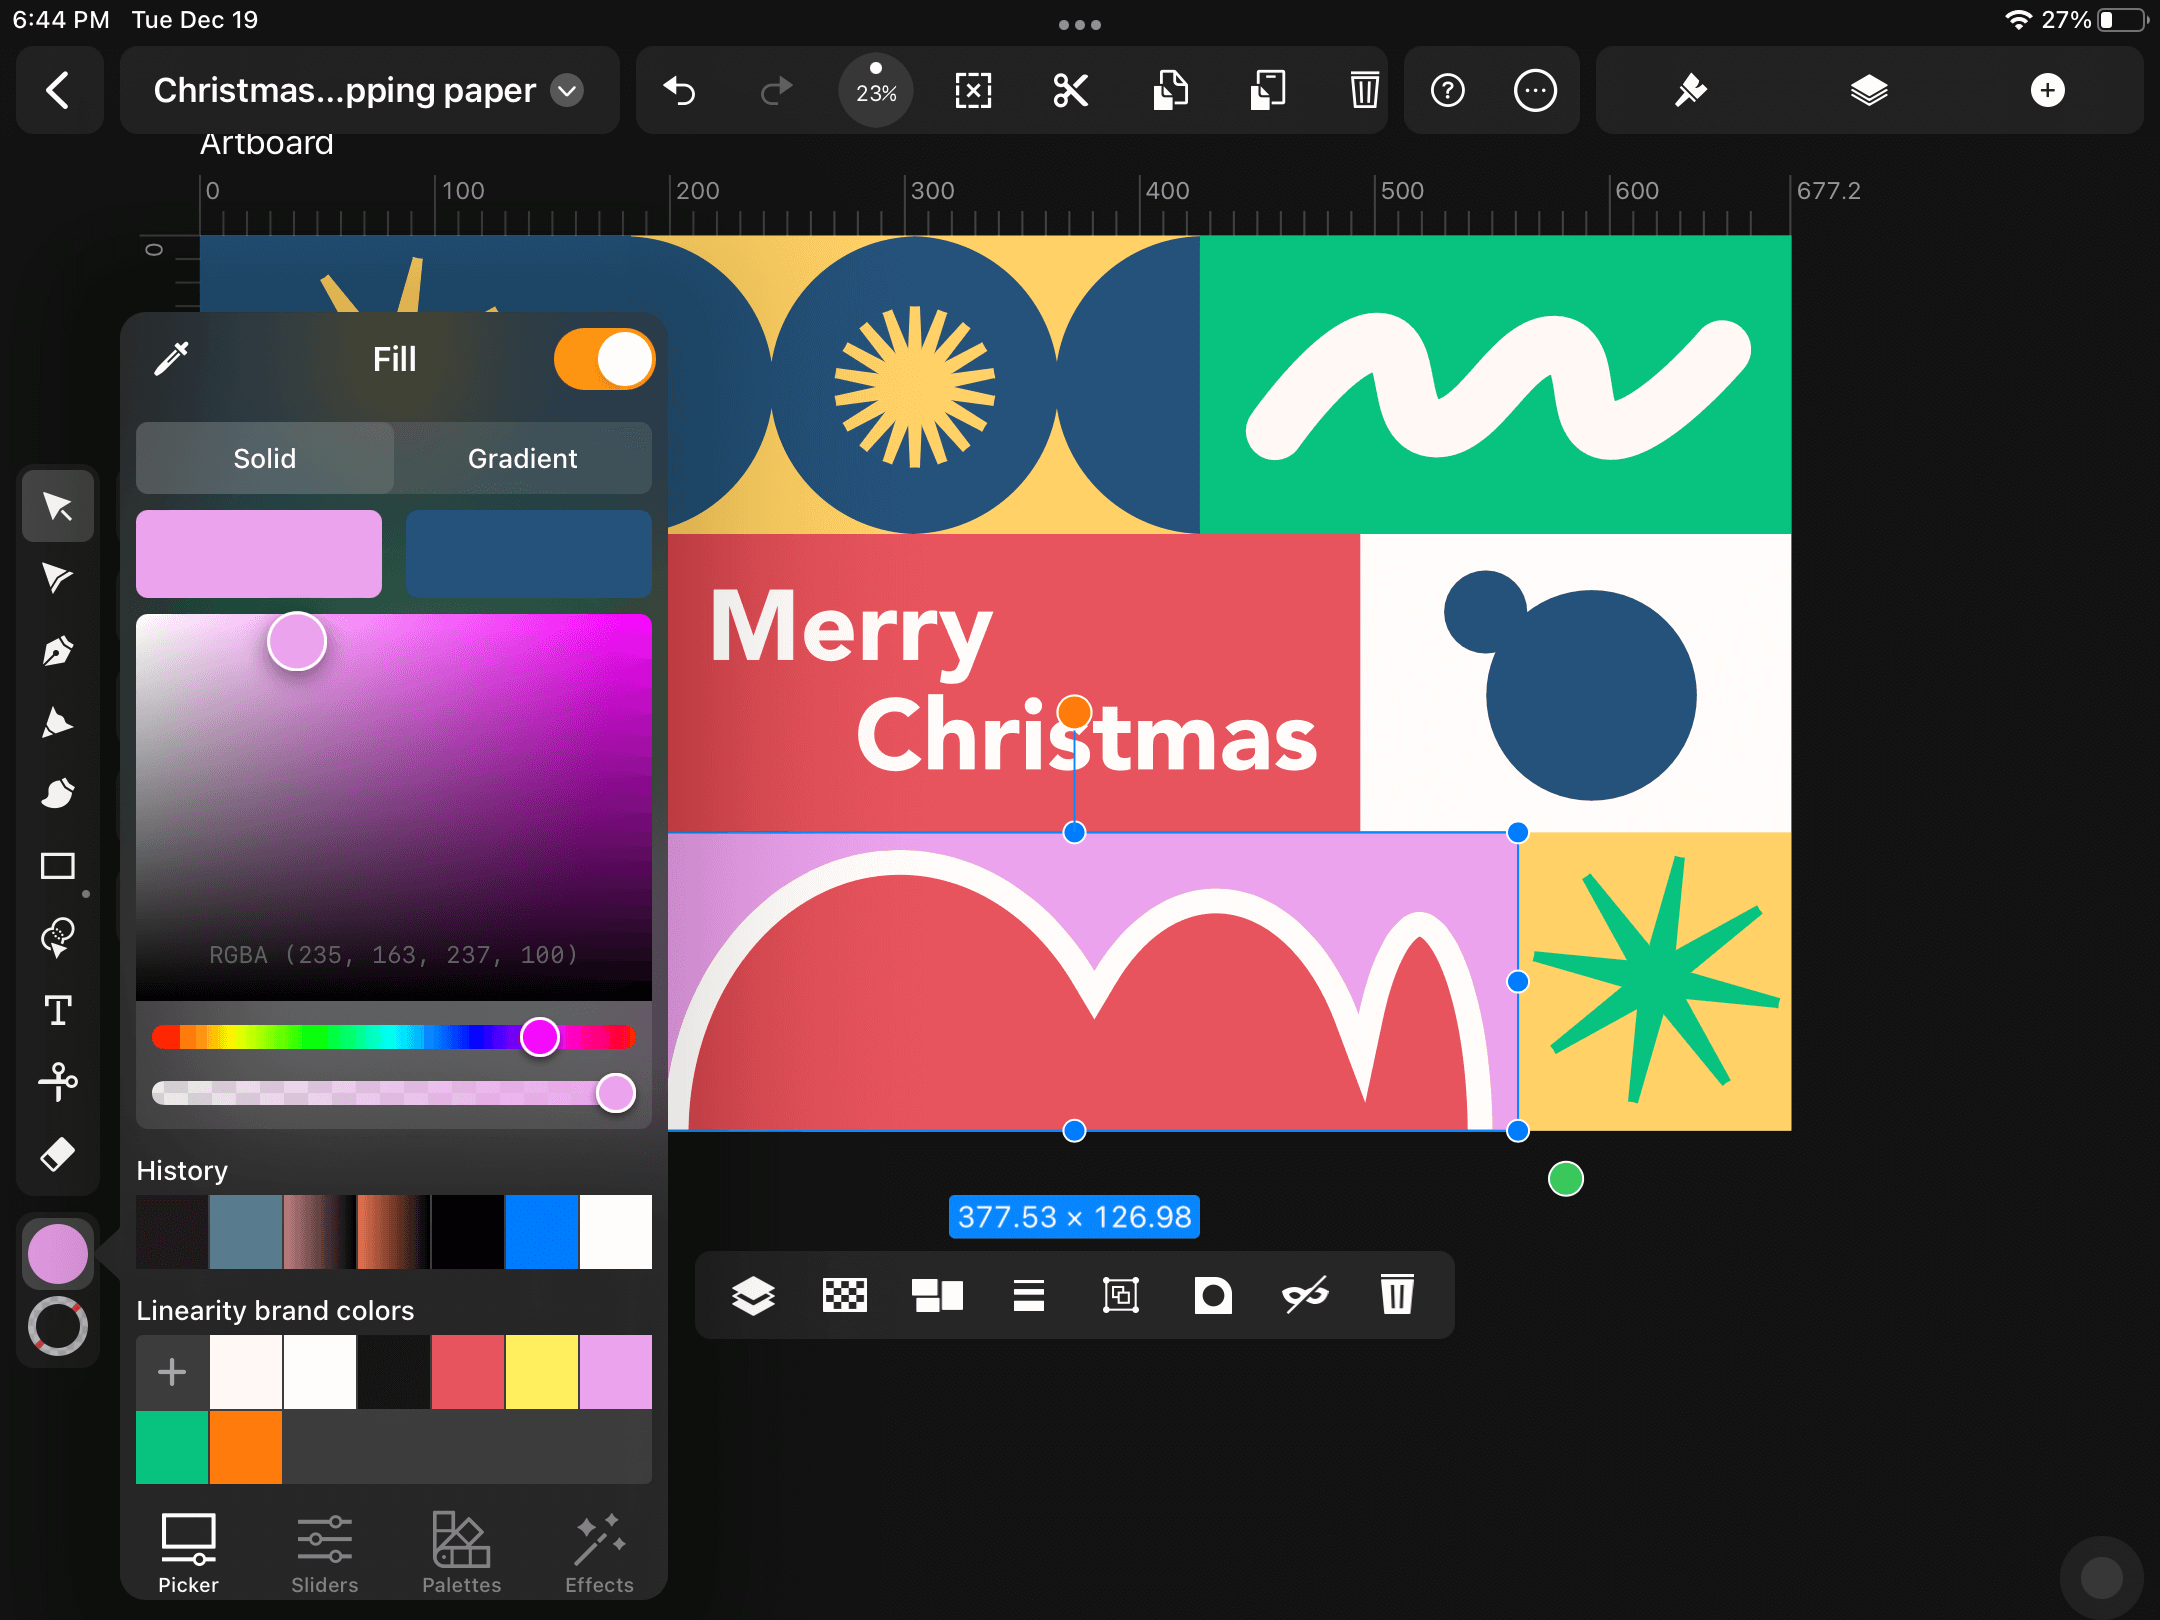
Tap on the various template elements and apply your chosen color scheme by changing the Fill and Stroke colors. Experiment with different shades and tints, or add some gradients (they're trending).
Resize the Artboard
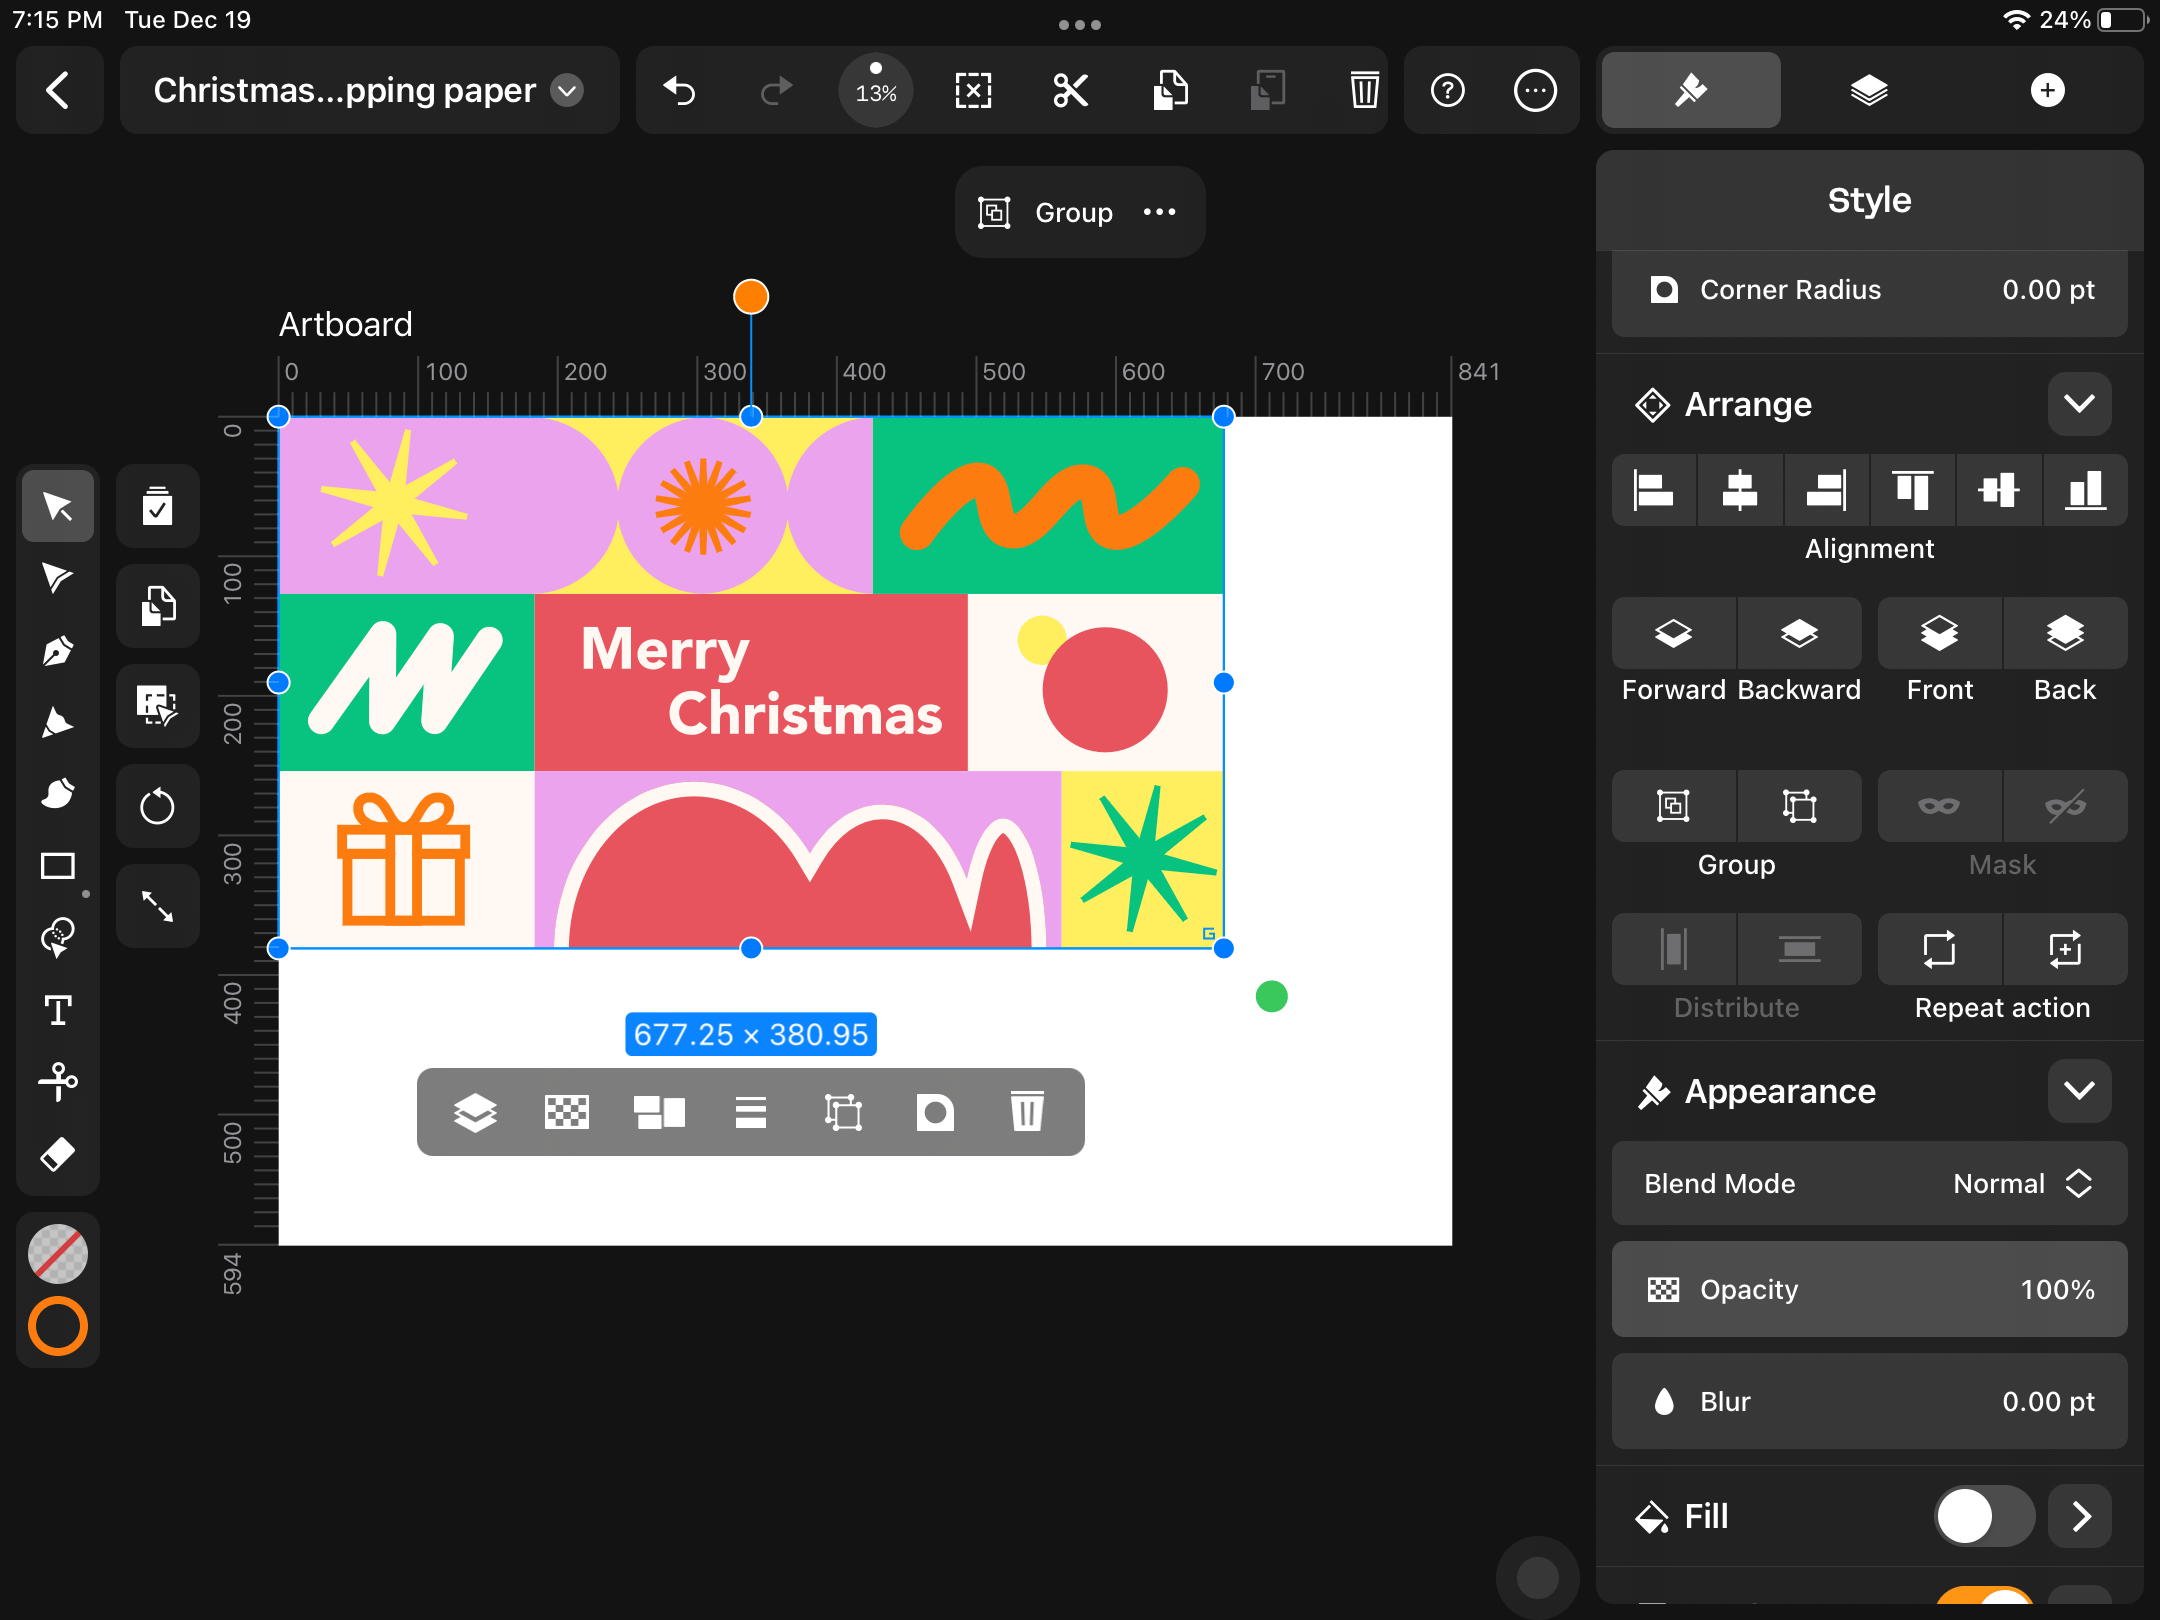
Once you're happy with your base design, you can resize your Artboard to your custom wrapping paper print size.
To do this, select your Artboard by tapping on its name at the top left corner. Then, tap on the Style Tab in the Inspector on the right-hand side of your screen.
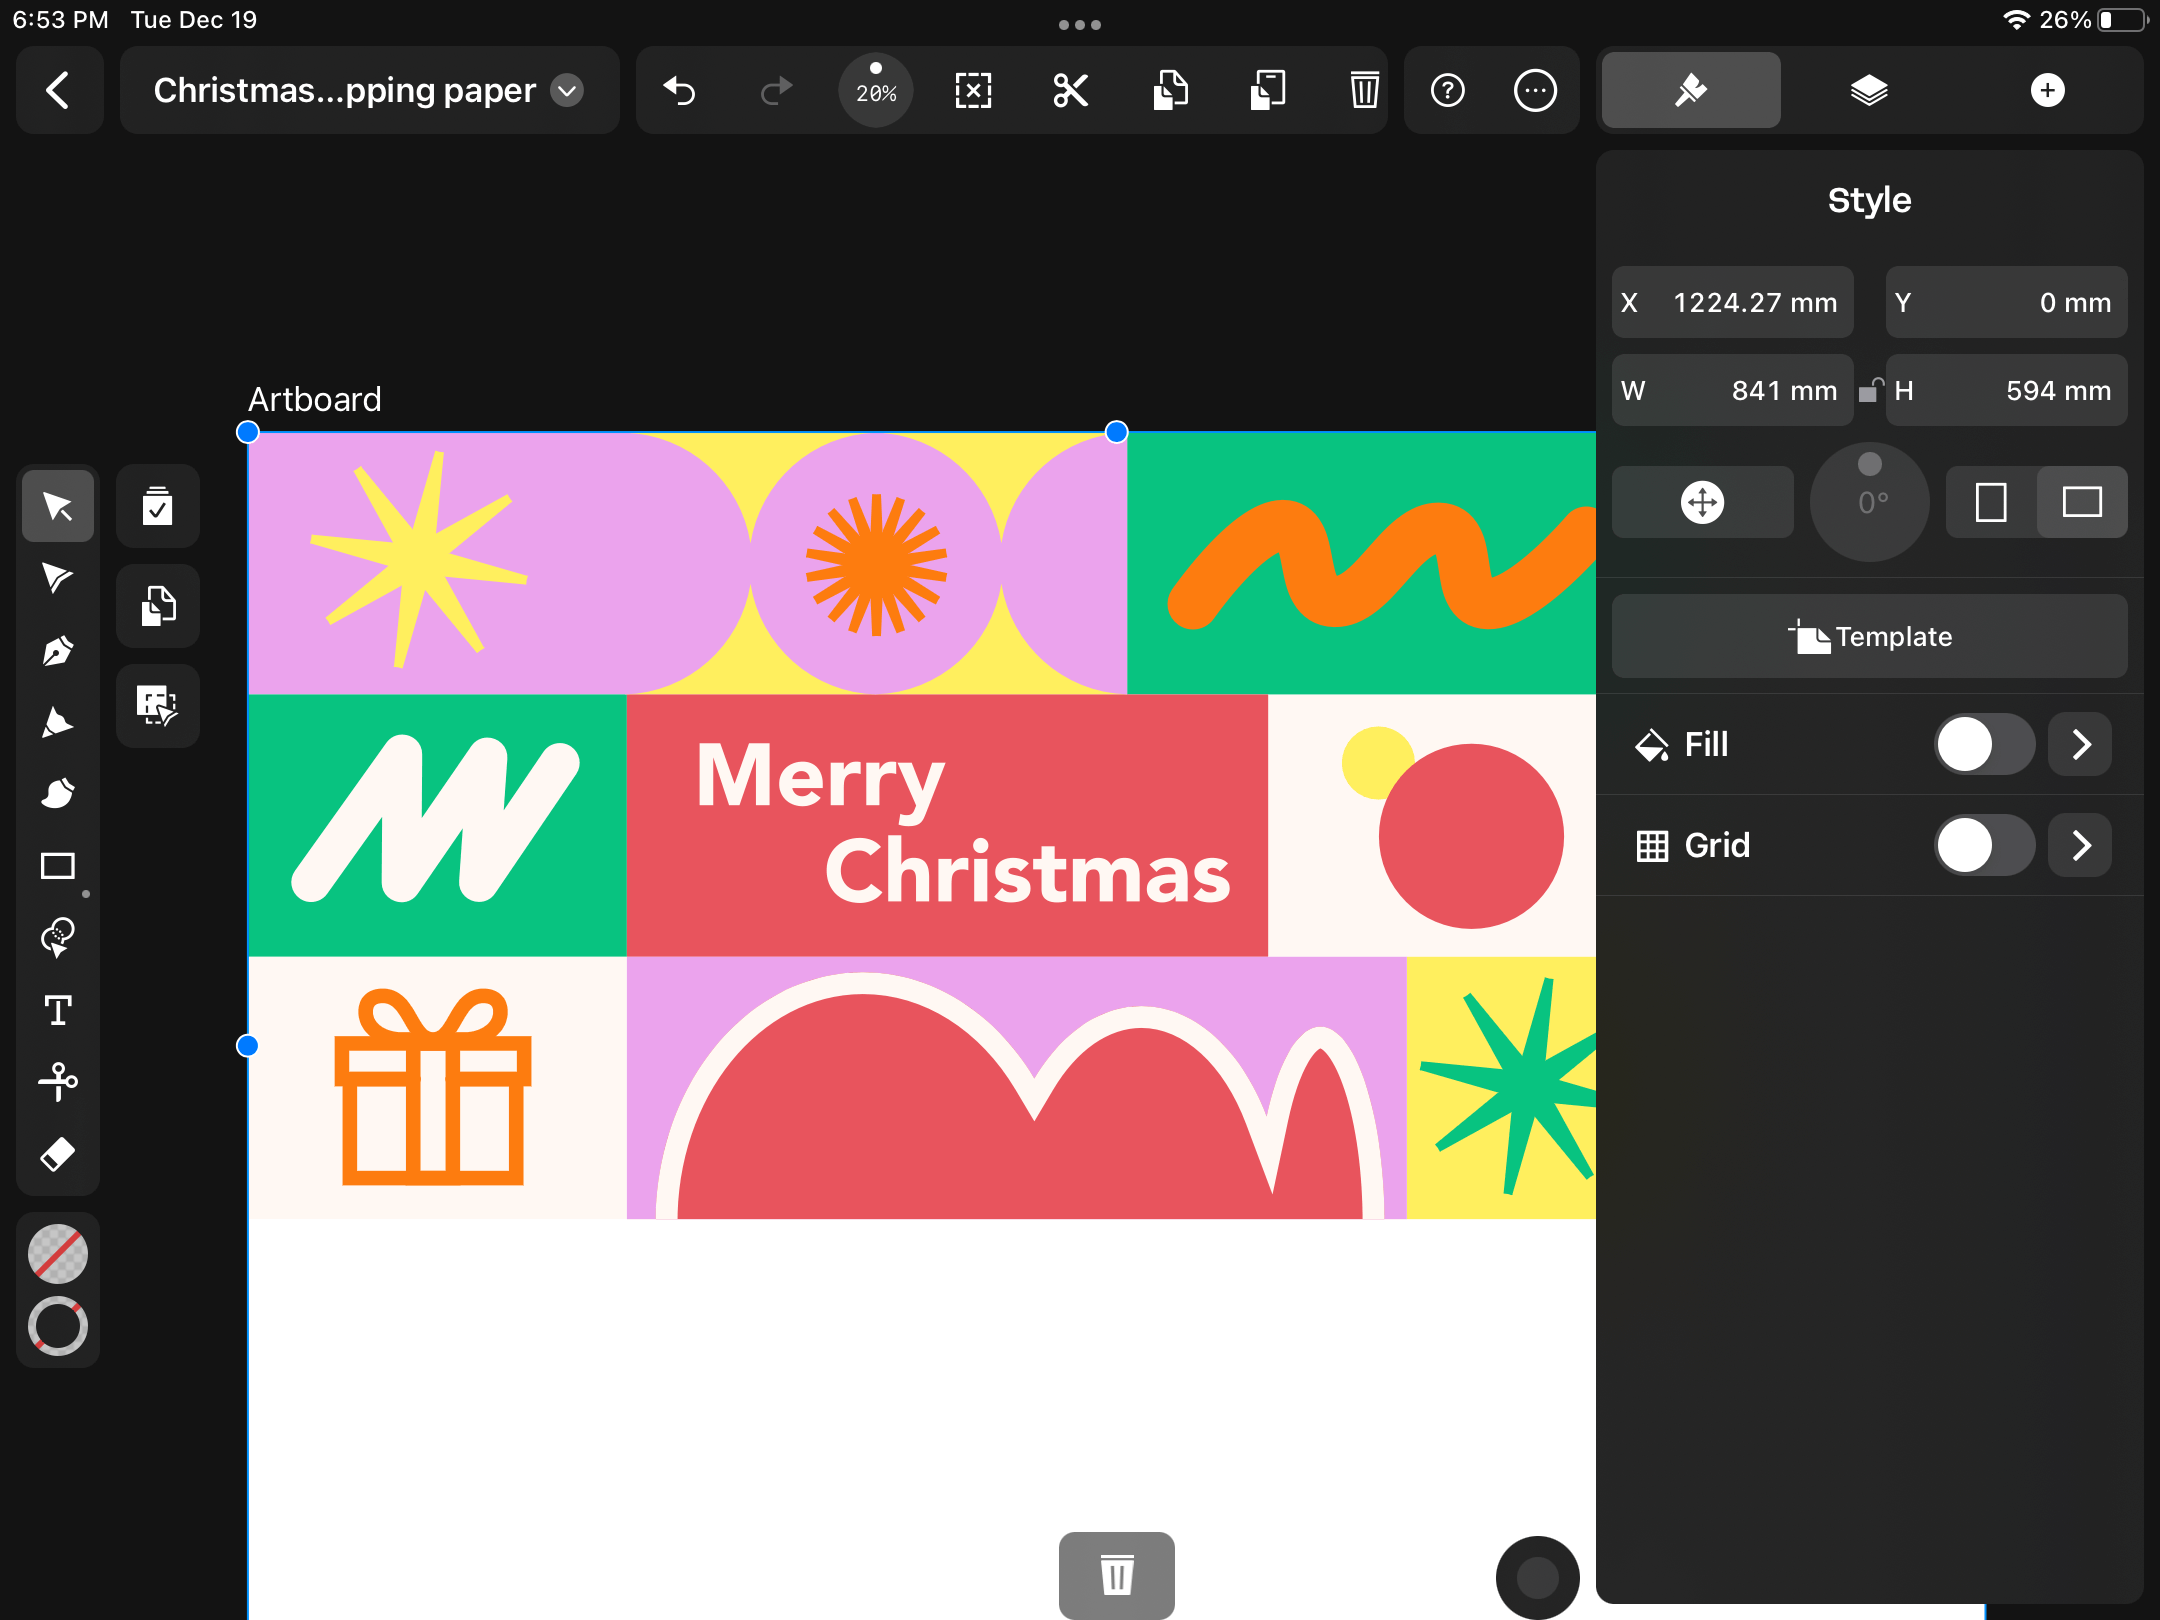
Here, you can see your Artboard editing options, including the size. We changed ours to A1 paper size (841 x 594mm or 33.1" x 23.4") for printing.
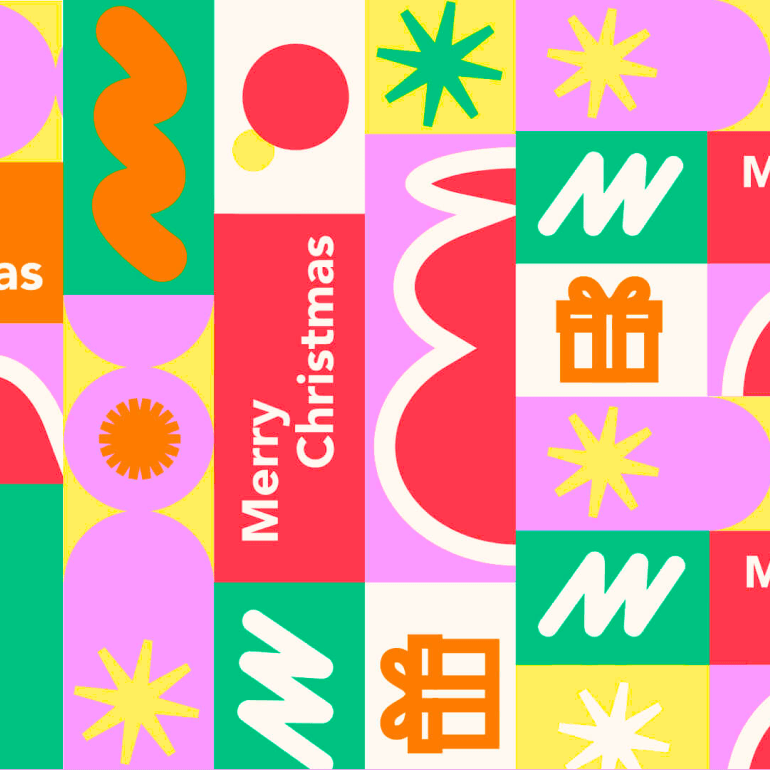
Create the pattern
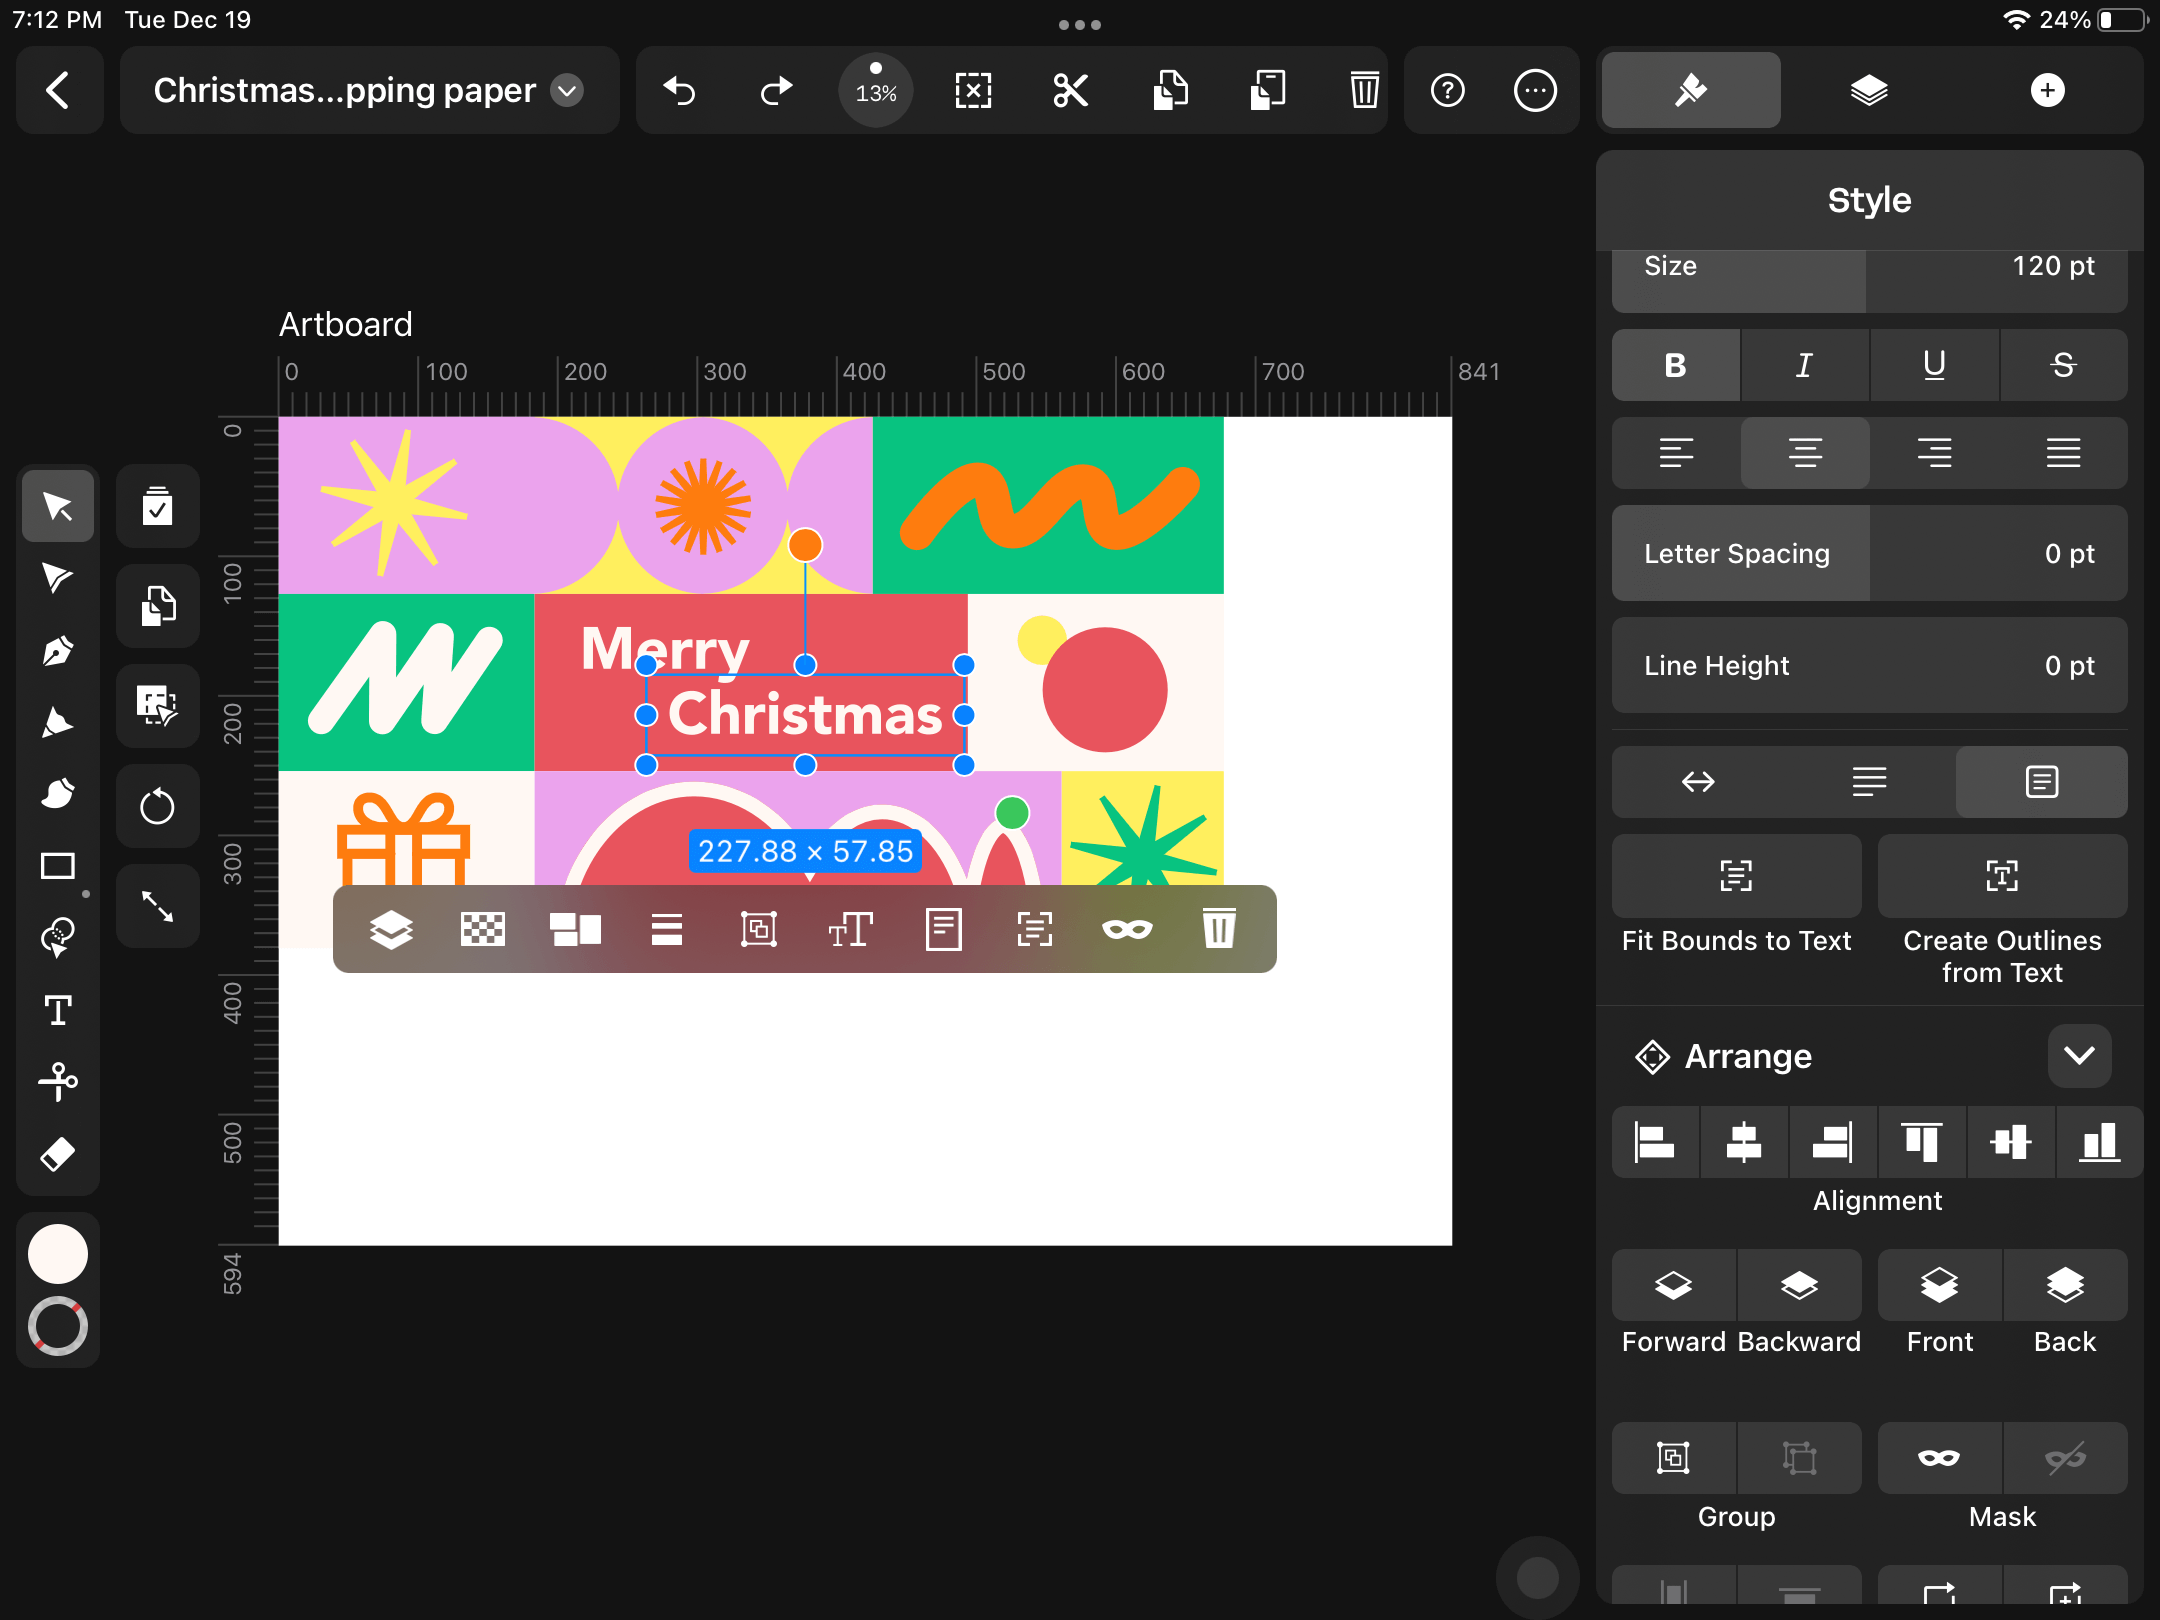
Arrange your elements to fit your updated Artboard size. Before resizing our base design, we turned the text into outlines. This allows the text to resize along with the other vector elements.
To do this, select one text box at a time and tap on the Create Outlines from Text button in the Style Tab.
Drag the Selection Tool over the entire design area and choose Group in the Quick Actions Toolbar that appears below. Grouping will make resizing and repeating your base design easier.
To repeat the base design pattern, choose Duplicate Mode and drag your selection to create a copy.
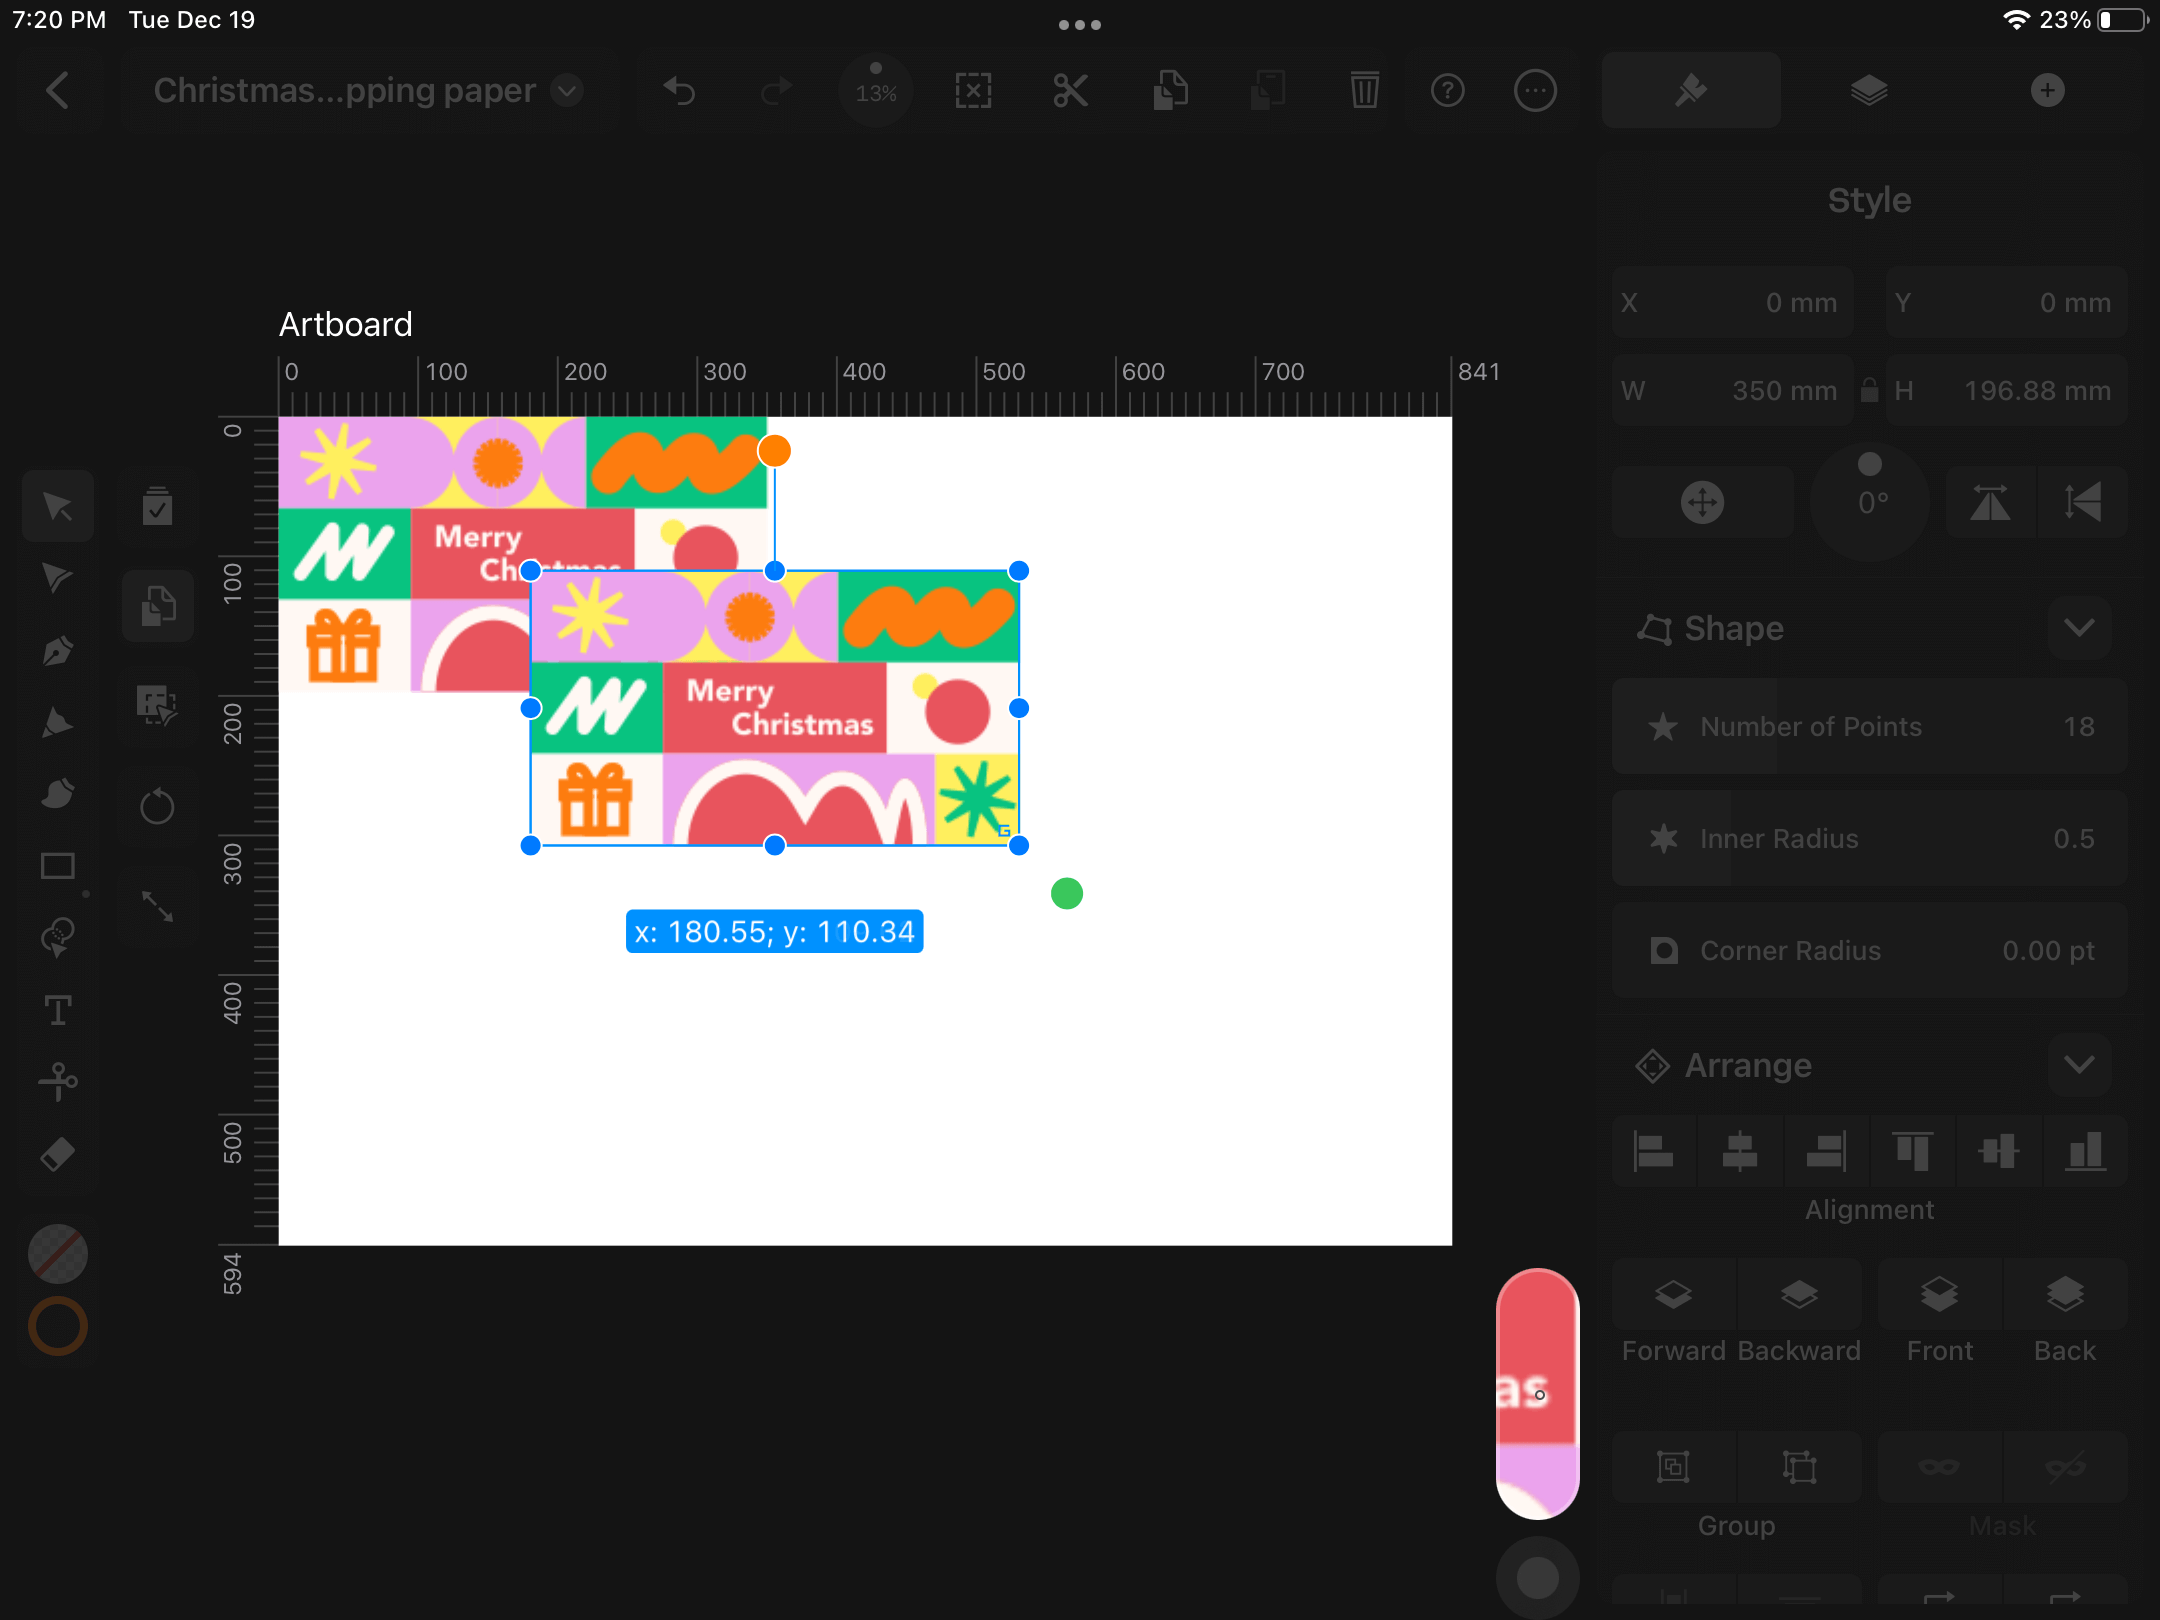
Keep duplicating and customizing your base design until you've covered the entire Artboard area.
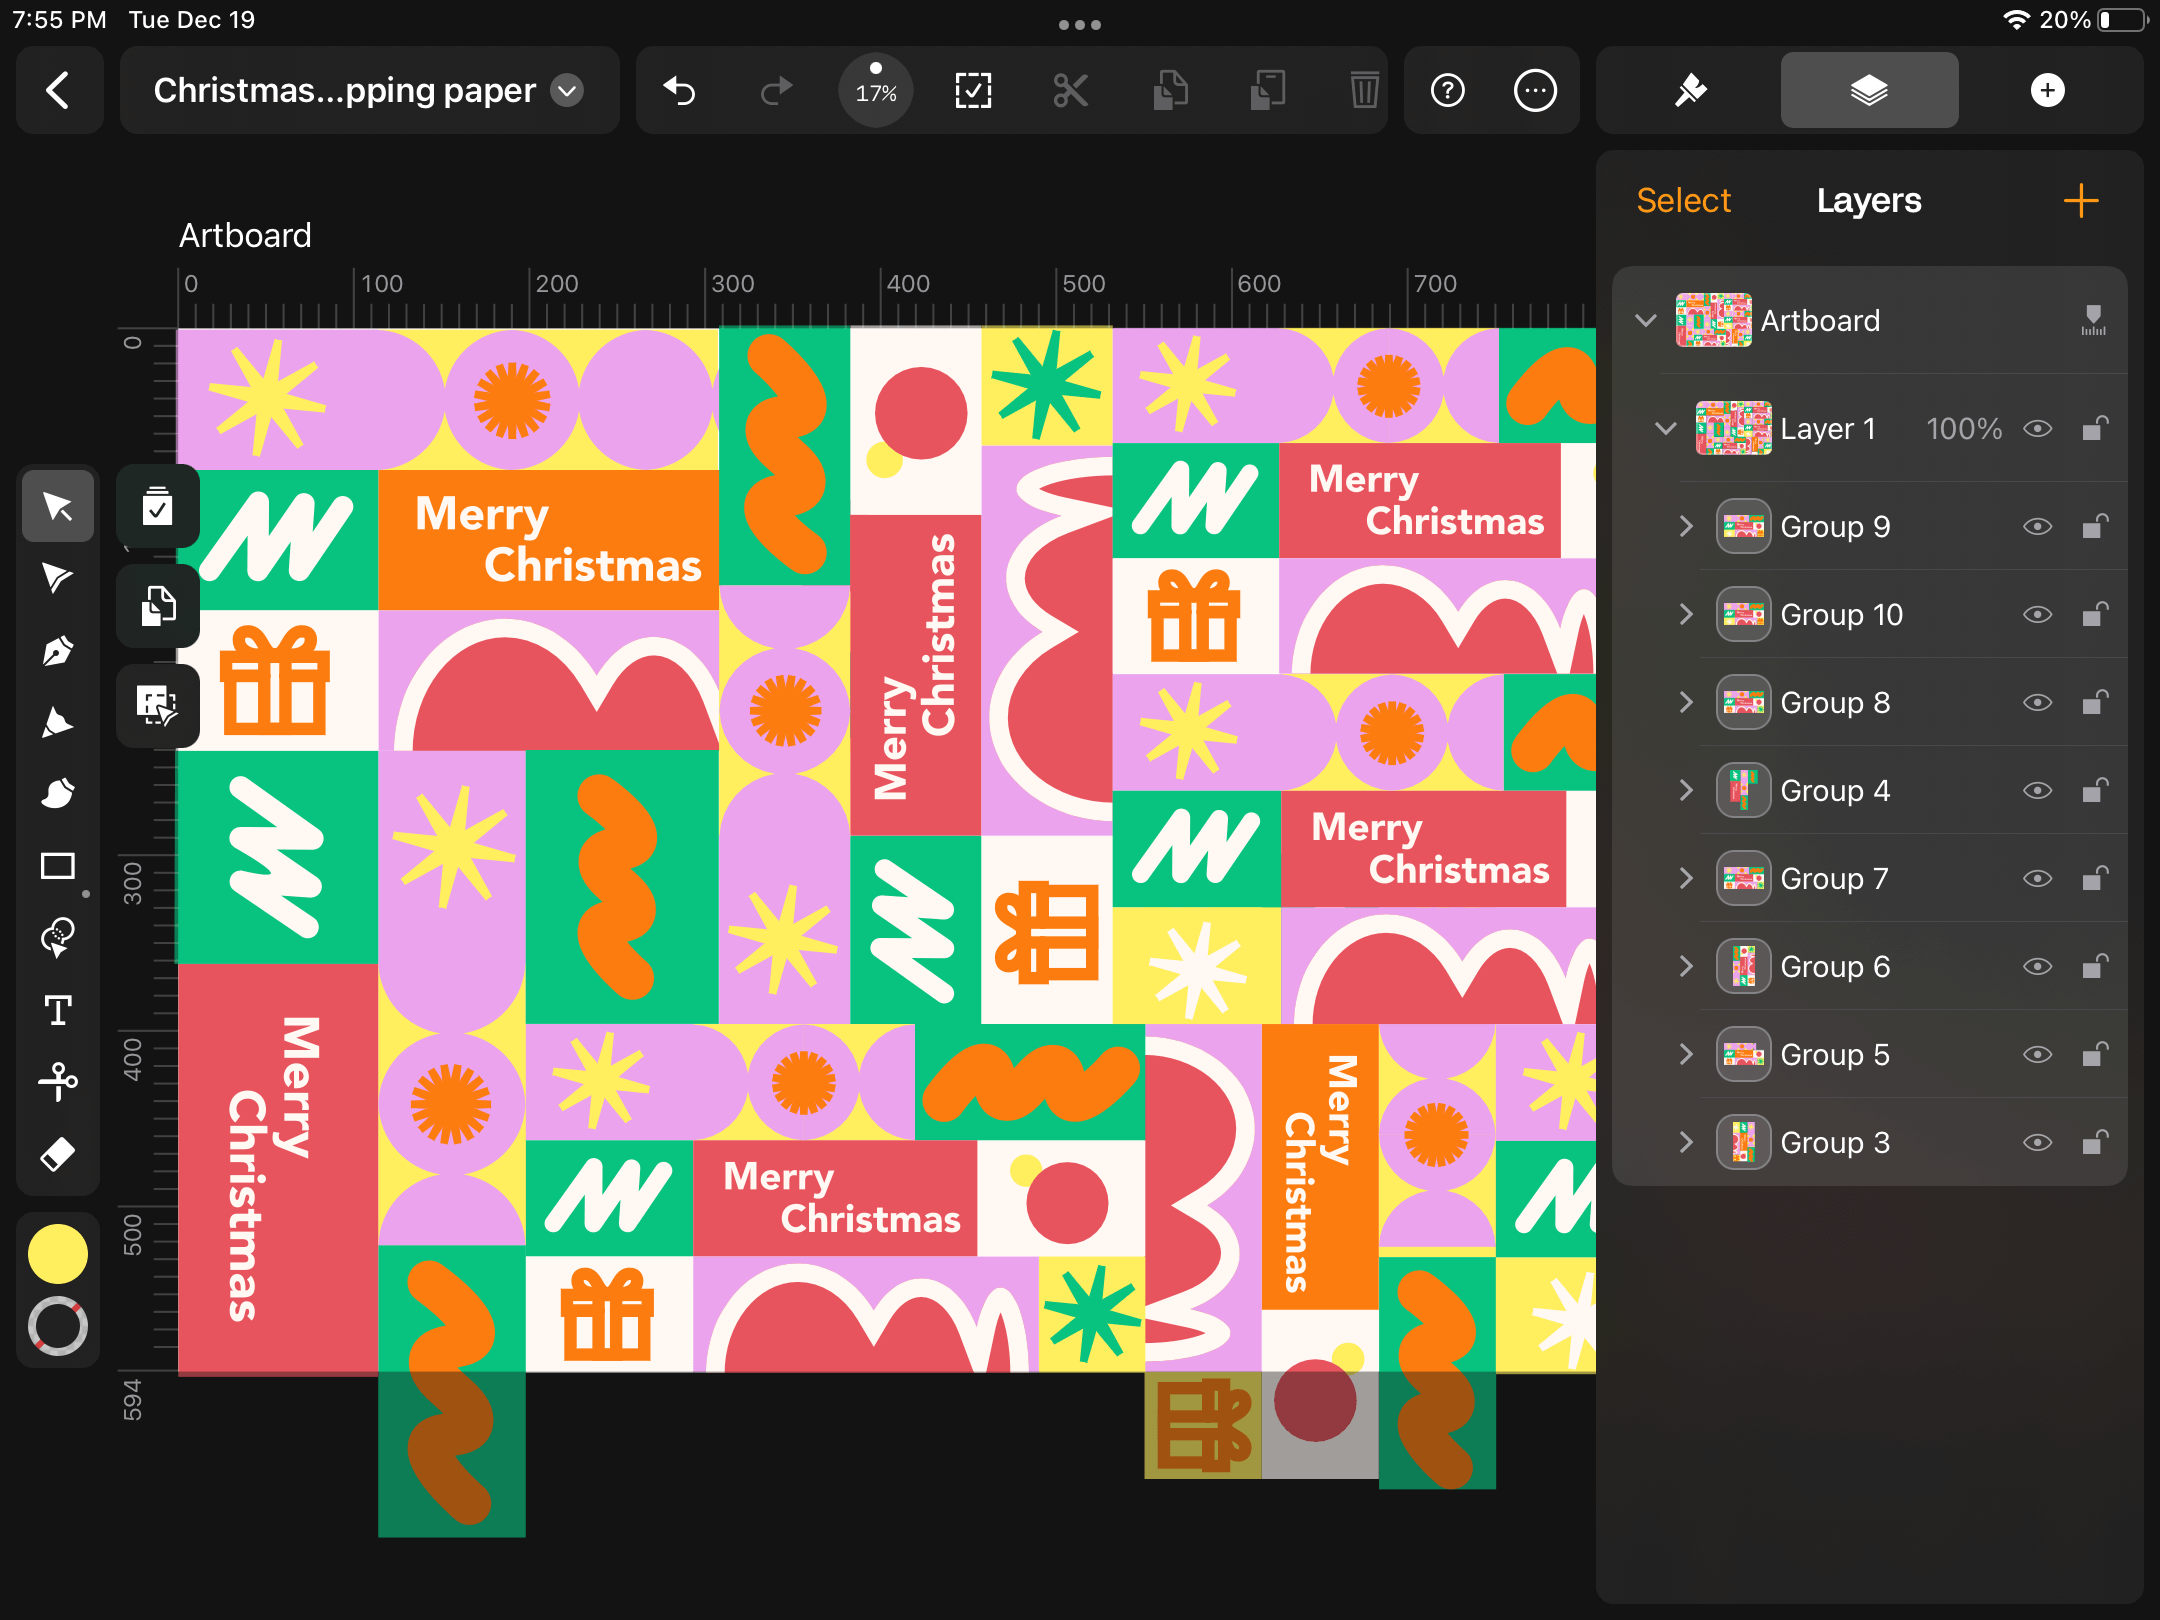
Note that this method doesn't create an infinitely repeating pattern—it's only suitable for one sheet of paper and won't fit seamlessly onto a paper roll.
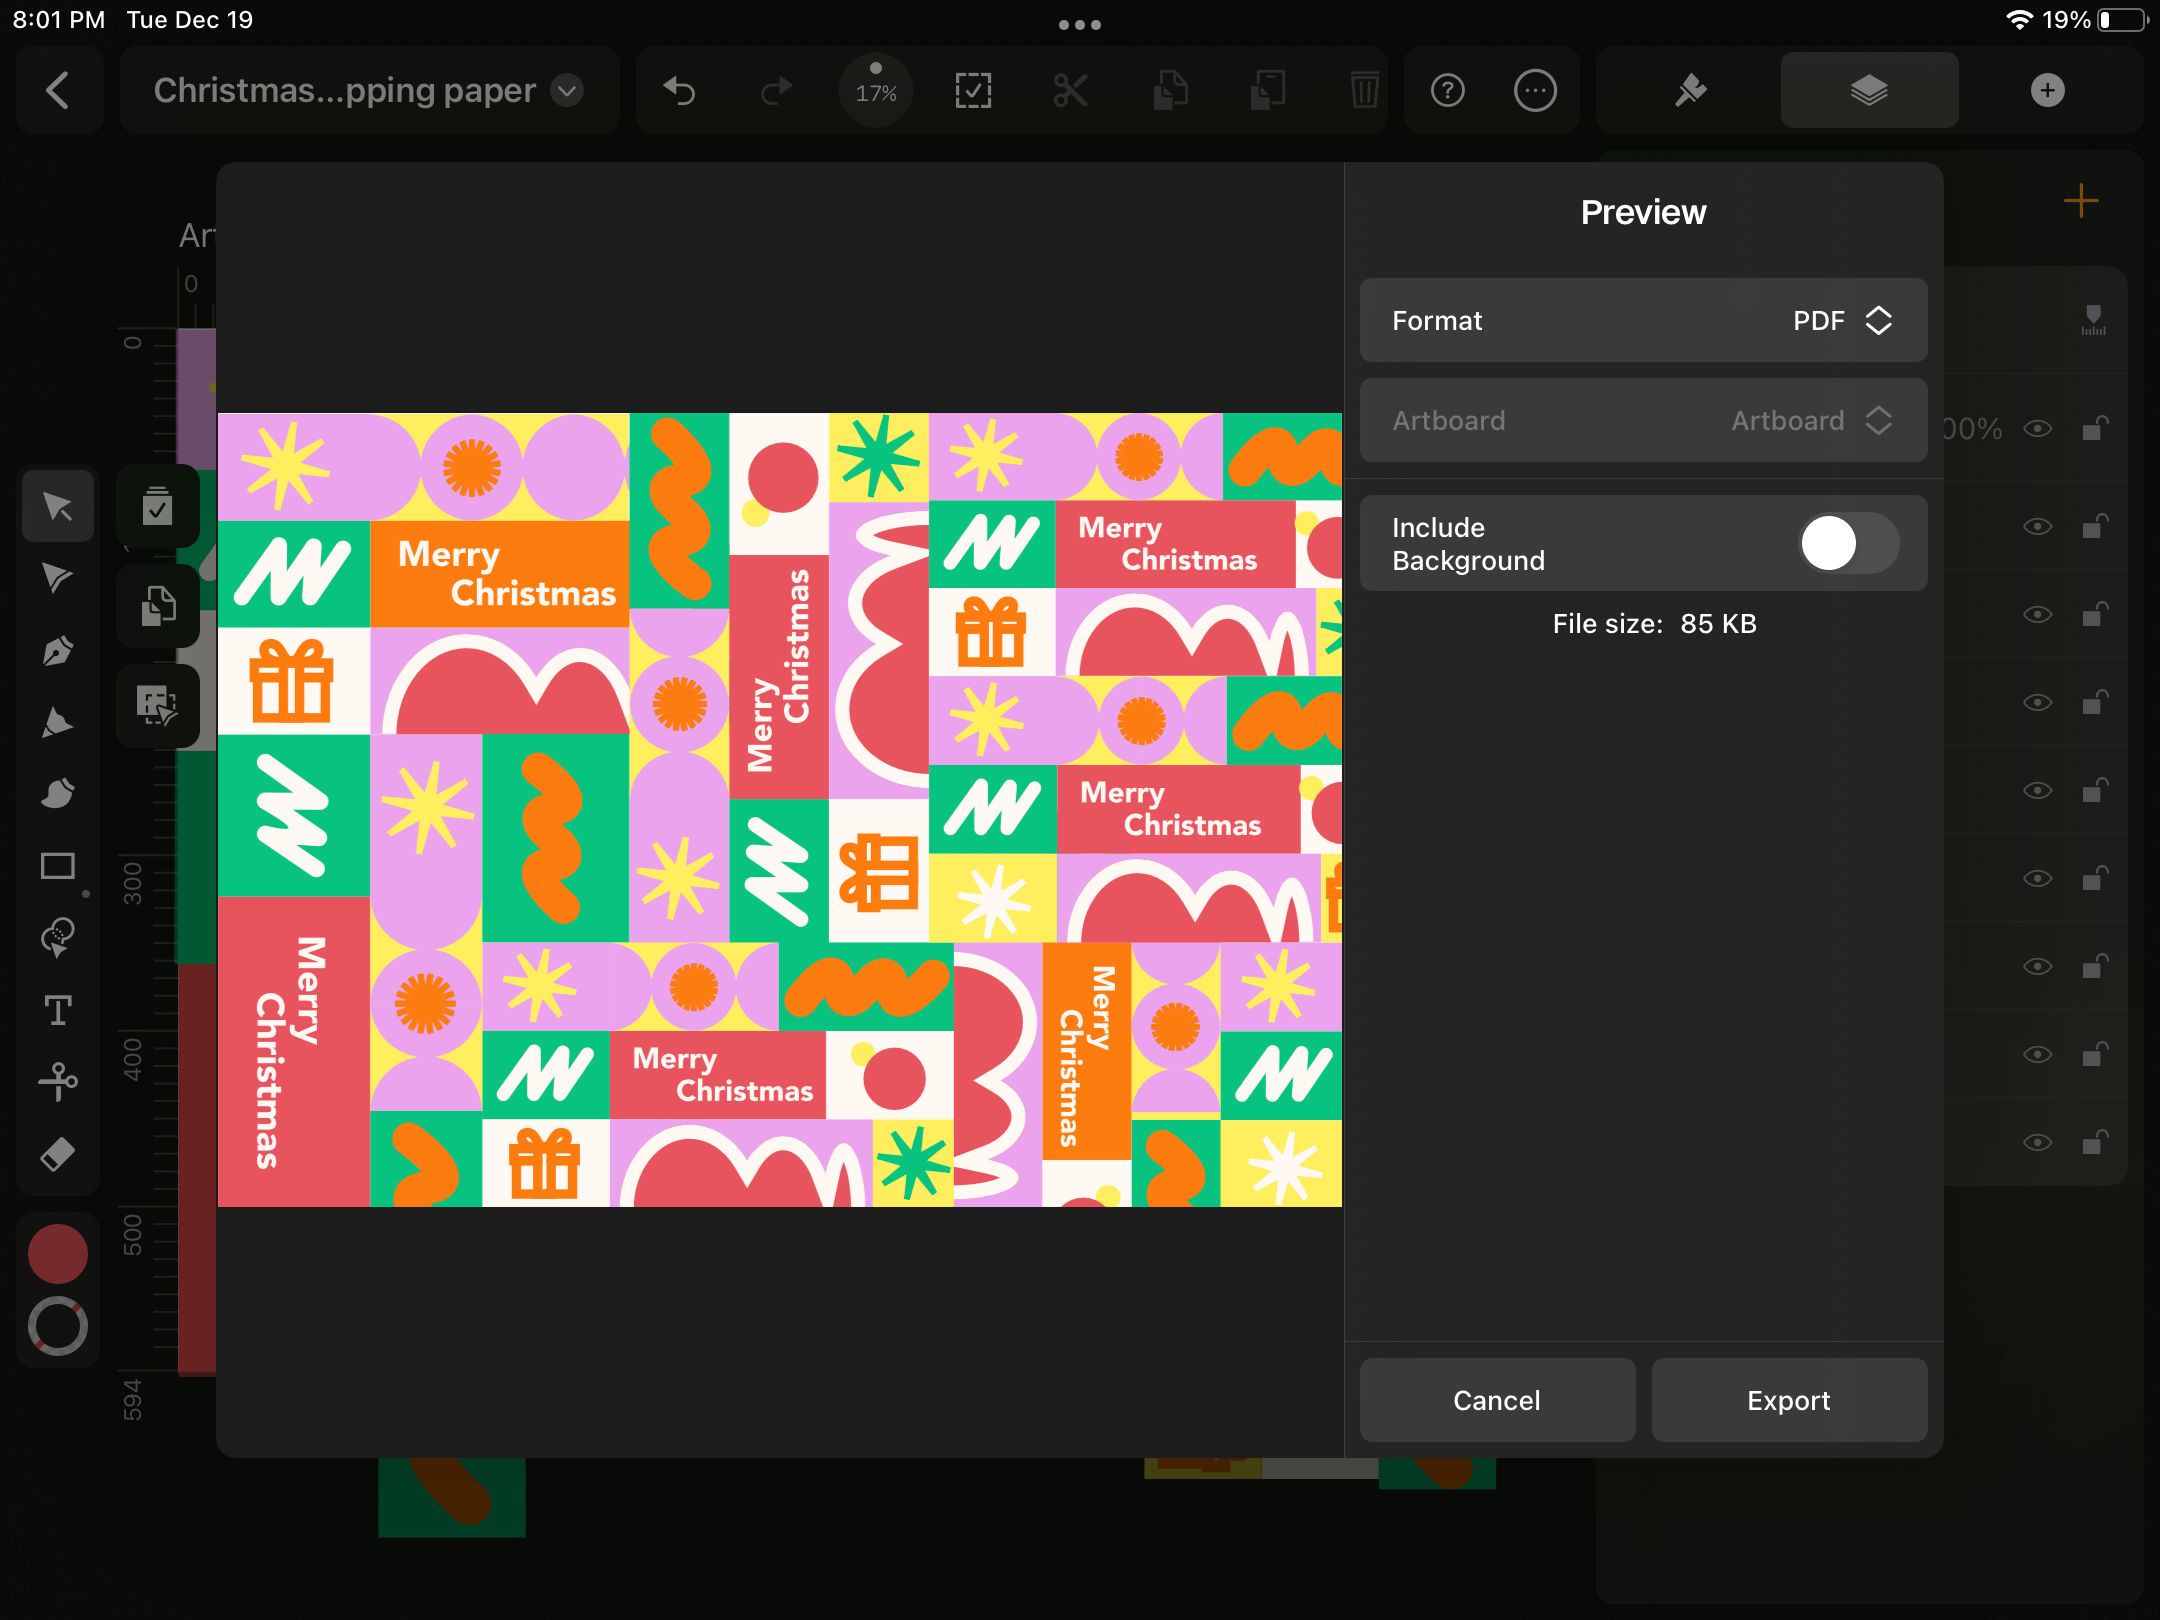
Export your wrapping paper design for print
Your wrapping paper sheet is print-ready. Tap on the File name menu item and expand the Export To dropdown.
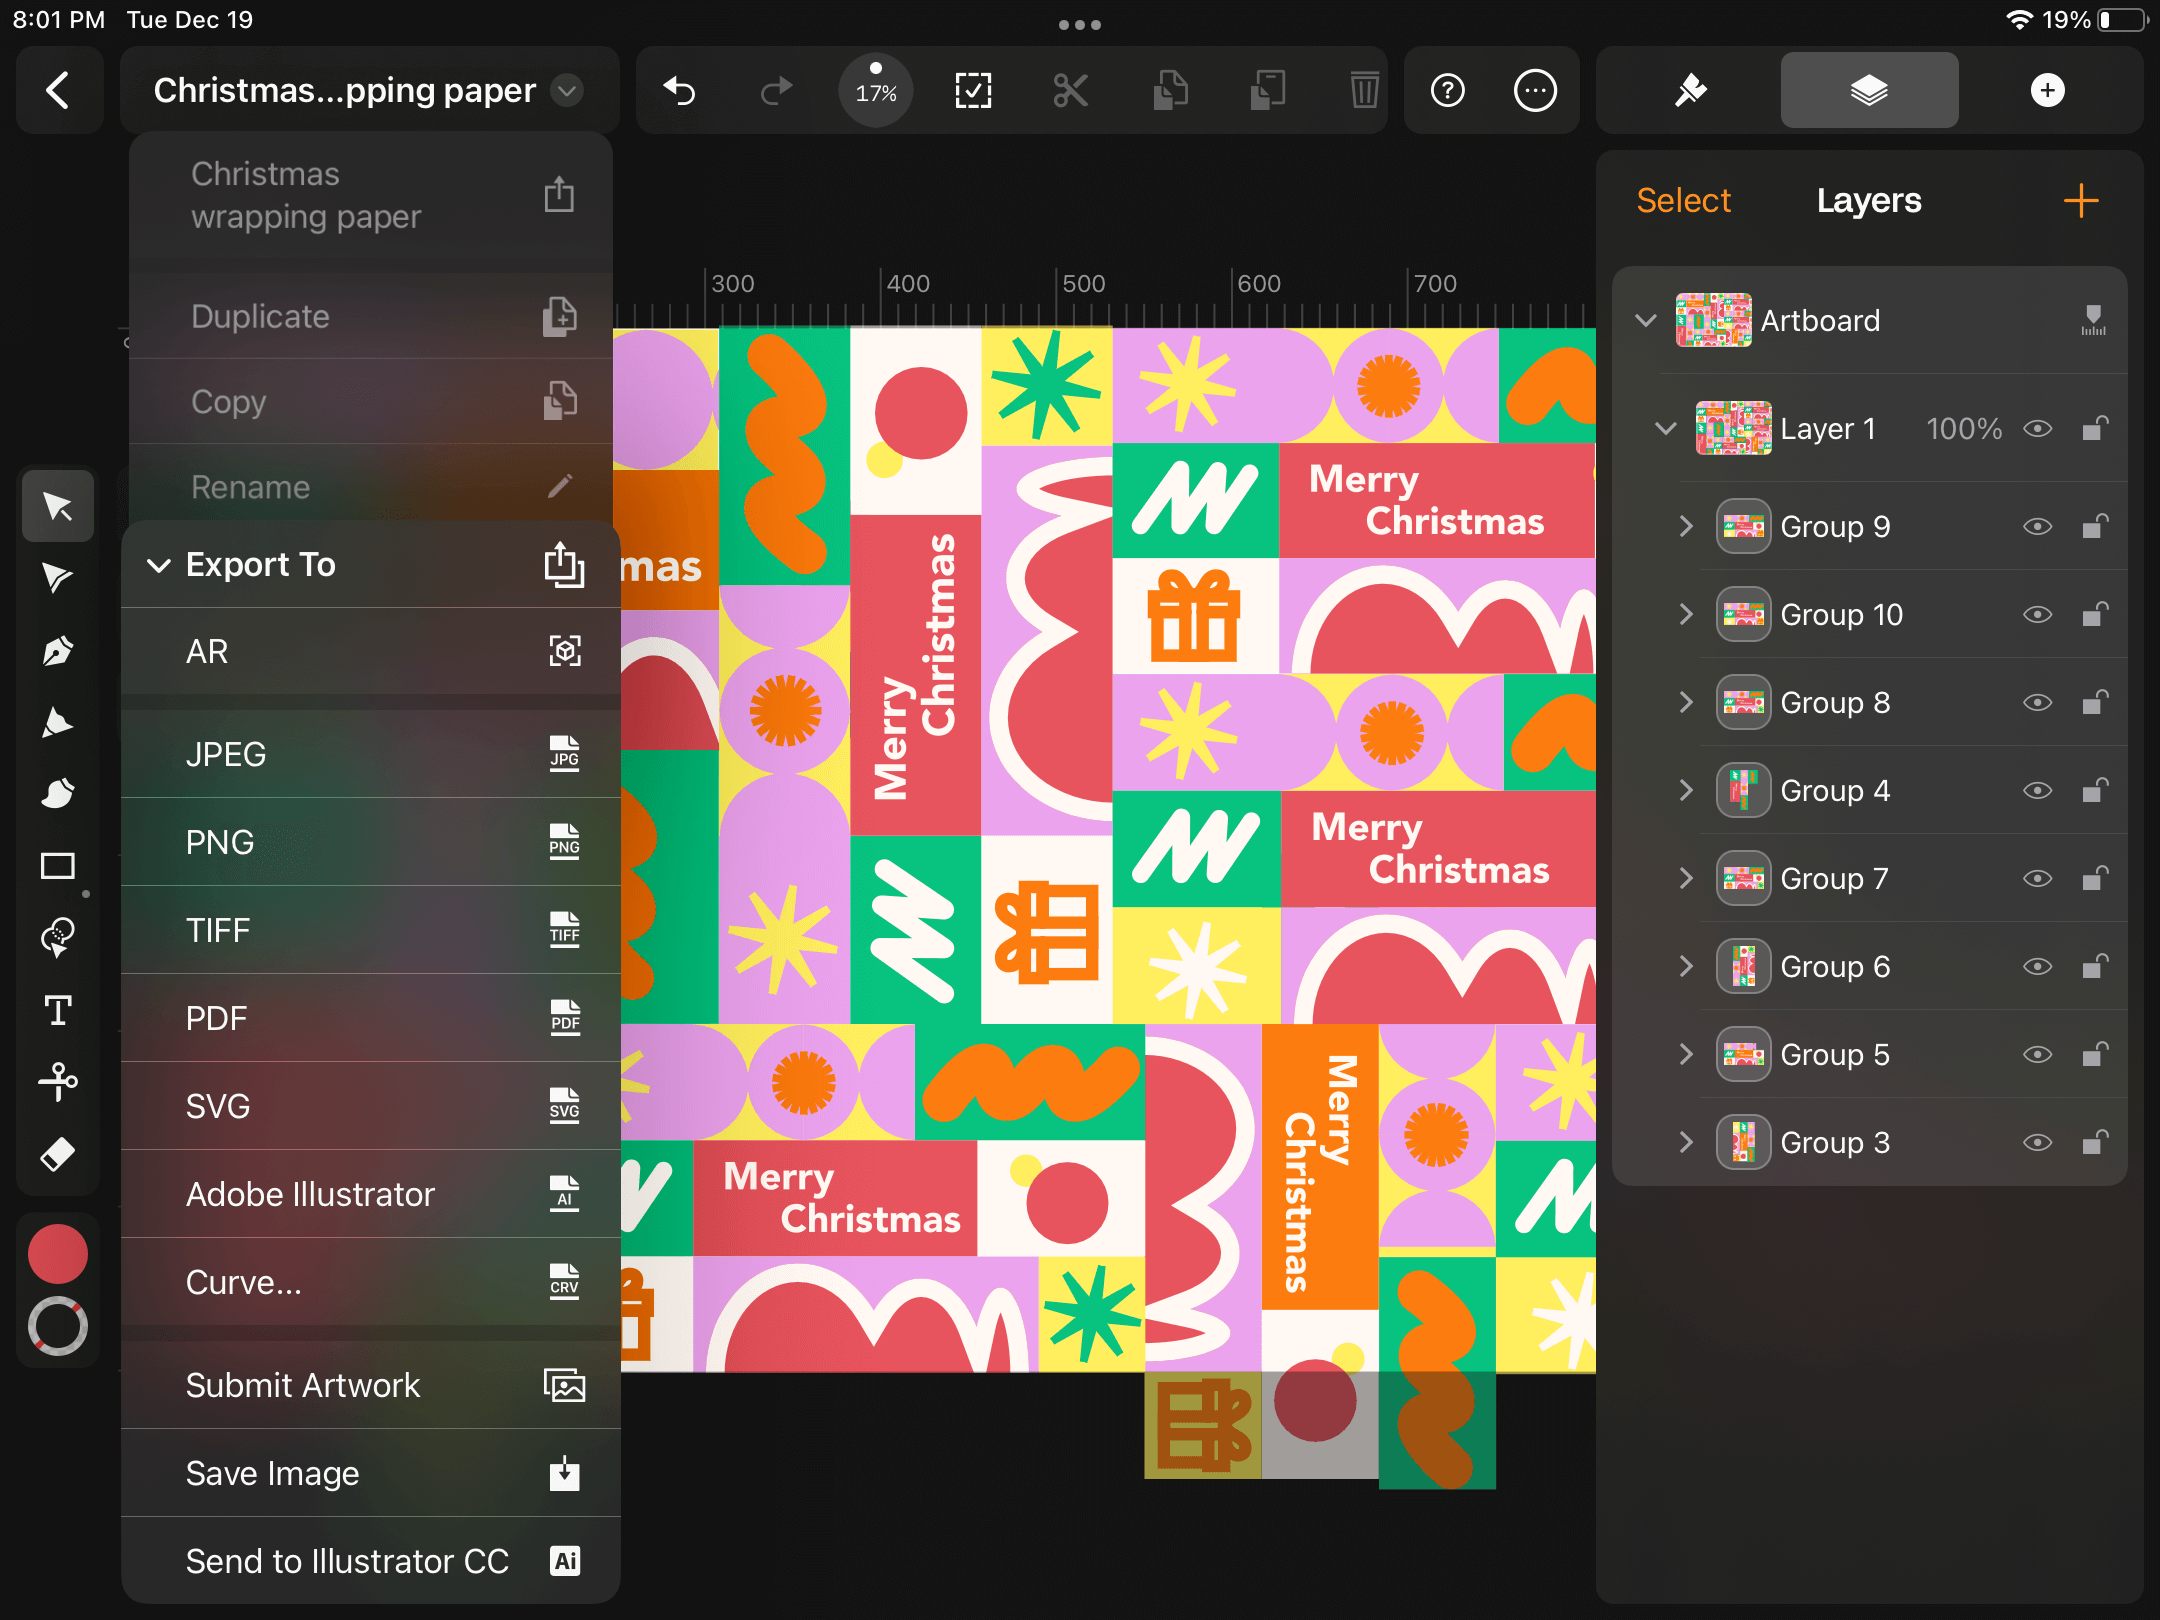
Choose a suitable file format for printing, such as .jpeg, .tiff, or .pdf, then tap Export.
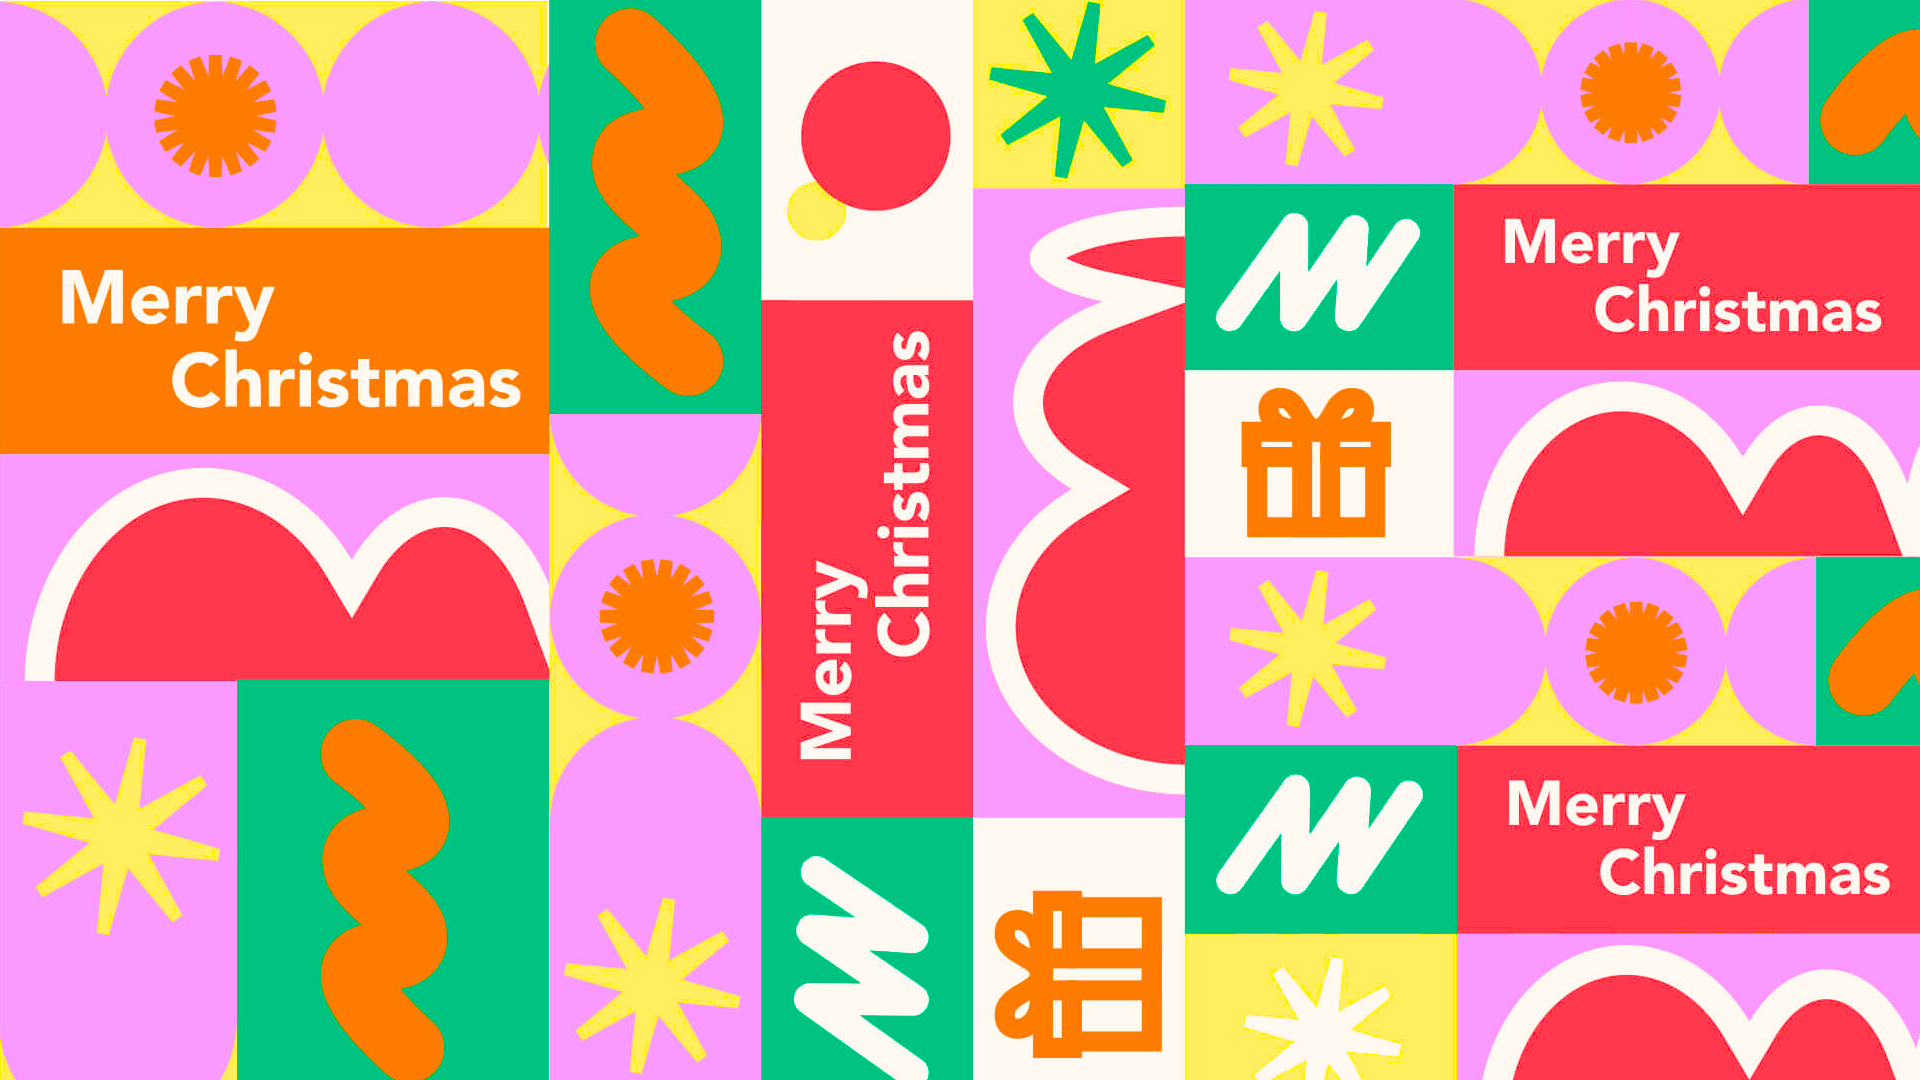
And that's a wrap: your next steps in gift wrapping paper design
Congratulations, you've designed a custom Christmas wrapping paper. Your unique design reflects your creativity and care and will add a special touch to every gift you wrap this holiday season.
As you move forward from here, remember that the world of surface design is vast and full of possibilities. The Christmas design you made today is just the beginning.
Here are a few next steps to consider as you continue to explore and create custom designs:
- Keep learning and exploring: The world of graphic design is constantly evolving. Keep up with the latest trends, tools, and techniques. Platforms like Linearity Curve offer not only the tools you need to create but also a design community to learn from.
- Experiment with different materials: Beyond the standard paper, consider printing your designs on different materials for a varied texture and feel. Explore metallic paper options, recycled materials, tissue paper, or even fabric. Printing on unconventional gift wrap materials can offer a unique unwrapping experience.
- Share your designs: Don't keep your beautiful designs to yourself. Share them on social media, or consider selling them online. A community of like-minded individuals and potential customers would love to see and use your creations.
- Collaborate with others: Collaboration can bring new perspectives to your work. Partner with other designers, artists, or local businesses to create limited-edition wrapping paper designs. It’s a great way to expand your portfolio and reach new audiences.
- Create personalized wrapping paper for all occasions: Offer your clients personalized wrapping paper, gift boxes, and gift tag designs. These make corporate gifts extra special. A custom wrapping set is also the perfect gift for stationery lovers.
Keep pushing the boundaries of your creativity. Each design is a gift in itself—a piece of art that wraps another’s joy. Here’s to many more designs, celebrations, and wrapped gifts in your future.
Jumpstart your ideas with Linearity Curve
Take your designs to the next level.
Frequently asked questions
What's the best file format for printing wrapping paper?
When printing your custom wrapping paper, the file format is crucial in ensuring the best quality. For professional printing, it's recommended to use high-resolution .pdf or .tiff formats.
These formats preserve the quality and details of your design, ensuring that colors and patterns are reproduced accurately and vividly on the final printed product. Ensure your design is set to the correct resolution, typically 300 dpi (dots per inch), to avoid any loss in quality during printing.
Can I use photographs in my wrapping paper design?
Absolutely. Incorporating photographs into your wrapping paper design can add a personal and unique touch. Whether it's a family photo, a scenic landscape, or any other meaningful image, photographs can elevate your design.
It’s important to ensure these photographs are high resolution to avoid pixelation when resized and printed. Ideally, photos should be 300 dpi at the size they'll be printed. This ensures that your images look crisp and clear.
How can I ensure my wrapping paper pattern repeats seamlessly?
To create a seamless repeating pattern, you must adjust and align your design elements for a continuous flow. The elements on the edges of your design should line up perfectly at each side to ensure a seamless transition.
Experiment with the spacing and arrangement of elements. With patience and attention to detail, you can ensure your pattern is flawless and ready for printing.
How can Christmas wrapping paper be reused or recycled?
Reusing and recycling wrapping paper is a great way to be eco-friendly. Reuse it for craft projects, such as book covers, or for future gift-wrapping. Check if your local facility accepts wrapping paper for recycling, as some types (especially metallic or glittery paper) may not be recyclable.
Who invented Christmas wrapping paper?
Christmas wrapping paper originated in the early 20th century. It gained popularity when Hall brothers (who founded Hallmark Cards) began selling decorative envelope liners as wrapping paper in 1917. This innovation came about after they ran out of traditional white, red, and green tissue paper during the holiday season.
But the origin of gift wrapping goes back much further than the 20th century. Some of the earliest forms of gift wrapping were done with fabric, not paper. For example, the Japanese tradition of furoshiki (wrapping gifts in cloth) dates back to the 1600s. Wrapping paper became more popular and affordable in the West as printing technology improved and paper cards became widespread. Today, Americans spend billions of dollars on wrapping paper each year.
Where can I print custom Christmas wrapping paper?
Custom wrapping paper can be printed at various online services or local print shops. Design platforms like Linearity Curve provide tools for uploading and customizing designs, while local printers can assist with printing and paper options.
It's a good idea to research different printers to find one that matches your quality requirements and budget.
Share this!
Sharné McDonald
Sharné is a contributing writer to the Linearity Blog. She has 10+ years' experience in graphic design and marketing and holds a Master's degree in Art Education.