:quality(75))
:quality(75))


:quality(75))
Learning how to create children's illustrations requires its own, unique kind of imagination and artistic process.
With a diverse range of applications, creating children's characters can take you in so many directions.
Jumpstart your ideas with Linearity Curve
Take your designs to the next level.
How to draw children's illustrations with Ewa Brzozowska
For this tutorial, we've partnered with the artist
Illustrations done in a more child-like style have many applications. For instance, Ewa loves using her characters for patterns. But you can also think of creating children's books, picture books, fairytales, other types of prints, and custom notebooks; the list goes on and on.
But no matter the application, your characters must remain accessible and attention-grabbing. Plus, with many young children unable to read, the character itself should perfectly capture the essence of your story on its own.
If this sounds like something you want to do but you aren't sure where to start, this beginner's tutorial will give you some tips and tricks for creating children's illustrations.
• iPad
• Apple Pencil
• Latest version of Linearity Curve
Map out your character’s story

This step is probably the most important of all.
You need to know your story before you draw your character. The character’s story is the backbone of your illustration, and it’s going to define all your future decisions. But most importantly, it’s going to make your character special.
A good character must evoke a reaction from the viewer.
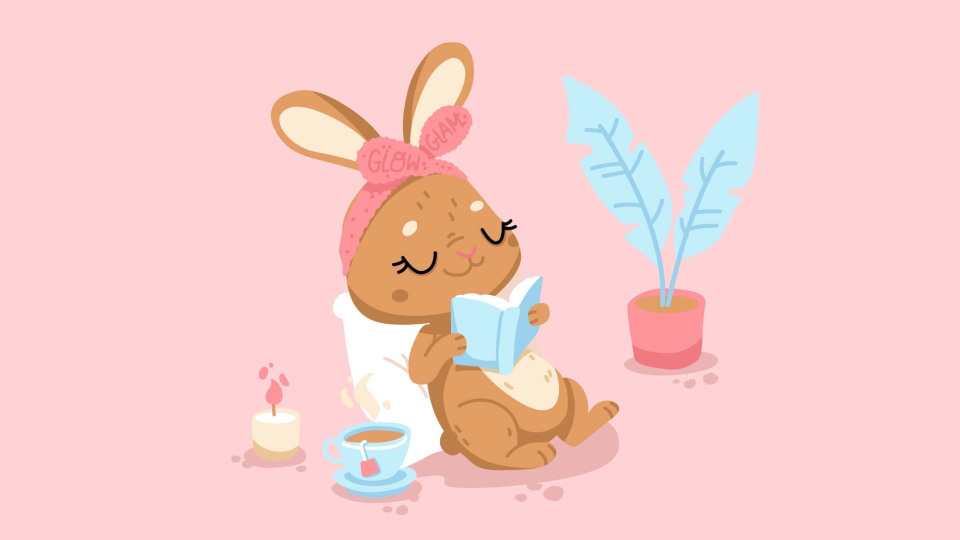
To start, map out three or four defining traits that describe your character’s personality, occupation, and hobbies. Here, Ewa decided she’s going to go for a cute little bunny girl enjoying her alone time by reading a book and drinking tea. And her inspiration—herself! These are all things that Ewa loves doing, so she decided to project them onto her character.
The magic in this step is to think creatively and not be too rational. Ewa’s characters are animals who drive planes, take balloon rides, dance, so think of a funny activity that your character can perform to give it life personality and charm. Try thinking like a kid again.
If you're writing or illustrating a story for children, your main character will almost always be a child or a child-like figure. This is because kids prefer to see people their own age solving their own problems. Keep that in mind!
Think of your inspiration

Ewa chose her own personality to define this particular character, but there are infinite sources that can inspire you.
Are you a fan of people-watching? Because that genuinely comes in handy when creating unique characters. Do you have children or little nephews that you can observe? That can also add plenty of ideas to your reservoir of character types.
Make a storyboard of all your references if it helps your process!
Define your character’s pose
Once you’ve defined your character’s personality, focus on their pose.
Try to make good use of shape theory during the process, as that will further cement the type of character you want to create. Ewa tends to rely heavily on curved lines because that makes her characters more approachable. For this character, she uses a bean shape as a base for the body. It's a great starting point for creating any character pose.
Master the Art of Drawing Poses
Enhance your illustration skills with our comprehensive guide on drawing poses. Learn techniques to bring your characters to life with realistic and dynamic postures.
A lot of professional illustrators start off with small, quick thumbnail sketches in order to figure out what works best for a particular character.
Try to give your character a pose that describes their personality and makes them easy to recognize. How can you check that for sure? You'll learn more in Step 12.
Think of proportions

There are some basic principles that you can follow to enhance the cuteness factor of your character.
These features are pretty well-established: a big head, a small body, and round shapes. Additionally, you should apply the triangle rule for placing the eyes nose and mouth.
Here's a comparison of two slightly different characters. Notice how by applying these simple proportions, your illustration becomes much more child-friendly.
Facial expressions

Let’s take a closer look at the triangle rule we mentioned before. It tells us that the smaller the triangle made with the eyes, nose, and mouth is, the cuter your character will end up looking. Can you see the difference here?
Even when we draw regular, not-so-cute eyes, the character looks definitely cuter when we place them right.
That is why the first step is so important. Every single thing you do after relates to it.

Sketch it out

Always start with a sketchbook and pencil, or a sketching software like Procreate.
Make a few doodles until you feel like you’re captured the essence of your character. Some sketches come to life straight away, while some are very tricky and can take a long time to get right.
Give yourself time and practice. As Ewa said, it's easiest to start off with something simple, like a bean shape, and add all your other elements to it.
Add accessories

Perhaps your character wears mismatched clothes or carries a blanket with them wherever they go.
It’s important to give your character some props that will support your story. Ewa gave her little bunny a bow and, of course, a book.
Import your sketch into curve

To import your sketch into Linearity Curve (formerly Vectornator), you can save a .jpeg or .png from a digital sketching software onto your device, and then go to File -> Import, or simply drag and drop it into Curve from your device Gallery.
Alternatively, if you've drawn a physical sketch of your character, you can use the Camera Import feature to bring the illustration directly into your canvas.
Create a new layer for the vector file

Now that you've imported your sketch into Curve, it's time to get it ready for the rest of your illustration process.
To keep your work tidy and organized, you'll need to make a new layer for every new dimension of your illustration, like background details, shadows, and so on.
It helps if you reduce the opacity of the sketch layer as you can better visualize what you’re vectorizing.
Vectorize in parts

With the Pen Tool, tap and drag along your sketch to start vectorizing your graphic.
Working with vector illustrations is key for any print project, as the quality of your file will stay the same indifferent of how big or small the graphics will be laid out. They will look crisp no matter what!
:quality(75))
:quality(75))
Vector design has its own minimal aesthetic, but if you prefer to achieve a watercolor effect in your illustration, you can line your characters in Curve and then move on to a pixel-based software like Procreate for their various watercolor brushes.
If this is the first time using the Pen Tool, or you'd simply like to learn more about working with it, then read its dedicated Learning Hub section. Or watch the video in its entirety.
Group all your shapes together

Make sure you vectorize in parts and close each section individually by ending your vector shape exactly where it started.
You can do this by tapping the first (green) node again. This will create a closed vector shape.
Once all your sections are finished, select them all and use the Unite Boolean operation to merge them into one big shape. You can easily find it in the Quick Actions menu.
Final checks on your pose

Remember how we talked about evaluating your character's pose in Step 3?
The best way to objectively understand how effective your character's pose is at this point is by turning your character all-black. You can do that by selecting all your shapes and going to the Style Tab -> Fill.
So now you can solely focus on the silhouette. Can you tell what your character is and what they're doing just by the nature of their silhouette? If the answer is yes, then you're doing it right.
If you’re unsure, then pick up the Node Tool and adjust your character’s posture and silhouette until it’s more well-defined.
Vectorize the facial features

To vectorize the nose and eyes, continue using the Pen Tool with a thinner stroke (Ewa chose 8pt) and tap and drag until the desired shape is achieved.
For any adjustments you want to make, simply use the Node Tool to change the angle or position of your anchor points.
Tell the story with color

It's really important to choose a color palette that evokes the character and the environment that they're in.
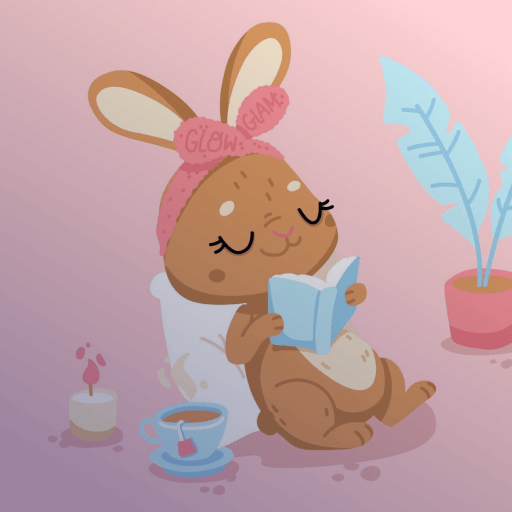
Ewa chose a warm palette of pastels—like fresh pink hues with a touch of blue for contrast. She wanted her illustration to be cozy and warm.
Once you have chosen your main colors, create an additional shade of each hue to help with the detailing and shading. As an example, Ewa chose a light brown color for the bunny base, and then another darker brown for the fur.
Ready to create brand assets that pack a punch?
Visit our Academy for free draw illustrations courses.
Finally, she added a background that complements her composition by using a different shade of pink that exists on the canvas.
However, when choosing a hue for your background, you can use a color on the opposite end of the color spectrum in order to bring contrast.

Speaking of which, make sure that your colors have contrasting values, in order to avoid different areas of your illustration blending in with each other. If you want a detailed lesson in color theory, read this extensive tutorial.
Once created, save your color palette in the Style Tab so you have it handy at all times.
Add shadows

You can choose to leave your characters fully flat, but shading will give them some much-needed depth.
First, you need to decide where the light source is. In this case, it’s coming from above. Then map out your shadows with the Pen Tool and make use of the secondary, darker color to fill them in. The Pen Tool is going to ensure that your curves are nice and smooth.
If you are having issues shading with vectors, then this tutorial is going to help.
And it's always a good idea to keep the Node Tool nearby.
Keep it simple
Try not to get lost in details, because that's not the point when you design children’s characters.
Ewa, for example, does not draw things like their fur except for a few subtle lines. She uses the same principle for individual fingers. Sometimes, her characters don't even have a mouth. Children's characters are meant to be playful and you don't have to spoon-feed every single detail. They don't have to be realistic.
And that's where the simplicity of vector design comes in handy! The fewer unnecessary details, the sweeter the character will be.
But add a few defining details

As simple as your final illustration is, there are a few details you could focus on nonetheless. Here are two almost identical illustrations side by side, with and without details, that show the power of a few small but purposeful detail elements.

Using your color palette and the Pencil Tool add tiny fur lines sparingly around your character to give the final artwork more balance. Much better now, isn’t it?

Ewa also decided to add some simple details to the bunny’s bow—like the writing, the dots, and the ruffled edges. All of this was done with the Pencil Tool, your best friend for creating freehand vector shapes.
.jpeg)
And now this is the final product!
We've gone over the main steps and principles that you should apply when drawing children's illustrations. But remember, the most important thing is just to have fun, to experiment, and to find your own unique style.
If you’re ready to try these tips, tricks, and techniques out, then download Curve and get started right away. You’ll find that Curve is intuitive, streamlined, and most importantly, easy to use.
And make sure to tell us in the comment section below what you'll be using your artwork for!
Is it to illustrate a children's book? Are you planning to self-publish a storybook? Or is it for any other graphic design project?
Let us know! We can't wait to see what you'll make.
Jumpstart your ideas with Linearity Curve
Take your designs to the next level.
(All images provided by Eva Brzozowska)
Share this!
Lavinia Aparaschivei
Lavinia is a contributing writer to the Linearity Blog.


