:quality(75))
:quality(75))


:quality(75))
As part of the annual challenge 36 Days of Type that's held on Instagram by the Barcelona-based graphic designers Nina Sans and Rafa Goicoechea, this tutorial shows you how to draw a beveled letter.
The contest is a 36-day celebration of typography and creativity, involving designers, visual artists, and creatives from all fields in a global and simultaneous act of creativity around type and lettering styles.
Jumpstart your ideas with Linearity Curve
Take your designs to the next level.
If you'd like to participate in the challenge with all the other creative people, then grab your stylus pen, and let's get started!
• How to use the Pen Tool
• How to use the Text Tool
• How to convert text into Vector Shapes
• How to use the Isometric Grid
• How to play with colors
Get some inspiration first
If you're completely new to typography, you may be asking yourself, what is a beveled letter?
The bevel is a slanted surface or edge that gives a flat surface a three-dimensional facet. In other words, bevel letters are a type of 3D lettering with the illusion of a pointed, raised texture on top to create a striking decorative effect.
Typographic bevels are created by adding shading. These artificial shadows mimic the appearance of a three-dimensional letter on a flat surface.
What are beveled letters used for?
It is used in mainstream logos and other design elements. Internal lines and added shadows create the illusion of 3D embossing and extrusion on a 2D surface. A beveled letter graphic font is a typeface that was originally designed for use in digital printing on paper.
Before you attempt to draw beveled lettering styles, searching for some pictures of beveled letters online is a good idea. Study the structure of the lettering styles, their letter inline and outline, and observe how the shadow colors are utilized to create the extrude and bevel effect.
You can start by drawing a few beveled letters on paper, on your iPad, or on paper to grasp how to set the bevel lines and shadows to create the embossed look. It's also important to master a few basic letter shapes, such as block letters.
This is an advanced lettering effect. If you have no previous experience drawing this type of lettering, take your time to draw a few letters in preparation for this tutorial.
Let loose and don't be afraid to make mistakes!
Prepare the template
To be able to participate in the challenge, you have to share your letter artwork on Instagram with a specified template. That's why we created the template before we started drawing our beveled letter.
When you upload your file, it's very important that the main hashtag of the project is included in your Instagram post (#36daysoftype), but don't forget to include the individual daily hashtag as well (#36days_LETTER / NUMBER).
The correct hashtag for the first day would be #36daysoftype and #36days_a, for example.
There are three main submission rules on the 36 Days of Type website you have to follow to be able to participate in the challenge:
- Submit: Use #36daysoftype + #36days_LETTER / NUMBER to submit your work
- Image entries: JPG / PNG, ideally in squared format (1080 x 1080px)
- Video entries: Video entries in all formats are also welcome.
Both static images and videos are welcome. Just make sure that your file size is in the square format: 1080 x 1080px
You can create your color palette in Vectornator in advance. Below you can find all the Hex color codes to prepare the palette for the tutorial.
Background Gradient: #FFFFFF + #E80692
Light Blue: #84CEE8
Dark Blue: #042733
Medium Blue: #1B6680
Outline Stroke: #FFFFFF
Shadow: #02293B
Create a new layer in the Layers Tab and name it "Background".
Select the Rectangle Shape in the Toolbar and toggle the Stroke off.
Set the Linear Gradient of the background fill color to #FFFFFF and #E80692 in the Color Widget or the Color Slider Space.
Drag the Rectangle Shape across the canvas until it's completely covered in the white-rose gradient color.
Create the base letter
In the next step of our tutorial, we will create the base letter.
Create a new layer and name it "Letter". Drag the layer "Letter" above the "Background" layer or move it with the Order gesture in the Arrange Tab on top of the layer stack.
Unlock the Potential of Vector Drawing
Discover why drawing with vectors is a game-changer in design. Our tutorial explains the advantages and techniques of vector graphics, enhancing your creative process.
Activate the Text Tool by pressing on the text icon in the Toolbar or by pressing "T" on your keyboard. Set the Fill of the Text Tool to pure white #FFFFFF. In the Style Tab, set the font to Helvetica, the Type to Bold, and the size to 1000 pt.
Now, tap and drag anywhere on the canvas. A bounding box containing the word "Text" will appear on your canvas. You can then start writing the letter "E" by using the keyboard.

Convert the text into a vector shape
In the next step of our tutorial, we will convert the text into a vector shape to make it editable.
Select the Letter with the Selection Tool. Convert the text into a vector shape by tapping the button Create Outlines from Text in the attributes of the Text Tool.
Now, we have converted our letter into a vector shape, and you can see the exterior lines.
Set up the artboard with an Isometric Grid
In the next step of our tutorial, we will set up the Artboard with an Isometric Grid.
The Isometric Grid function on Vectornator helps you to draw the beveled optic of your letter – in other words, the diagonal lines that give it three-dimensionality.
If you're completely new to the term Isometric Grid, you can watch our Academy Mac video to get a basic understanding of this technique.
Go to Quick Settings > Artboards & Grid > Show Grid > Isometric Grid. Set the spacing to 200 pixels and the angle to 45°.

Position the letter on the Isometric Grid
After you've set up the Isometric Grid, we'll fit the letter correctly to the grid.
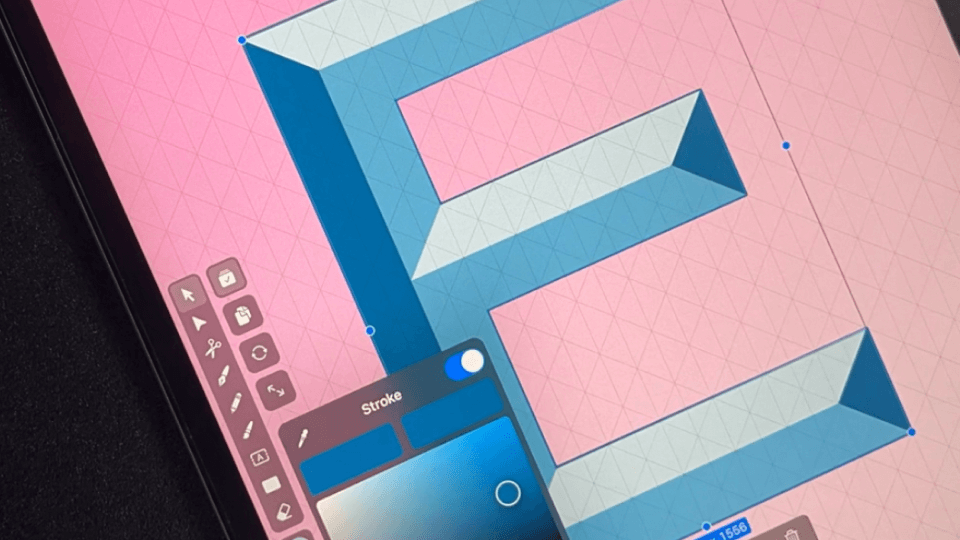
Activate Snap to Grid from the Quick Settings and select Snap to Grid. Select the Node Tool and move the nodes of your letter shape along the grid lines so that the parallel and horizontal lines of the letter align perfectly with those of the grid lines.

Draw the shadows
In the next step of our tutorial, we'll draw the basic shadow of our letter to create the extrude and bevel effect.
Tap on the Pen Tool and toggle the Fill Mode on and Stroke off in the Color Widget. Then set the color to Dark Blue: #042733.
Let's get started with drawing the shadow elements!
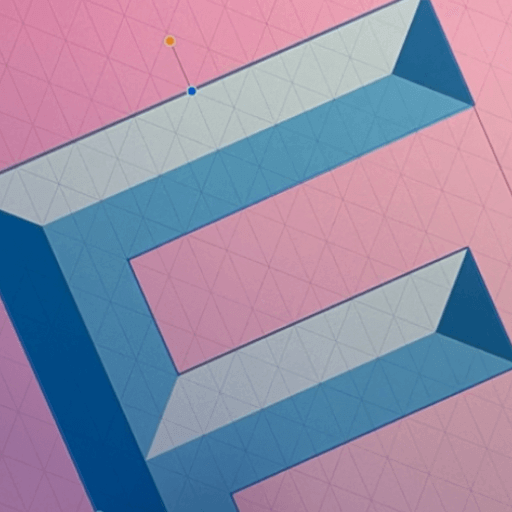
Tap on the corner lines of your letter to draw the first triangle. Tap again to create a new node and change the direction of your path.
Ready to create brand assets that pack a punch?
Visit our Academy for free draw beveled letters courses.
Follow the diagonal and horizontal lines of the Isometric Grid precisely. Copy the triangle twice with the Duplicate Mode and position the triangles on the letter, as you can see in the reference picture.
We will continue to draw the beveled surfaces with the previous method.
Light Blue: #84CEE8
Dark Blue: #042733
Medium Blue: #1B6680
Set the Fill Well of the Pen Tool to the individual Hex colors.
Draw the shapes precisely by following the lines on the Isometric Grid as the artist did in the reference image.

Can you see our lettering piece is already taking shape?
Draw the letter outline
In the next step of our tutorial, we'll create the white outline of the letter.
Select the background “E” shape, toggle the Stroke Mode on and set the Stroke Width to about 5 pt. Set the Stroke Color to pure white #FFFFFF.
That’s it, we've created the outline of the letter!

Add the drop shadow
In our tutorial's next and last step, we'll add a drop shadow to our letter to enhance the 3D effect.
Select the letter shape, open the expandable Shadow Menu in the Style Tab and toggle the Shadow on.
Use the following settings:
- Shadow Color #02293B
- Direction 135°
- Blur 32pt
- Shadow Offset 30pt.
The result
Et voilà! You've completed your custom beveled letter.
See how applying highlights and shades combined with gradients has created the illusion of a light source on a three-dimensional object.
Go ahead and try different letters of the alphabet as well as numbers.

Don't forget to post your masterpiece for the 36 Days of Type challenge on Instagram and share it with the Vectornator Community in our Gallery!
Jumpstart your ideas with Linearity Curve
Take your designs to the next level.
Share this!
Marion Gerlinger
Marion is a contributing writer to the Linearity Blog.